
Like the past off road IFMAR event in Australia 1989, AE had made a custom car just for that race. Masami won with that car as well, and probably like most people, we were all waiting for Associated to release the 89 car to public. Same story with the 91 Stealth. It was never released, until now! Happy days for me and many others that could only dream of driving this, and now we can. So I thought I would share my experience from start to finish. I want to keep the car as close to original as possible. I want to experience how the car worked back in 1991. The only things I will change because it is a racer are, modern electronics, batteries and tires.
Slotcarrod's NIX 91 Stealth Racer
-
slotcarrod

- Approved Member
- Posts: 4415
- Joined: Tue Nov 25, 2008 10:57 pm
- Location: Calgary Alberta Canada
- Has thanked: 1 time
- Been thanked: 41 times
Slotcarrod's NIX 91 Stealth Racer
This is the dream car that AE never made, but thanks to Jake and Niki I can now live my dream. You can buy most of what you need to build this dream car here: http://www.rc10talk.com/viewtopic.php?f=99&t=36418 Continue to read how my build and racing of the NIX91 went. I will be updating the first few posts to keep all the information on the first page.
In August 1991, Detroit hosted the IFMAR Off Road Worlds. This is a video of the third A Main Detroit 1991:
Like the past off road IFMAR event in Australia 1989, AE had made a custom car just for that race. Masami won with that car as well, and probably like most people, we were all waiting for Associated to release the 89 car to public. Same story with the 91 Stealth. It was never released, until now! Happy days for me and many others that could only dream of driving this, and now we can. So I thought I would share my experience from start to finish. I want to keep the car as close to original as possible. I want to experience how the car worked back in 1991. The only things I will change because it is a racer are, modern electronics, batteries and tires.
Rod Littau
Slotcarrod's Rumpus Room: http://www.rc10talk.com/viewtopic.php?f=77&t=16113
25 Years of the RC10: http://www.rc10talk.com/viewtopic.php?f=35&t=13059
Slotcarrod's Rumpus Room: http://www.rc10talk.com/viewtopic.php?f=77&t=16113
25 Years of the RC10: http://www.rc10talk.com/viewtopic.php?f=35&t=13059
-
slotcarrod
- Approved Member
- Posts: 4415
- Joined: Tue Nov 25, 2008 10:57 pm
- Location: Calgary Alberta Canada
- Has thanked: 1 time
- Been thanked: 41 times
Re: Slotcarrod's NIX 91 Racer
Part I The Build
The parts used:
All NIX 91 parts from Shapeways : http://www.shapeways.com/shops/nixconcepts
Chassis kit and towers from CNCrc : http://www.rc10talk.com/viewtopic.php?f=99&t=36418
2.25 tranny, motor plate, F axles, R CVD's, bulkhead, ball studs and cups, battery box, body, wing, body post, antenna mount, rear hub carrier, springs, wheels, hardware, etc, can be found here: http://www.teamassociated.com/cars_and_trucks/RC10WC/Worlds_Car/parts_accessories/
Shocks Front: http://www.teamassociated.com/parts/details/6432/
Shocks Rear: http://www.teamassociated.com/parts/details/6431/
Lunsford Ti Retro Turnbuckles: http://www.lunsfordracing.com/mm5/merchant.mvc?Screen=PROD&Store_Code=LUNS&Product_Code=1991&Category_Code=
Lunsford Ti Hingepins: http://www.lunsfordracing.com/mm5/merchant.mvc?Screen=PROD&Store_Code=LUNS&Product_Code=3009&Category_Code=
You can purchase all the AE parts one by one, but it's best to find a cheap white RC10T on eBay and scrap it for the tranny, shocks, steering, axle F, bearings and all the other hardware. You would only need a few things from AE like, body, wing, extra battery box, CVA or CVD's and wheels.
The wonderful new old stock Lunsford Ti turnbuckles with rere ball cups.
These measurements are critical to removing any bump steer on the front turnbuckles. Measure from centre to center of the ball cup.
Bellcrank link = 38.5mm
Steering link = 72.8mm
Camber link = 64.1mm
Shapeways NIX91 parts assembled
Cut with Dremel Bulkhead
For any carbon fiber chassis, a trick to add strength to the screw holes and to prevent some chassis tweek, is to coat the tapered cuts with CA glue. I normally do two coats of glue. Use a fine tip to gently place CA glue on the taper, and then quickly swirl with a cotton swab to get it evenly placed throughout the taper.
How does this trick stop some chassis tweak? In a crash the heads of the counter sunk screws dig in to the carbon fiber and hold the chassis in the last position, In this case the last position after the crash. When you loosen all the screws, the chassis comes back to normal. So by putting a hard layer of CA glue between the carbon fiber and the screw head, it acts as a type of slippery agent that allows the chassis in a crash to go back to it's original position in most cases with out loosening the screws.
Another trick to keep it from delaminating is to use CA glue along all the edges. Again a fine tip on the glue so you can control the amount coming out, and a cotton swab to quickly wipe any over spill accident. You can go over it with a second coat to even add more strength.
I used aluminium silver anodized screws from Fastener Express http://www.fastener-express.com/socket-head-cap-screws-silver-anodized-aluminum.aspx Just about everywhere on the car.
I used a rere 2.25 Stealth tranny, again with aluminium screws, VTS slipper and NEW RPM gear cover. Note the added washers under the CF tranny brace! Also cut the bulkhead Masami style and the motor plate.
I added 4/40 nuts to the rear suspension mounts, just to give that extra strength.
I made a chassis protection sheet to keep the CF nice. You guys that have seen my runners know I grind my chassis hard!
If you are using the excellent NIX race steering rack, you will need four 1/4x3/8 flanged bearings. You will also need to drill and chase a 3-32 tap, or it may snap like mine did!
I wanted to keep the original hub look without sacrificing performance and durability, so I used a set of RC10 MIP CVD's with truck 5/16 axles. I then used a strange sized flanged bearing that I got from Boca Bearing for another project. It's a 1/4X5/16 flanged, much stronger than the traditional 1/4x3/8. With this I can use the rere hubs and Worlds wheels and keep that vintage look.
The shocks are AE Team Truck F&R shocks as listed above
Many of you know this trick. Use simple green and wiping with shop towel to remove mold release from the bead of the tire and the bead of the rim. This will allow the CA glue (I like the Proline stuff) to never let go! For the 91 I narrowed B4 wheels by using lexan scissors to cut the inner bead off and then glue tire to the last rib of the rim. You can see what I removed in the picture. You can also see a leather hole punch, used to vent the tires.
The parts used:
All NIX 91 parts from Shapeways : http://www.shapeways.com/shops/nixconcepts
Chassis kit and towers from CNCrc : http://www.rc10talk.com/viewtopic.php?f=99&t=36418
2.25 tranny, motor plate, F axles, R CVD's, bulkhead, ball studs and cups, battery box, body, wing, body post, antenna mount, rear hub carrier, springs, wheels, hardware, etc, can be found here: http://www.teamassociated.com/cars_and_trucks/RC10WC/Worlds_Car/parts_accessories/
Shocks Front: http://www.teamassociated.com/parts/details/6432/
Shocks Rear: http://www.teamassociated.com/parts/details/6431/
Lunsford Ti Retro Turnbuckles: http://www.lunsfordracing.com/mm5/merchant.mvc?Screen=PROD&Store_Code=LUNS&Product_Code=1991&Category_Code=
Lunsford Ti Hingepins: http://www.lunsfordracing.com/mm5/merchant.mvc?Screen=PROD&Store_Code=LUNS&Product_Code=3009&Category_Code=
You can purchase all the AE parts one by one, but it's best to find a cheap white RC10T on eBay and scrap it for the tranny, shocks, steering, axle F, bearings and all the other hardware. You would only need a few things from AE like, body, wing, extra battery box, CVA or CVD's and wheels.
The wonderful new old stock Lunsford Ti turnbuckles with rere ball cups.
These measurements are critical to removing any bump steer on the front turnbuckles. Measure from centre to center of the ball cup.
Bellcrank link = 38.5mm
Steering link = 72.8mm
Camber link = 64.1mm
Another trick to keep it from delaminating is to use CA glue along all the edges. Again a fine tip on the glue so you can control the amount coming out, and a cotton swab to quickly wipe any over spill accident. You can go over it with a second coat to even add more strength.
Rod Littau
Slotcarrod's Rumpus Room: http://www.rc10talk.com/viewtopic.php?f=77&t=16113
25 Years of the RC10: http://www.rc10talk.com/viewtopic.php?f=35&t=13059
Slotcarrod's Rumpus Room: http://www.rc10talk.com/viewtopic.php?f=77&t=16113
25 Years of the RC10: http://www.rc10talk.com/viewtopic.php?f=35&t=13059
-
slotcarrod
- Approved Member
- Posts: 4415
- Joined: Tue Nov 25, 2008 10:57 pm
- Location: Calgary Alberta Canada
- Has thanked: 1 time
- Been thanked: 41 times
Re: Slotcarrod's NIX 91 Racer
Part II The Body and Electronics
I found mounting the servo the most difficult. After cutting the ears off and using 3M grey out door double sided tape, getting the servo in the right place was very hard for me. I wanted the servo as forward as possible. I used a old Futaba s9550 shorty servo I had kicking around. I had to use a longer servo arm to get maximum throw. I can see why on some of the original cars, drivers ground out the top plate so the servo arm could swing further back. I did not want to grind the top deck!
Because I moved the servo forward, I did have to grind a bit off the NIX race steering.
The shorty servo clears the chassis nicely.
I re wired my LRP Stock Spec with new Reedy 12G wire. I tried to keep it as tidy as possible.
I finally finished painting and stickering the body. I used a rere Worlds RCPS Turbo Mirage ASC6162 and 5 1/2 inch Wing ASC6182
I had to keep that old school vibe with the Mr R decal! 
The chassis will rub and scratch your paint job, so I used some clear 3M vinyl to protect some of the spots that touch the chassis.
I found mounting the servo the most difficult. After cutting the ears off and using 3M grey out door double sided tape, getting the servo in the right place was very hard for me. I wanted the servo as forward as possible. I used a old Futaba s9550 shorty servo I had kicking around. I had to use a longer servo arm to get maximum throw. I can see why on some of the original cars, drivers ground out the top plate so the servo arm could swing further back. I did not want to grind the top deck!
Rod Littau
Slotcarrod's Rumpus Room: http://www.rc10talk.com/viewtopic.php?f=77&t=16113
25 Years of the RC10: http://www.rc10talk.com/viewtopic.php?f=35&t=13059
Slotcarrod's Rumpus Room: http://www.rc10talk.com/viewtopic.php?f=77&t=16113
25 Years of the RC10: http://www.rc10talk.com/viewtopic.php?f=35&t=13059
-
slotcarrod
- Approved Member
- Posts: 4415
- Joined: Tue Nov 25, 2008 10:57 pm
- Location: Calgary Alberta Canada
- Has thanked: 1 time
- Been thanked: 41 times
Re: Slotcarrod's NIX 91 Racer
Part III Racing the Darn Thing
My starting setup is based mostly off Niki's original setup, with a little tweak by me for my local track. My local track is clay loam mix. When wet or damp Losi silver step pins work well, but for the most part the track is damp to dry and Proline Holeshot M3's are used the most. Proline M3 4 rib on the front, M3 Holeshot 2wd front's work also. During a large event the track will blue groove on the racing line and is very rough, as it will chunk and breakup in spots.
Track: RC Gears (out door) Calgary
NIX91 setup
Front:
AE 30wt oil, #1 piston, 1/8th limiters, AE Brown springs
Shock mount upper: 3rd hole from inside (#3)
Camber link: Standard hole, 0 degree
Bump steer washers: 2
Ride height: 24mm
Front bulkhead: 25 deg
Wheels: Narrowed B4
Tires: Losi 4 rib A7202 silver
Rear:
AE 25wt oil, #1 piston, 1/8th limiter, AE Green springs
Shock mount upper: Inside (#1)
Shock mount lower: Center (#2)
Camber link: under wing tube (ASC6365 classic rear hub), -2.0 degrees
Arm mount: NIX91-001 (1.5deg toe-in/side & 3deg anti-squat)
Ride height: 24mm
Wheels: AE rere Worlds 6805
Tires: Proline M3 Holeshot (Losi Step Pin shown)
Running Weight: 1483g (no extra weight added at this time)
Motor: LRP 10.5T
Gearing: 21 pinion 81 spur.
ESC: LRP Stock Spec
Battery: Reedy 5500
Servo: Futaba S9550 (shorty)
Radio: Futaba 4PK-R
I used the Hudy 1/10 Set Up Station to get every thing perfect. As you can see, things are a bit off.
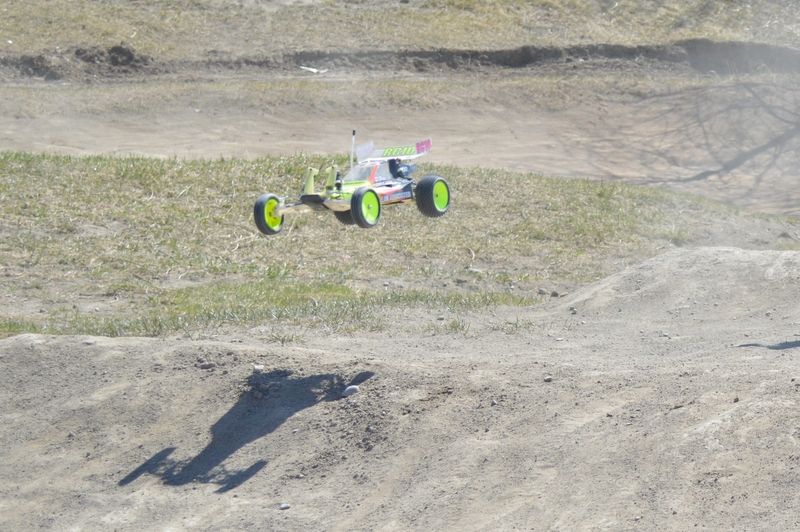
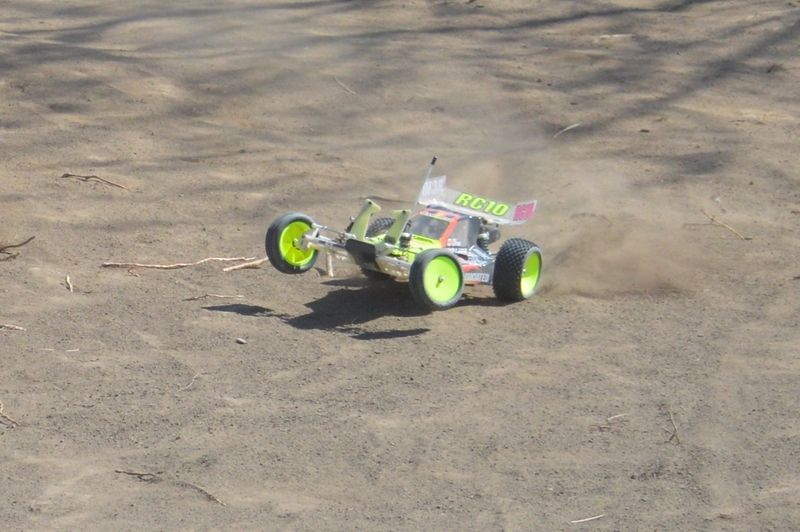
First time out testing at a loamy basher track. The car was very pleasant to drive with less push than my 93 RC10 Worlds, testing with the same tires at the same time. Track was rough and sandy.
Track: RC Gears (out door) Calgary
NIX91 setup
Front:
AE 30wt oil, #1 piston, 1/8th limiters, AE Brown springs
Shock mount upper: 3rd hole from inside (#3)
Camber link: Standard hole, 0 degree
Bump steer washers: 2
Ride height: 24mm
Front bulkhead: 25 deg
Wheels: Narrowed B4
Tires: Losi 4 rib A7202 silver
Rear:
AE 25wt oil, #1 piston, 1/8th limiter, AE Green springs
Shock mount upper: Inside (#1)
Shock mount lower: Center (#2)
Camber link: under wing tube (ASC6365 classic rear hub), -2.0 degrees
Arm mount: NIX91-001 (1.5deg toe-in/side & 3deg anti-squat)
Ride height: 24mm
Wheels: AE rere Worlds 6805
Tires: Proline M3 Holeshot (Losi Step Pin shown)
Running Weight: 1483g (no extra weight added at this time)
Motor: LRP 10.5T
Gearing: 21 pinion 81 spur.
ESC: LRP Stock Spec
Battery: Reedy 5500
Servo: Futaba S9550 (shorty)
Radio: Futaba 4PK-R
I used the Hudy 1/10 Set Up Station to get every thing perfect. As you can see, things are a bit off.


Rod Littau
Slotcarrod's Rumpus Room: http://www.rc10talk.com/viewtopic.php?f=77&t=16113
25 Years of the RC10: http://www.rc10talk.com/viewtopic.php?f=35&t=13059
Slotcarrod's Rumpus Room: http://www.rc10talk.com/viewtopic.php?f=77&t=16113
25 Years of the RC10: http://www.rc10talk.com/viewtopic.php?f=35&t=13059
-
Mark Westerfield
- Approved Member
- Posts: 340
- Joined: Wed Apr 23, 2008 9:32 am
- Location: Connecticut, USA
- Has thanked: 11 times
- Been thanked: 24 times
-
dragon_av3
- Regular Member
- Posts: 13
- Joined: Mon Nov 10, 2014 8:32 pm
-
slotcarrod
- Approved Member
- Posts: 4415
- Joined: Tue Nov 25, 2008 10:57 pm
- Location: Calgary Alberta Canada
- Has thanked: 1 time
- Been thanked: 41 times
Re: Slotcarrod's NIX 91 Stealth Racer
It is running, I just need to paint a body and glue the tires. We do not have a indoor track in Calgary, so I am not in a big rush but I suppose I should get off my ass in case spring comes early! 
Rod Littau
Slotcarrod's Rumpus Room: http://www.rc10talk.com/viewtopic.php?f=77&t=16113
25 Years of the RC10: http://www.rc10talk.com/viewtopic.php?f=35&t=13059
Slotcarrod's Rumpus Room: http://www.rc10talk.com/viewtopic.php?f=77&t=16113
25 Years of the RC10: http://www.rc10talk.com/viewtopic.php?f=35&t=13059
-
slow_jun
- Approved Member
- Posts: 958
- Joined: Mon Oct 05, 2009 10:59 am
- Location: Manila/Singapore
- Been thanked: 2 times
Re: Slotcarrod's NIX 91 Stealth Racer
great details. will the body be a masami art replica also?
subscribed.
subscribed.
“It is more shameful to distrust our friends than to be deceived by them.”
― Confucius
― Confucius
-
vintage AE
- Approved Member
- Posts: 3012
- Joined: Fri Nov 14, 2008 1:47 pm
- Location: Sunken Lake, Nova Scotia
- Has thanked: 29 times
- Been thanked: 35 times
Re: Slotcarrod's NIX 91 Stealth Racer
Can't wait to see it in action this year. I just hope I can get mine out beside yours this season too, probably next year though.
-
Asso_man!

- Approved Member
- Posts: 3959
- Joined: Thu Aug 03, 2006 7:49 am
- Location: EU
- Has thanked: 40 times
- Been thanked: 70 times
Re: Slotcarrod's NIX 91 Stealth Racer
Nice preps and attention to detail there Rod, looks awesome!
_____________________________________________
_____________________________________________
Come and visit the stable
_____________________________________________
Come and visit the stable
-
Oozzee
- Approved Member
- Posts: 144
- Joined: Mon Dec 23, 2013 9:09 am
- Location: Brisbane Australia
- Has thanked: 15 times
- Been thanked: 2 times
Re: Slotcarrod's NIX 91 Stealth Racer
Hi Rod, looks real good your runner looks better than my shelfer,
quick question how well does the servo tape work and have you considered using posts for the servo, I only ask as the 1 that I have in my car twists a fair bit under load.
cheers
quick question how well does the servo tape work and have you considered using posts for the servo, I only ask as the 1 that I have in my car twists a fair bit under load.
cheers
The Dreaded 7 - 10 Split
-
slotcarrod
- Approved Member
- Posts: 4415
- Joined: Tue Nov 25, 2008 10:57 pm
- Location: Calgary Alberta Canada
- Has thanked: 1 time
- Been thanked: 41 times
Re: Slotcarrod's NIX 91 Stealth Racer
Oozzee wrote:Hi Rod, looks real good your runner looks better than my shelfer,
quick question how well does the servo tape work and have you considered using posts for the servo, I only ask as the 1 that I have in my car twists a fair bit under load.
cheers
Thank you guys for your compliments!
As for the servo tape, The 3M grey stuff works wonderfully, just make sure you clean chassis and servo with motor spray or solvent before applying servo tape. No need for servo posts. We always used servo tape back in the day, and that was with weaker tape than the 3M stuff. If it's twisting, make sure you adjust your end points so that at full lock left to right there is no strain of the servo trying to go beyond those points. In the end mine are set to 55% R&L for my servo position, servo type, arm and radio. This car is real fiddly getting it just right. Use Niki's front turnbuckle/cup lengths as they are perfect! Adjust turnbuckle servo to bell crank arm as needed, but I found the servo arm had to be leaning forward about 10 degrees.
These measurements are critical to removing any bump steer on the front turnbuckles. Measure from centre to center of the ball cup.
Bellcrank link = 38.5mm
Steering link = 72.8mm
Camber link = 64.1mm
Rod Littau
Slotcarrod's Rumpus Room: http://www.rc10talk.com/viewtopic.php?f=77&t=16113
25 Years of the RC10: http://www.rc10talk.com/viewtopic.php?f=35&t=13059
Slotcarrod's Rumpus Room: http://www.rc10talk.com/viewtopic.php?f=77&t=16113
25 Years of the RC10: http://www.rc10talk.com/viewtopic.php?f=35&t=13059
-
josh
- Approved Member
- Posts: 38
- Joined: Tue Feb 24, 2015 8:39 am
- Location: Garner, NC
- Has thanked: 10 times
Re: Slotcarrod's NIX 91 Stealth Racer
I love this! I agree with ohters in saying your attention to details is impressive
-
JK Racing

- Approved Member
- Posts: 4603
- Joined: Thu Jul 19, 2007 2:32 pm
- Location: Placentia, CA
- Has thanked: 103 times
- Been thanked: 199 times
Re: Slotcarrod's NIX 91 Stealth Racer
Thank you, I couldnt find those the other day when lookingslotcarrod wrote: Bellcrank link = 38.5mm
Steering link = 72.8mm
Camber link = 64.1mm
--Joey --
Vintage A&L and Factory Works
Old School Racer & Vintage RC Car nut
JKRacingRC.com
Vintage A&L and Factory Works
Old School Racer & Vintage RC Car nut
JKRacingRC.com
-
slotcarrod
- Approved Member
- Posts: 4415
- Joined: Tue Nov 25, 2008 10:57 pm
- Location: Calgary Alberta Canada
- Has thanked: 1 time
- Been thanked: 41 times
Re: Slotcarrod's NIX 91 Stealth Racer
Got my body finally painted and all stickered up! Been so damn lazy getting this done!:lol:
I also updated some of my first posts.
I also updated some of my first posts.
Rod Littau
Slotcarrod's Rumpus Room: http://www.rc10talk.com/viewtopic.php?f=77&t=16113
25 Years of the RC10: http://www.rc10talk.com/viewtopic.php?f=35&t=13059
Slotcarrod's Rumpus Room: http://www.rc10talk.com/viewtopic.php?f=77&t=16113
25 Years of the RC10: http://www.rc10talk.com/viewtopic.php?f=35&t=13059
Create an account or sign in to join the discussion
You need to be a member in order to post a reply
Create an account
Not a member? register to join our community
Members can start their own topics & subscribe to topics
It’s free and only takes a minute
Sign in
-
- Similar Topics
- Replies
- Views
- Last post
-
- 13 Replies
- 2996 Views
-
Last post by Minisforever
-
- 34 Replies
- 5819 Views
-
Last post by bully
-
- 31 Replies
- 4734 Views
-
Last post by GoMachV
-
- 7 Replies
- 1090 Views
-
Last post by seismic
-
- 21 Replies
- 3678 Views
-
Last post by slotcarrod
-
- 6 Replies
- 3189 Views
-
Last post by minimini
-
- 1 Replies
- 1290 Views
-
Last post by Patriiick
-
- 13 Replies
- 2339 Views
-
Last post by green510


Who is online
Users browsing this forum: ![]() 76jimmy,
76jimmy, ![]() Ahrefs [Bot],
Ahrefs [Bot], ![]() Amazon [Bot],
Amazon [Bot], ![]() Tbot [Bot] and 38 guests
Tbot [Bot] and 38 guests