
B1M

-
mk-Zero

- Business Member
- Posts: 1678
- Joined: Fri Jan 03, 2014 2:14 pm
- Location: Orange, CA
- Has thanked: 4 times
- Been thanked: 19 times
Re: B1M
Cool idea, maybe I'll do that.romulus22 wrote:Cool build. Would be cool if you could mill the rear of the chassis and bumper on opposite sides and made it flush fitting.
-
jwscab

- Super Member
- Posts: 6484
- Joined: Wed Jan 28, 2009 9:42 am
- Location: Chalfont, PA
- Has thanked: 10 times
- Been thanked: 441 times
Re: B1M
though it would looks cool, it would make it really weak. even with the extra bracing. a good hard hit would likely shear the back of the chassis off especially if the mill cut was a sharp cut, not a radius cutter.
-
mk-Zero
- Business Member
- Posts: 1678
- Joined: Fri Jan 03, 2014 2:14 pm
- Location: Orange, CA
- Has thanked: 4 times
- Been thanked: 19 times
Re: B1M
Yeah, it would look very nice, but this is going to be a runner, so I'm going to leave it how it is, which is very strong. If I were building one for the shelf then for sure, I'd do it.
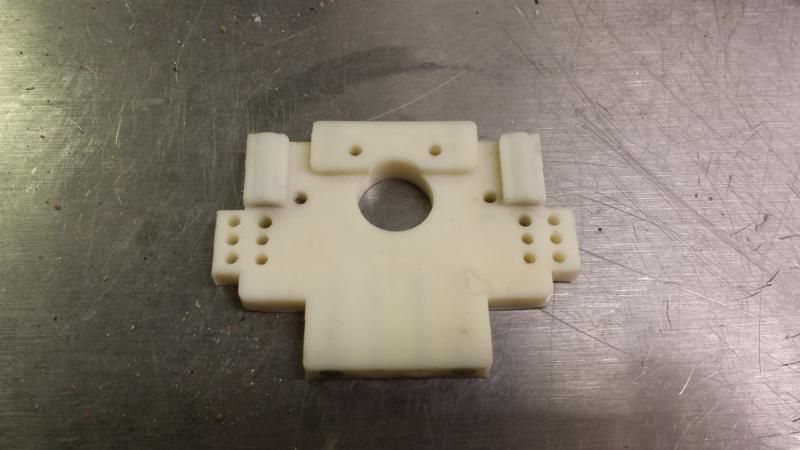
Designed up a battery strap to be made from cf. Nothing fancy, basically just a shorty-pack version of the world's car brace...
Designed up a battery strap to be made from cf. Nothing fancy, basically just a shorty-pack version of the world's car brace...
- Attachments
-
-
mk-Zero
- Business Member
- Posts: 1678
- Joined: Fri Jan 03, 2014 2:14 pm
- Location: Orange, CA
- Has thanked: 4 times
- Been thanked: 19 times
Re: B1M
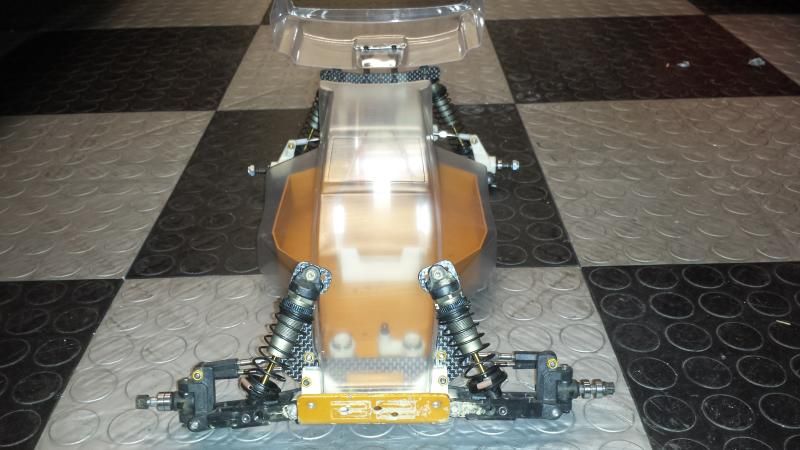
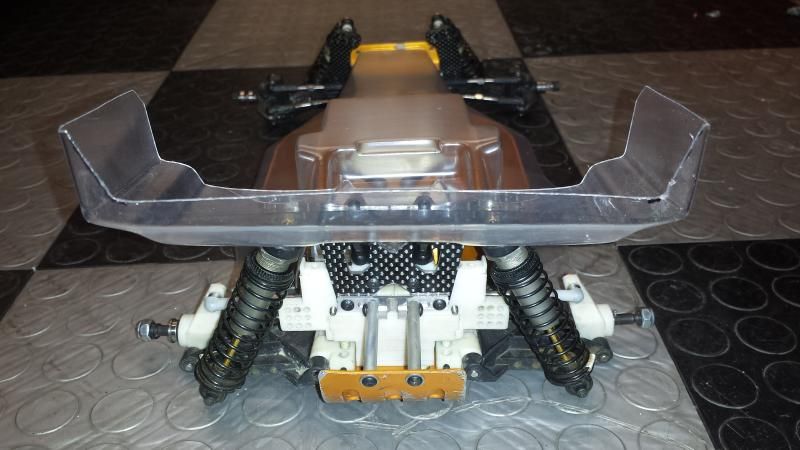
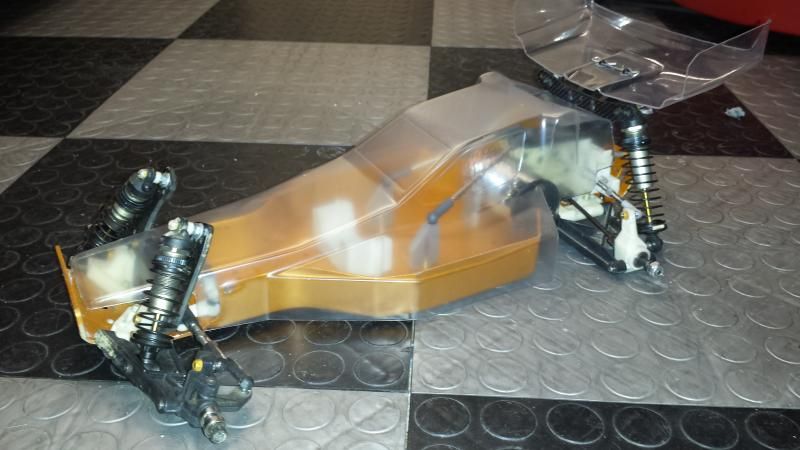
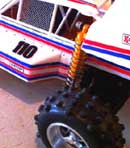
Tonight i decided to take a break from machining parts and trim the new body for the car. I decided to go with a Viper to get a little more sleek look to it. I retained about as much of the body as i could around the rear suspension in hopes of giving the car a clean look.


-
JK Racing

- Approved Member
- Posts: 4602
- Joined: Thu Jul 19, 2007 2:32 pm
- Location: Placentia, CA
- Has thanked: 103 times
- Been thanked: 196 times
Re: B1M
Looks good Brian...get it finished up so I can come see it run.
--Joey --
Vintage A&L and Factory Works
Old School Racer & Vintage RC Car nut
JKRacingRC.com
Vintage A&L and Factory Works
Old School Racer & Vintage RC Car nut
JKRacingRC.com

-
mk-Zero
- Business Member
- Posts: 1678
- Joined: Fri Jan 03, 2014 2:14 pm
- Location: Orange, CA
- Has thanked: 4 times
- Been thanked: 19 times
Re: B1M
I've been doing a little work on the rear bulkhead recently. I added two holes below the inner most camber link position (the one below the wing tube), then added another set of 3 holes outboard of those to have more tuning options. Then, on the sides, I cut it down to the wing tube bosses, but left a little tab for the camber link holes. I wanted to try to maintain the stock shape overall, but eliminate all the unused material.
I also finished milling down the sides of the chassis. Pics of that to come later...

I also finished milling down the sides of the chassis. Pics of that to come later...
-
mk-Zero
- Business Member
- Posts: 1678
- Joined: Fri Jan 03, 2014 2:14 pm
- Location: Orange, CA
- Has thanked: 4 times
- Been thanked: 19 times
Re: B1M
Thanks! Yeah, I hope so too... Tuning it is going to be a bit of an unknown, since I can't just use CE tuning. For starters on the shocks, I'm going to run the same springs as a B5M stock setup (gray front and white rear, IIRC), since at least in terms of weight distribution it should be closer to that car than to an RC10. We'll see...
-
JK Racing
- Approved Member
- Posts: 4602
- Joined: Thu Jul 19, 2007 2:32 pm
- Location: Placentia, CA
- Has thanked: 103 times
- Been thanked: 196 times
Re: B1M
Looks good, sling some paint, toss in the electronics and get that thing on the track!
--Joey --
Vintage A&L and Factory Works
Old School Racer & Vintage RC Car nut
JKRacingRC.com
Vintage A&L and Factory Works
Old School Racer & Vintage RC Car nut
JKRacingRC.com

Re: B1M
Love it! Quick question about the top shaft in the Stealth Trans...when you flipped it, did you have to do anything else? I'm looking at starting a similar project in the not-too-distant future, and want to start gathering pieces and parts for it.
Thanks!
Byrdman
Thanks!
Byrdman
-
mk-Zero
- Business Member
- Posts: 1678
- Joined: Fri Jan 03, 2014 2:14 pm
- Location: Orange, CA
- Has thanked: 4 times
- Been thanked: 19 times
Re: B1M
MCKNBRD wrote:Love it! Quick question about the top shaft in the Stealth Trans...when you flipped it, did you have to do anything else? I'm looking at starting a similar project in the not-too-distant future, and want to start gathering pieces and parts for it.
Thanks!
Byrdman
Thanks!
Nope, just knock out the cap on the other side of the trans case and flip the shaft around. You also need to flip the diff around so that it isn't trying to loosen itself. All there is to it
Hopefully I'll be wrapping this project up over the next couple weeks
-
vintage AE
- Approved Member
- Posts: 3012
- Joined: Fri Nov 14, 2008 1:47 pm
- Location: Sunken Lake, Nova Scotia
- Has thanked: 29 times
- Been thanked: 35 times
Create an account or sign in to join the discussion
You need to be a member in order to post a reply
Create an account
Not a member? register to join our community
Members can start their own topics & subscribe to topics
It’s free and only takes a minute
Sign in
-
- Similar Topics
- Replies
- Views
- Last post
-
- 11 Replies
- 1401 Views
-
Last post by mk-Zero
-
- 34 Replies
- 4008 Views
-
Last post by Lonestar
-
- 106 Replies
- 9106 Views
-
Last post by DaveM
-
- 170 Replies
- 24765 Views
-
Last post by RagingHounds
-
- 15 Replies
- 2066 Views
-
Last post by mk-Zero
-
- 22 Replies
- 6720 Views
-
Last post by GoMachV
-
- 2 Replies
- 2272 Views
-
Last post by mk-Zero
-
- 96 Replies
- 8449 Views
-
Last post by Chewbacca


Who is online
Users browsing this forum: No registered users and 8 guests