Page 3 of 4
Re: RC10 Pan Car Refurb
Posted: Wed Apr 08, 2015 9:36 pm
by littleVETTE
very cool mike. it hauls ass! the mini mags look awesome too.
Re: RC10 Pan Car Refurb
Posted: Wed Apr 08, 2015 10:08 pm
by LTO_Dave
It's nice to see the Lethal Weapon is holding up after all these years. Does it ever sound or feel like the belt is slipping with all that HP and no slipper?
Re: RC10 Pan Car Refurb
Posted: Thu Apr 09, 2015 9:10 am
by n20capri
littleVETTE wrote:very cool mike. it hauls ass! the mini mags look awesome too.
Thanks! Definitely fun!
LTO_Dave wrote:It's nice to see the Lethal Weapon is holding up after all these years. Does it ever sound or feel like the belt is slipping with all that HP and no slipper?
It's always sounded perfect. ZERO issues! I do remember seeing replacement belts available (I think) but I forget where! lol
Re: RC10 Pan Car Refurb
Posted: Wed Apr 22, 2015 4:40 pm
by n20capri
I feel like I need to share something this cool! Reminds me of my real car launching at the track. (slow mo and the end)
This was clocked at 41mph btw - 87s/25p
[youtube]yEIVepczsxI[/youtube]
Enjoy!!!
Re: RC10 Pan Car Refurb
Posted: Mon Jun 01, 2015 6:42 pm
by n20capri
As expected...I can't leave well enough alone...
Decided to mid-motorize this one too...
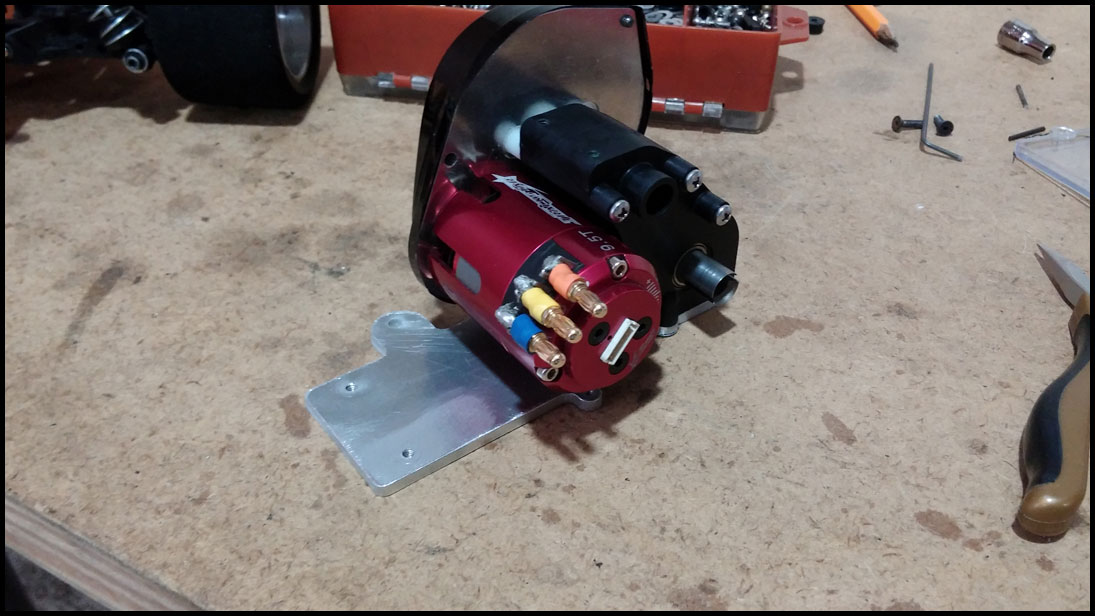
First thing was to mill the A&L motor plate...
Stock

...and flipped and milled...
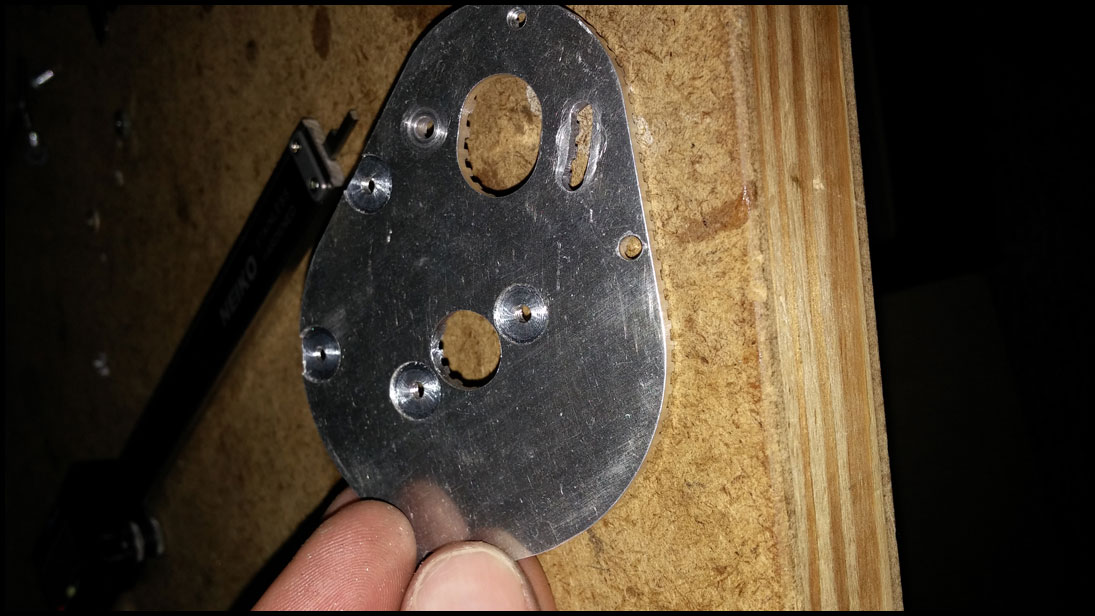
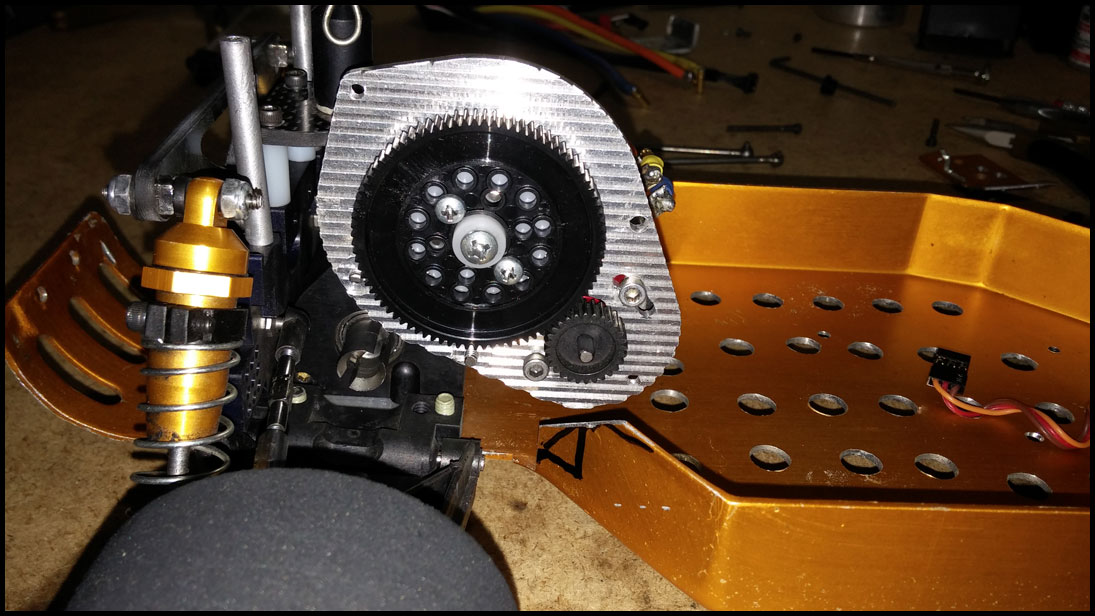
Initial mock-up...if you look closely you can see the A&L drill template under the trans...Yup still have it after all these years! The trans was cake to flip too...just had to drill a hole for the top shaft. Another cool thing was the symmetry - the gear cover worked perfectly on the other side...unlike the stealth setup - the stock gear cover won't work...
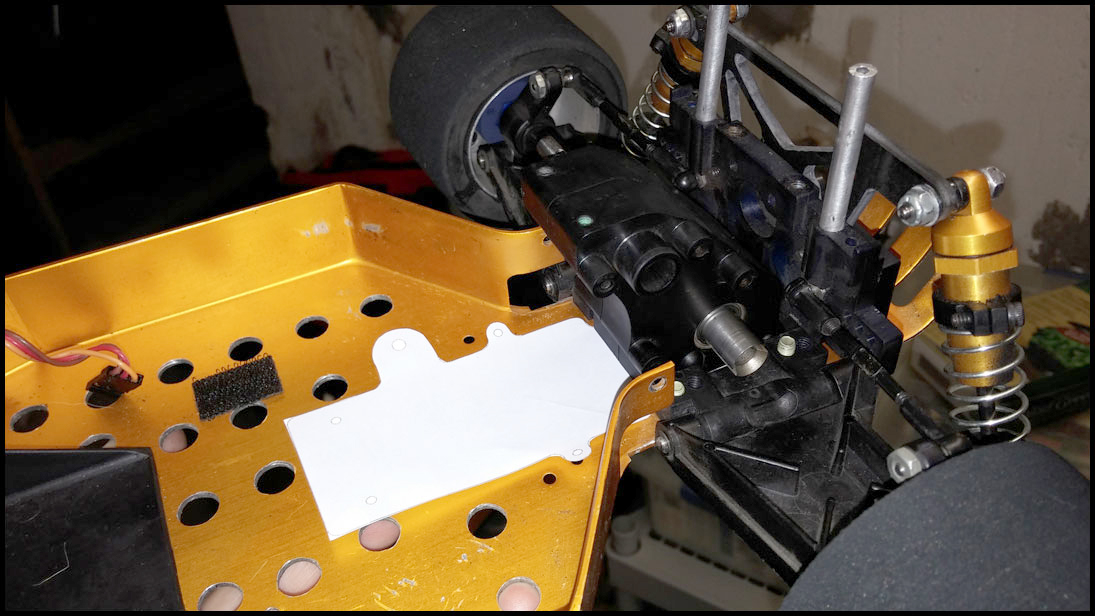
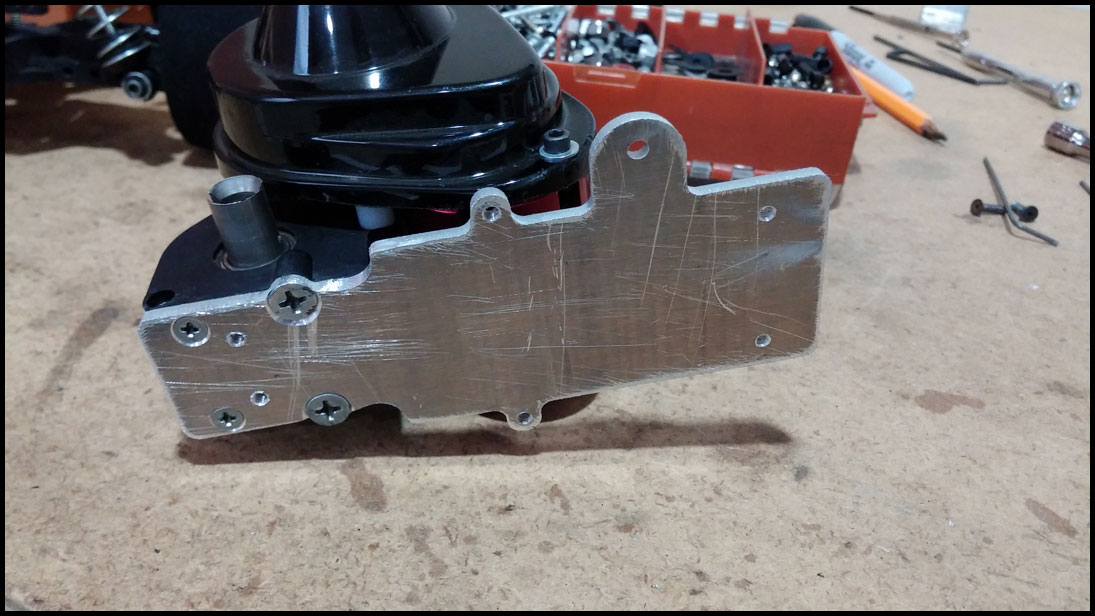
Simply flipping the trans wasn't going to work because the holes fall so close to other holes...didn't want to ruin or even Swiss cheese the chassis so I had to think of something else...Didn't feel like fabbing another trans brace like on my oin build so I made a lower plate to cover 2 birds with one stone...I can mount the trans to it - and then it to the chassis...it's wicked stiff too - even though I was initially reluctant I love the finished product and I'm very happy.
The middle mounting holes for the brace are existing - just had to drill 4 others. Also, the larger kick out will mount the antenna - covering an existing speed hole...
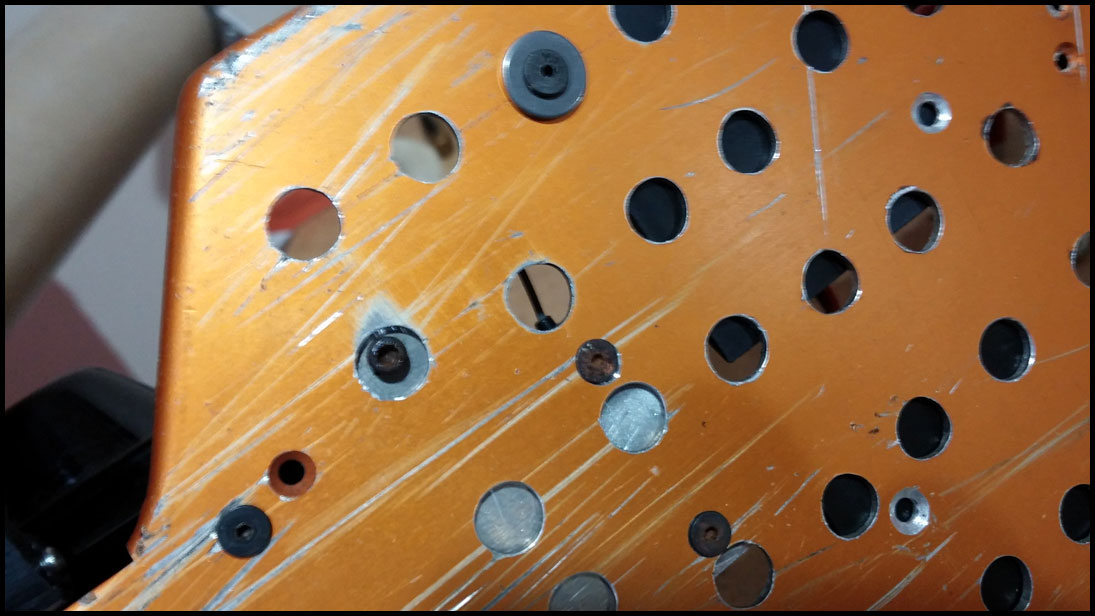
While I waited for waterjet to finish the brace I started marking and cutting the chassis...
This pic reminds me that I made a cap to cover the top shaft hole - gotta find it...hmmm. Also, didn't want to hack the stock A&L case so I had to get longer screws...only thing I could find in 4-40 were phillips heads...no biggy.
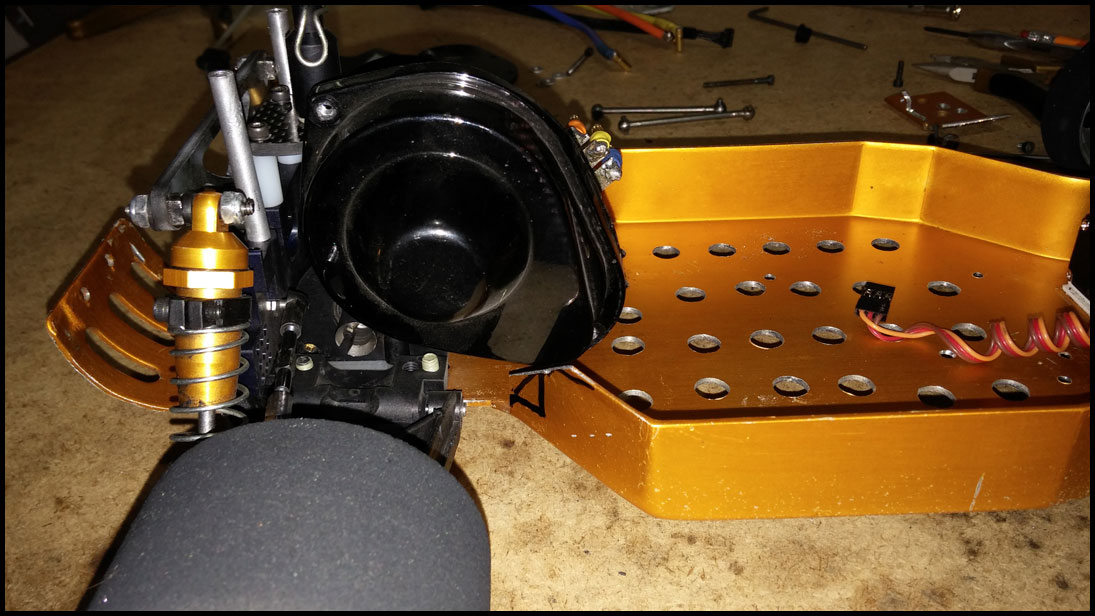
Shock tower spaced out in order to keep the shocks in line...

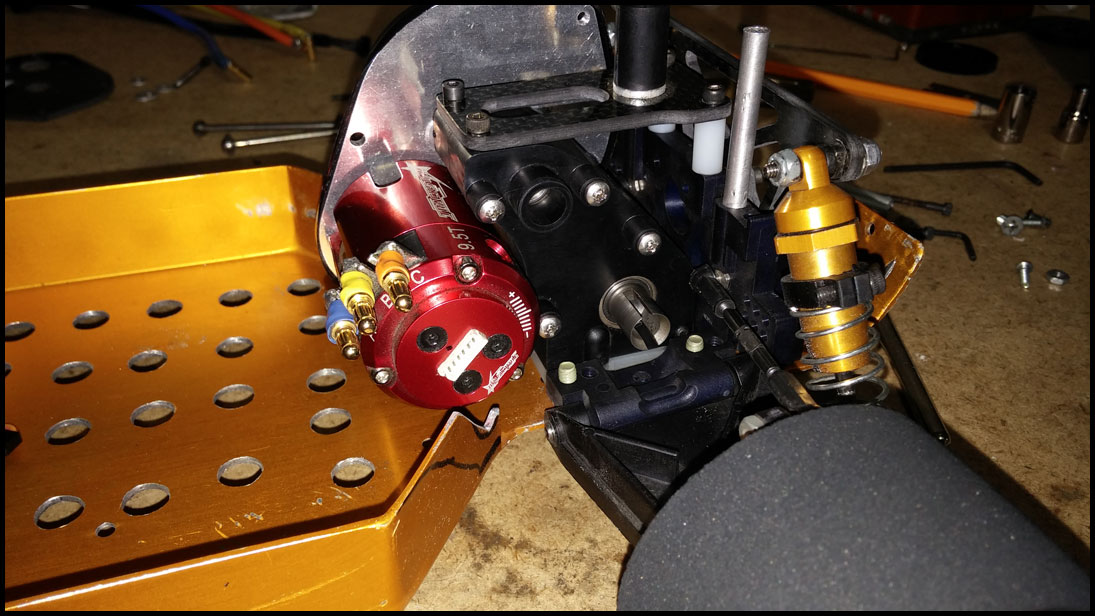
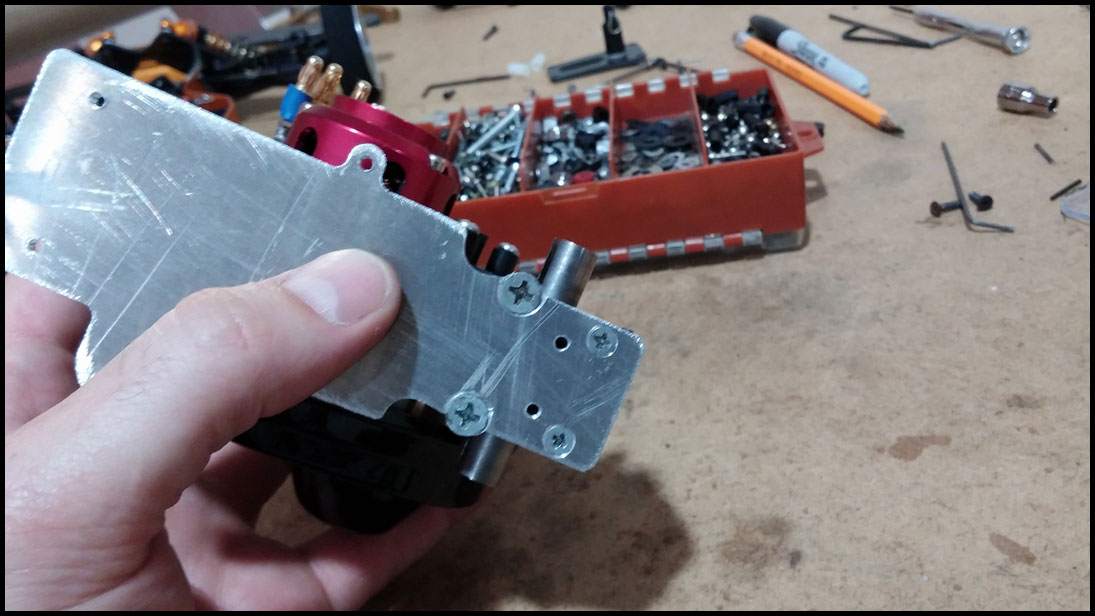
Brace arrived...just had to tap the mounting holes...
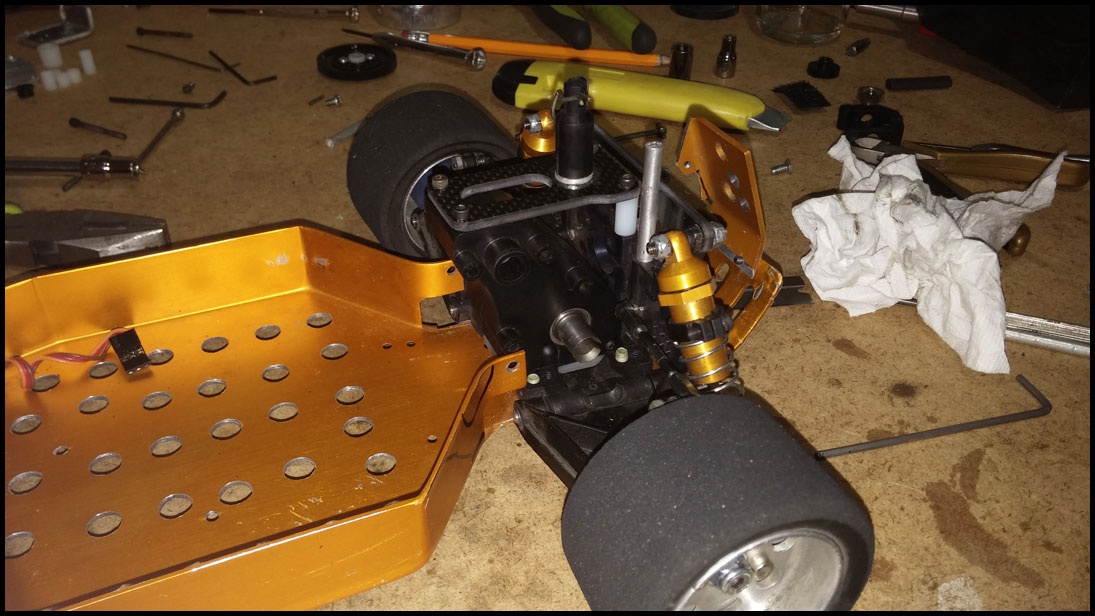
Trans mounted...you can also see the spacers I made to match the stock motor plate spacing...
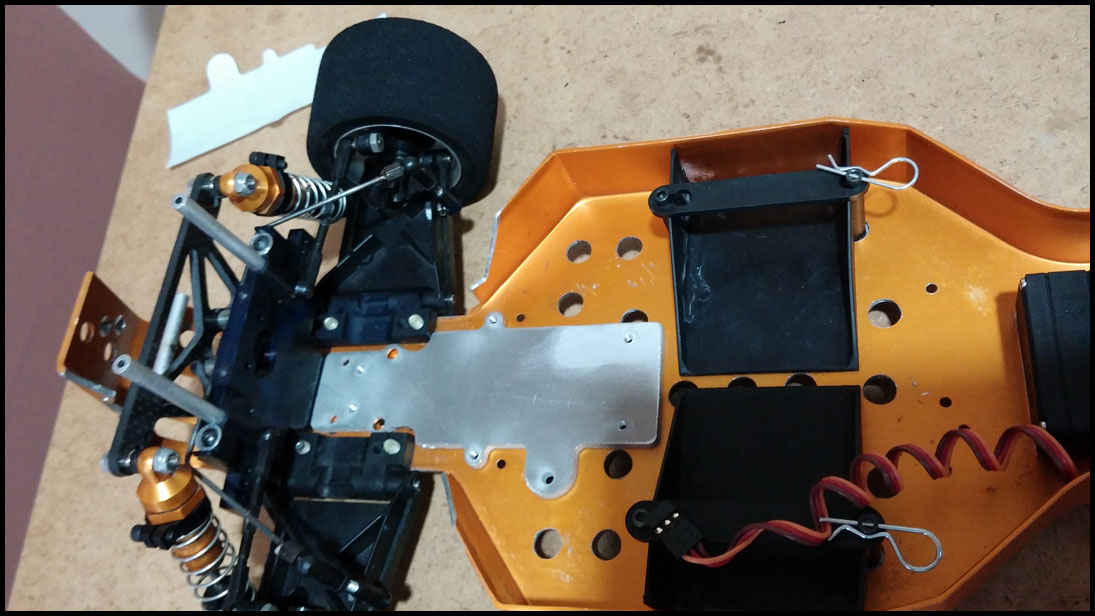
Underneath...

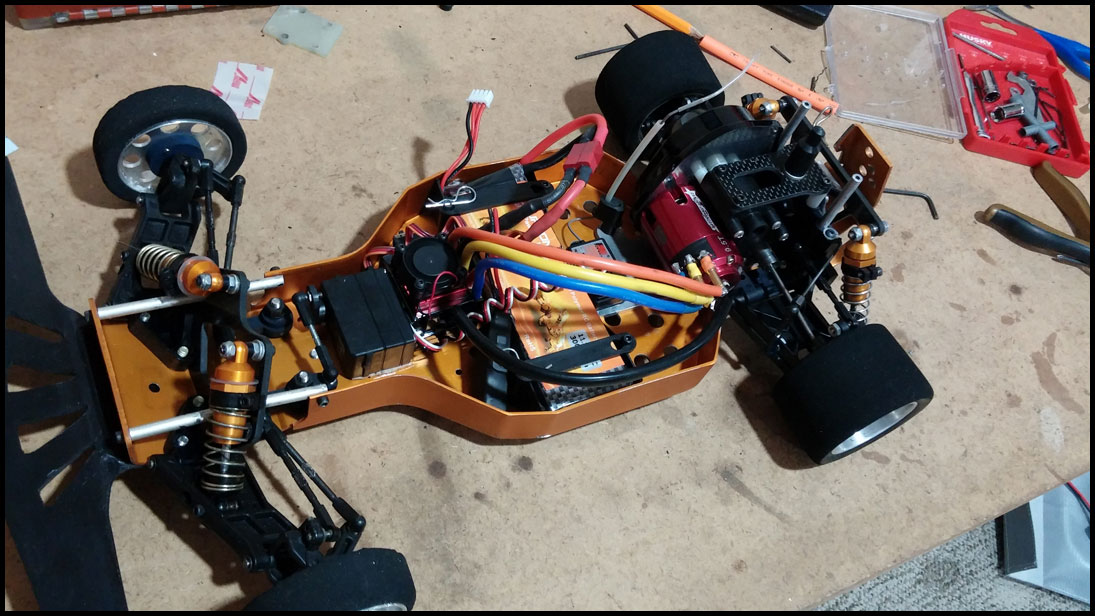
Everything going back together...
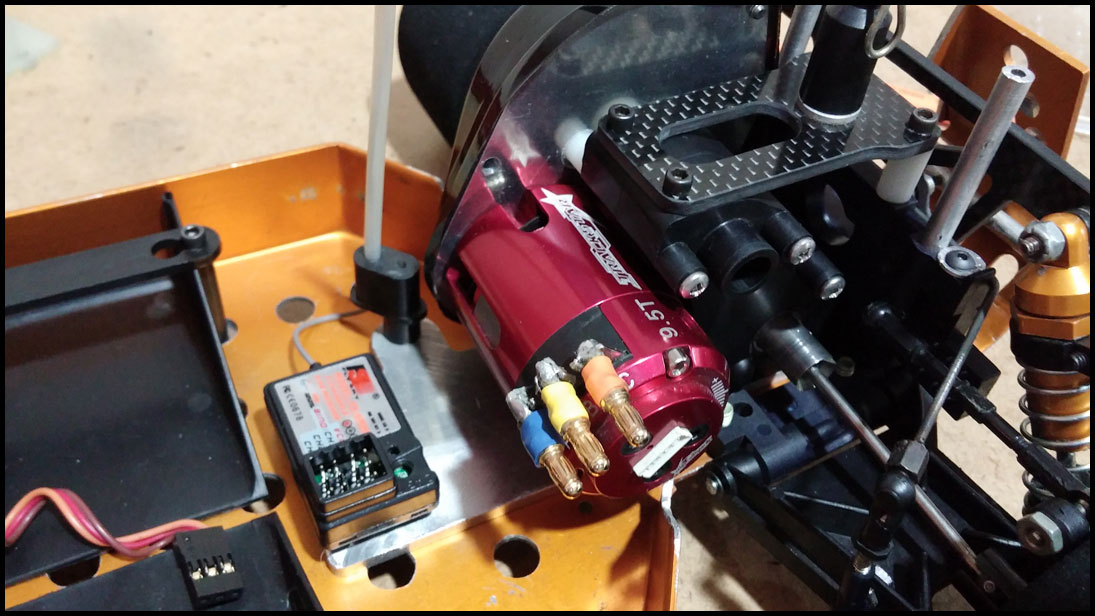
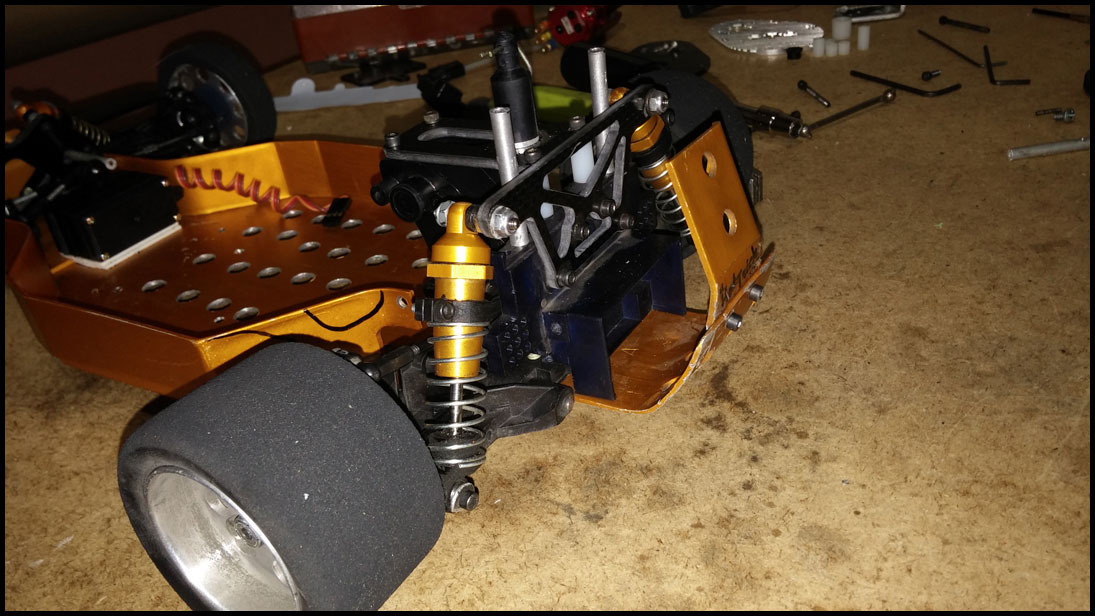
Antenna mounted...
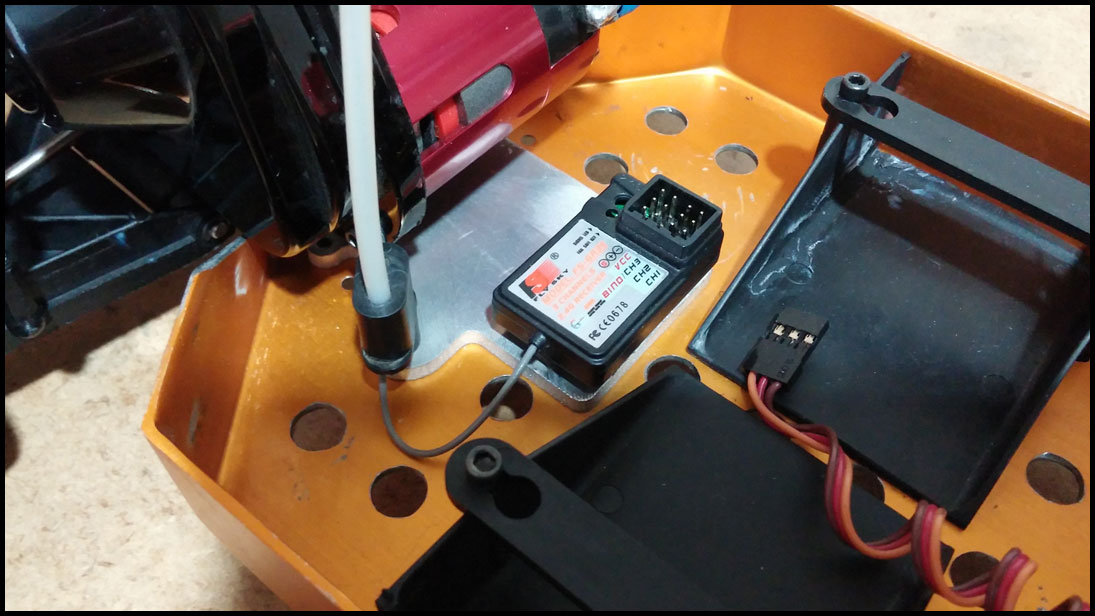
From underneath...
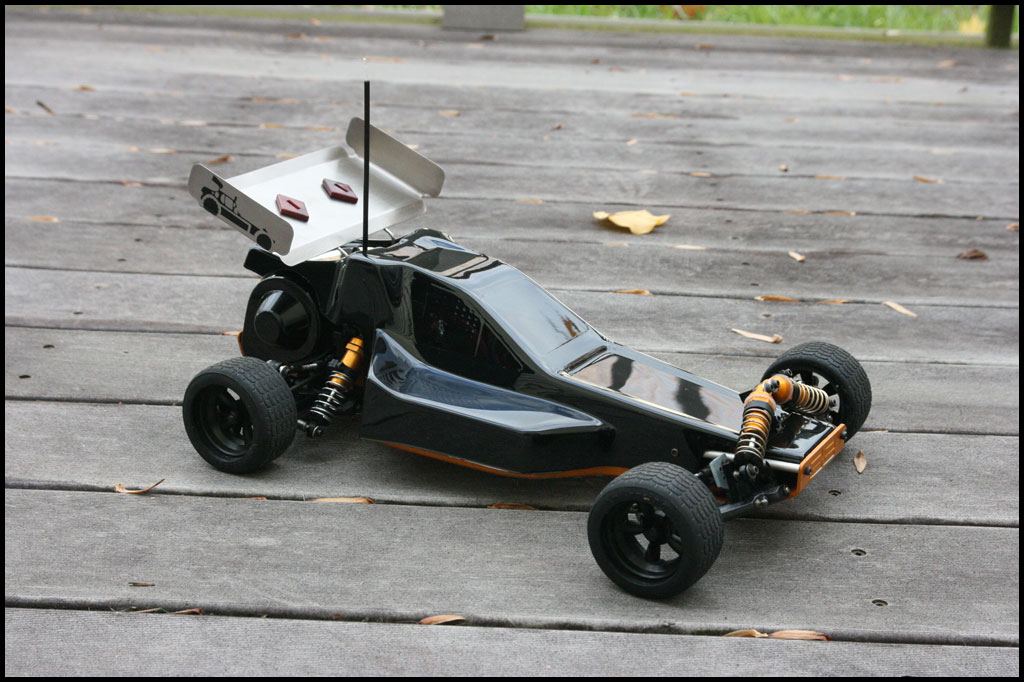
Full shot...
I'll report back with how she runs...Also got a new body for it...will go with the same black paint but the shock cutouts of the old body were really annoying me...plus I lost the small trim part of the body that covered the very front portion of the car in a wreck a while back - so it will be complete now! lol
Enjoy!
Re: RC10 Pan Car Refurb
Posted: Tue Oct 27, 2015 1:52 pm
by Njpartsguy
Hi good looking car. When you put the shock towers on before the mid engine conversion , how did you mount the body? And what was holding it on?
Re: RC10 Pan Car Refurb
Posted: Tue Oct 27, 2015 2:04 pm
by n20capri
Thanks. The body has small holes in each side that matched up with the heads of the screws that holds the front nose braces on. The very front portion of the body is mounted with a body pin...
Look directly above the front wheel in the pic below - you'll see the head of the screw poking out of the body. It's fits tight enough that it secures the body on. You can also use the screws with the holes in them and use body pins there - but I didn't do that.
Re: RC10 Pan Car Refurb
Posted: Tue Oct 27, 2015 3:20 pm
by Njpartsguy
Cool idea , and the body stays on with just those two screws?
Re: RC10 Pan Car Refurb
Posted: Tue Oct 27, 2015 5:26 pm
by n20capri
Yup. The body just pops over the screw heads and it's good to go.
Re: RC10 Pan Car Refurb (A&L trans update)
Posted: Wed Oct 19, 2016 11:29 am
by n20capri
Hmmm - well 72mph and the first signs of trans problems! However, it didn't help that I tried to hold the thing still while trying to heat up the tires. DOH. They stuck better than I expected and I heard some belt slippage and clicking. It was fine after that but this along with multiple speed runs and here we are.
Overall the trans was still very smooth - but there was a slight notch in the rotation so I decided to take her apart...
Lots of belt material for sure! lol


As mentioned it was still smooth and worked fine. I'm sure I could put it back together and be ok...BUT in reality the top shaft gear is wasted! lol

Good news though - it looked at first like the diff gear was bad - but upon closer inspection it's just got melted pieces of belt or something glazed between the gears and they flake right off and the gear is perfectly fine...You can see the pieces on my finger and the nice white gear underneath!

I can't complain this trans is a beast - NOTE this is W/O a slipper too!!!! Unbelievable for sure. Just need to see if I can get a replacement belt and top shaft gear! lol. I have a video of the 72mph run but I have get it uploaded...stay tuned.
Re: RC10 Pan Car Refurb (A&L trans update)
Posted: Fri Oct 21, 2016 7:19 pm
by n20capri
Video...
I actually captured my screw up...LMAO
[youtube]6zL9Xfn24Jo[/youtube]
Re: RC10 Pan Car Refurb
Posted: Tue Oct 25, 2016 8:17 am
by matt1ptkn
Just saw this part:
n20capri wrote: LOVE the old race prep connectors but I'm finding some are not reliable so have to make the switch!
Let me know if you need somewhere to dispose of old Race Prep connectors.

I still use them on everything.

Re: RC10 Pan Car Refurb
Posted: Wed Oct 26, 2016 6:58 pm
by n20capri
matt1ptkn wrote:Just saw this part:
n20capri wrote: LOVE the old race prep connectors but I'm finding some are not reliable so have to make the switch!
Let me know if you need somewhere to dispose of old Race Prep connectors.
I still use them on everything.
I think I may have sold them already - I'll have check my box - I know someone showed interest before but I can't remember if I sold them or not. HA. I'll check my box and get back to you.
Mike
Re: RC10 Pan Car Refurb (A&L trans update)
Posted: Sat Oct 29, 2016 11:26 am
by blubblood
I'm trying to build up a similar RC10 for high speed, except I'm using a mid-mounted Trackmaster belt drive. How much did you have to modify the front A-arm and/or shock mount and did it make them weak?
Love the build.
Re: RC10 Pan Car Refurb (A&L trans update)
Posted: Sun Oct 30, 2016 8:50 am
by n20capri
blubblood wrote:I'm trying to build up a similar RC10 for high speed, except I'm using a mid-mounted Trackmaster belt drive. How much did you have to modify the front A-arm and/or shock mount and did it make them weak?
Love the build.
Thanks man! Didn't really do anything special to the front end. Originally (from back in the day) - it had Andy's arms and a McCallister lowering kit all around - all bolt on stuff. I liked the shock tower look so I designed RC10DS inspired shock towers and that's what currently on there with worlds car front arms. You could easily use all stock stuff and be fine. For high speed stuff though your going to want to be a bit lower to the ground.