Page 5 of 9
Re: Restoring an old RC10T2
Posted: Tue Nov 05, 2013 5:33 pm
by MayorRC
Just read the whole thread- Nicely done! The powdercoated chassis actually looks really well!
Re: Restoring an old RC10T2
Posted: Tue Nov 05, 2013 6:36 pm
by Vale
@ Romolus: thank you for the information

at the moment I don't need any part to finish this T2 but an molded drag link. Later I will start a second T2 project and probably need some parts...then I will pm you
@ MayorRC: thank you
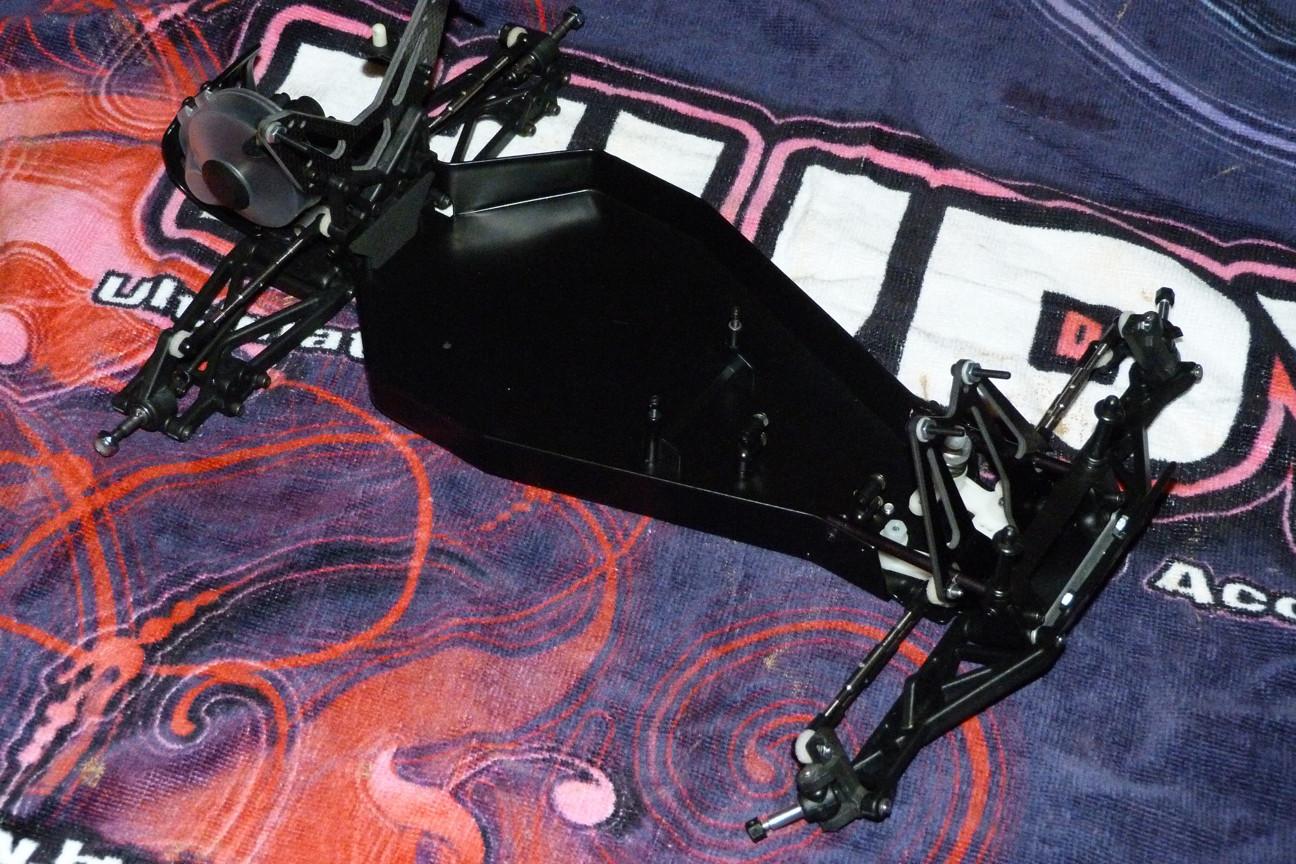
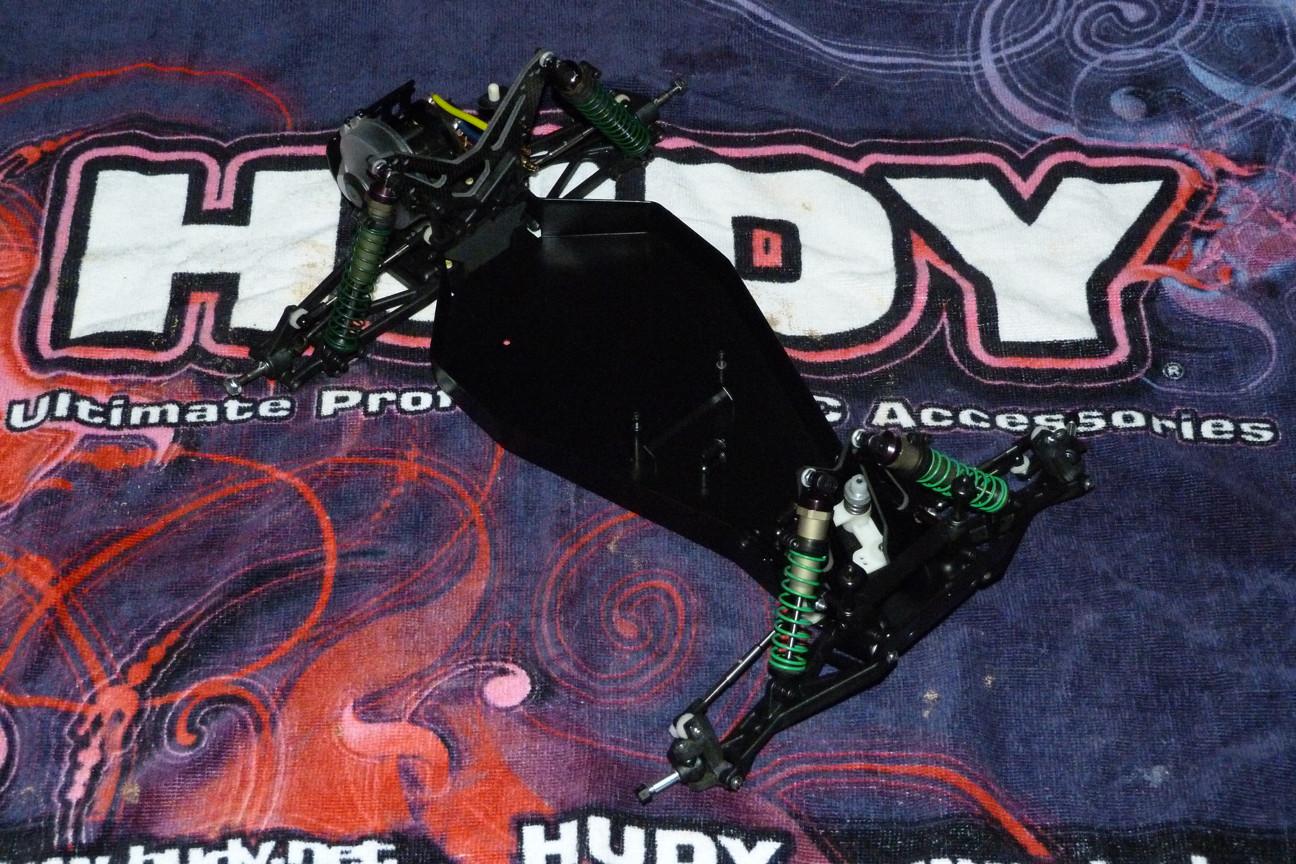
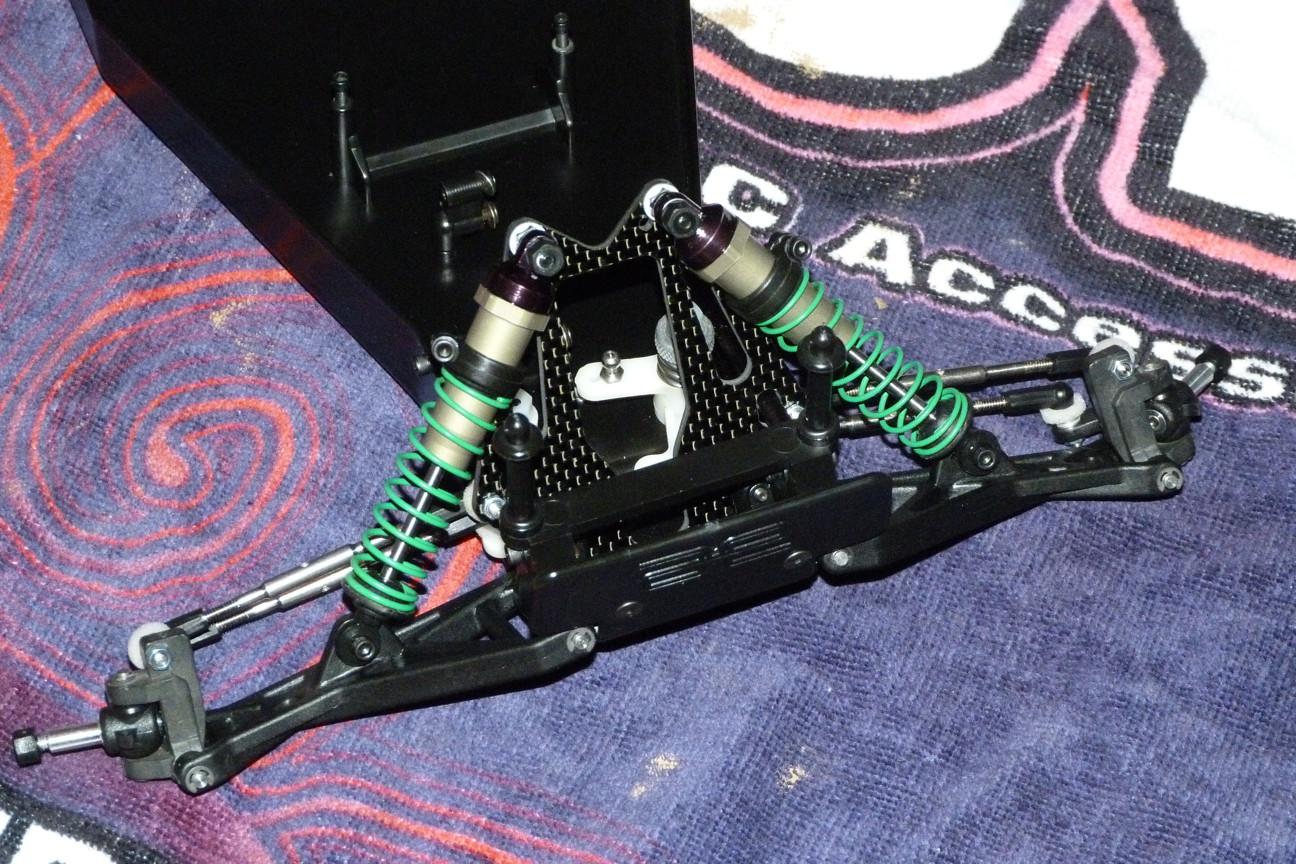
So today I've been assembling the T2 and here is the result
(battery strap missing on the pictures) just need a molded drag link. My T2 has as turnbuckle as drag link, looks cool but I prefer the easier solution, so I will use the molded one. Tomorrow...oh, ehm...today I will disassemble the shocks (again) and will replace the shock shaft.
Then I can finally say that the chassis is 90% complete

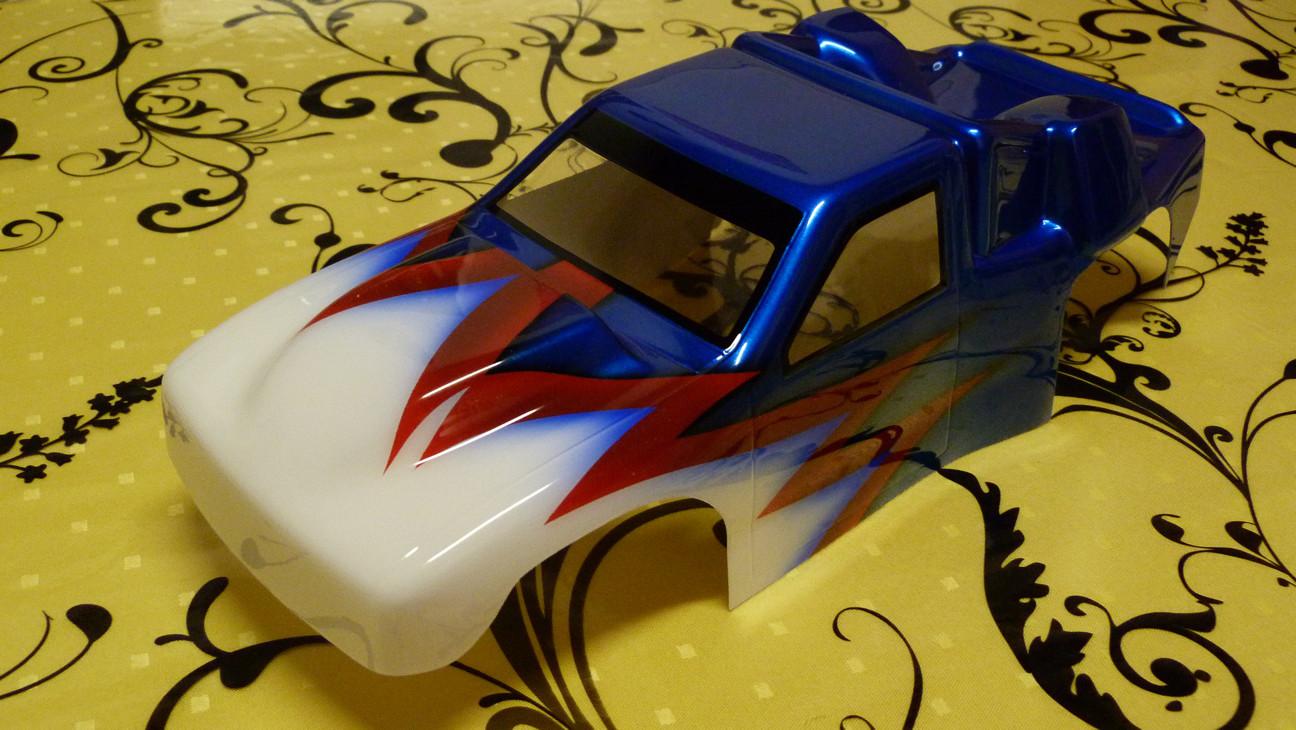
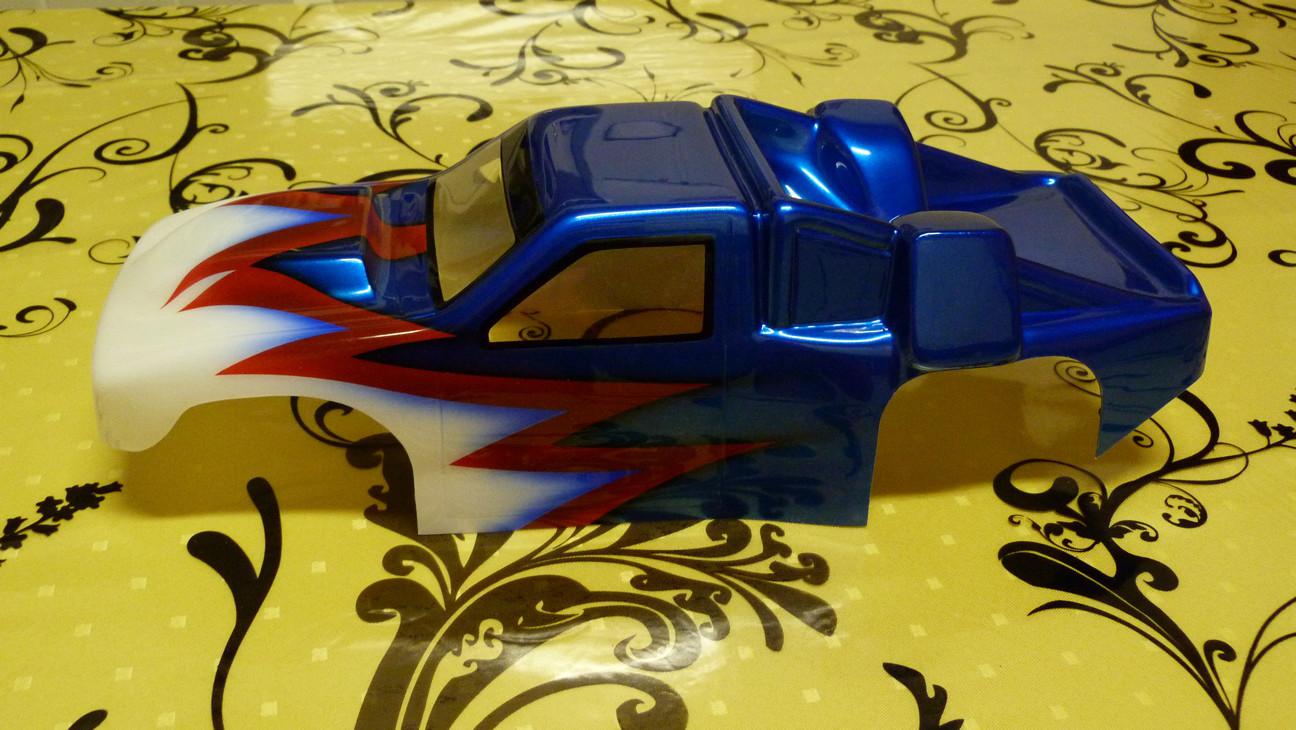
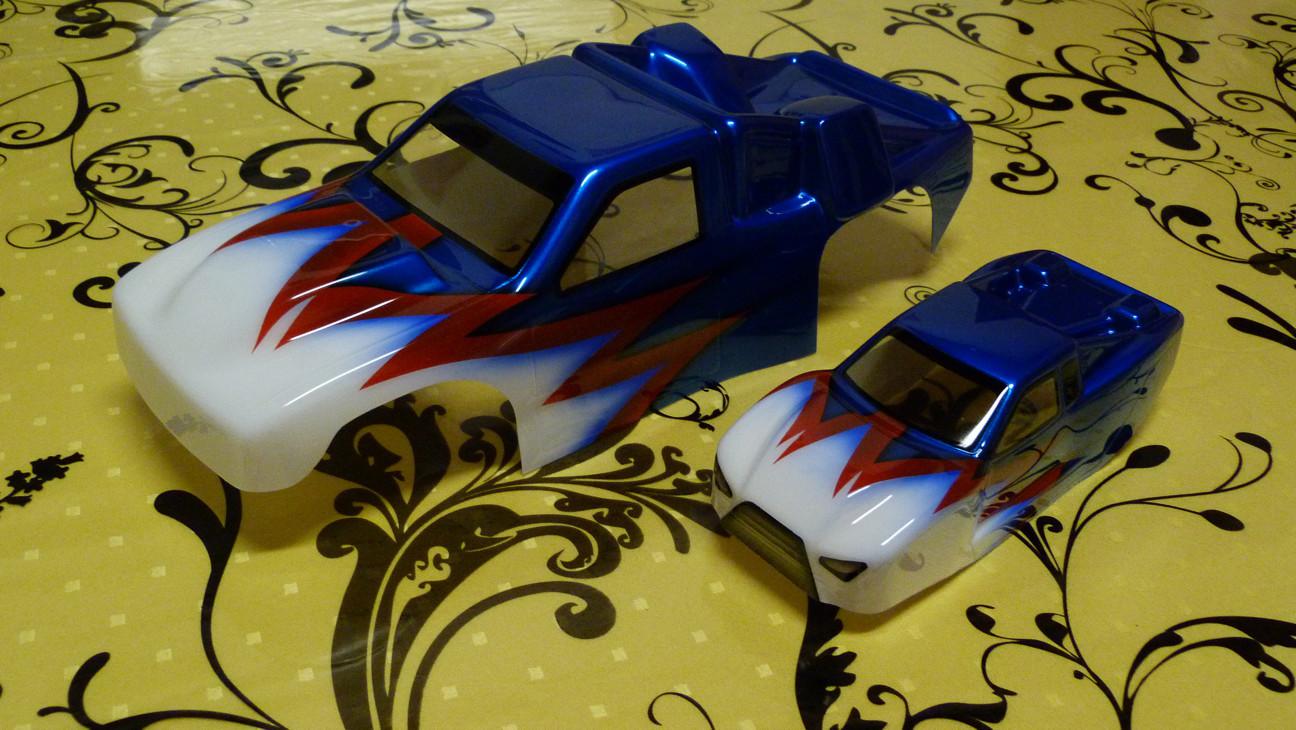
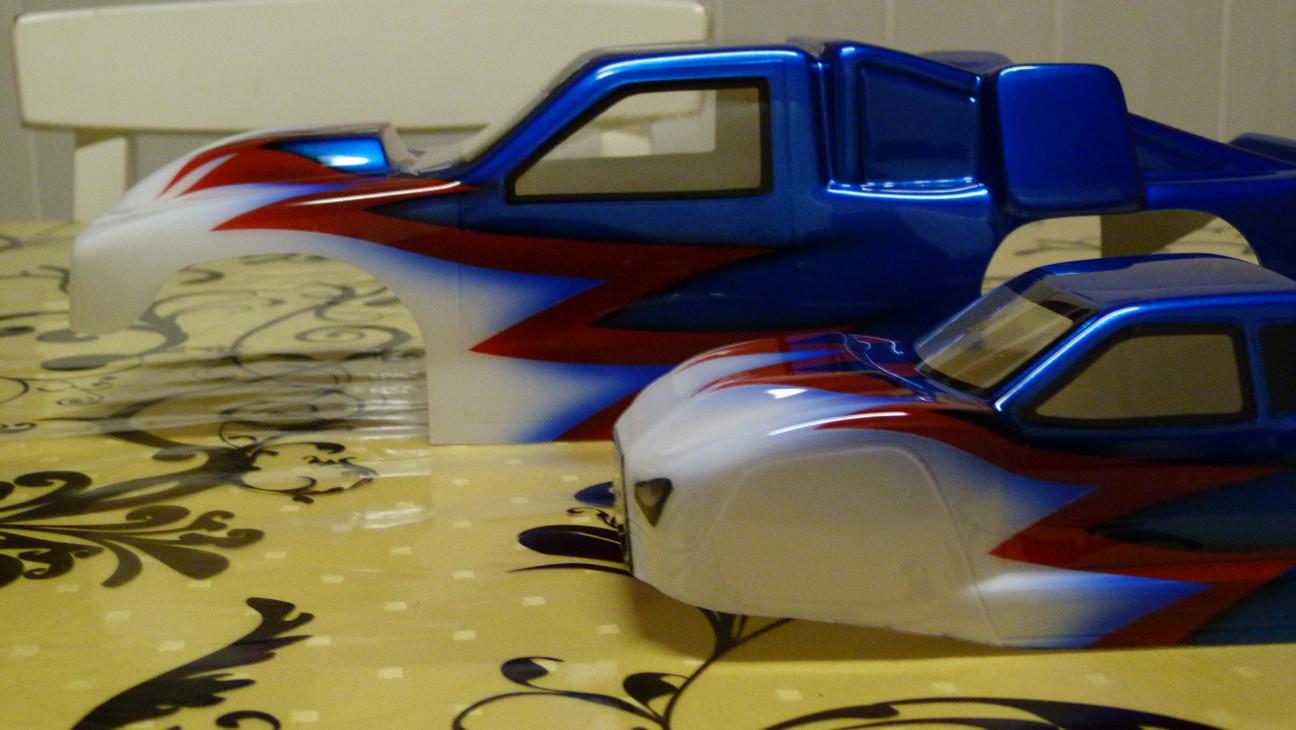
the body will be sent to a professional airbrusher tomorrow.... Provisionally I will use "the edge" tires on the front and "hole shots" on the rear.
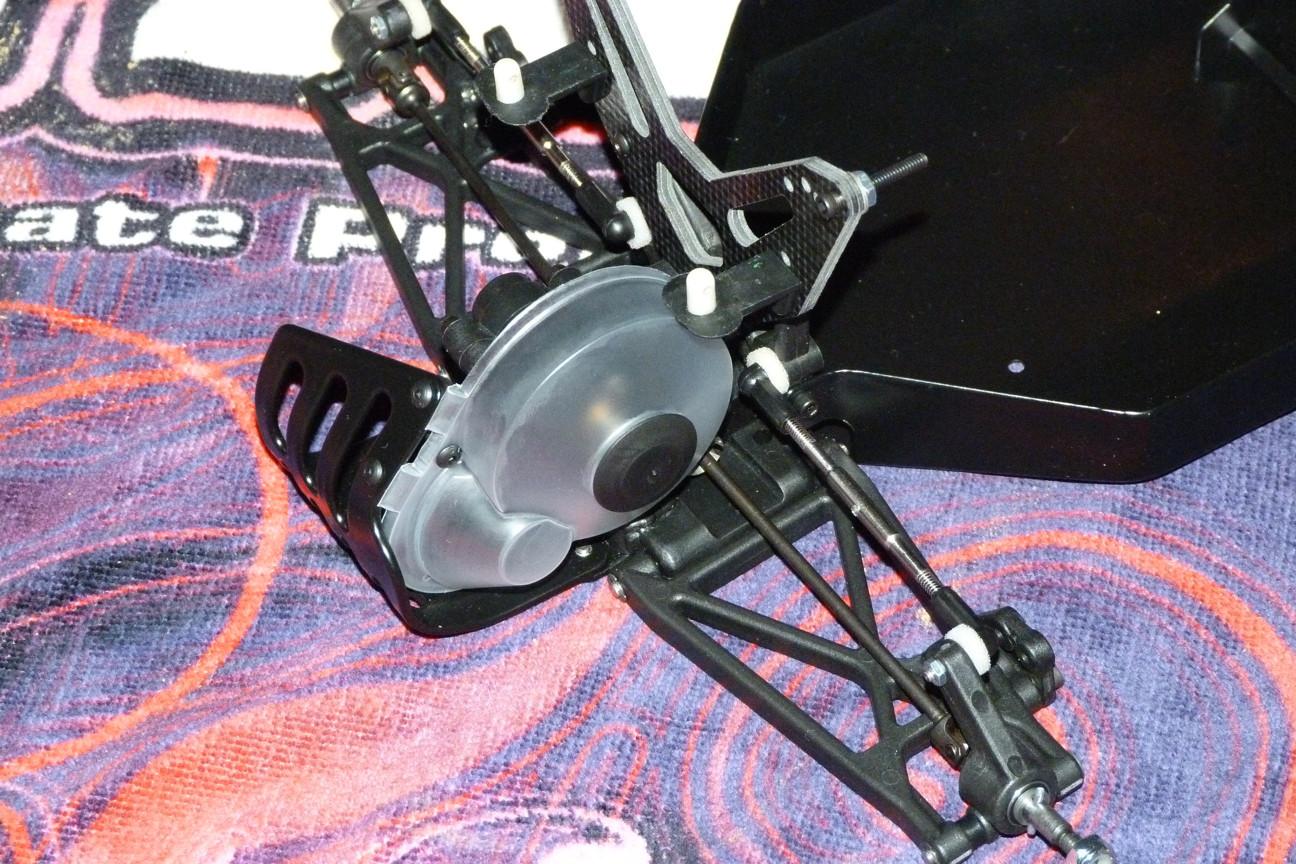
However, I have a little problem: the left brace tube is touching the servo saver adjusting screw...does anyone know a solution? What have i done wrong? ...While you're looking for a solution, I'll go to sleep now, good night
Re: Restoring an old RC10T2
Posted: Wed Nov 06, 2013 5:28 pm
by Vale
So today I disassemble the shocks and replace the 4 shock shafts because the old ones were in very bad conditions/scratched.
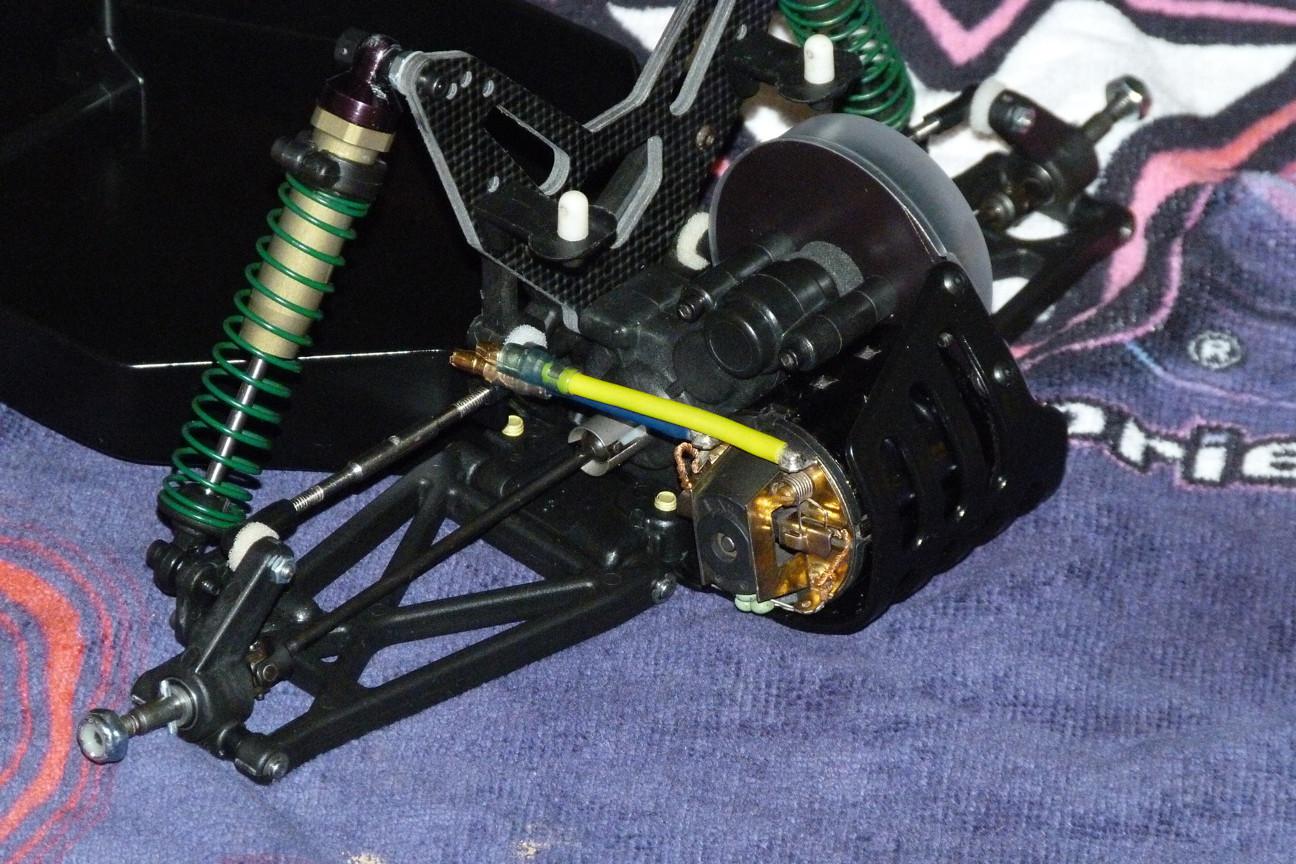
I don't knew which motor I should use but I took a look at my small collection and found this one (picture 3). It has no decal/description, so I don't know which motor it is
But it looks good and is in a very good shape
I'm not sure, but I think it should be a recent 17t Thunder Tiger motor.
Re: Restoring an old RC10T2
Posted: Wed Nov 06, 2013 5:43 pm
by littleVETTE
post up a picture of the servo saver nut and the nose tube contact.
Re: Restoring an old RC10T2
Posted: Wed Nov 06, 2013 6:00 pm
by Vale
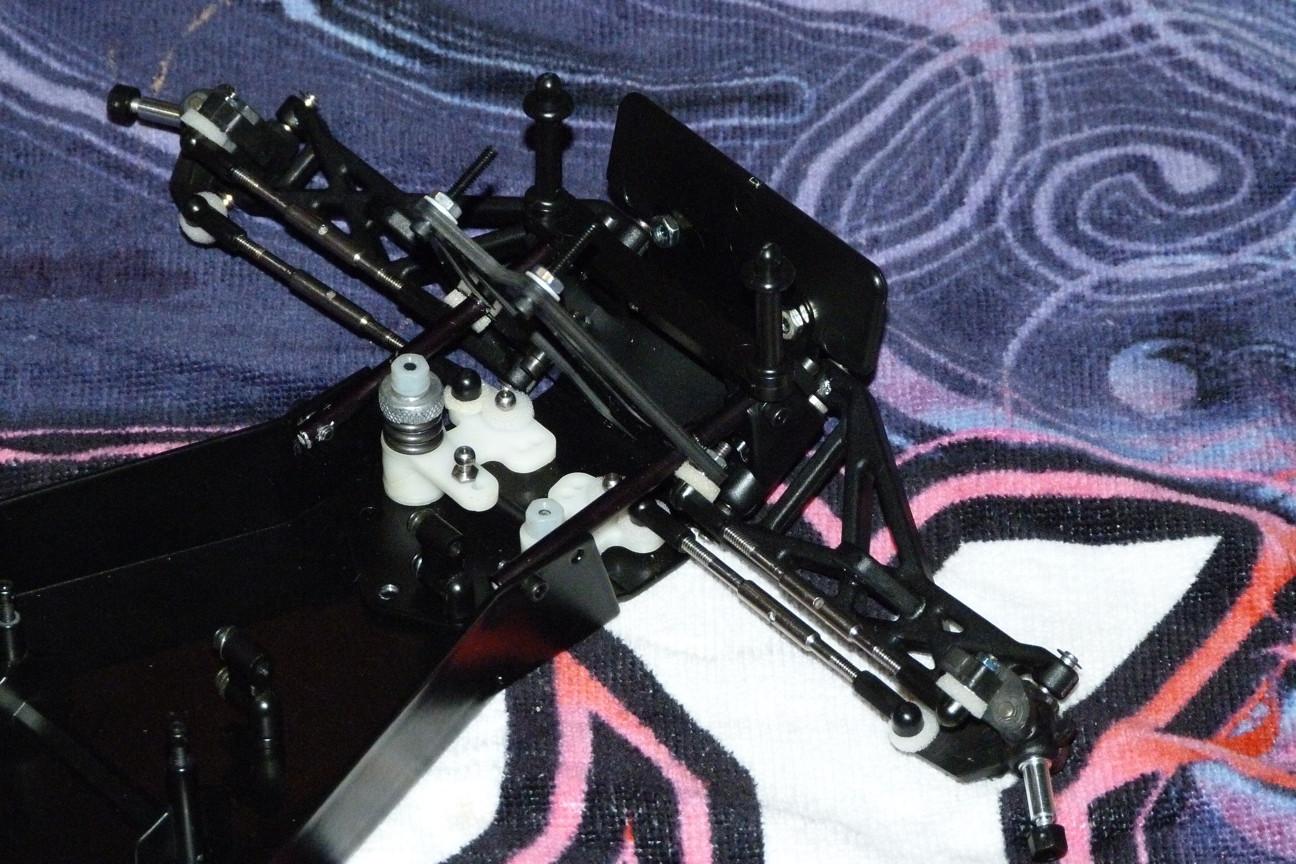
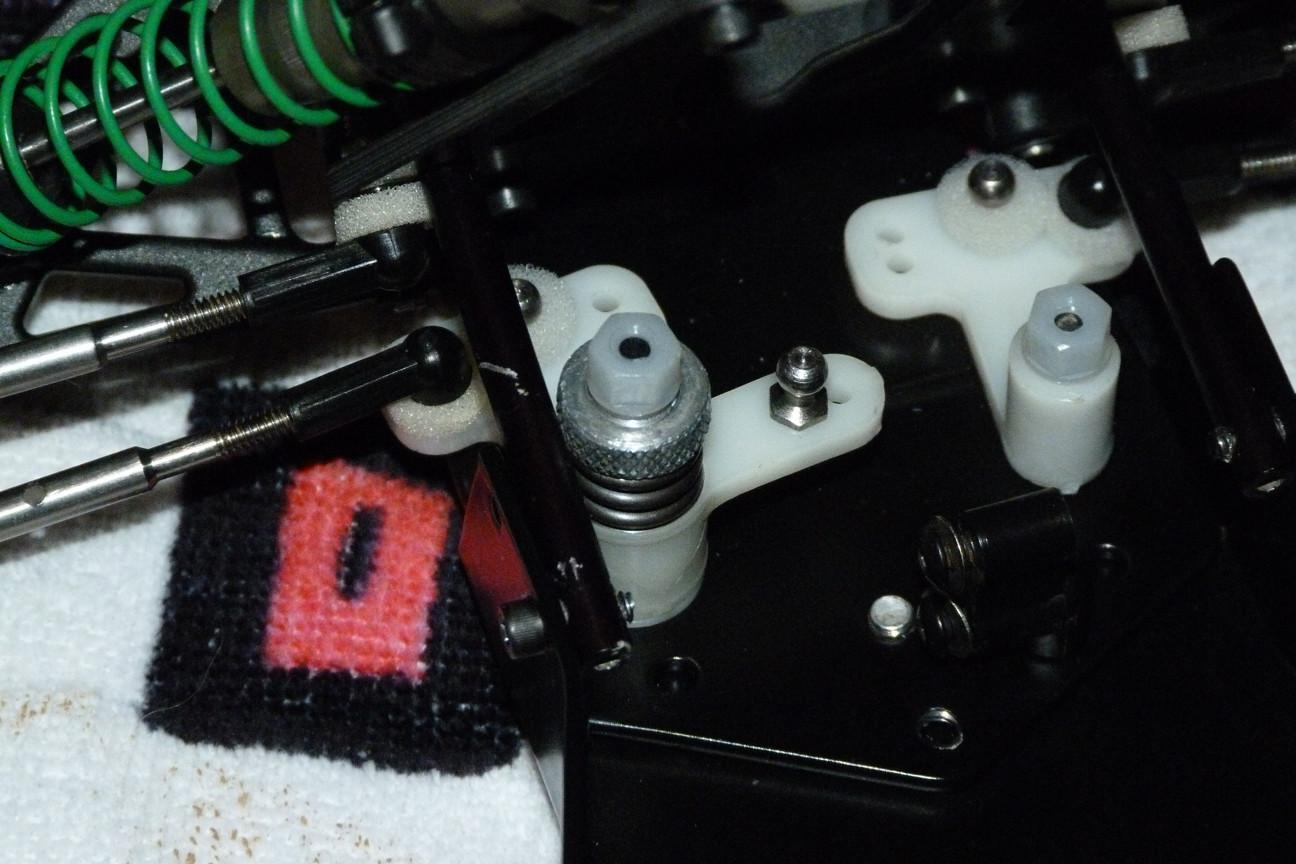
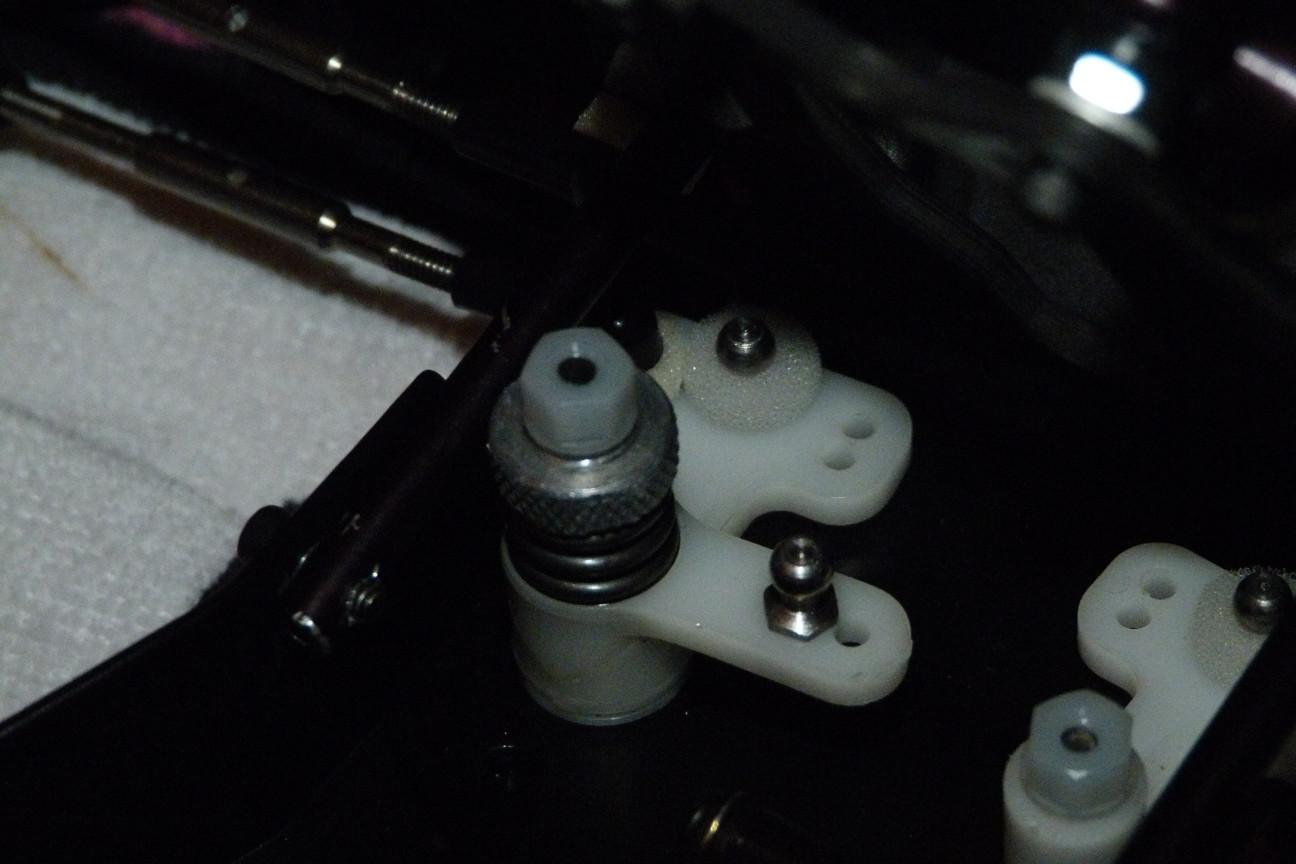
Here are two pictures of the servo saver nut...
I can't tighten the servo saver screw as it should be because the thread of servo saver tube is destroyed. I think that could be the reason why nut has contact with the nose tube...
Another reason could be that the servo saver mounting screw is slightly bent.
Re: Restoring an old RC10T2
Posted: Wed Nov 06, 2013 6:05 pm
by littleVETTE
it kind of looks like the nose tube is slightly bent. have you tried flipping the nose tube to the other side? also check to see if your tub isn't bent in slightly. if all checks out i would break out a dremel and sanding drum. sand the area on the nose tube to clear the nut. i had to this to one of my trucks once.
also check to see if the servo saver screw, the one that bolts to the chassis, isn't bent too.
Re: Restoring an old RC10T2
Posted: Wed Nov 06, 2013 6:19 pm
by Vale
When you see it live it does not look as if the nose tubes were bent. But I will try to flipping the nose tubes to the other side, I have not tried it yet.
Another question: I wonder if I should I use shims under the servo saver parts? Because the ball ends are touching/scratching the nose tube
Re: Restoring an old RC10T2
Posted: Wed Nov 06, 2013 6:29 pm
by littleVETTE
you mean scratching the nose plate? i use a single aluminum washer. that gives me enough clearance. no matter what the servo saver is going to flex under hard cornering. just make sure you have the shorty ball ends and not the longer ones.
Re: Restoring an old RC10T2
Posted: Wed Nov 06, 2013 6:33 pm
by Vale
Yes, the nose plate sorry
and yes I used the short ball ends
Okay, will use a aluminium washer, should be enough.
Re: Restoring an old RC10T2
Posted: Fri Nov 29, 2013 4:39 pm
by Vale
Re: Restoring an old RC10T2 (M. Pavidis replica, updated 11-
Posted: Fri Nov 29, 2013 5:27 pm
by romulus22
He was one of my favorite drivers growing up. I really like his paint and always wanted to replicate it but have yet to get around to it. Well done on the paint. Looks really good right now. Look forward to seeing it decalled up.
Re: Restoring an old RC10T2 (M. Pavidis replica, updated 11-
Posted: Sun Dec 01, 2013 7:56 am
by Vale
Hey Romulus, thank you
I'm also looking forward to see the final result
the decals and some specials parts to finalize the Pavidis replica are on their way to me, I hope they will arrive in the following days.
I probably will replace the shock shafts again, by goldie ones
I also have to modify the rear bulkhead...further details will follow
Re: Restoring an old RC10T2 (M. Pavidis replica, updated 11-
Posted: Sun Dec 01, 2013 9:06 am
by littleVETTE
looking good daniel. no plans on anodizing the chassis parts?
Re: Restoring an old RC10T2 (M. Pavidis replica, updated 11-
Posted: Sun Dec 01, 2013 9:34 am
by Vale
Thank you Rob
Not for the moment, maybe in future.
As soon as the modifications are done, the "special" parts and electronics are installed and the body 100% finished I want to start additionally the other projects like the B3, my XX-4 or the Mid Custom Special.
I already have a second chassis kit lying here. Just have to look after someone who could anodize the parts. If I want a real replica I should also modify the nose plate and battery strap, right?
Re: Restoring an old RC10T2 (M. Pavidis replica, updated 11-
Posted: Sun Dec 01, 2013 6:29 pm
by Vale
For those who are interested and never seen it: this was Pavidis chassis
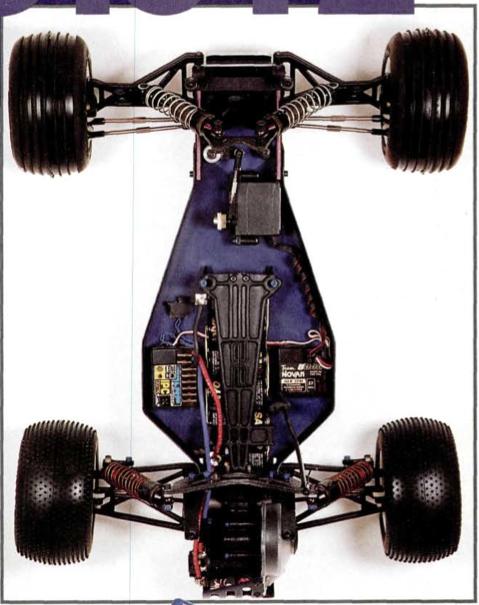
As you can see the chassis was blue anodized. Notice the modified nose plate and the battery strap. Also the rear bulkhead was modified. The rear shocks were fixed on the rear of the shock tower, and the tower itself was installed on the front of the bulkhead instead of being on the back of it. Some "special" parts were installed like gold shock shafts, RCPS turnbuckles and different body mounts on the rear.