Page 1 of 2
Procat Refurb No.1
Posted: Tue Oct 23, 2012 7:20 pm
by Groomi
Well I have finally pulled my finger out and started to build up my first refurbishment. This car is intended to be built to standard specification using used parts in good working condition.
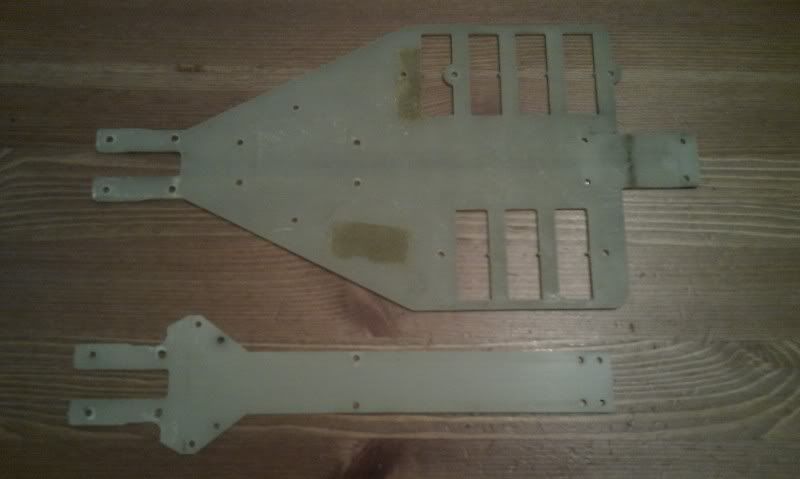
First up, the original chassis decks in need of a good clean:
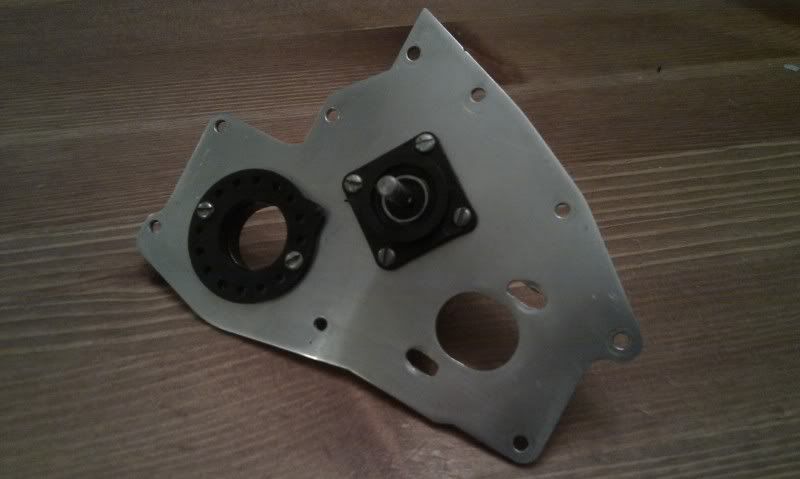
Transmission plates cleaned up and given a light polish, then assembly begins:
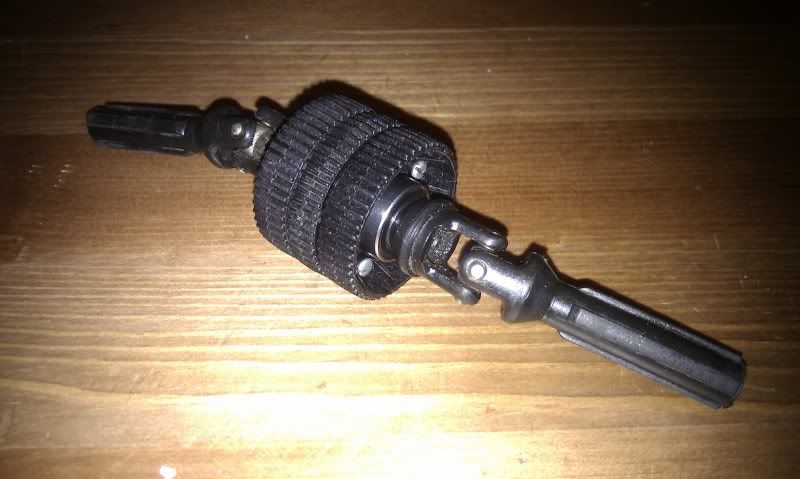
Standard 3-part diff built up. Turns nice and smooth:
And transmission assembled:
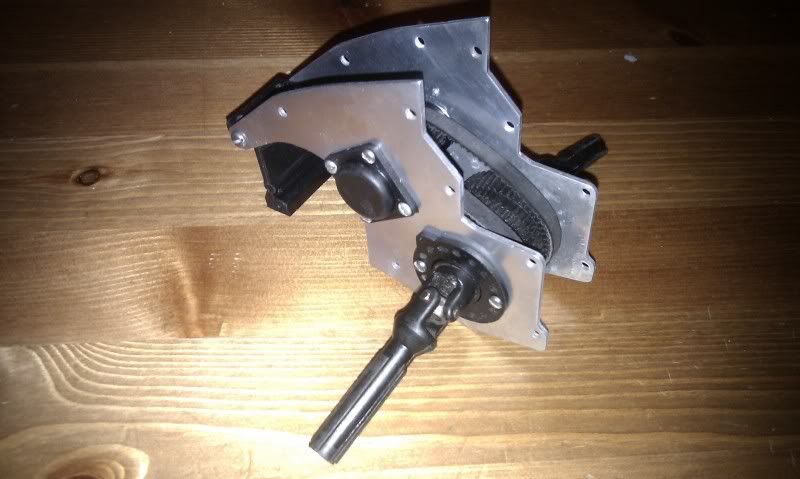
Finally for now, the transmission is attached to the upper and lower decks:
Re: Procat Refurb No.1
Posted: Tue Oct 23, 2012 7:23 pm
by Groomi
I'm disappointed that I couldn't get the old adhesive residue off the lower deck. Can anyone suggest a suitable product to use to do this? Otherwise I might get on with making the reproduction decks that I've been meaning to do.
Also, I had to stop work when I got to the front diff assembly as I don't have the T080 flanges. Can anyone tell me what these are - are they metal or plastic and what thickness? I'm assuming a washer or washers of the right size will do the trick?
Re: Procat Refurb No.1
Posted: Tue Oct 23, 2012 8:10 pm
by SFC K
You could try some goo gone. It works well for removing left over adhesive or WD40 works too.
That is a unique looking transmission.
Re: Procat Refurb No.1
Posted: Tue Oct 23, 2012 10:03 pm
by tesla33
w40 and then correct the alcohol and is perfect
Re: Procat Refurb No.1
Posted: Wed Oct 24, 2012 5:14 am
by Groomi
Thanks for your suggestions for cleaning the chassis. I'll give them a try.
SFC K wrote:That is a unique looking transmission.
It's just the standard transmission as per the manual. The only difference is where I have positioned the screws for the eccentrics which I prefer to use the holes on either side rather than top and bottom to allow easier access for adjustment once the suspension and driveshafts are installed.
Re: Procat Refurb No.1
Posted: Wed Oct 24, 2012 10:03 am
by sheriff
Groomi wrote:I'm disappointed that I couldn't get the old adhesive residue off the lower deck. Can anyone suggest a suitable product to use to do this? Otherwise I might get on with making the reproduction decks that I've been meaning to do.
Also, I had to stop work when I got to the front diff assembly as I don't have the T080 flanges. Can anyone tell me what these are - are they metal or plastic and what thickness? I'm assuming a washer or washers of the right size will do the trick?
Tyre additive is good at softening glue residue too, try that.
Re: Procat Refurb No.1
Posted: Wed Oct 24, 2012 11:54 am
by Coelacanth
WD-40 works, but will be slow. As long as the deck isn't plastic, acetone will remove remnant adhesive nice & quick. Most RC car deck material isn't plastic so it's sure to be safe...if it's a Tamiya, be careful.

Re: Procat Refurb No.1
Posted: Sun Oct 28, 2012 4:34 am
by Groomi
I had a go with WD40 last night and it didn't touch the residue - it's probably been dried on there for 20 years!
I'll get some acetone and try that, failing that a friend has suggested carefully sanding it off. I have a broken chassis that I can practice on to work out how best to get a suitable finish after sanding.
Re: Procat Refurb No.1
Posted: Sun Oct 28, 2012 6:43 am
by CAT3K
I had a residue problem on my Procat chassis too, and the only way i got rid of it was very gentle sanding with the lightest grade wet'n'dry. I did try acetone but it wouldn't shift, although yours looks like tape residue while mine was a resin :
http://www.rc10talk.com/viewtopic.php?f=28&t=22555
Paul.
Re: Procat Refurb No.1
Posted: Sun Oct 28, 2012 6:54 am
by Groomi
Wow, that looked like hard work. Great result though!
Mine is just the backing from some old Velcro as you can still see the pattern in it. It is rock hard, so I think Sanding is the only way.
Re: Procat Refurb No.1
Posted: Sun Oct 28, 2012 8:02 am
by naushad
Use lighter fluid.
Apply with cloth to dab. or wrap a cloth/tissue soaked in lighter fluid and leave for several hours.
Then remove with cloth and some elbow grease.
If the residue is hard then I found that using a hammer and chisel end (like that on a screwdriver) can remove it off cleanly. But be careful you don't chip the chassis. I've done it plenty of times without damaging the chassis!
Re: Procat Refurb No.1
Posted: Tue Oct 30, 2012 7:56 pm
by Groomi
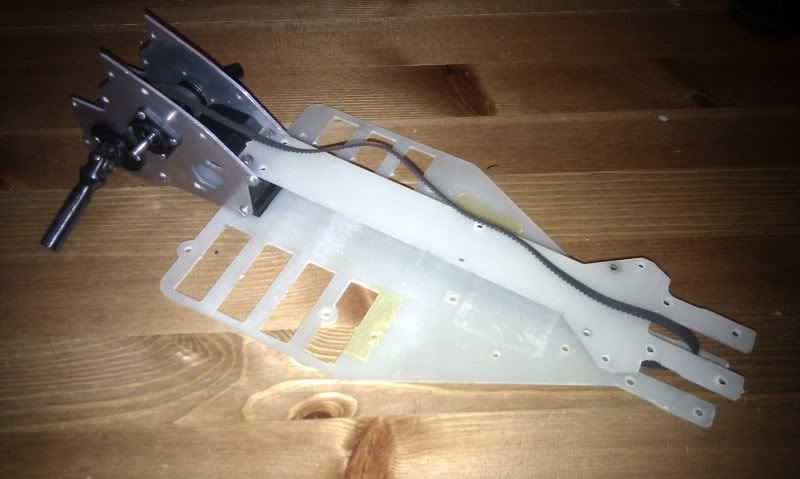
I managed to find a bit more time this evening to progress things.
I built up the original standard specification front differential and am happy it turns pretty freely. This was then installed into the diff housing and mounted to the chassis. I removed an unused tensioning bar from the sprue and fitted it for this build as I want to keep it totally standard spec and a used one would probably be a weak spot.

Then all the belts were tensioned and the transmission housing fitted. In this photo you can see that I finally managed to remove the residue from the lower deck by chipping it away as one of you suggested. Unfortunately, I have managed to leave a couple of minor scratches to the lower deck, but it's not bad and is certainly better without the residue.

Finally for tonight, I fitted the rear shock and wing mounts along with the upper suspension mount.

I realise that what I haven't been showing is the cleaning up process for each of the parts. Remember all of these parts (except the front tensioning bar) are used, so cleaning up and making sure everything is in good condition is far more time consuming than the assembly. I'll try to remember to take some pictures when I work on it next.

Re: Procat Refurb No.1
Posted: Tue Oct 30, 2012 10:56 pm
by Bormac
Glad to see another Procat getting some good attention.
Building or refurbishing old Cats really are time consuming to do well. Building them up from new parts takes long enough but having to clean up old well used parts really is a lot of work. Luckily Procat's are a little more simpler to do than the earlier versions.
Good work this far in
Re: Procat Refurb No.1
Posted: Wed Oct 31, 2012 7:22 am
by CAT3K
Good work so far
I don't like dissasembling cars, but i love this part, the rebuilding. It feels like building a new kit
Paul.
Re: Procat Refurb No.1
Posted: Thu Nov 01, 2012 2:10 pm
by Groomi
I agree it's good fun to rebuild but I did the dissassembly about ten years ago, then left it in a box. Have recently bought loads of other bits for multiple cars but at least nowadays I can easily download manuals. Back in the day I was stripping and rebuilding my XLS without one!