Page 2 of 10
Re: Rusty RC12E Resto
Posted: Tue Jun 12, 2012 7:56 pm
by AndrewSi
WOW! Nice work!
I have the stock version of that modified leisure motor on my Leisure car. You can see it here-
http://www.rc10talk.com/viewtopic.php?f=33&t=27075
Re: Rusty RC12E Resto
Posted: Wed Jun 13, 2012 4:48 am
by PlastiZapCA+
Thanks man! I'm really digging your Leisure car!

The vintage machines have far more character than their modern counterparts.
I'll be giving my Leisure modified motor a good cleanup on Friday and will post some pics. I'm hoping it just needs a good cleaning inside. If not I may find someone to rebuild it for me.
Re: Rusty RC12E Resto
Posted: Wed Jun 13, 2012 1:38 pm
by j-sou
were the tires and wheels NOS pre-mounted? I'm having trouble finding tires for my 12e wheels

Re: Rusty RC12E Resto
Posted: Wed Jun 13, 2012 3:40 pm
by durb69
HUBBA HUBBA
thats awesome man! great job! did you get the wet sand and polish idea from that how too thing i wrote up a while back? Just curious? fantastic job on the restore!

i cant wait to see the painted body!
Re: Rusty RC12E Resto
Posted: Wed Jun 13, 2012 8:02 pm
by PlastiZapCA+
j-sou wrote:were the tires and wheels NOS pre-mounted? I'm having trouble finding tires for my 12e wheels
It took months of searching on ebay for me to find the tires and wheels for this car. I managed to find three sets of new unmounted rear donuts and two sets of new unmounted front donuts. The rears are Pro-Line Jaco firm compound and the fronts are Associated pre trued hard compound donuts. Not exactly a balanced combination but I'll take what I can get! I also won a fairly large lot of RC12E wheel sets. I picked out the rims on my car from this lot and restored them. This required removing the old tires and wet sanding and polishing the plastic rims. The rims also got a month long soak in hydrogen peroxide. I used CA to mount the new tires to the rims. Tires are indeed tough to find for this car but through persistence they can be found.
Re: Rusty RC12E Resto
Posted: Wed Jun 13, 2012 8:21 pm
by PlastiZapCA+
durb69 wrote:HUBBA HUBBA
thats awesome man! great job! did you get the wet sand and polish idea from that how too thing i wrote up a while back? Just curious? fantastic job on the restore!
i cant wait to see the painted body!
Thanks durb! I actually missed that article!

I'm a scale model builder too and always sand and polish my subjects before painting so it was the first thing I did. It was the only way I found to remove all of the ground in dirt from the edges of the chassis. This method also cleaned up some of the rough spots where fiberglass cloth that was protruding. I actually soaked some of the chassis in hrdrogen peroxide as well and it helped loosen up a lot of the dirt.
I've been following your awesome builds too. Really love the CNC work you do! I've got a graphite RC10L too (I think

) that I'll start on after I finish this machine. Will have to go over your builds again so I can get this car in order.
Cheers,
Don
Re: Rusty RC12E Resto
Posted: Thu Jun 14, 2012 7:21 am
by PlastiZapCA+
So far:
New repro radio tray ordered Also got a bumper but will be saving for another RC12 project.
1/12 Tamiya Jagermeister decals coming in from the UK
Orange paint ordered
Restoration of the wing in progress
Vintage battery connectors ordered ( Plan is to make a modern stick pack look somewhat vintage and also to connect to the NOS Associated resistor speed control. Will either paint or shrinkwrap the modern nimh pack in white and hang it in the original position from wire ties like the book shows.)
Pending:
Servos - Can't make up my mind on which ones yet. Don't think I can use digital servos with an old AM set. More research to be done.
Looking at new in the box Futaba Magnum AM radio set in case the old gold box Futaba or receiver doesn't work. Probably get it anyway as the gold box looks very cumbersome to use. If the receiver is DOA I might fit the new reciever in the old case. It can be done!
Stay tuned!
Re: Rusty RC12E Resto
Posted: Thu Jun 14, 2012 9:35 am
by bearrocco
I'm looking for front chissis parts for that car do you know anyone.
Re: Rusty RC12E Resto
Posted: Thu Jun 14, 2012 10:44 am
by PlastiZapCA+
bearrocco wrote:I'm looking for front chissis parts for that car do you know anyone.
Unfortunately I don't have any spare suspension parts but do check the PM I just sent you.
Re: Rusty RC12E Resto
Posted: Wed Jun 20, 2012 4:15 pm
by PlastiZapCA+
Well I'm working overtime all this week so I didn't get much done on the car as I had planned. Still the project is moving forward and I now have all the parts coming in to complete the car. By mid July I should have a fully functional RC12E. I'll be adding a few scale details to the body so it might put me behind a bit but not much. Here is just a small update for now.
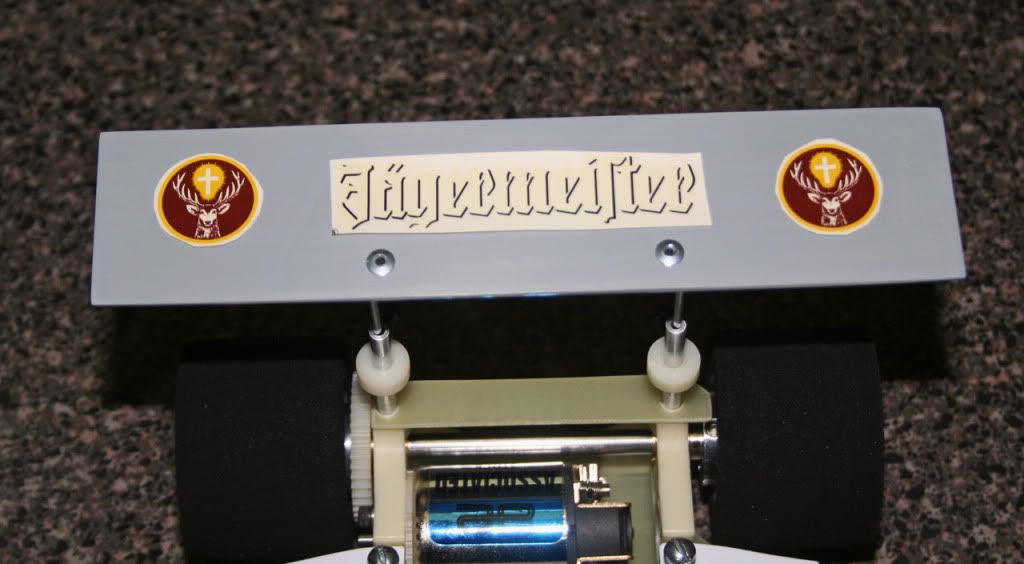
The wing has been primed and is now ready for paint and decals. Once primed the wing revealed some very noticeable shape issues. I corrected the obvious ones but it would really take making a new wing to have it perfect and that is not something I want to do as the goal is to keep as many original parts as possible. I used a filler primer to hide all the low spots and corrected most of the crooked lines. It's almost perfect and you would really have to look hard to catch anything out of place so I'm satisfied. As a personal touch I made two wing mounts out of pop rivet heads. These will be polished up once painted. The wing mount was cleaned of all rust and will also be polished soon. I placed my new decals on so you can see how it's going to look. The decals should really pop over bright orange.
The wing is not bolted on in this photo.
New replacement radio tray by reign 79. This is an absolutley fantastic part! Just the like the original only new. This is the icing on the cake. There was no way I could have gotten the old radio tray to look like this.
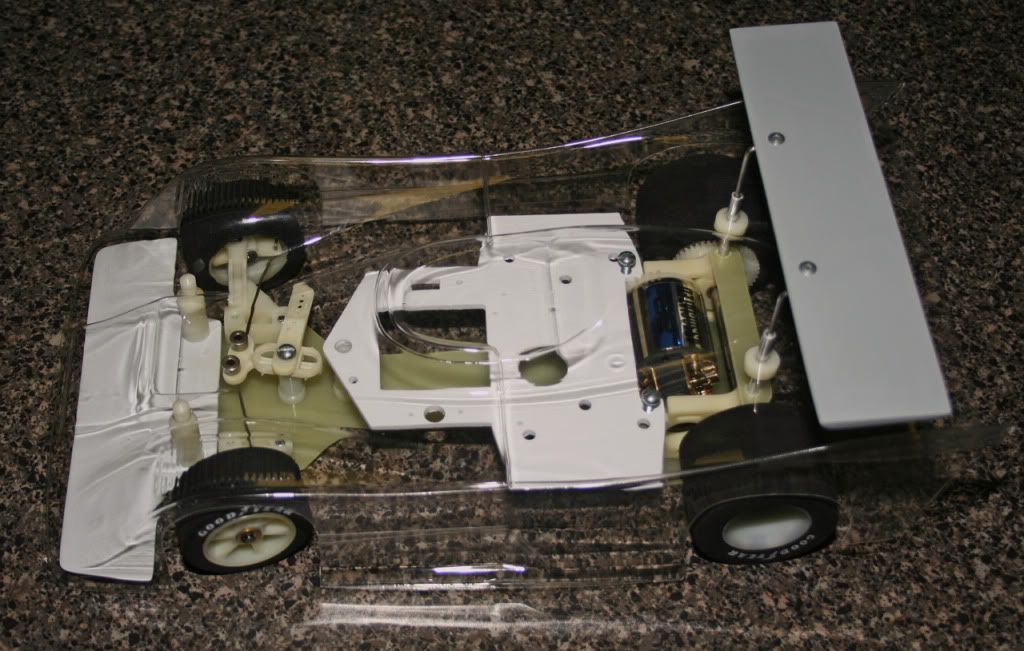
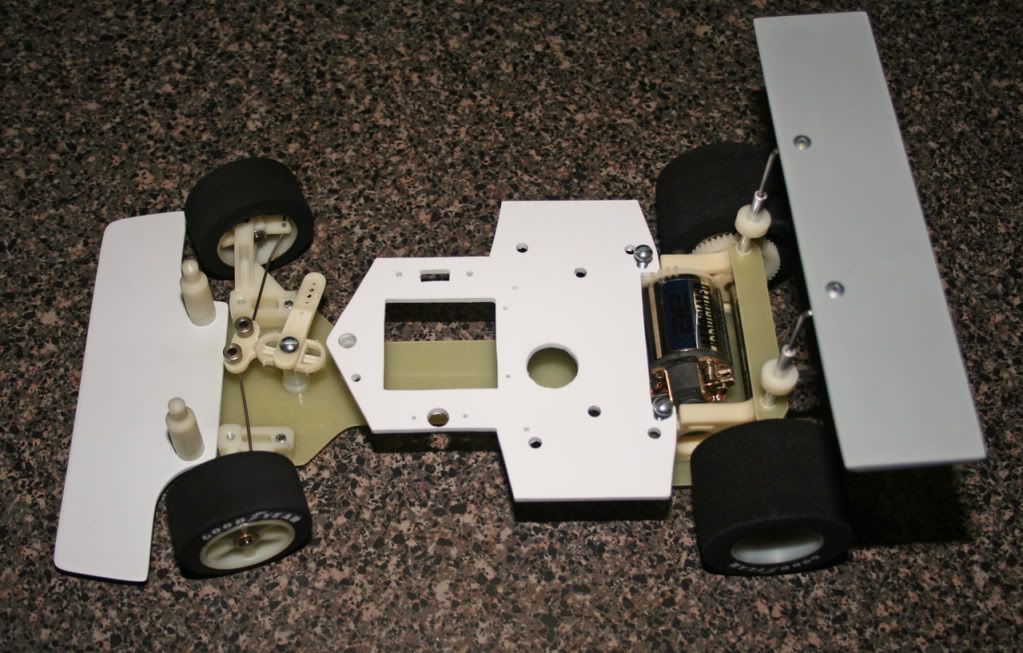
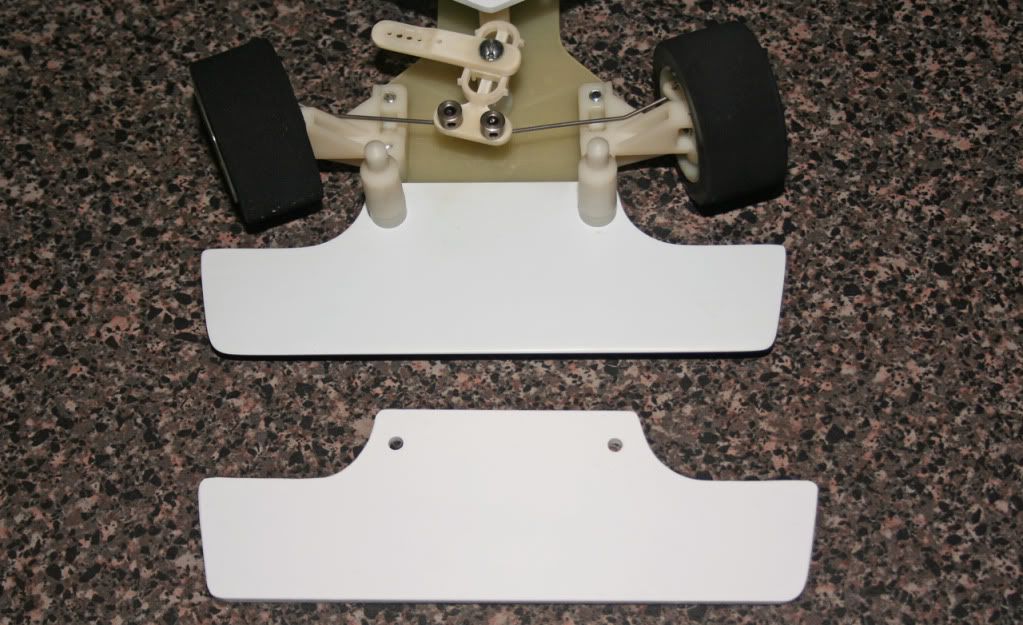
Replacement bumper by reign79 (unmounted). Another perfect piece that i'm saving for another RC12 restoration. The original bumper came out like new after restoration so I've kept it.
That's all for now as I've got to go back to work.

This weekend I hope to get a lot done though so check in on Monday as there should be some more updates.
And by the way the decals are from an old Tamiya sheet. I'm thinking number 25.

Re: Rusty RC12E Resto
Posted: Wed Jun 20, 2012 4:40 pm
by slotcarrod
Such a nice resto! So far, a job very well done for a "so called" RC resto rookie!
Re: Rusty RC12E Resto
Posted: Wed Jun 20, 2012 7:19 pm
by PlastiZapCA+
slotcarrod wrote:Such a nice resto! So far, a job very well done for a "so called" RC resto rookie!
Thanks! I wouldn't have made it to this point without all the great info on this forum. The tips for whitening parts with peroxide were invaluable. I even got a history lesson on these cars. Many members helping with info and parts too. What a great forum!
Cheers,
Don
Re: Rusty RC12E Resto
Posted: Thu Jun 21, 2012 7:06 pm
by GJW
stunning job there don, just love that orange body mate. can you show us what polish compounds you used and tools?
Re: Rusty RC12E Resto
Posted: Fri Jun 22, 2012 3:20 pm
by PlastiZapCA+
GJW wrote:stunning job there don, just love that orange body mate. can you show us what polish compounds you used and tools?
Thanks GJW! I'll be happy to show how I got the parts cleaned and polished up. I'll post a tutorial this weekend along with some updates on the car. It's nothing really fancy just old fashioned manual labor and a few items from the auto parts store and hobby shop. I'll show just what I did and the items used to do the job.
Cheers,
Don
Re: Rusty RC12E Resto
Posted: Sat Jun 23, 2012 6:02 pm
by bearrocco
Lot of time there looks excellent , where did the tire's and rims come from. That car is a bute !!!!!!!!!!!!