GoMachV wrote: ↑Thu Aug 08, 2024 9:33 pm
unfortunately AE forgot about thew Worlds holes on the new bulkheads. Best alternative is the inside under the wing tube holes where you have them. It was always impossible to get a driver in there haha. A tamiya took just sqeaks by
Nicely done, you called it
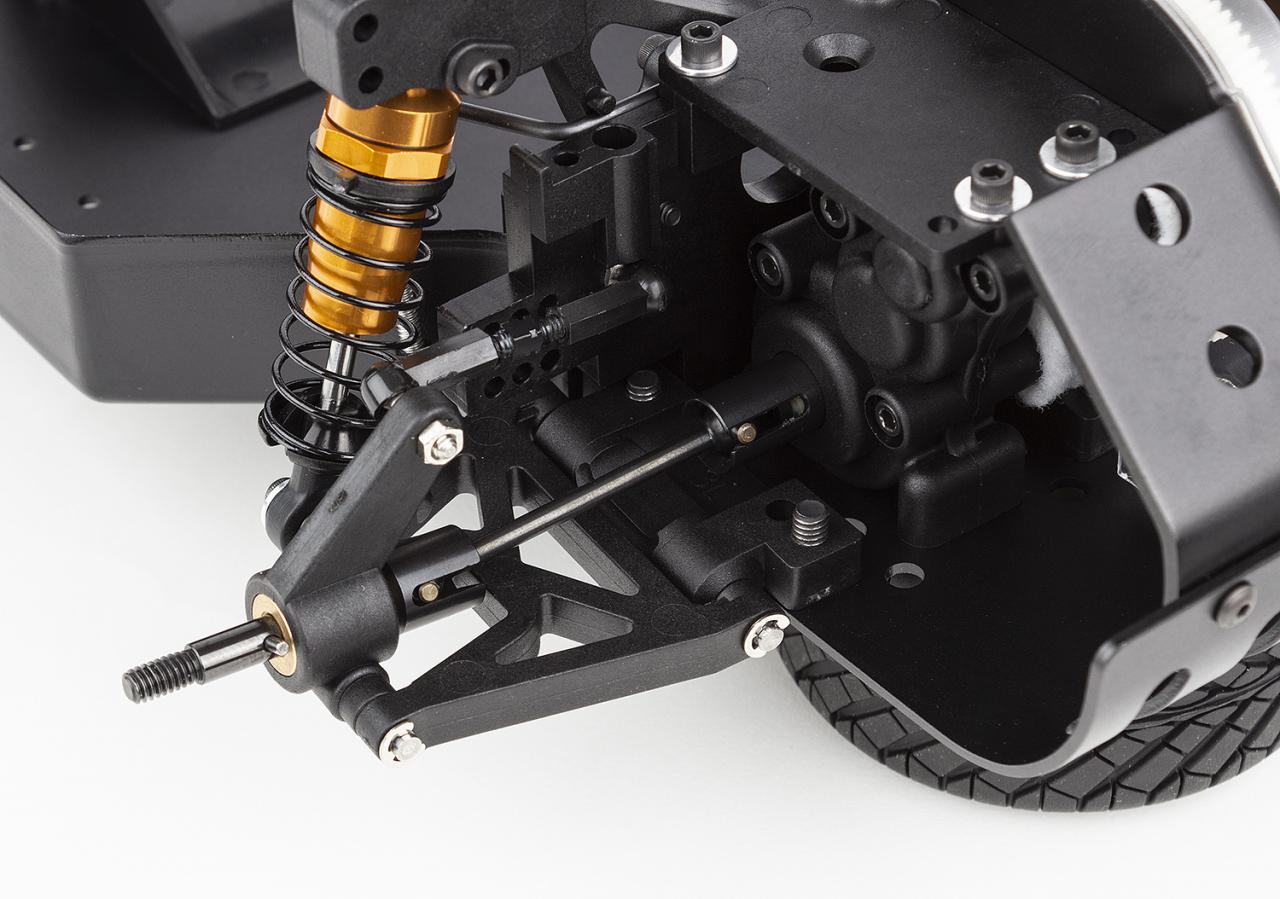
I tried putting the ball studs in the vintage spot, with the Classic camber tie rod length, and then this happened - serious positive camber:
Looked at the DS on AE, and sure enough, the ball studs go under the wing tubes.
Going to take another swing at it, thanks guys!
Re: RC10 DS Classic - Build
Posted: Thu Aug 08, 2024 10:28 pm
by GoMachV
Just don't put the trans brace on upside down like they did
Re: RC10 DS Classic - Build
Posted: Thu Aug 08, 2024 10:31 pm
by XLR8
I've never built a DS so I appreciate that you're documenting your build here.
I'll definitely be coming back when I'm ready to build mine.
Thanks.
Re: RC10 DS Classic - Build
Posted: Thu Aug 08, 2024 10:34 pm
by GreenBar0n
That Tamiya tool tip made it happen, thanks @GoMachV!
Moved the ball stud to the 'correct' location under the wing tubes, and now with the rear camber tb set according to the DSC manual, I have crazy negative camber.
Not sure why there's such a disconnect from reality in the manual.
Going to get the correct gap, then try to apply it to the other side to see if I have it exactly correct, and then report back with the actual setting necessary.
Re: RC10 DS Classic - Build
Posted: Thu Aug 08, 2024 10:46 pm
by juicedcoupe
GreenBar0n wrote: ↑Thu Aug 08, 2024 10:34 pm
Going to get the correct gap, then try to apply it to the other side to see if I have it exactly correct, and then report back with the actual setting necessary.
GreenBar0n wrote: ↑Thu Aug 08, 2024 10:34 pm
Going to get the correct gap, then try to apply it to the other side to see if I have it exactly correct, and then report back with the actual setting necessary.
I've got the RPM 1/10 camber gauge, and their toe-in gauge too, I was prepared for something like this. Thanks!
Re: RC10 DS Classic - Build
Posted: Thu Aug 08, 2024 11:08 pm
by GreenBar0n
I'm going to get back to work, but had to share this one.
After the manual shows putting one of the too long ball studs from Bag D in the rear arm, and in the center hole:
Nothing actually goes in the center hole at all. Sway bar goes in the hole closest to the Stealth:
The shock goes in the farthest from Stealth.
I really hope that's the last of this non-sense. Back to it.
Re: RC10 DS Classic - Build
Posted: Thu Aug 08, 2024 11:51 pm
by GreenBar0n
I set the RPM camber gauge at 0°.
There is only the slightest sliver of negative camber with the rear arms parallel to the chassis.
I set my Rear Camber turnbuckles to 0.45" or 11.49mm, to get there.
Re: RC10 DS Classic - Build
Posted: Fri Aug 09, 2024 12:00 am
by Dustydrone
Thank you for taking the time to document this build with all the trials and tribulations. This is definitely going to save me time and frustration!
Keep up the great work!
Alan
Re: RC10 DS Classic - Build
Posted: Fri Aug 09, 2024 3:36 am
by GreenBar0n
Dustydrone wrote: ↑Fri Aug 09, 2024 12:00 am
Thank you for taking the time to document this build with all the trials and tribulations. This is definitely going to save me time and frustration!
Keep up the great work!
Alan
Appreciate the encouragement, and glad to hear you'll be able to get some use out of all this. Thanks!
Re: RC10 DS Classic - Build
Posted: Fri Aug 09, 2024 3:39 am
by GreenBar0n
Chassis nearly done.
In Bag D are (4) small 4-40 nuts, and (2) large 4-40 nuts, the manual doesn't say which nuts go where:
The large 4-40 nuts in Bag D, go on the rear shock tower shock bolts.
No shocks yet, propped up to ride height.
Couldn't resist testing out the wheelbase.
HPI body fits well.
No shocks, slammed all the way down and still have clearance. Starting to really like the DS.
Should be able to finish the entire chassis tomorrow. Motor\ESC and paint should be here Monday.
Re: RC10 DS Classic - Build
Posted: Fri Aug 09, 2024 11:14 am
by Dustydrone
GreenBar0n wrote: ↑Fri Aug 09, 2024 3:39 am
Chassis nearly done.
In Bag D are (4) small 4-40 nuts, and (2) large 4-40 nuts, the manual doesn't say which nuts go where:
The large 4-40 nuts in Bag D, go on the rear shock tower shock bolts.
No shocks yet, propped up to ride height.
Couldn't resist testing out the wheelbase.
HPI body fits well.
No shocks, slammed all the way down and still have clearance. Starting to really like the DS.
Should be able to finish the entire chassis tomorrow. Motor\ESC and paint should be here Monday.
WOW! That double cab fits perfect and looks amazing
I think I'm going to have to order a second DS now Who makes the double cab body and do you know where they are sold? I will be paying close attention to how you build the mounts.
Alan
Re: RC10 DS Classic - Build
Posted: Fri Aug 09, 2024 3:31 pm
by GreenBar0n
Dustydrone wrote: ↑Fri Aug 09, 2024 11:14 am
WOW! That double cab fits perfect and looks amazing
I think I'm going to have to order a second DS now Who makes the double cab body and do you know where they are sold? I will be paying close attention to how you build the mounts.
Alan
The DC body is an unlicensed knockoff found on ebay, it's 190mm wide, and a really tight fit with stock DS wheels. Could open up the wheel wells a bit, or even add fender flares. https://www.ebay.com/itm/165985341090
The DC body would work better with different wheels, but probably not the best choice for the DS, I'll keep trying to make it work though.
Re: RC10 DS Classic - Build
Posted: Fri Aug 09, 2024 3:39 pm
by GreenBar0n
Having difficulty figuring out the shock seals and spacers.
On the tree are (4) thick spacers in the yellow box, and (8) thin ones with a bevel that looks like they ride on the o-rings on one side, in the red box:
Manual shows (5) spacers and seals per shock, and shows the thin plastic washers need to be trimmed:
What are these soft looking washers, and how do they fit in to all of this?
Thanks!
Re: RC10 DS Classic - Build
Posted: Fri Aug 09, 2024 4:19 pm
by rctenracer
I could be wrong but they look like 1/16 " spacers. Can be used for down stops and also for adjusting the rear hub carrier.


 Who makes the double cab body and do you know where they are sold? I will be paying close attention to how you build the mounts.


