Page 3 of 10
Re: Rusty RC12E Resto
Posted: Mon Jun 25, 2012 1:23 am
by PlastiZapCA+
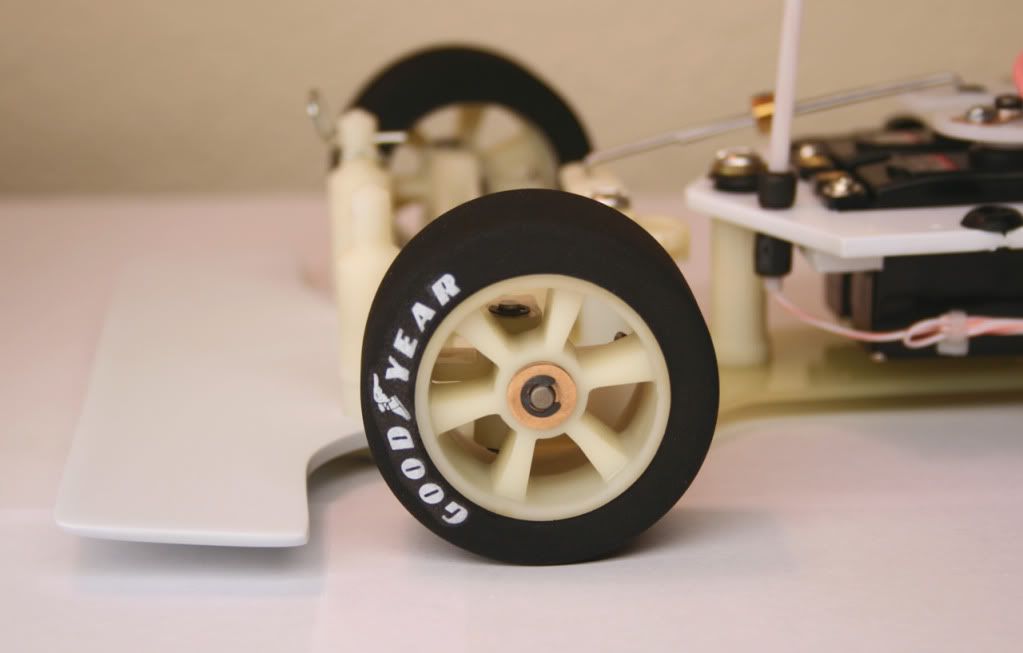
bearrocco wrote:Lot of time there looks excellent , where did the tire's and rims come from. That car is a bute !!!!!!!!!!!!
Thanks bearrocco! I had to watch e-Bay for several months to get the rims and tires. Finding the tires was the hardest part.
Re: Rusty RC12E Resto
Posted: Mon Jun 25, 2012 2:31 am
by PlastiZapCA+
Running way behind again! I'm working on several things at the same time to try and speed things up a bit though. I got my servos in and fitted them to the radio tray and also started working on the receiver. I tested the old Futaba gold radio and found that it works but haven't tested out the receiver just yet. I'll find out soon though.
The wing is painted and decaled now. Unfortunatley the ancient Tamiya decal sheet has problems. When I dipped the decals in water they wouldn't come off the sheet as all of the backing solution has dried up. I had to use some decal solvent to loosen them up and then pry them off the sheet with a toothpick. I really needed the larger round decal to go in front on the Jager logo but it wouldn't budge even with decal solvent. I've decided to just settle for one of the smaller decals. The Jager sheet is not produced anymore so I hope I can get the other ones to work! At the moment the wing is coated in Future to protect the decals and will be sprayed with several coats of gloss enamel once cured. Think it looks OK?
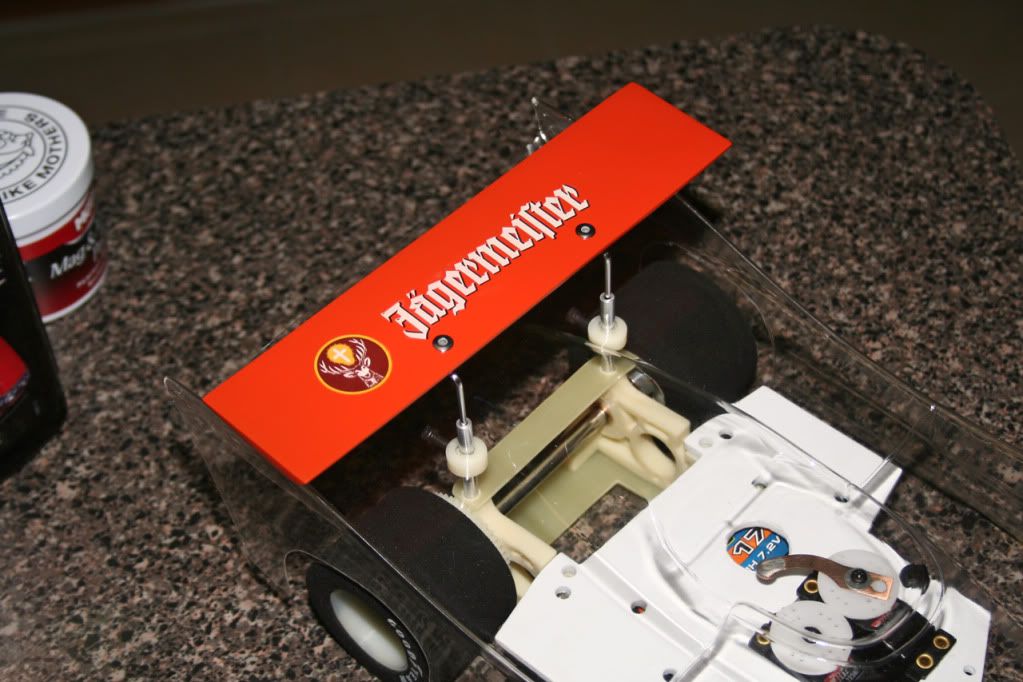
Will get started on the wiring after I finish checking out the receiver. I've ordered the correct pan head screws for the radio tray too. Might as well go all the way.
The receiver circuit board was covered in dust so I blew it out with compressed air and dusted it with a fine brush. The case had come into contact with the resistor and has a melted spot on it so i've done some body work too it. I'm going to match up some color in the morning and give it a repaint.

These are the compounds I use for polishing. For the chassis I first gave it a good cleaning and then wet sanded it with 3M wet sandpaper. I used 800 grit on the edges and 1500 on the top surface. This was followed by several grades of Micro-Mesh all the way down to 12000 grit. Use a sanding block so you don't create any low spots and sand gently in one direction only. Don't sand in circles! Afterward I used Meguiar's rubbing compound to remove the fine scratches. This was followed by Meguiar's Tech Wax 2.0. Buff with the wax too and this will really bring out the shine. After buffing with the wax I allowed a coat to dry and then polished it up. This won't remove really deep scratches but it will clean them up so they're not so visible. I used Mother's to polish all the metal parts on the car. Eagle 1 metal polish is good too.

This is Micro-Mesh for extremely fine polishing. You can polish any material with these cloths including metal. These go down to to 6000 grit. Plastic and fiberglass will gleam after polishing with the finer grades. I don't build anything without these!
Here is a link to them:
http://www3.towerhobbies.com/cgi-bin/WTI0095P?FVSEARCH=micro-mesh

I'll be restoring the original steering wires Monday and will show the steps. This part will be back in action soon!
Re: Rusty RC12E Resto
Posted: Tue Jul 03, 2012 12:47 am
by PlastiZapCA+
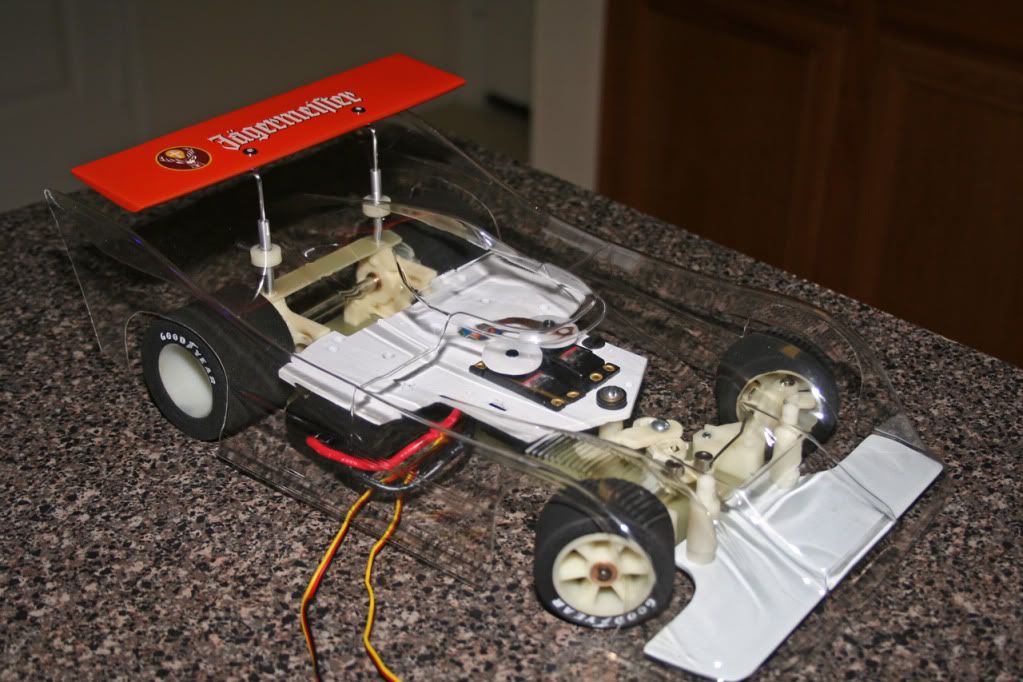
Time for an update! The car is now closer than ever to being functional again. I've got the radio tray about wrapped up and now it's a matter of final details to the chassis and a little soldering. I should mention that I'm counting on the old receiver to work! I haven't tested that little detail out just yet. I should know by Friday. Once the chassis is complete and running smooth I'll start on the body.
Specs:
NOS Assoc. resistor. It was the yellow one so I airbrushed it blue to match the original. Mounts were fabricated out of aircraft sheet aluminum.
Battery: Reedy 7.2v stick with NOS Assoc plug.
Servos: Hi Tech HS-225MG rewired with the original vintage Futaba leads.
Receiver: Original Futaba FP-R2F. Melt damage form the resistor was repaired and it was repainted. The antenna wire really needs to be replaced too but other than that it looks good internally. We shall see though. Will try to find the correct gauge wire so I can cut a new one to the exact same lenght as the original. Only the case is whown in the photos and it's not mounted yet.
Power switch is the original after clean up.


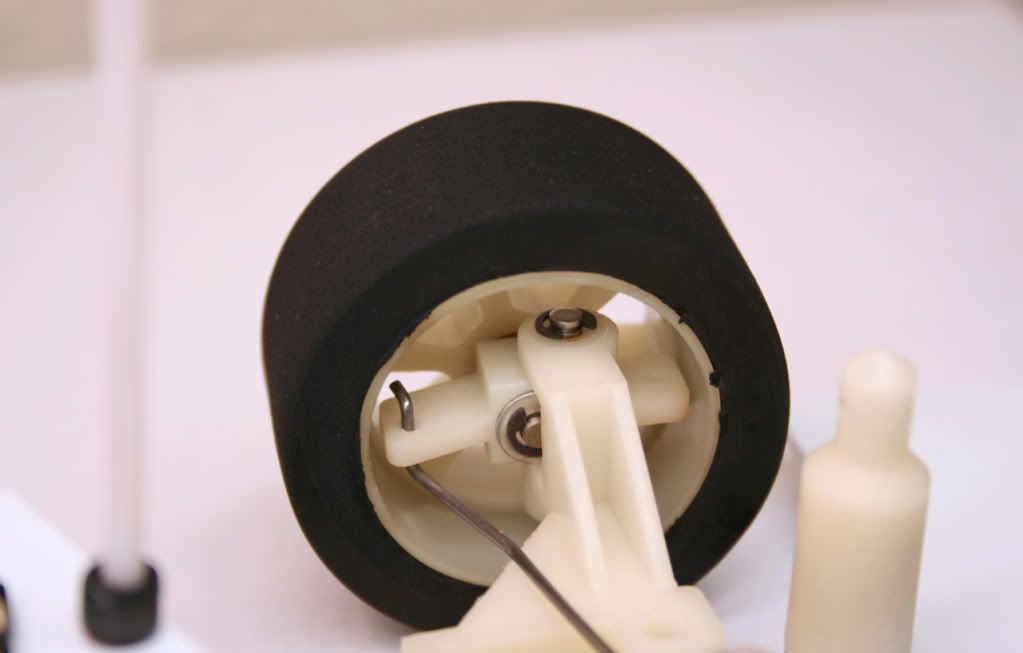
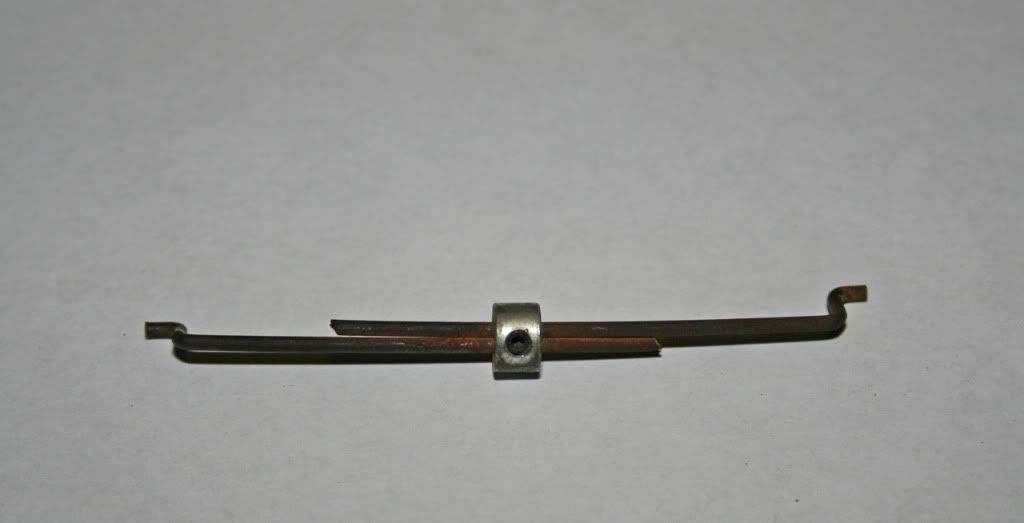
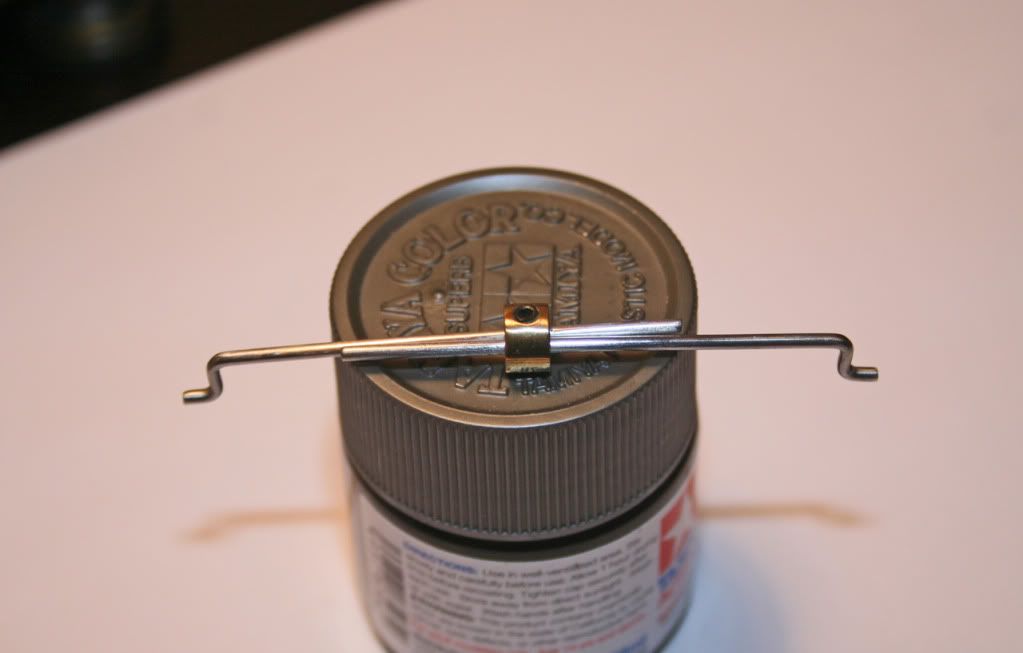
And here is the original steering linkage after restoration. Much better now! Don't throw away those old parts until you try fixing them up.
Re: Rusty RC12E Resto
Posted: Tue Jul 03, 2012 11:31 am
by slotcarrod
Your work is fantastic, but you got to get rid of those modern servos. Unless it's going to be a runner?
Re: Rusty RC12E Resto
Posted: Tue Jul 03, 2012 11:47 am
by durb69
Re: Rusty RC12E Resto
Posted: Thu Jul 05, 2012 7:28 pm
by bearrocco
I think you should keep the servo's , and you know your going to have to run it , at least 1 tiime . Really really cautiously

would'nt change thing you the man !!!!!!!!!!
Re: Rusty RC12E Resto
Posted: Thu Jul 05, 2012 10:17 pm
by GoMachV
If your trying to keep it original there are a pair of resistor mounts on eBay for about $4. They are in a parma bag but exactly the same as the associated ones I have saved up for my project
Re: Rusty RC12E Resto
Posted: Thu Jul 05, 2012 11:59 pm
by PlastiZapCA+
slotcarrod wrote:Your work is fantastic, but you got to get rid of those modern servos. Unless it's going to be a runner?
I knew I was going to catch heat for those servos.

I do intend for the car to have limited running and wanted a good set of servos. Limited running means a trip around the living room every now and again before going back on the shelf. It's the easy pampered life for this car from now on. I will be watching e-Bay for a set of vintage working servos though. I could always put the old seized Futaba servos back in too as static pieces.
Re: Rusty RC12E Resto
Posted: Fri Jul 06, 2012 12:01 am
by PlastiZapCA+
Thanks durb! I've been having a blast fixing up this little machine. This is much more fun than the scale modeling I've been doing. I've now got four more cars to build as a result of it.
Re: Rusty RC12E Resto
Posted: Fri Jul 06, 2012 12:03 am
by PlastiZapCA+
bearrocco wrote:I think you should keep the servo's , and you know your going to have to run it , at least 1 tiime . Really really cautiously
would'nt change thing you the man !!!!!!!!!!
Thanks bearrocco! After all the work I've done on it there will indeed be some limited running of the car. She was born to run!

Re: Rusty RC12E Resto
Posted: Fri Jul 06, 2012 12:06 am
by PlastiZapCA+
gomachv wrote:If your trying to keep it original there are a pair of resistor mounts on eBay for about $4. They are in a parma bag but exactly the same as the associated ones I have saved up for my project
Thanks gomachv! I'll have a look at those.
Re: Rusty RC12E Resto
Posted: Fri Jul 06, 2012 12:14 am
by GoMachV
PlastiZapCA+ wrote:gomachv wrote:If your trying to keep it original there are a pair of resistor mounts on eBay for about $4. They are in a parma bag but exactly the same as the associated ones I have saved up for my project
Thanks gomachv! I'll have a look at those.
Search parma 4025. They ship from france, but only $4 shipped.
Re: Rusty RC12E Resto
Posted: Fri Jul 06, 2012 12:23 am
by PlastiZapCA+
The radio system works now! Over the fourth I gave the receiver circuit board a bath in circuit board cleaner and soldered on an new antenna lead to replace the old torn one. The thing works like a champ! This is a great day for the restoration of this car! The car now has it's original radio and receiver.

Here is a quick video I uploaded to YouTube.
[youtube]6HdyEBYJzwY[/youtube]
The radio tray is going on the car in the morning and the final wiring will be begin.

I've tried to copy the protoype as much as I could. It sort of looks like it. I wish I had that bellcrank.

Re: Rusty RC12E Resto
Posted: Fri Jul 06, 2012 12:32 am
by PlastiZapCA+
gomachv wrote:PlastiZapCA+ wrote:gomachv wrote:If your trying to keep it original there are a pair of resistor mounts on eBay for about $4. They are in a parma bag but exactly the same as the associated ones I have saved up for my project
Thanks gomachv! I'll have a look at those.
Search parma 4025. They ship from france, but only $4 shipped.
Just got it! Thanks gomachav!
This will be a nice addition to the car.
Re: Rusty RC12E Resto
Posted: Sat Jul 07, 2012 6:48 am
by PlastiZapCA+