Page 1 of 2
The start of my "Team Themed" rides....
Posted: Mon Jul 05, 2010 9:58 pm
by cyclepsych0
I figured I'd start my own thread here for these 4 cars I'm building up so I don't keep hi-jacking the other weld thread....
 http://www.rc10talk.com/viewtopic.php?f=36&t=16531
Once each car build starts, I'll start their own thread for their induvidual progress.....
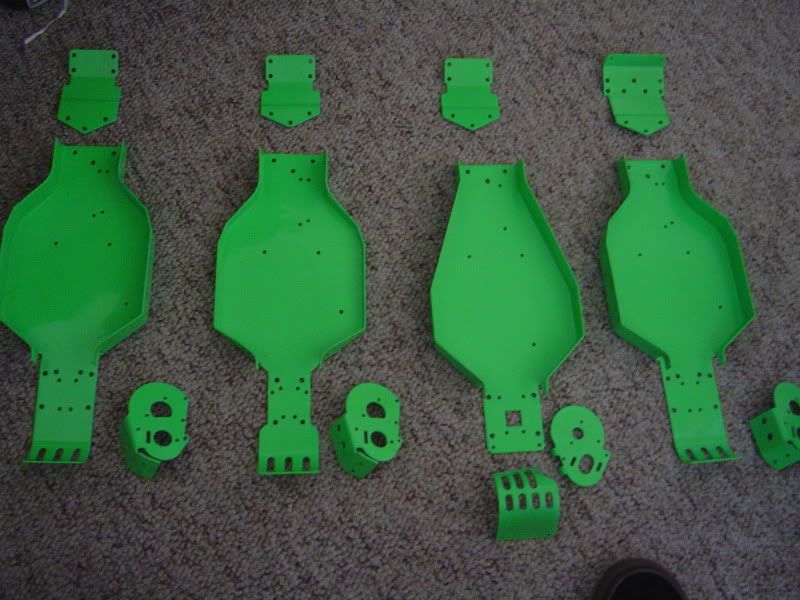
Anyway, I dropped 4 chassis sets off at the powder coaters last Monday to be done in the neon green like AE used to offer. (It was very ironic to me to see Rick's 10T green tub pics posted the very next day..

) I was supposed to get 'em back today, but they were closed for the holiday. They should be done in the next day or so...

I'm going for my own "Team Theme" on these 4 cars.
1.- Standard Buggy (stock length arms front and rear.)
2.- World's Buggy (basically a "whats old is new car, but with the rear of the chasssis cut to run RPM narrow chassis a-arm mounts, and the sides of the chassis cut down to help "slam" the body around a 10T rear tower)
3.- Standard 10T
4.- Standard 10T2
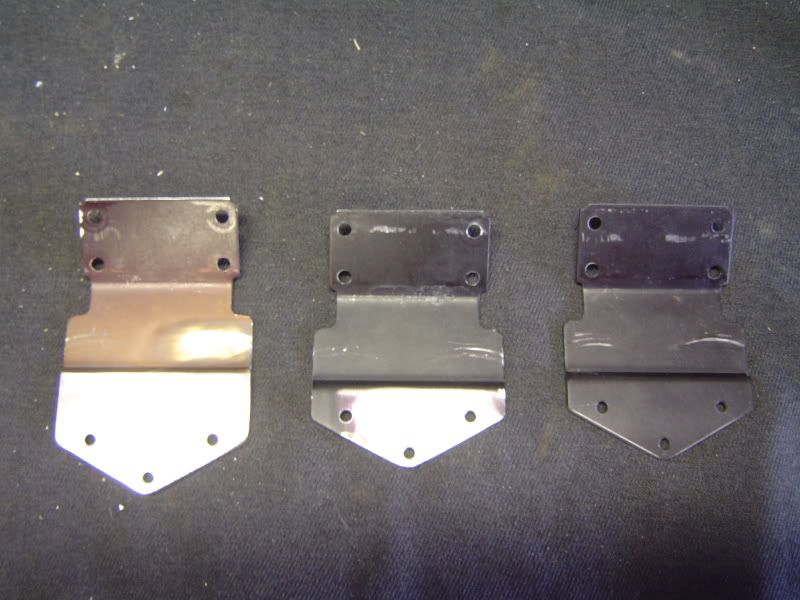
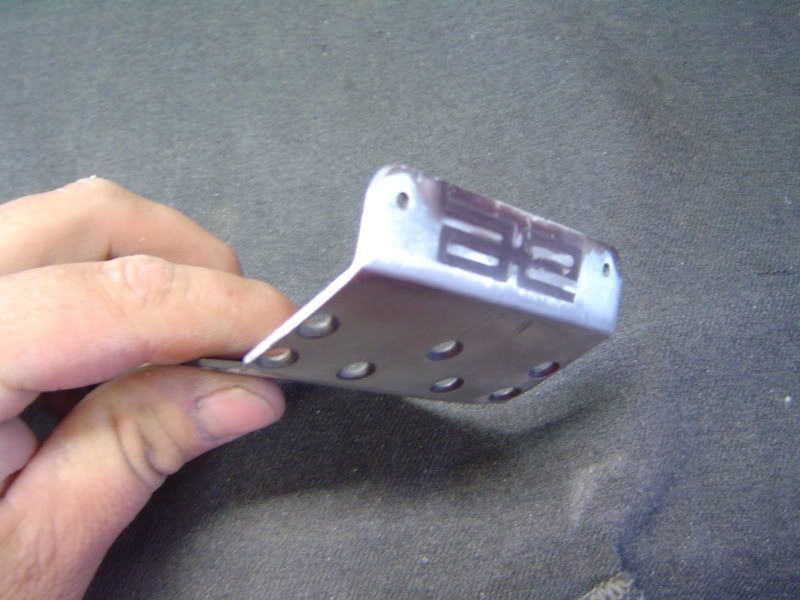
I chopped the long wheel base screw holes off on 2 10T nose plates. 1 for the 10T2 and 1 for the "world's" buggy. Since these to set-ups only require the short wheelbase, I thought it would look much cleaner..
For the 10T nose plate, I welded in the short wheel base holes, since this only gets used in the long wheel base position on this truck...
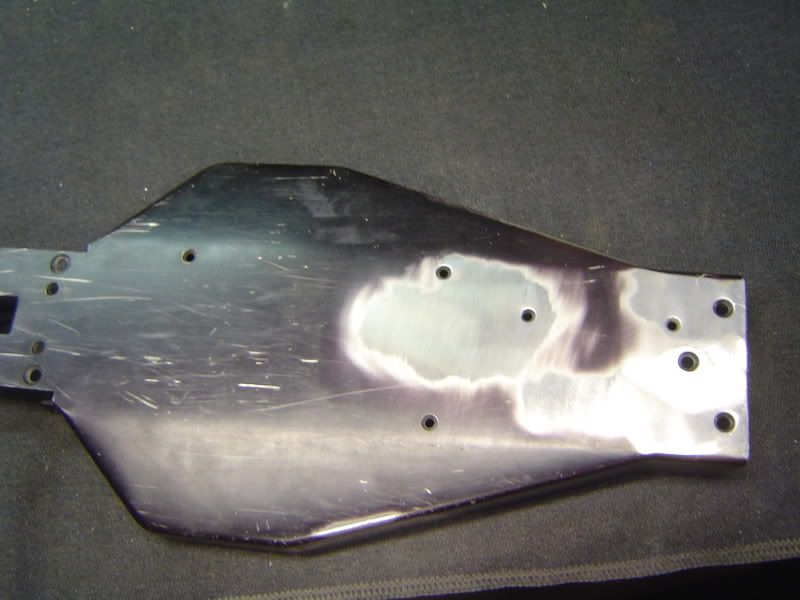
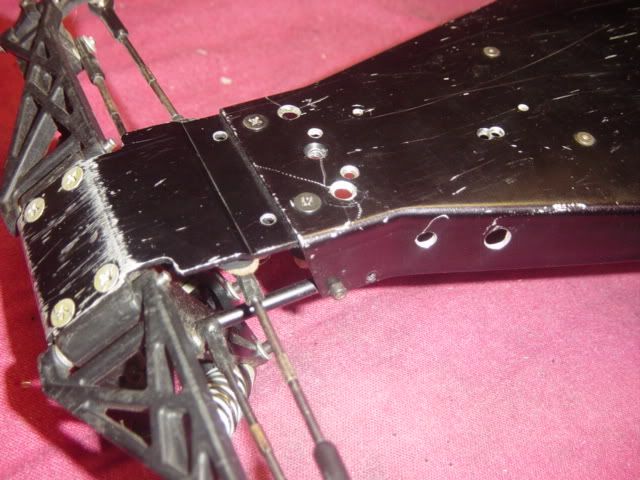
Here's a few pics of how it all looked before I dropped it off......


Re: The start of my "Team Themed" rides....
Posted: Mon Jul 05, 2010 10:23 pm
by cyclepsych0
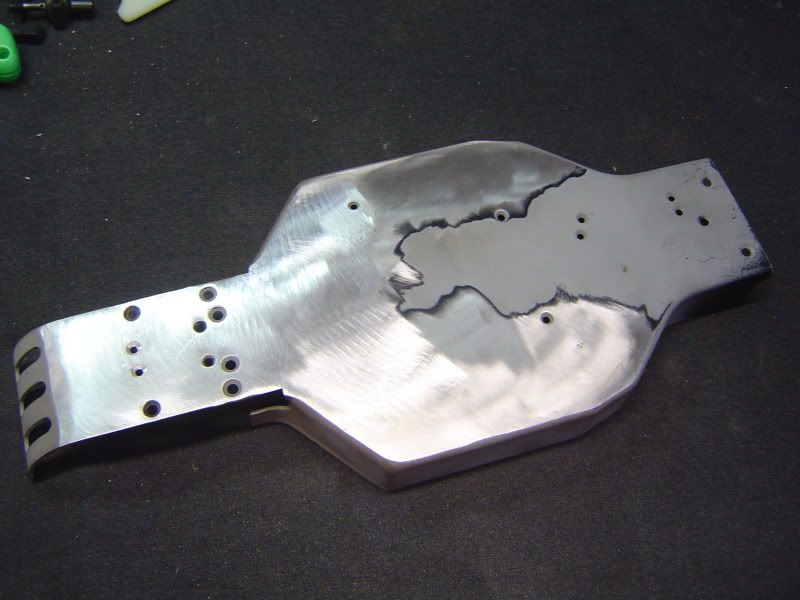
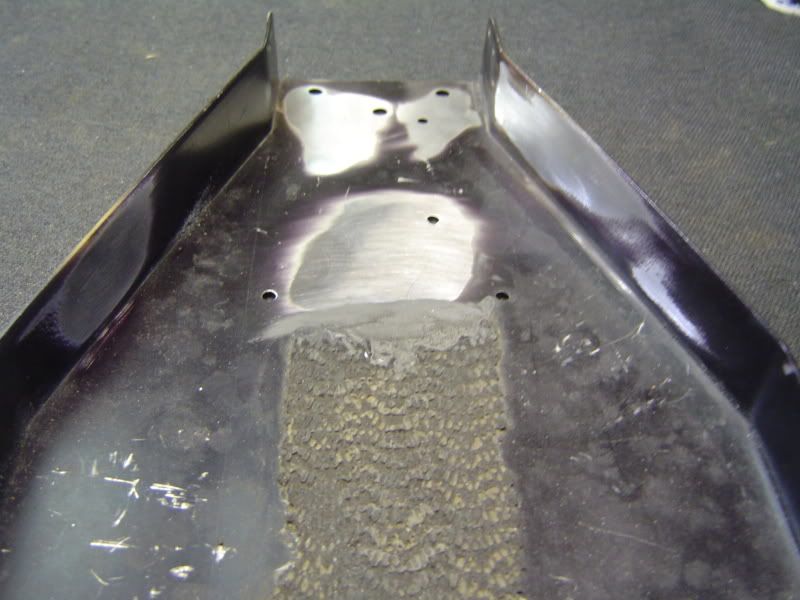
The T2 chassis and stock buggy nose plate were the 2 that actually needed repair, not just welded for cosmetic reasons...
Before shot of the T2.... This truck was definitely abused before I got it. Lots of random extra holes needed filling. It was also ran in the long wheelbase position. Not correct for the T2.
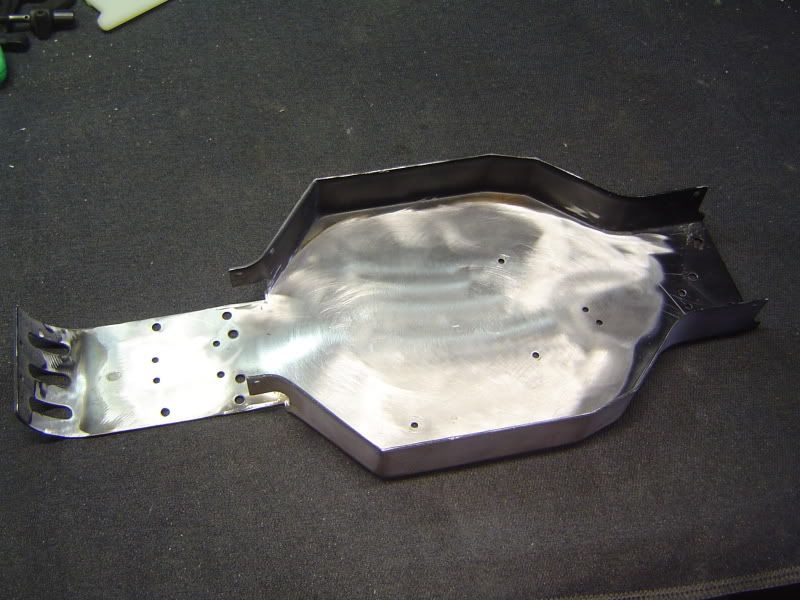
This buggy nose plate was also heavily rounded on the underside. I welded and reshaped it to try and bring the shape of the bend back...
Before
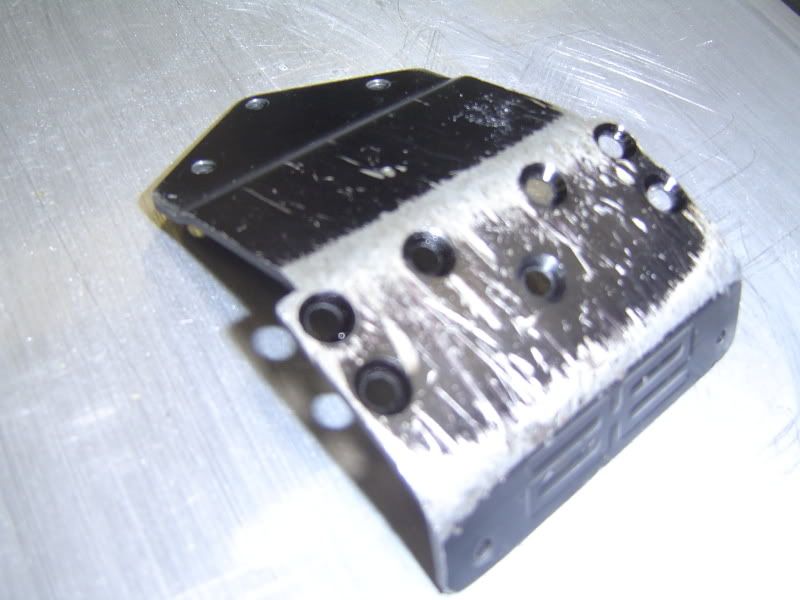 After
After
Re: The start of my "Team Themed" rides....
Posted: Tue Jul 06, 2010 8:48 am
by jwscab
nice work. what welding equipment are you using?
Re: The start of my "Team Themed" rides....
Posted: Tue Jul 06, 2010 8:45 pm
by cyclepsych0
I used the Miller dynasty 350....
http://www.millerwelds.com/products/tig/dynasty_350/
I don't have constant access to it. My good friend uses these at his work and he lets me come in after hours sometimes when I need to weld aluminum.
Re: The start of my "Team Themed" rides....
Posted: Tue Jul 06, 2010 11:04 pm
by Seabass
Man those pans look very nice. I am completely jealous of your ability to fix these pans.
Awesome work man!! Please post more pics.
Jake
Re: The start of my "Team Themed" rides....
Posted: Wed Jul 07, 2010 4:02 pm
by m_vice
bigjeepzz wrote:Man those pans look very nice. I am completely jealous of your ability to fix these pans.
Awesome work man!! Please post more pics.
Jake
x2 on this, exellent work.
Re: The start of my "Team Themed" rides....
Posted: Wed Jul 07, 2010 4:46 pm
by cyclepsych0
Thanks guys for the kind words!
The two of you have both done many custom touches to your rides that make me drool aswell...
I'm gonna give the powder coater a call today and see what the status is. This waiting game is drivin' me crazy!!
As soon as I get this stuff back, I will post more pics!
Then of course when the building starts I will have build threads for each car. I think I will do the standard buggy or the T2 first, as I have the most parts saved for those 2.
Re: The start of my "Team Themed" rides....
Posted: Sun Jul 11, 2010 10:01 pm
by cyclepsych0
Well, I got all my powder coating back last Thursday. Overall I'm happy with it. It is definitely
NEON GREEN in person although the pics don't really show it. I'll have to get better shots out in the sun after I find my camera charger...

There are some slight imperfections. Some are my fault for assuming the coating was thicker than it really is. I should have feathered out some scratches a little finer than I did. Some are the coaters fault. Tiny fish-eyes/orange peel. None of it is bad enough to complain about as they did cut me deal on the price since I use them frequently for motorcycle parts. Plus these are all going to be built to run.....
More pics to follow as each build progresses.
Re: The start of my "Team Themed" rides....
Posted: Sun Jul 11, 2010 10:12 pm
by RichieRich
Hey those look really nice. I'm definitely seeing green.

Re: The start of my "Team Themed" rides....
Posted: Sun Jul 11, 2010 11:57 pm
by Panhead383
Kawasaki KX450F green...I LIKE!!!!!
Re: The start of my "Team Themed" rides....
Posted: Mon Jul 12, 2010 12:50 am
by cyclepsych0
Thanks guys!
Rich, All I meant was they don't look as
NEON in the pics as they do in person...
Panhead, yeah Kawasaki green for sure!
I thought about doing a Monster Energy/Pro-Circuit Kawasaki paint scheme on one of these, but I kinda want to go early 90's R/C retro scheme instead. All four cars are going to match eachother as close as possible, but still have their own induvidual flair...
Re: The start of my "Team Themed" rides....
Posted: Mon Jul 12, 2010 12:51 am
by RichieRich
I meant "seeing green" like "really jealous".

Re: The start of my "Team Themed" rides....
Posted: Mon Jul 12, 2010 1:00 am
by cyclepsych0
Re: The start of my "Team Themed" rides....
Posted: Mon Jul 12, 2010 1:16 pm
by delsami
WHAT IS THE SANDING PROCESS??
i like many have a lot of badly scratched pans. i would like to powder coat them also as these are awesome. i tried a wire wheel and thats a no no(atleast mine is). could you give a step by step saying what tool and grit? THANKS, dell
Re: The start of my "Team Themed" rides....
Posted: Mon Jul 12, 2010 1:29 pm
by jwscab
yeah, wirewheel will gall the aluminum and lead to a poor finish.
sanding is just what you would expect. the best thing to do to get a very smooth finish is sand from low grit to high grit, so start with somewhere in the 400-600 grit range for medium scratches.....wetsanding will give a nice smooth finish without clogging paper. go up from there to get what finish you want, 1000 or 1500 will give a VERY smooth finish. beyond that you would need to buff. use a sanding block of some sort (block of wood, plastic, actual sanding block, whatever.....you probably would only need to use something like 400 grit, then end up 600 grit or so for a good powdercoat finish.
sand in an random orbital pattern to leave pretty much a uniform finish. if you have a specific 'brushed' finish you want (probably not, if powder coating), then just sand in one direction only after you have removed all the anodized, scratches, etc. this is the final pass with the paper. you'll see how it works once you start sanding.