Page 1 of 1

Light box for photos

Posted: Wed Jul 27, 2011 5:06 pm
by shodog
I made this light box to start taking pictures of parts for upcoming sales.

Image


here are a couple of sample pics

Image

Image

what material can I use over top to reduce glare?

Re: Light box for photos

Posted: Wed Jul 27, 2011 5:35 pm
by Charlie don't surf
White muslin will soften the glare

Re: Light box for photos

Posted: Wed Jul 27, 2011 6:26 pm
by Eau Rouge
I use tracing paper or marker paper. Any white sheet or diffuser that lets some light through will remove shadows and reflections.

It's important to use color-corrected bulbs. I have my lightbox set up with 5000k CFLs. Using different color bulbs will produce that yellow cast in the photos. Many cameras also have white balance corrections, and that's almost a crucial function of setting up good lightbox photos. You can remove some of that in post production in Photoshop, but it's a lot of extra labor that isn't necessary.

Image

Re: Light box for photos

Posted: Wed Jul 27, 2011 7:15 pm
by shodog
I like that Doug. How are you housing the CFL's? strip or bulb?

Re: Light box for photos

Posted: Wed Jul 27, 2011 8:54 pm
by Eau Rouge
I use those cheap aluminum work lights with clamps, and then use the bulb CFLs that are between 5000 and 6000 Kelvin on the color scale. This is crucial, and they used to be hard to find, but with more CFLs out there now, it's getting easier to find different color bulbs.

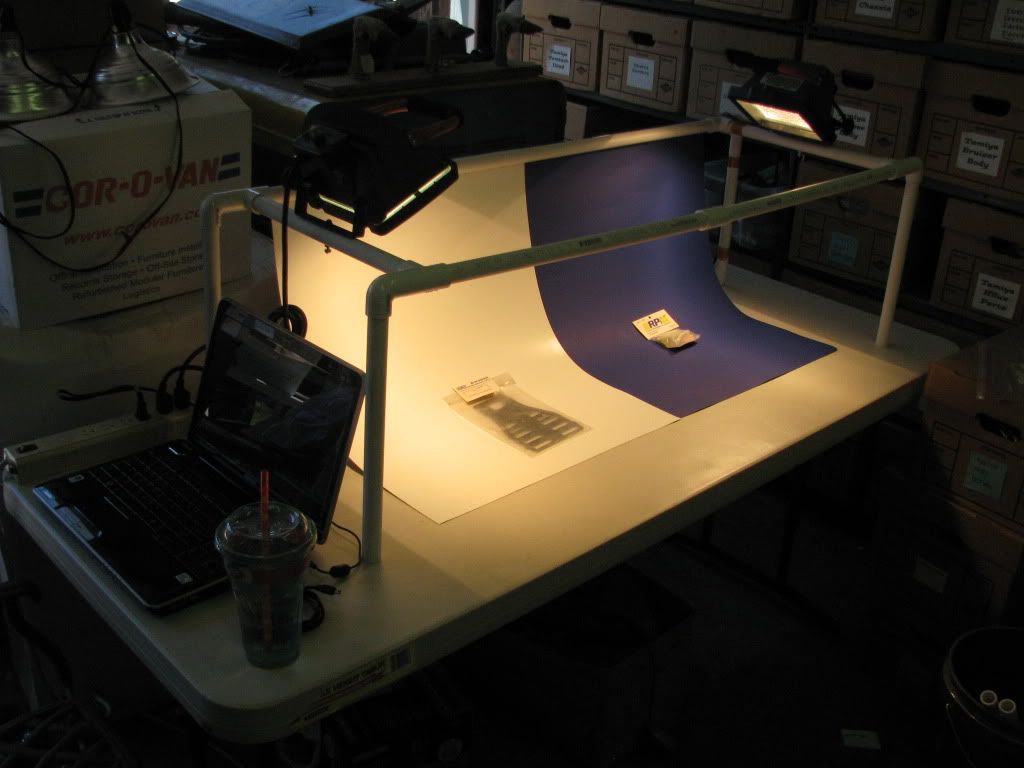
I think my whole setup only cost me like $30 including the lights. I used a 24" x 24" x 24" cardboard box, cut square holes in the top, left and right sides, cut the lid flaps off, then attached my sweep inside the box. I then taped large pieces of tracing paper over the square holes I cut out. I like tracing paper because it's cheap, and I can add more sheets if I want more diffusion.

I go between white and black backgrounds in the sweep (art stores have colored sheets of craft paper for cheap), but it's hard to keep the white clean from tire scuffs from diecast and RC cars. Usually, you can store the other sweep you aren't using underneath the one you are using, saving space and making your booth a little more compact.

You can also drape a white sheet over your pipework to create a simple, quick diffuser that should work really well.


The key to the lightbox is the lightbulbs and the camera settings. Oh, and a tripod is CRUCIAL, because the light that you will be using in a lightbox is not bright enough for fast shutter speeds. A slow shutter speed and a high F-stop (like f18 or higher) will give you nice, sharp photos that have a good depth of field.

Lots of trial and error to get good shots. I think I spent a whole day experimenting with camera settings and lighting before I got it where it was a point and shoot operation.


dc


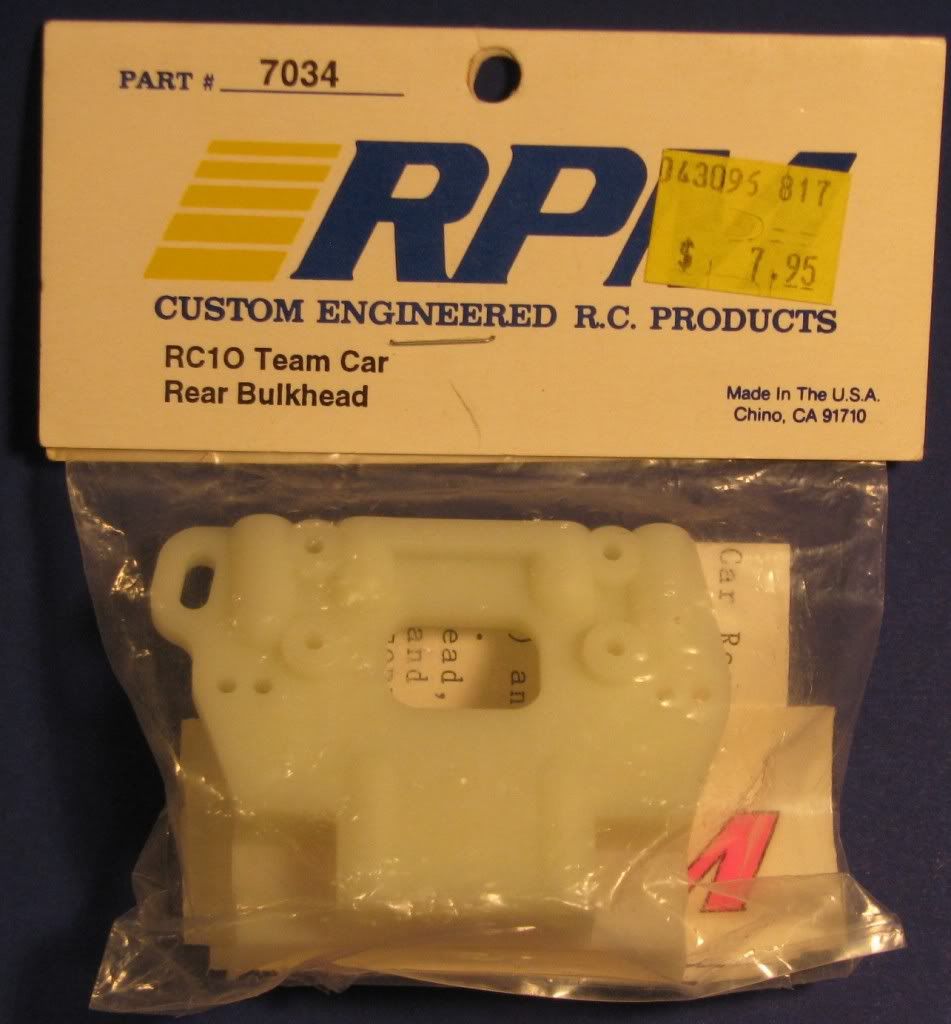
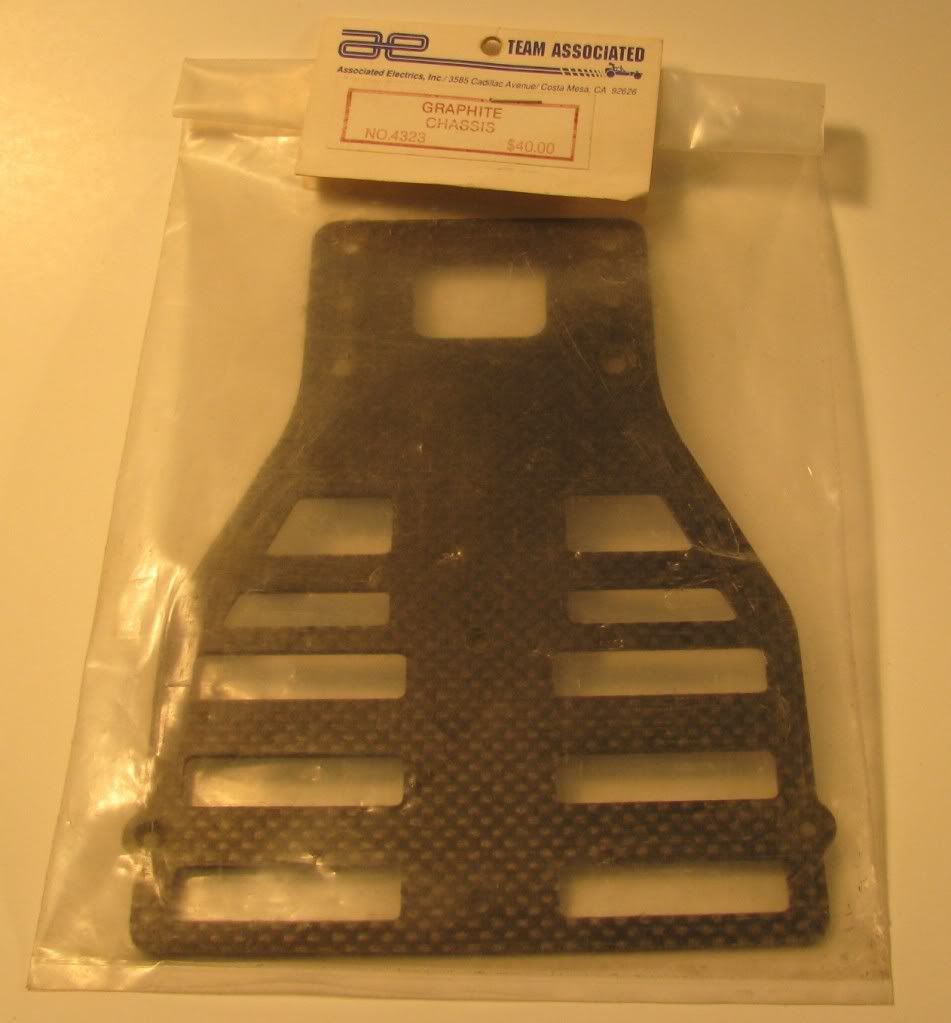
A couple more for ya... far from perfect by any stretch of the imagination, but light years better than 99.9% of eBay photos.

Image

Image

Re: Light box for photos

Posted: Thu Jul 28, 2011 11:16 am
by Halgar
shodog wrote:what material can I use over top to reduce glare?
Bounce the light off a white surface rather than using direct lighting. Got another piece of white cardboard/construction paper?

Re: Light box for photos

Posted: Thu Jul 28, 2011 12:14 pm
by Eau Rouge
That definitely works great for filling in dark areas with light, but for tabletop photos, you can still get harsh edges on shadows, and funky reflections in glossy surfaces. Soft diffused light works the best for small stuff like this in a home-brewed light box.