Gold pan, A stamp, box art by the HIVE...

General discussion, builds/restorations, etc...

Moderators: scr8p, klavy69

User avatar
UltraHIVE
Approved Member
Posts: 369
Joined: Mon May 30, 2011 1:31 am
Location: Cape Coral, FL

Gold pan, A stamp, box art by the HIVE...

Post by UltraHIVE »

Here are some progress pics of the OG that I've been working on. Unfortunately I had to replace the front arms, trans brace, steering cranks, nose brace tubes, wheels and tires with re-release ones.

The decals are printed "in house" or bedroom to be exact, and some are slightly modified for the better in my opinion. I also did some faux shock collar hex nut decals, since the collars are just some inexpensive machined aluminum spacers found on Ebay. These first pics are just so I can reference back to fix things for the future. Once I get everything right, proper decal sizes and driver figure paint masks, I will redo the body and driver figure properly.

Image
Image
Image
Image
Image

User avatar
UltraHIVE
Approved Member
Posts: 369
Joined: Mon May 30, 2011 1:31 am
Location: Cape Coral, FL

Re: Gold pan, A stamp, box art by the HIVE...

Post by UltraHIVE »

Heres a few pics after swaping the original shocks out with stripped re-release ones. The decal on the fakie collars in the pic, isnt the best one I printed. Sometimes when the graphic is very small, the shape gets distorted. So out of a row of lets say 40 of these decals, maybe 10 are good, adn I happened to choose a odd shape to apply, then take a pic of without looking at it... duh!

These pics show the new nets that I made from static cling material, die-cut from a plotter. They are non sticky, flexible and will return back to original shape, in case you poke them with hour fingers. These were a test and were taped to the inside using clear vinyl sticker material. The only problem is that I forgot to paint the inside cage area black, and the tape isnt that stong of a hold, again duh! Now I use double sided tape for a better stick, works great.

Image
ImageImage
Image

User avatar
UltraHIVE
Approved Member
Posts: 369
Joined: Mon May 30, 2011 1:31 am
Location: Cape Coral, FL

Re: Gold pan, A stamp, box art by the HIVE...

Post by UltraHIVE »

More progress / reference pics. I added the fog lights in the proper position to the mango body, and took some side by side pics of the first box art style one I did in metallic orange, before I packed it up to ship out. The fog light bases were shaved slightly to make a better angle, that way they all point in the same direction, sorta... I'll take some outdoor pics of the buggy with and without the body in a few days.

I'm proud of the box art Novak that I did, stripping the black anno off the heatsink, then dyeing the back cover black. Since Im using a T4, I plan to recreate box art Novak label to fit the T4, should look cool. Pics of that coming soon as well.

Its good practice to use an existing pre-cut and pre-drilled body, to mark out the cut and drill hole lines for a new un-cut body. Just make sure your template is correct, before you transfer mistakes onto the new one... 8)

Image
Image
Image
Image
Image
Image
Image

User avatar
UltraHIVE
Approved Member
Posts: 369
Joined: Mon May 30, 2011 1:31 am
Location: Cape Coral, FL

Re: Gold pan, A stamp, box art by the HIVE...

Post by UltraHIVE »

Got some more wings in yesterday, still not sure which size look better. Looks great on this green body, but too big on the blue. On my phone now so i have to upload these, will edit later on. Hope this works!
Attachments
image.jpg

User avatar
UltraHIVE
Approved Member
Posts: 369
Joined: Mon May 30, 2011 1:31 am
Location: Cape Coral, FL

Re: Gold pan, A stamp, box art by the HIVE...

Post by UltraHIVE »

Green & Natural color body, waiting on fogs...

Image
Image
Image

User avatar
UltraHIVE
Approved Member
Posts: 369
Joined: Mon May 30, 2011 1:31 am
Location: Cape Coral, FL

Re: Gold pan, A stamp, box art by the HIVE...

Post by UltraHIVE »

...

Image
Image
Image

User avatar
UltraHIVE
Approved Member
Posts: 369
Joined: Mon May 30, 2011 1:31 am
Location: Cape Coral, FL

Re: Gold pan, A stamp, box art by the HIVE...

Post by UltraHIVE »

Waiting on fogs, plan to leave one side of the halves natural nylon color, not sure yet. Also did a tighter net, more accurate to box art, but I re-angled them parallel to the window lines.

Image
Image

User avatar
UltraHIVE
Approved Member
Posts: 369
Joined: Mon May 30, 2011 1:31 am
Location: Cape Coral, FL

Re: Gold pan, A stamp, box art by the HIVE...

Post by UltraHIVE »

Its a runner too, got slicks for the driveway :) Heres where im at...

Image
Image
Image

User avatar
UltraHIVE
Approved Member
Posts: 369
Joined: Mon May 30, 2011 1:31 am
Location: Cape Coral, FL

Re: Gold pan, A stamp, box art by the HIVE...

Post by UltraHIVE »

Wide wing looks good on here too. The wheels are sprayed "chrome", but will soon be aluminum :)

Image
Image
Image

User avatar
UltraHIVE
Approved Member
Posts: 369
Joined: Mon May 30, 2011 1:31 am
Location: Cape Coral, FL

Re: Gold pan, A stamp, box art by the HIVE...

Post by UltraHIVE »

...

Image
Image
Image

User avatar
UltraHIVE
Approved Member
Posts: 369
Joined: Mon May 30, 2011 1:31 am
Location: Cape Coral, FL

Re: Gold pan, A stamp, box art by the HIVE...

Post by UltraHIVE »

The next one I do will be a more accurate orange color.

Image
Image
Image

User avatar
SMOKE-DOG
Approved Member
Posts: 723
Joined: Wed Jul 23, 2008 1:03 pm
Location: Columbus, Ohio
Been thanked: 1 time

Re: Gold pan, A stamp, box art by the HIVE...

Post by SMOKE-DOG »

Nice work. I like the white cage on the green one. What's your method for removing the anno from the shocks? They look clean.

User avatar
UltraHIVE
Approved Member
Posts: 369
Joined: Mon May 30, 2011 1:31 am
Location: Cape Coral, FL

Re: Gold pan, A stamp, box art by the HIVE...

Post by UltraHIVE »

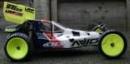
SMOKE-DOG wrote:Nice work. I like the white cage on the green one. What's your method for removing the anno from the shocks? They look clean.
Thanks, I used Easy-Off spray but I dont recommend it. You NEED to wear a mask, the chemicals in it are very dangerous when inhaled, spray it outside. I dont know how its marketed for indoor use, actually hurts if you breathe it. There are other ways im sure, this is the one that I tried from reading stuff online.

If you keep the Easy-Off on the aluminum too long, it will corrode and pit the surface. Not good when you do shocks and the threads start to corrode. My neighbor interupted me mid process, so I left the spray on too long for a few things, what a hassel. Wear surgical gloves to avoid skin irritation.

Spray everything, wait a few minutes then wash off with water and a brush, I used an old toothbrush. I believe that water stops the process, kind of like a base. Repeat the process until it looks silver, not tinted at all with gold. I used steel wool to even out the finish, then a tiny bit of aluminum polish on a paper towel. I didnt want them chrome, but the Mothers polish will make them chrome easily if you wanted.

I plan to redo the sides of the tub on the re-release, theres some pitting that I let go. Possibly shave down the tubs height a little bit so that the bodies fit better. This is my model for custom bodies...

Image

User avatar
UltraHIVE
Approved Member
Posts: 369
Joined: Mon May 30, 2011 1:31 am
Location: Cape Coral, FL

Re: Gold pan, A stamp, box art by the HIVE...

Post by UltraHIVE »

Driver figure updates... Been working on paint masks for it in my spare time, not used on this driver, the next one. This one I hand painted with a brush and Testors paint, from the inside. I started adding stuff to the outside, flat brown painted cushion and gloves, black vinyl sticker piping, chrome sticker visor, textured looking belts, stickered buckles and buttons. Its got that old school Cobra Commander look :)

I messed this one up when I cut through the steering wheel. I thought I could give it more depth by having the wheel look more realistic. Gonna fix it, then let it go, then do a better one with the knowledge gained. I had this one mounted to the battery cups, thats why theres holes it the sides. I found the right way to cut them out a little bit late, in the manual. Theres always room for improvement 8)

Image
Image
Image
Image
Image
Image
Image

tuna.Rc
Approved Member
Posts: 312
Joined: Tue Jan 29, 2013 10:01 pm
Location: central Illinois
Has thanked: 11 times
Been thanked: 6 times

Re: Gold pan, A stamp, box art by the HIVE...

Post by tuna.Rc »

What chrome paint did you use for the rims?

Post Reply

Create an account or sign in to join the discussion

You need to be a member in order to post a reply

Create an account

Not a member? register to join our community
Members can start their own topics & subscribe to topics
It’s free and only takes a minute

Register

Sign in

  • Similar Topics
    Replies
    Views
    Last post
  • Box art Optima restoration by the HIVE...
    by UltraHIVE » » in Kyosho Forum
    12 Replies
    2127 Views
    Last post by UltraHIVE
  • Box Art Runner meets Gold Pan Twins
    by wevarc10 » » in RC10 Buggy Forum
    2 Replies
    814 Views
    Last post by wevarc10
  • Alternative Box-Art colour schemes for original A stamp RC10
    by DerbyDan » » in RC10 Buggy Forum
    8 Replies
    816 Views
    Last post by DerbyDan
  • Gold Pan A Stamp CE
    by jeepy2013 » » in RC10 Buggy Forum
    13 Replies
    2165 Views
    Last post by jeepy2013
  • Gold Pan A Stamp
    by REMJ666 » » in RC10 Buggy Forum
    2 Replies
    687 Views
    Last post by REMJ666
  • another A-stamp gold pan wants to go brushless
    by pcrussell50 » » in Modern Electronics
    24 Replies
    3337 Views
    Last post by pcrussell50
  • RC10 Gold Pan - C stamp?
    by GreenBar0n » » in RC10 Buggy Forum
    148 Replies
    3022 Views
    Last post by GreenBar0n
  • A stamp gold pan part needed
    by plymouth67 » » in RC10 Buggy Forum
    6 Replies
    1216 Views
    Last post by gumbajv

Return to “RC10 Buggy Forum”

Who is online

Users browsing this forum: No User AvatarAhrefs [Bot], No User AvatarAmazon [Bot], No User AvatarFacebook [Bot], No User AvatarTbot [Bot] and 6 guests