HPI Street Machine restoration
-
GeneralZod
- Approved Member
- Posts: 409
- Joined: Sun Dec 09, 2012 7:19 pm
- Location: Colorado
- Has thanked: 148 times
- Been thanked: 153 times
HPI Street Machine restoration
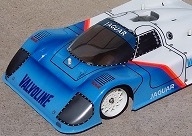
Next basket case resto is an old Street Machine from HPI. I don't see them around very often. They have a cool design and the car can be configured for stick battery quick change or saddle pack. Once I get it off the ceiling, this is what I start off with... 

-
BattleTrak
- Approved Member
- Posts: 676
- Joined: Sun Oct 06, 2019 11:33 pm
- Location: Ill-Noise, USA
- Has thanked: 944 times
- Been thanked: 560 times
Re: HPI Street Machine restoration
Cool looking car! What is up with the grey inside edge of the tires?
-Brad
-
RC10th

- Approved Member
- Posts: 4276
- Joined: Sat Feb 16, 2013 9:51 am
- Location: Australia
- Has thanked: 40 times
- Been thanked: 1001 times
Re: HPI Street Machine restoration
They were an early Trinity spec tire identified by the grey foam, similar to the RJ Speed/BSR tires with the different colored bands.
I couldn't find a magazine ad but look up Trinity Street Spec, it was an attempt at a cost controlled racing class.
I couldn't find a magazine ad but look up Trinity Street Spec, it was an attempt at a cost controlled racing class.
I was old school - when old school wasn't cool !
-
TRX-1-3
- Super Member
- Posts: 1730
- Joined: Sat Mar 29, 2014 12:13 pm
- Location: USAG Humphreys, South Korea
- Has thanked: 1378 times
- Been thanked: 755 times
-
MarkyDents

- Approved Member
- Posts: 1021
- Joined: Sun Jan 10, 2021 11:52 am
- Location: Staten Island, N.Y.
- Has thanked: 1347 times
- Been thanked: 509 times
Re: HPI Street Machine restoration
Perfect ! I actually laughed out loud
Sweet car too
Who do you race for ?
Me……. I race for me.
That’s impossible, I was told you need a sponsor to race.
Hey Cru ! Go balls out
Me……. I race for me.
That’s impossible, I was told you need a sponsor to race.
Hey Cru ! Go balls out
-
GeneralZod
- Approved Member
- Posts: 409
- Joined: Sun Dec 09, 2012 7:19 pm
- Location: Colorado
- Has thanked: 148 times
- Been thanked: 153 times
Re: HPI Street Machine restoration
The diff didn't work at all and taking it apart revealed why.
What the.........
Double sided tape used as a diff locker. Hmm, never saw that before.
The axle will need replacing since it's an old Bolink steel type and bent anyhow. Plus it's real heavy.
The original hubs had to be chased with the correct tap to clean them up but at least they were not bent.
The bottom pod plate was warped pretty bad so I made an aluminum one using the original as a guide. Should also better dissipate heat from the motor.
-
GeneralZod
- Approved Member
- Posts: 409
- Joined: Sun Dec 09, 2012 7:19 pm
- Location: Colorado
- Has thanked: 148 times
- Been thanked: 153 times
Re: HPI Street Machine restoration
Since the original chassis was essentially junk, I fired up my cad program and drew a new one and sent to Jeff at Factory Works. Not long after it arrived in the mail. The quality he puts out is simply amazing! Thanks Jeff!
Rebuilt the rear pod and checked fit to main chassis. Just like OEM!
Time to dye the parts black.
Looks better now.
Cleaned and rebuilt the front suspension. The front underside screw holes had to be countersunk a bit to prevent warping of the chassis when tightening down the mounts. I do this step on all my builds and it works to keep the plate flat.
Now on the hunt to locate new front axles. These are worn out due to seized front bearings.
-
GeneralZod
- Approved Member
- Posts: 409
- Joined: Sun Dec 09, 2012 7:19 pm
- Location: Colorado
- Has thanked: 148 times
- Been thanked: 153 times
Re: HPI Street Machine restoration
More progress. Sorry some thumbnails are still rotated.
Upgraded to ceramic diff balls from Acer.
Diff action is extremely smooth now.
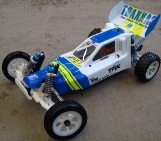
Putting it all back together.
Made a small lipo battery stop.
Replaced the friction style shock with a vintage Kyosho gold. Much better now.

Upgraded to ceramic diff balls from Acer.
Replaced the friction style shock with a vintage Kyosho gold. Much better now.
Create an account or sign in to join the discussion
You need to be a member in order to post a reply
Create an account
Not a member? register to join our community
Members can start their own topics & subscribe to topics
It’s free and only takes a minute
Sign in
-
- Similar Topics
- Replies
- Views
- Last post
-
- 8 Replies
- 2025 Views
-
Last post by KidAgain
-
- 7 Replies
- 1063 Views
-
Last post by geeforce59
-
- 5 Replies
- 2180 Views
-
Last post by FASTEDDIE
-
- 6 Replies
- 1156 Views
-
Last post by jwscab
-
- 16 Replies
- 3140 Views
-
Last post by marlo
-
- 0 Replies
- 31 Views
-
Last post by Dangeruss
-
- 3 Replies
- 641 Views
-
Last post by Kayne
-
- 24 Replies
- 2582 Views
-
Last post by knucklebuster


Who is online
Users browsing this forum: No registered users and 0 guests