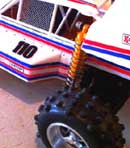
I also need to add covers for the cvd, I had one fly apart.
Goldpan DS conversion
-
JosephS
- Super Member
- Posts: 1519
- Joined: Thu Mar 23, 2017 5:31 pm
- Has thanked: 1001 times
- Been thanked: 460 times
Re: Goldpan DS conversion
Starting on the paint. Trying to keep it simple.
I’m also making a few changes. I am going to try wide drag slicks on the rear and see if that helps with on power traction.
I also need to add covers for the cvd, I had one fly apart.
I’m also making a few changes. I am going to try wide drag slicks on the rear and see if that helps with on power traction.
I also need to add covers for the cvd, I had one fly apart.
-
JosephS
- Super Member
- Posts: 1519
- Joined: Thu Mar 23, 2017 5:31 pm
- Has thanked: 1001 times
- Been thanked: 460 times
Re: Goldpan DS conversion
The bulk of the paint is done
Now it’s on to the front end, tail lights and exhaust.


-
JosephS
- Super Member
- Posts: 1519
- Joined: Thu Mar 23, 2017 5:31 pm
- Has thanked: 1001 times
- Been thanked: 460 times
Re: Goldpan DS conversion
I was really happy with how the paint went down. Masking with tape was challenging. Something went wrong with the masking for the blue, I used magic eraser and was able to remove the unwanted paint. It didn't seem to haze the body. I used many many very light coats of paint. I was able to get into the crevice of the trunk with out drips. That was a neat technique I just heard about.
I still need to work out the nose and the tail lights. It came with an extra nose so that's less stress. There are some nice decals. I may just back them black and call it a day.
-
JosephS
- Super Member
- Posts: 1519
- Joined: Thu Mar 23, 2017 5:31 pm
- Has thanked: 1001 times
- Been thanked: 460 times
Re: Goldpan DS conversion
I have a new servo and some rear foams to try on this once I mount the shell
-
JosephS
- Super Member
- Posts: 1519
- Joined: Thu Mar 23, 2017 5:31 pm
- Has thanked: 1001 times
- Been thanked: 460 times
Re: Goldpan DS conversion
I realized that I am using a servo mounting on this car I hadn't seen anyone else use yet.
The servo is hot glued to the chassis. I put down a generous about of hit glue from a glue gun and place the servo about in the right place.
Then I used a heat gun on the underside of the chassis to heat up the pan enough for the glue to flow, then pushed the servo down. Then keep the pressure on until the glue cools down.
So far it has been strong enough and solid with no rocking. It saved me from drilling out the chassis for the transverse servo mounting.
Create an account or sign in to join the discussion
You need to be a member in order to post a reply
Create an account
Not a member? register to join our community
Members can start their own topics & subscribe to topics
It’s free and only takes a minute
Sign in
-
- Similar Topics
- Replies
- Views
- Last post
-
- 4 Replies
- 614 Views
-
Last post by Charlie don't surf
-
- 2 Replies
- 402 Views
-
Last post by jwscab
-
- 6 Replies
- 1007 Views
-
Last post by CamplinP
-
- 15 Replies
- 3320 Views
-
Last post by vintage AE
-
- 2 Replies
- 765 Views
-
Last post by cguit
-
- 6 Replies
- 1157 Views
-
Last post by wiremonkey73
-
- 1 Replies
- 621 Views
-
Last post by 85Edinger
-
- 1 Replies
- 321 Views
-
Last post by RedScampi


Who is online
Users browsing this forum: No registered users and 1 guest