Composite Craft Predator Lynx re-build
-
TravelinTravis
- Approved Member
- Posts: 149
- Joined: Tue Feb 09, 2021 8:19 pm
- Location: Richmond,VA.& Cotignac,France
- Has thanked: 509 times
- Been thanked: 154 times
Re: Composite Craft Predator Lynx re-build
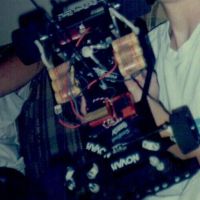
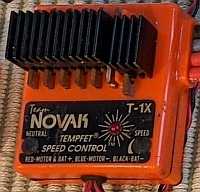
Ok...finally after a long delay and some family health issues to deal with....all restocked with parts and ready to get back at it....sort of. Got side tracked with tearing down a low priced CC Predator to use for spares on this build/others as I've now got a full built roller to add to the NIB along with this build. Nice score in all as the king pin inserts were still good (hard to find)....king pins bent of course  . Surprisingly double stacking the cross bars didn't damage either one and the left side pod plate and steel axle are in good shape! Nice to see an old Novak 1. Hadn't seen a Futaba FP-R2H micro receiver with the pigtail connectors in a looong time....mostly used Novak bitd....but might be of some value to anybody here that needs/wants it. The S-48 servo will be a paperweight though. The Race Prep stocker had so much end play I thought the armature shaft was gonna slip out the top bushing...so...garbage. The top plate and T-Bar can be re-purposed for Lynx spares, after cutting the T off the bar of course and since they are .065"thk (Predator) vs. .075"thk (Predator Lynx), I'll shave a little weight and lower the ride height by a completely unnoticeable amount . The motor plate has been hogged out so bad I think she's a goner and the worst news is the chassis. Was looking forward to having a road worn chassis I could drill for the Lynx first runs....but, the front cross bar mounting holes, especially the LT Front are damaged too much (8-32 screw partially pulling through from the bottom)...with slight chassis delamination LT/RT. Probably from the added screw length/height + years of wall bangin/rubbin. Good body mounts, misc. hardware, rear wing supports a little oversized but kinda cool...although I never had to run a wing on this car bitd. More on the Lynx build soon!
-
TravelinTravis
- Approved Member
- Posts: 149
- Joined: Tue Feb 09, 2021 8:19 pm
- Location: Richmond,VA.& Cotignac,France
- Has thanked: 509 times
- Been thanked: 154 times
Re: Composite Craft Predator Lynx re-build
Ok....now that parts are fully stocked...back to the build...FINALLY! Sooo...here we go! The front end and chassis prep. OG RC-10 steering blocks with CRP stub axles. This is what I ran bitd on this car...more solid than the alternatives in '87. The CC Predator Lynx manual calls for .080"-.100" of travel on the front blocks.....but, that was never enough for cutting the corners close on the on-road courses, especially while rolling over the edges of the OG plow disks. Trim .045" off the top and bottom of the blocks and that gets you a full .200" of travel. Don't trim all .090" off one side since it won't leave enough material to support the stub axle. Springs are 1/10th size/.020" (a bit soft to start, but this is for the outdoor/asphalt runner). The indoor car will have more washers added and maybe 1/12th (shorter) springs with tighter/shorter throw. The CC kingpins and collars were notorious for being slightly different lengths/height's once screwed together, that's why you can see 2 washers on the left front vs. 1 on the right front. Unfortunately, the Parma kingpins are way shorter than the CC pins, but the collars/inserts are the same and needed, as one of the originals was cracked. The travel is exactly .200" on each, with the blocks shaved from a height of .480" down to .390". Of course, the I.D. of the blocks and the kingpins are sanded/polished. They should spin round the king pins freely 4-5 times when you flick them with your finger. Just loose enough so they're smooth...too much and the blocks will wiggle left to right on the king pins and that's bad...as the wheels will wobble at speed. Battery slots on the chassis have now been hand filed to let the cells sit lower (CG), or maybe to allow for slightly larger NIMH's as NiCad's for runners are gonna be hard to find....I know, I know...sacrilege for a shelfer/resale value...but this ones gonna be a runner and I will NEVER sell these cars....plus, I've got 3 other NIB/NIP chassis in reserve  . Rear end assembly up next!
-
TravelinTravis
- Approved Member
- Posts: 149
- Joined: Tue Feb 09, 2021 8:19 pm
- Location: Richmond,VA.& Cotignac,France
- Has thanked: 509 times
- Been thanked: 154 times
Re: Composite Craft Predator Lynx re-build
On to the rear....All 4 Links set up. I could give measurements...but the quick and dirty way is to simply tighten the 2 lower links on the 1/2" (lower) tie rods as tight as possible, point the two mini flat heads on the front lower links inwards so they have no chance of rubbing or scratching up against the middle cells. Use a square to adjust the upper 2 links (1") so the rear pod pieces are square to the chassis...don't go off the upper and lower graphite plates...they just aren't as uniform and the pod decides the best as it relates to the axle being a true T to the chassis. You can slip in a pair of calipers right to left and measure the gap from the pod to the rear of the chassis. Adjusting the exact ride height (with the circular rear shock tower/mount) will be done later once batteries/electronics/tires are added. Both rear shocks were missing the pressure spring. I've got 5 others (2 used, 2 NIB and 1NIP), and was able to source the springs from the other used ones...had to replace the O-Rings, but had found a pack of new ones a while back..so all good....eventually....took me 2 times on the left and 3 times on the right of re-filling and bleeding to get em right....tricky little things...or bad eyes on my part The manual suggests 90wt oil...but that seemed too stiff from memory, so I'm starting with 70wt. (Note:the stock Delta springs are .030"). Diff build went smooth, but opted for steel over the graphite axle as the damn stud pulled out of the old one. That's my only steel one, so the indoor car will get one of the other 3 graphite's I've got...hopefully they hold up...but would be nice to source more steel axles. Magic spacers against the right and left rear hubs/bearings...and she spins free for days! This sure is taking a lot longer than I remember...but the last time I built one of these I was 15 and all hopped up on Mountain Dew, hot pockets and Ho-Ho's Loooong time ago! Electronics next!
-
TravelinTravis
- Approved Member
- Posts: 149
- Joined: Tue Feb 09, 2021 8:19 pm
- Location: Richmond,VA.& Cotignac,France
- Has thanked: 509 times
- Been thanked: 154 times
Re: Composite Craft Predator Lynx re-build
Finally got the right length tie rods...so...on to the front end. Associated titanium, DuBro 4-40's to the blocks and 2-56's to the Kimbro. You've got to ream the 2-56's to fit the rod...but, they're self tapping with plenty of material, so easy to do. Futaba S132h and good old 12e/i/L front spacer blocks for bump stops and all good to go.
-
TravelinTravis
- Approved Member
- Posts: 149
- Joined: Tue Feb 09, 2021 8:19 pm
- Location: Richmond,VA.& Cotignac,France
- Has thanked: 509 times
- Been thanked: 154 times
Re: Composite Craft Predator Lynx re-build
Receiver, speed control and OG CC graphite antenna. Never remembered it being so hard to get the damn receiver wire through....but 2 days later and got her done...lol. Eyes ain't what they used to be I guess, but if you hold the wire and spin the antenna, it worked through. I cut the top to let the wire ride out a bit as that's how I did it bitd.
-
TravelinTravis
- Approved Member
- Posts: 149
- Joined: Tue Feb 09, 2021 8:19 pm
- Location: Richmond,VA.& Cotignac,France
- Has thanked: 509 times
- Been thanked: 154 times
Re: Composite Craft Predator Lynx re-build
Electronics fully mounted and wires routed. Added some decals to make her pop a little too. Been slow moving lately. Didn't realize the Ruddog pinion set screws are a different size than the OG's/MIP, so need a decent wrench and need to stock some of the longer motor screws and washers. But will update more soon, as I just got a power supply, wire and heat shrink tubing today with the solder station and supplies arriving tomorrow. Wiring up the speed control and saddle packs will be next.
-
TravelinTravis
- Approved Member
- Posts: 149
- Joined: Tue Feb 09, 2021 8:19 pm
- Location: Richmond,VA.& Cotignac,France
- Has thanked: 509 times
- Been thanked: 154 times
Re: Composite Craft Predator Lynx re-build
A little longer than I liked since the last update...but here we go! Large stock of M3x12 + washers and 4-40's for motor screws and rear wheel hubs, solder station, solder, flux, tips, multiple wire gauges and heat shrink tubing to test...all good to go now! MIP metric wrenches to come tomorrow, Acer braid on a longer lead time, fingers crossed!
I started out wanting to solder the positive wire split on the ESC, but it's been a looonnnggg time since I soldered...so I wimped out and decided to test/refresh the old brain on these SCR cells I got a while back. Just crank the heat up and go...lol! Five matched packs in good shape, triple wrapped (ie. Sanyo wrap + clear single cell wrap + outer stick wrap)...wow! Kind of sucks with the plastic collars on the pos/neg side integrated into the single cell wrap....but I dig the care the original owner put into these cells. Makes me hopeful they'll give me a few years of service...again, fingers crossed. Carefully cut the outer layer, remove a battery bar, softly split the old cell glue in the middle.....helpful that each cell had a double shrink....add a jumper wire.....all done! Repeat 4 more times, then man up and wire the ESC...lol! Was really cool that I was able to recycle the wired plugs as I plan to use the OG 4 pin deans throughout anyway....love being able to save the neon and pink Dynamite wire.
I started out wanting to solder the positive wire split on the ESC, but it's been a looonnnggg time since I soldered...so I wimped out and decided to test/refresh the old brain on these SCR cells I got a while back. Just crank the heat up and go...lol! Five matched packs in good shape, triple wrapped (ie. Sanyo wrap + clear single cell wrap + outer stick wrap)...wow! Kind of sucks with the plastic collars on the pos/neg side integrated into the single cell wrap....but I dig the care the original owner put into these cells. Makes me hopeful they'll give me a few years of service...again, fingers crossed. Carefully cut the outer layer, remove a battery bar, softly split the old cell glue in the middle.....helpful that each cell had a double shrink....add a jumper wire.....all done! Repeat 4 more times, then man up and wire the ESC...lol! Was really cool that I was able to recycle the wired plugs as I plan to use the OG 4 pin deans throughout anyway....love being able to save the neon and pink Dynamite wire.
-
TravelinTravis
- Approved Member
- Posts: 149
- Joined: Tue Feb 09, 2021 8:19 pm
- Location: Richmond,VA.& Cotignac,France
- Has thanked: 509 times
- Been thanked: 154 times
Re: Composite Craft Predator Lynx re-build
Got in my order of M3X12 and 4-40 screws along with an MIP metric hex wrench set...so finally able to properly mount up wheels, motors and pinions! Hope there's no more tools needed to buy for a while....but I doubt it.
-
TravelinTravis
- Approved Member
- Posts: 149
- Joined: Tue Feb 09, 2021 8:19 pm
- Location: Richmond,VA.& Cotignac,France
- Has thanked: 509 times
- Been thanked: 154 times
Re: Composite Craft Predator Lynx re-build
Since the old brain sorta started to remember how to solder with the first battery pack as practice....decided to finish up the electrics. Soldering 3 large gauge wires to OG 4 pin deans plugs...was not as easy as I remembered...could've used a few more hands/alligator clips But all in all happy with it. I left the wires on the esc long on purpose for now, until I get it all actually powered up and tested. For now, the battery has no juice....but after cleaning up the contacts on the Magnum Sr. at least the radio powered up nicely!
-
TravelinTravis
- Approved Member
- Posts: 149
- Joined: Tue Feb 09, 2021 8:19 pm
- Location: Richmond,VA.& Cotignac,France
- Has thanked: 509 times
- Been thanked: 154 times
Re: Composite Craft Predator Lynx re-build
The moment of truth! Will she power up or blow up? Are the batteries still any good? Does the charger even work?! Can I remember what all these damn knobs on the Magnum Sr. do
-
Frankentruck
- Super Member
- Posts: 2588
- Joined: Fri Feb 19, 2021 9:59 am
- Location: Texas, USA
- Has thanked: 1583 times
- Been thanked: 1763 times
Re: Composite Craft Predator Lynx re-build
Well, you figured out what the trigger and steering thing do. Just a few more knobs to go. 
It sounds smooth and evil, nice job! Do you have a good place to run it?

It sounds smooth and evil, nice job! Do you have a good place to run it?
Frankensteined RC10T3 / Franky Jr RC10GT-e (x2) / A+ stamp / Toy Story RC / Graphite replica / B1.5 BFG 5LTi / Clonewald / Hyper Hornet
"I love the effort, but it sure looks like you took the long way around to a tub again"
"I love the effort, but it sure looks like you took the long way around to a tub again"
-
TravelinTravis
- Approved Member
- Posts: 149
- Joined: Tue Feb 09, 2021 8:19 pm
- Location: Richmond,VA.& Cotignac,France
- Has thanked: 509 times
- Been thanked: 154 times
Re: Composite Craft Predator Lynx re-build
Lol! Thanks man! Yeah...more bells and whistles than a lifeguard at church. That's why the video was so long...me tryin to figure out servo/throttle trim and brakes. Still got more work to do before track ready (body's/paint, modern wheels/tires...etc.), but searching for some indoor tracks to get shakedown runs for outdoor next summer....fingers crossed!Frankentruck wrote: ↑Wed Aug 09, 2023 8:49 am Well, you figured out what the trigger and steering thing do. Just a few more knobs to go.
It sounds smooth and evil, nice job! Do you have a good place to run it?
-
TravelinTravis
- Approved Member
- Posts: 149
- Joined: Tue Feb 09, 2021 8:19 pm
- Location: Richmond,VA.& Cotignac,France
- Has thanked: 509 times
- Been thanked: 154 times
Re: Composite Craft Predator Lynx re-build
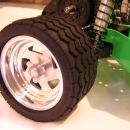
Got around to sourcing tires/wheels. After researching a bit here's a list of company's I drummed up that currently offer on-road pan car tires: Matrix Racing Tires; Xceed; GP Speed Tires; Contact RC Racing Tires; BSR Racing Tires; CRC (Calandra Racing); JFT (Japan Foam Tire); Corally, Hot Race Tyres. In the end, I went with Hot Race...being overseas, the availability and price seemed right. Surprised how close they are size wise to the OG TRC's. Nice spongy sticky grip out of the package too. Looking forward to seeing how they roll on track sometime soon!
-
TravelinTravis
- Approved Member
- Posts: 149
- Joined: Tue Feb 09, 2021 8:19 pm
- Location: Richmond,VA.& Cotignac,France
- Has thanked: 509 times
- Been thanked: 154 times
Re: Composite Craft Predator Lynx re-build
Been a while since I posted up any progress....but I've been back at it lately, thanks to upgrading my work area....formerly the guest bedroom, now my man cave So, I ditched the old steel axle and added a T&A Machine titanium one....got a good deal on two of em a while back.
-
TravelinTravis
- Approved Member
- Posts: 149
- Joined: Tue Feb 09, 2021 8:19 pm
- Location: Richmond,VA.& Cotignac,France
- Has thanked: 509 times
- Been thanked: 154 times
Re: Composite Craft Predator Lynx re-build
Next up was to actually get around to setting up the loaded ride height. If memory serves correct, I seem to recall in '87/'88 the on-road ROAR ride height was 1/4" for 1/10th and 1/8" for 1/12th....so I set her up slightly over 1/4" at .360" at all four corners of the chassis to allow for some tire wear that'll bring her lower while running. I think it'll due as a nice balance and help the chassis last longer from the eventual scrapes and whatnot.
Create an account or sign in to join the discussion
You need to be a member in order to post a reply
Create an account
Not a member? register to join our community
Members can start their own topics & subscribe to topics
It’s free and only takes a minute
Sign in
-
- Similar Topics
- Replies
- Views
- Last post
-
- 16 Replies
- 2873 Views
-
Last post by TravelinTravis
-
- 2 Replies
- 935 Views
-
Last post by PARMA01
-
- 7 Replies
- 1978 Views
-
Last post by blast
-
- 7 Replies
- 1415 Views
-
Last post by TravelinTravis
-
- 3 Replies
- 1311 Views
-
Last post by drbelleville
-
- 0 Replies
- 1698 Views
-
Last post by PrincessShandi82
-
- 1 Replies
- 1006 Views
-
Last post by Phin
-
- 0 Replies
- 1492 Views
-
Last post by Lowgear


Who is online
Users browsing this forum: No registered users and 1 guest