Showcase's Kinwald Worlds inspired WOIN build

General discussion, builds/restorations, etc...

Moderators: scr8p, klavy69

User avatar
Showcase1186
Approved Member
Posts: 221
Joined: Tue May 15, 2012 3:56 pm
Location: Saratoga Springs NY
Been thanked: 3 times

Re: Showcase's Kinwald Worlds inspired WOIN build

Post by Showcase1186 »

I finished applying the decals on the body.
Image
Image
Image

User avatar
uniquenamehere
Approved Member
Posts: 553
Joined: Tue Jun 07, 2011 6:34 am
Location: Ontario, Canada
Been thanked: 2 times

Re: Showcase's Kinwald Worlds inspired WOIN build

Post by uniquenamehere »

Looks great!

Where did you get the decals? Sorry if i missed that earlier...

User avatar
Showcase1186
Approved Member
Posts: 221
Joined: Tue May 15, 2012 3:56 pm
Location: Saratoga Springs NY
Been thanked: 3 times

Re: Showcase's Kinwald Worlds inspired WOIN build

Post by Showcase1186 »

uniquenamehere wrote:Looks great!

Where did you get the decals? Sorry if i missed that earlier...
Some of the decals I got recreated by a local graphic artist (RC10, Oakley, Turbo Mirage, Team associated, RCPS, Reedy), the Yokomo decals I got on ebay (which are always available but from overseas), the proline and novak decals I got from sheets available through tower.

User avatar
Showcase1186
Approved Member
Posts: 221
Joined: Tue May 15, 2012 3:56 pm
Location: Saratoga Springs NY
Been thanked: 3 times

Re: Showcase's Kinwald Worlds inspired WOIN build

Post by Showcase1186 »

Tomorrow I'll have the chassis back from machining and powder coat, but in the meantime let's dye some parts black. This was new to me, so this was my 1st shot at it. I was very pleased with the results.
To dye my white rc10 parts black I went to my local Walmart and purchased Rit clothing dye, UPC 88596783150. This came highly recommended from the fellow forum members.
Image

I've heard several ways to go about dying the parts, such as hanging them in the pot with a string, but I'll just concentrate on the process I used.
1: Clean your parts really well and be sure to remove any and all residue.
2: The cleaner the part the better the dye will take, so I did the hydro P treatment to all my parts prior to dyeing, perhaps redundant, but since I was whitening other parts anyway, it was no big deal. (I instruct how the hydro P treatment works earlier in the thread).
3: Get a medium size pot (that your wife won't mind you destroying) and fill it 1 cup of vinegar and the rest with water about 1"-1.5" above the largest part that will go in the pot (typically the rear bulk head).
4: Get a a strainer for after the process is complete and also a spatula to stir the parts throughout the process.
5: Since you're dealing with dye be sure to think ahead and have a surface to set your spatula on between stirring. I used aluminum foil. Last thing you want to do is dye your counter tops black.
Image
6: Set the pot filled with water on the stove and bring the water to a boil.
Image
7: With the water at a steady boil and not overflowing add the entire package of dye. You'll notice some steam and the water will turn black. Stir the solution until uniform color results.
Image
8: Let the water come to a boil again and add your parts. Be sure to stir your parts while the water is still boiling. I was really concerned about the parts sticking to the bottom of the pan and melting, but it never happened.
9: Stir the parts with your burner on high for about 7 minutes, then turn the burner on low and stir your parts every 5 minutes or so up to 30 minutes.
10: Turn the burner off and let your parts sit in the dye for about an hour.
11: Take your strainer and the pot with the dye outside. I suppose you could do it in the sink, but I was overly cautious. Drain the parts in to the strainer leaving behind only the parts.
12: Rinse the parts under cold water and this should be your exact result. The flash from the camera does it no justice. The parts are jet black!
Image
Image

User avatar
uniquenamehere
Approved Member
Posts: 553
Joined: Tue Jun 07, 2011 6:34 am
Location: Ontario, Canada
Been thanked: 2 times

Re: Showcase's Kinwald Worlds inspired WOIN build

Post by uniquenamehere »

I can hear the collective screams of the members here as you dyed those parts black. :D

Looks great... really nice build!

User avatar
Showcase1186
Approved Member
Posts: 221
Joined: Tue May 15, 2012 3:56 pm
Location: Saratoga Springs NY
Been thanked: 3 times

Re: Showcase's Kinwald Worlds inspired WOIN build

Post by Showcase1186 »

This is where we will squash the modern 2.2 wheels and tires on an old RC10 once and for all!!!! Also how to do 10T inspired front end!
I started assembling the 10T style front end on my buggy. I used a 10T nose, RPM mini bumper, 10T bulk head with Fibre lyte front shock tower, SC10 front shocks, rc10GT wide front axles, titanium turnbuckles, aluminum hinge pin brace etc... All part numbers can be found on the very 1st page of this thread, in my Bill Of Materials. I did find that you should drill the holes a tad bigger on the shock tower. I broke an aluminum bolt off in the carbon tower.
Associated #'s
wide front axles 7222
B4.1 stock front wheels 9588
B4.1 front tires 9591
B4.1 Rear wheels 9589
FT Turnbuckle 1405
FT Turnbuckle 1404 (qty 2)
FT Turnbuckle 1402
Blue nose tubes 7315
Screws 6280
SC10 front shocks 1.08 #ebay
Dynotech Klein arms#
front 2701
Image
Image
Image

I will be modifying/grinding the tower to better fit a factory turbo mirage body, or using a standard worlds front tower and modifying it pending on how the results come out.
Image

So to fit on newer style 2.2 rear wheels and tires, you use the b44.1 rear CVD's #9756 with (qty 2) shims internal supplied in the CVD kit, RPM RC10GT rear hub carriers 70272 with Avid RC bearings 3/16” X 1/2", Associated blue spacer 9608B, followed by a custom works spacer 7208
Assemble in this order:
Image

I then assembled most of the rear assembly. Also took the liberty of counter sinking most of the carbon for conical screws, and machining the rear bulk head like Brian Kinwald did to his worlds car:
Image
Image
So far I think the SC10 rear shocks are a bit too long for my application. I may go with a shorter stroke shock or simply limit the travel. I'll have to play with it once I finish the rolling chassis and update the master BOM.
Image
Image
Image

User avatar
Showcase1186
Approved Member
Posts: 221
Joined: Tue May 15, 2012 3:56 pm
Location: Saratoga Springs NY
Been thanked: 3 times

Re: Showcase's Kinwald Worlds inspired WOIN build

Post by Showcase1186 »

uniquenamehere wrote:I can hear the collective screams of the members here as you dyed those parts black. :D

Looks great... really nice build!
Those parts were yellowed and brown before I did the Hydro P treatment. Have no fear we can all make white parts if we want! Simply read earlier in this thread. I would've left them all white, but this is after all inspired by Kinwald's worlds car, which had black and white components.
:D Thanx for the kind words on the build I appreciate it!

User avatar
Showcase1186
Approved Member
Posts: 221
Joined: Tue May 15, 2012 3:56 pm
Location: Saratoga Springs NY
Been thanked: 3 times

Re: Showcase's Kinwald Worlds inspired WOIN build

Post by Showcase1186 »

Got the chassis and motor plate back from my buddy who did the milling.
Image
Image

Final assembly will start tonight and hopefully be completed shortly!

knucklebuster
Approved Member
Posts: 822
Joined: Mon Aug 07, 2006 11:05 pm
Location: Florida

Re: Showcase's Kinwald Worlds inspired WOIN build

Post by knucklebuster »

NICE!

User avatar
JK Racing
Super Member
Posts: 4603
Joined: Thu Jul 19, 2007 2:32 pm
Location: Placentia, CA
Has thanked: 103 times
Been thanked: 200 times

Re: Showcase's Kinwald Worlds inspired WOIN build

Post by JK Racing »

you may need to give up your buddies name :) I like that motor plate a lot.
--Joey --
Vintage A&L and Factory Works
Old School Racer & Vintage RC Car nut
JKRacingRC.com

User avatar
Showcase1186
Approved Member
Posts: 221
Joined: Tue May 15, 2012 3:56 pm
Location: Saratoga Springs NY
Been thanked: 3 times

Re: Showcase's Kinwald Worlds inspired WOIN build

Post by Showcase1186 »

He charged me $35 to do the chassis and motor plate. Not the cheapest, but it was worth it to me!

User avatar
Showcase1186
Approved Member
Posts: 221
Joined: Tue May 15, 2012 3:56 pm
Location: Saratoga Springs NY
Been thanked: 3 times

Re: Showcase's Kinwald Worlds inspired WOIN build

Post by Showcase1186 »

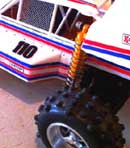
I started assembly of the nose to the main chassis and discovered I needed to cut down the nose tubes, so I had to take apart the entire front end again. Hopefully this saves the next guy some time:
Image
As you can see the tubes were too long. Instead of drilling the chassis and taking the easy way out, I cut the nose tubes down and re drilled the mounting hole. I didn't cut off the threaded end I simply cut off the unthreaded end and used it as a drill guide for the uncut part. I used vice grips to put the cut guide against my shortened nose tube. It helped stabilize the drill bit and also provide an accurate drill point.

Next step was to clearance the front shock tower to fit the turbo mirage body. I ended up using the same fibre lyte worlds carbon tower, but really took the dremel to it. After some sanding filing and grinding with sanding drums, this was the result.
Image
Far cry from what I started with:
Image
I'm very happy with the way it came out. I have no reservations about removing the top cross brace that was originally there. The carbon is still very strong. Even if i took an upside down total shock tower digger it would still stand tall.

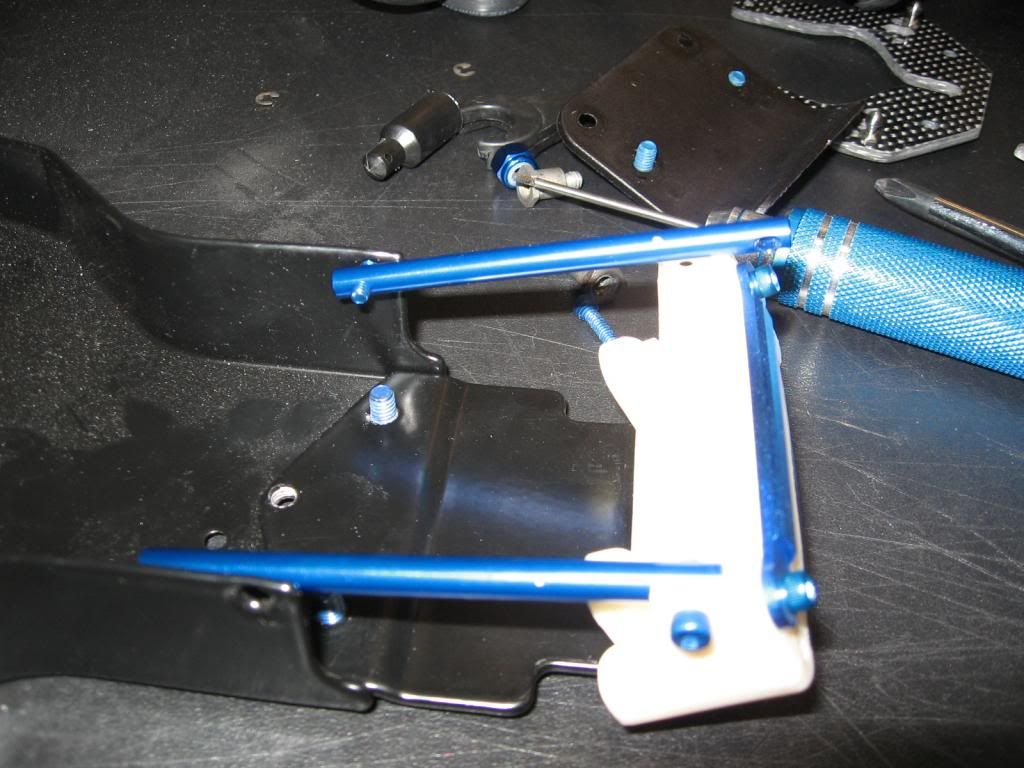
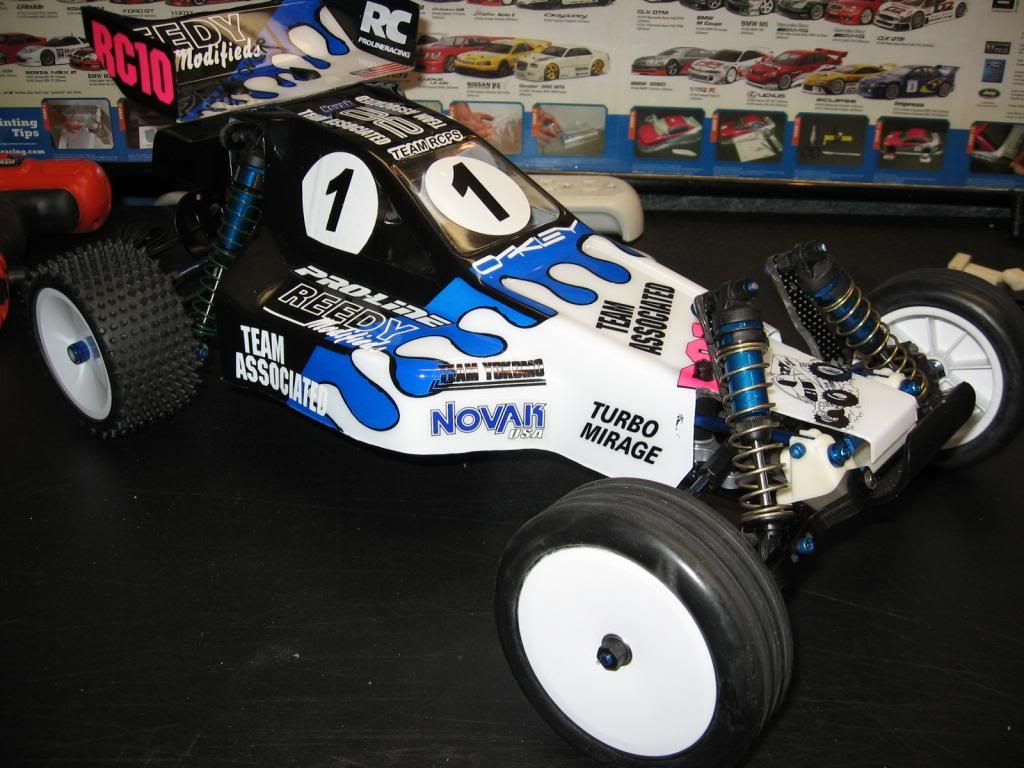
Next step was to attach the nose:
Image

I was very reluctant to cut the body up, but I had no other choice. I put the nose on a diet and removed slightly too much material from the side. Very unhappy with my hasty cutting of the body. Since this will be a runner it just means I'll have to paint another body for when it's sitting on the shelf not being used...
Image
Image

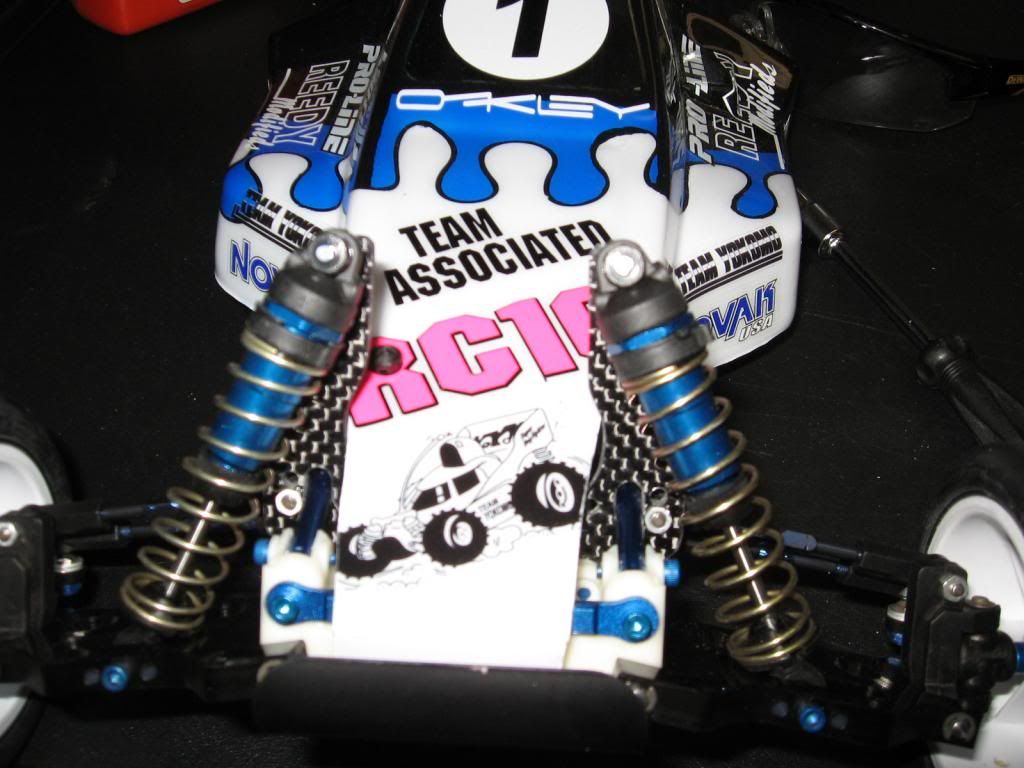
Another shot of the nose and body fitted:
Image

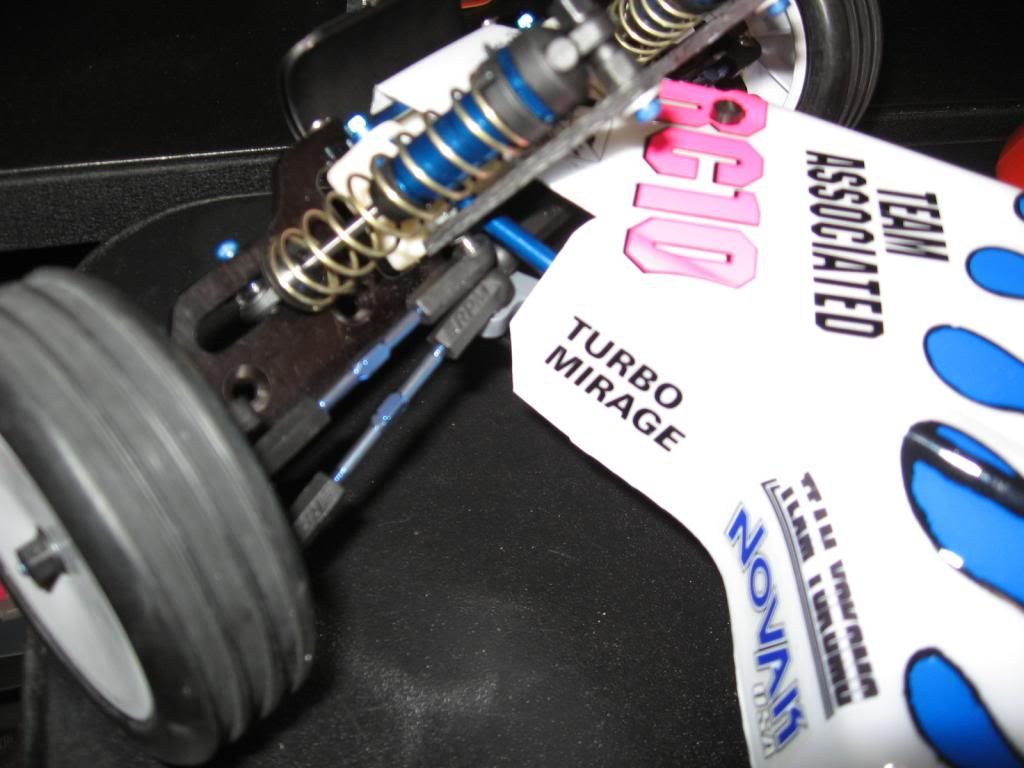
The tail end assembled without a hiccup:
Image

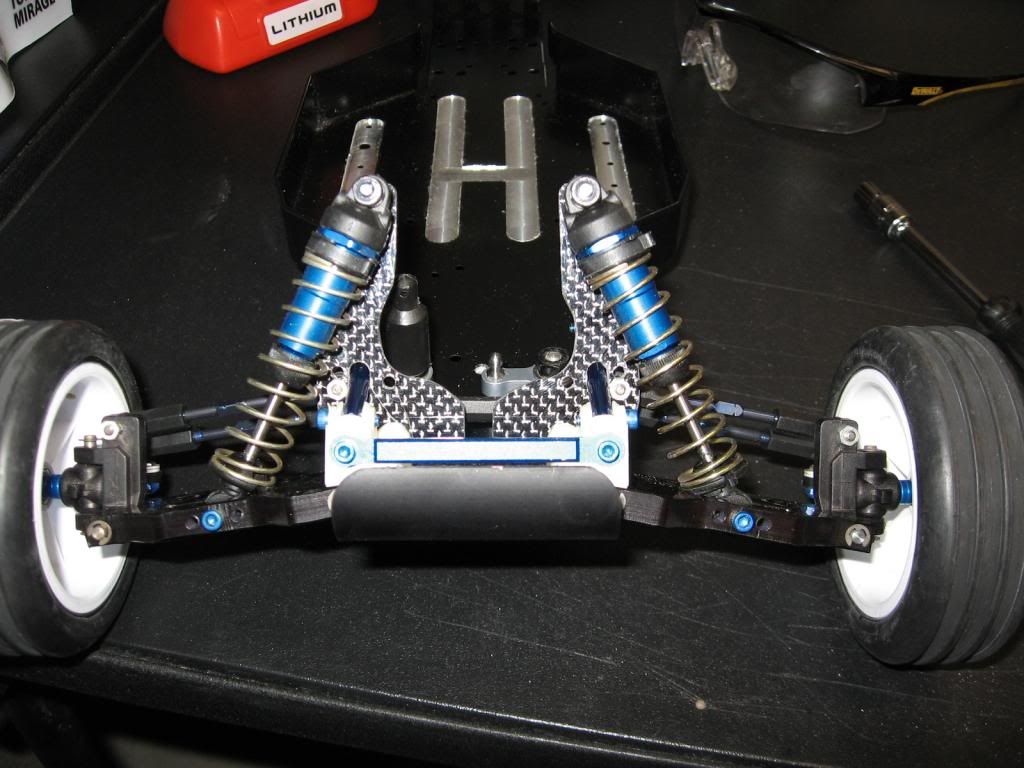
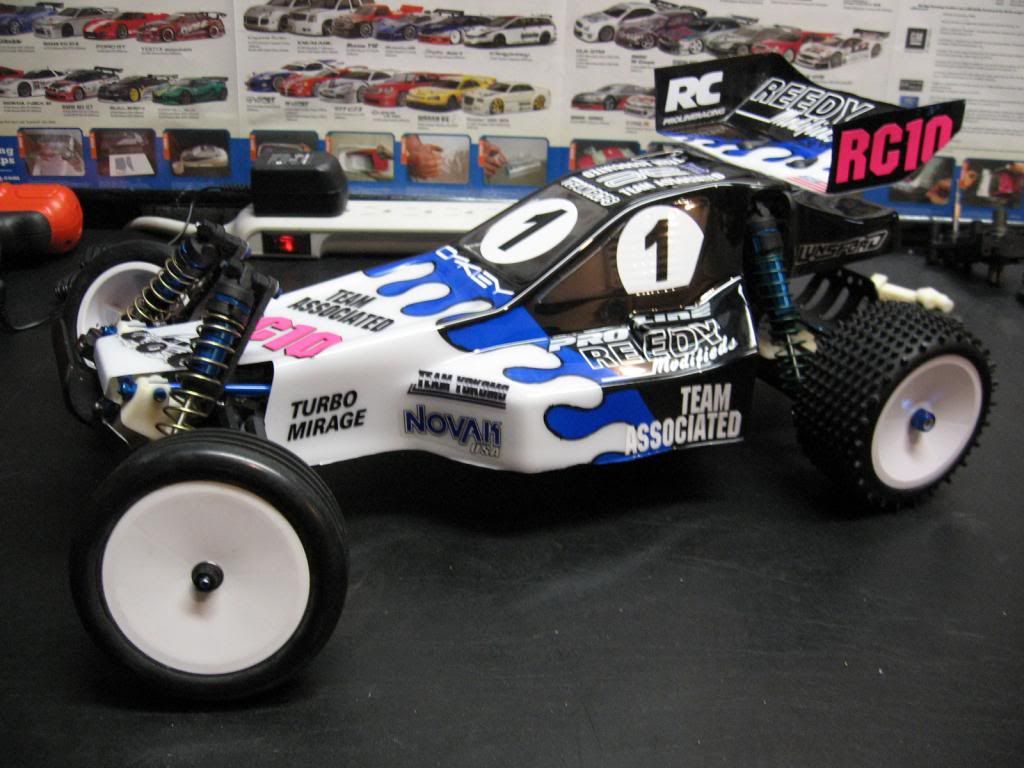
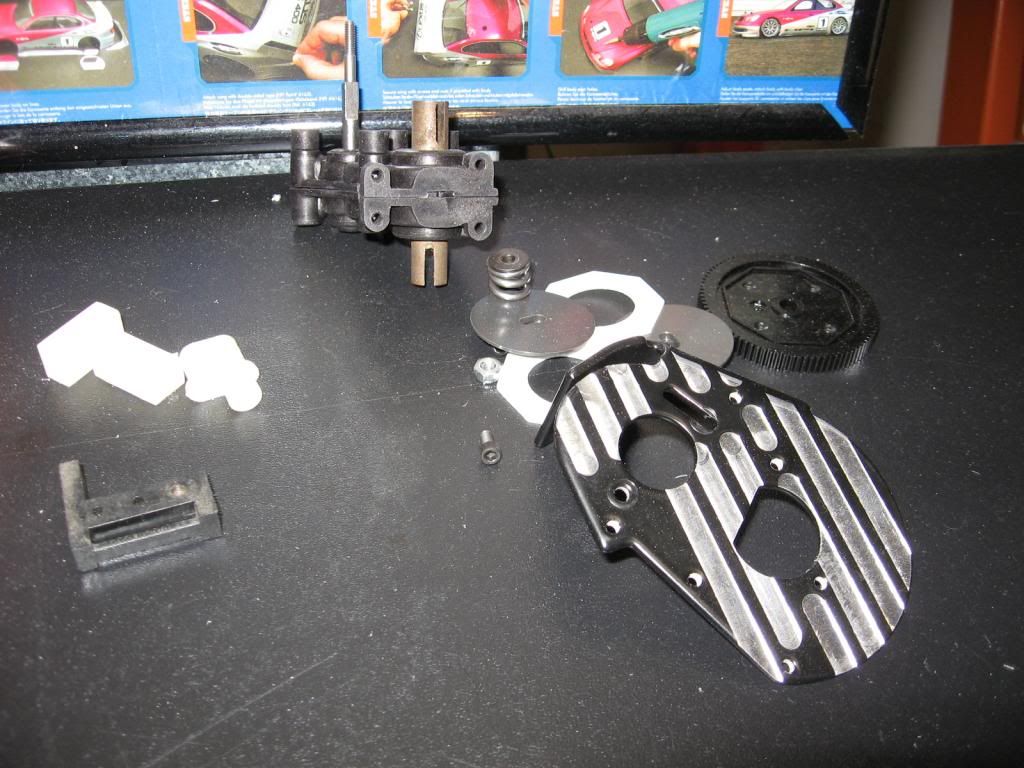
Rolling chassis pics, but the stealth trans still needs to be built:
Image
Image

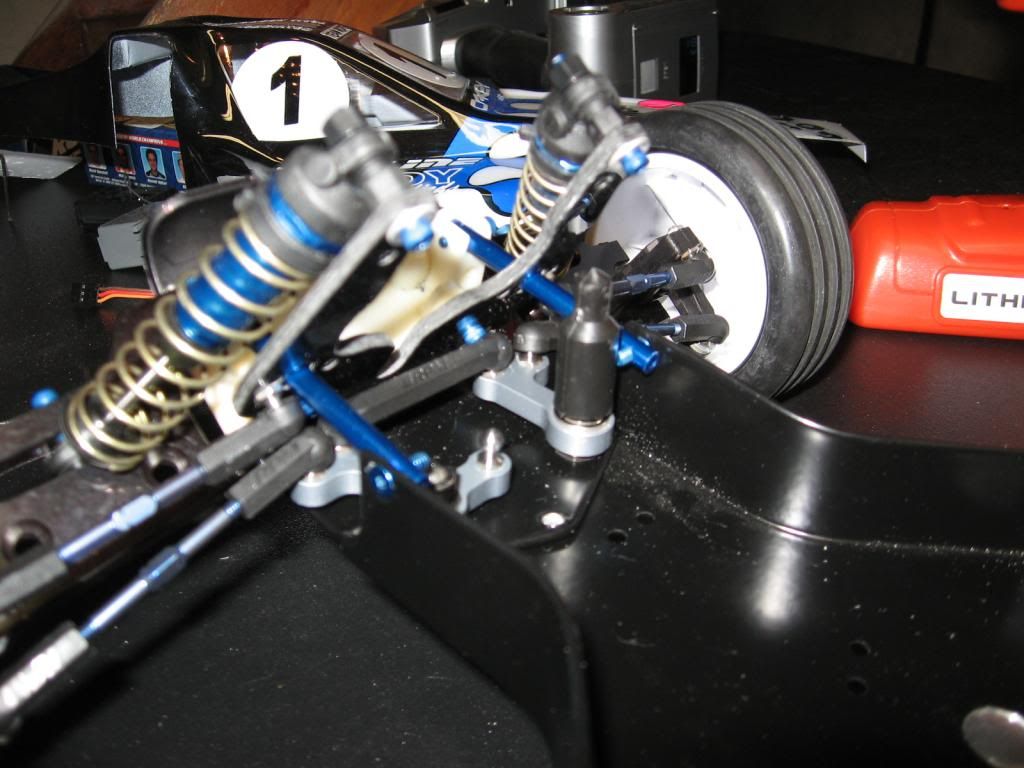
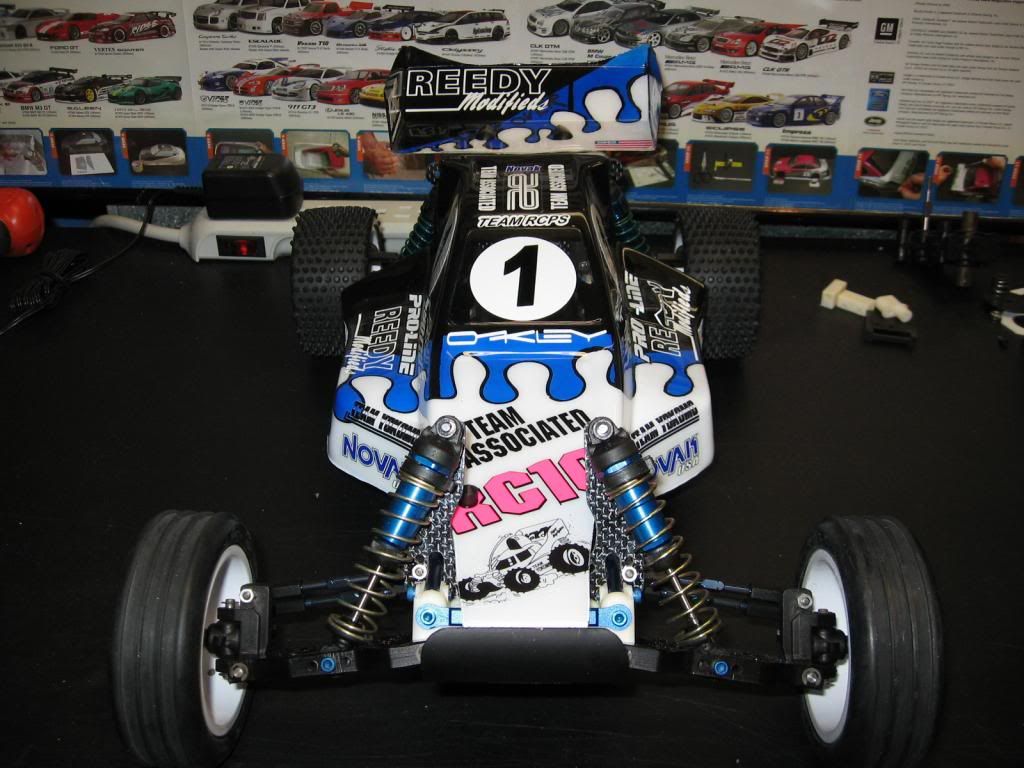
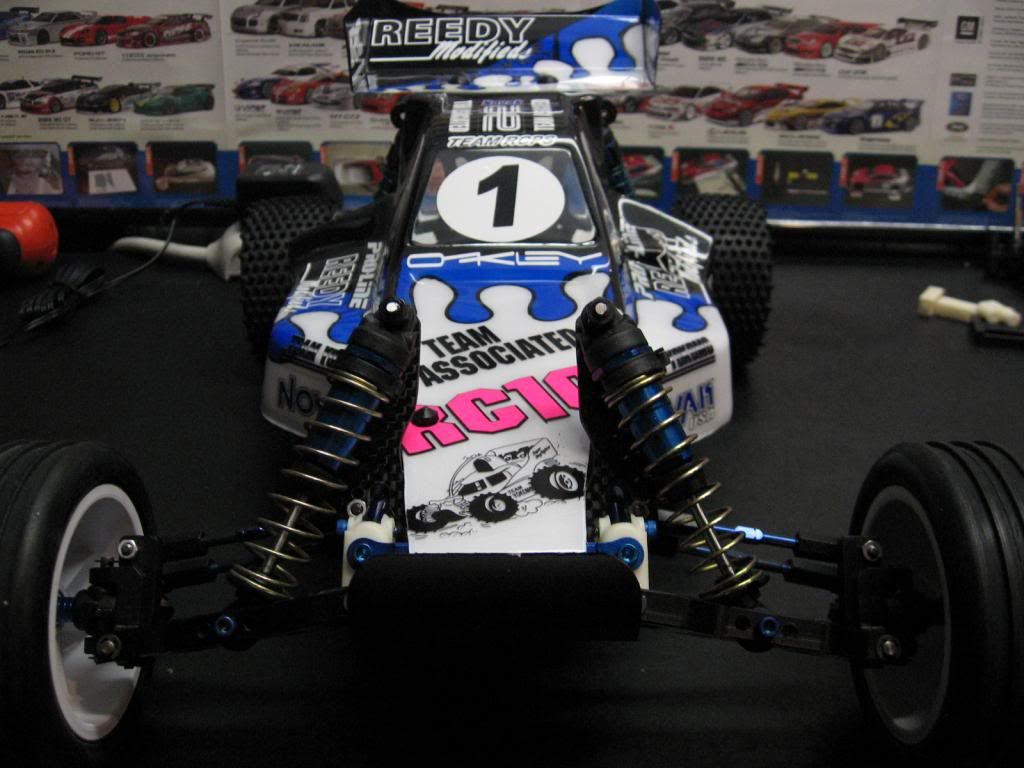
My initial impression on the rolling chassis is utter disappointment. The geometry is all wrong... Take a look at the extreme negative caster:
Image
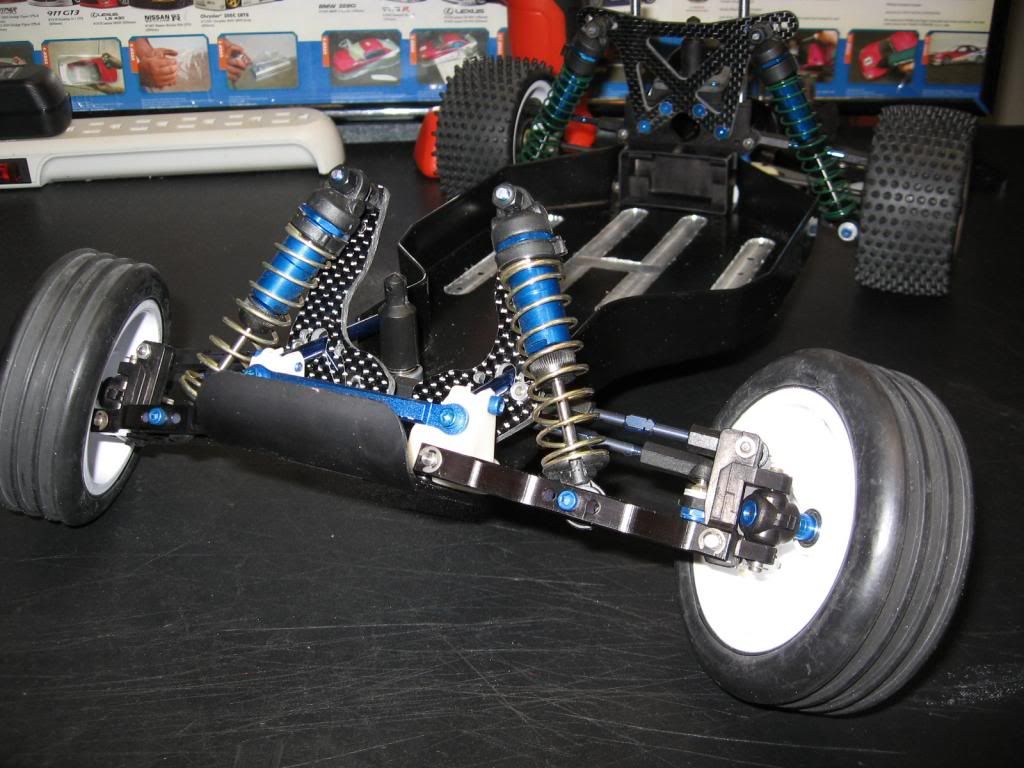
This thing is going to push more than a plow truck in the winter. I need to get another set of nose tubes and cut them slightly longer than these, pushing the nose down in conjunction with different caster blocks assuming they're still available???

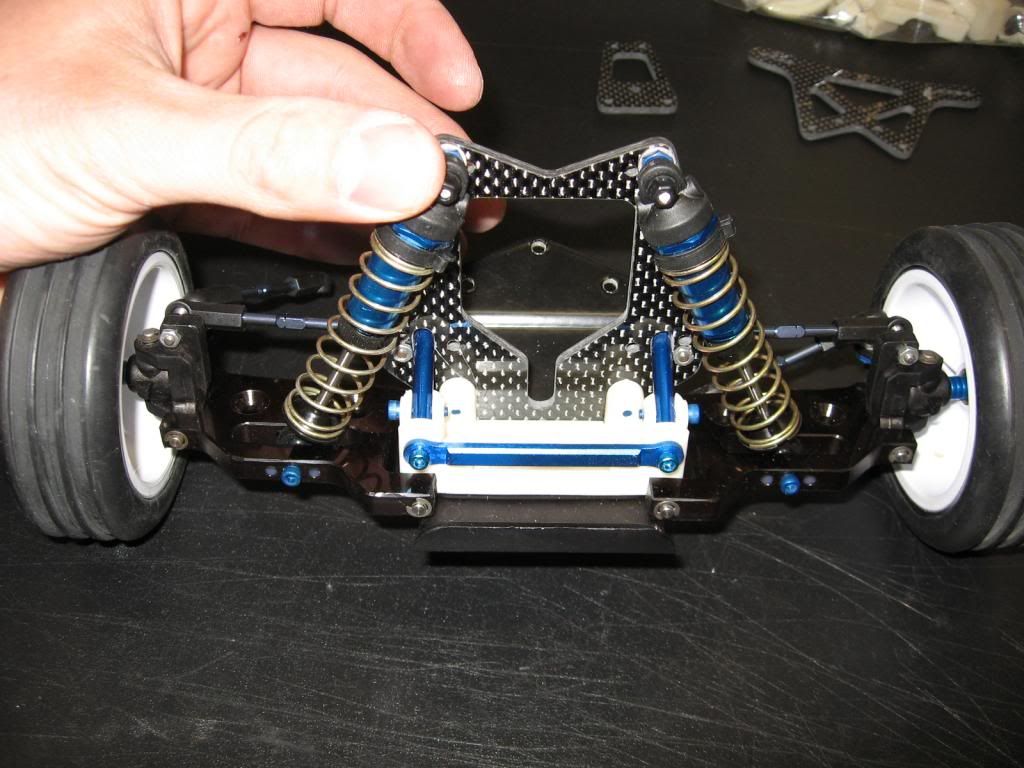
The shock dampening is completely off along with spring rate and travel. Not a surprise since these shocks were from another kit. All these problems can be fixed, but I'm slightly concerned about the caster issue. The 10T nose treatment sure looks cool, but I'm questioning the practicality.
Image
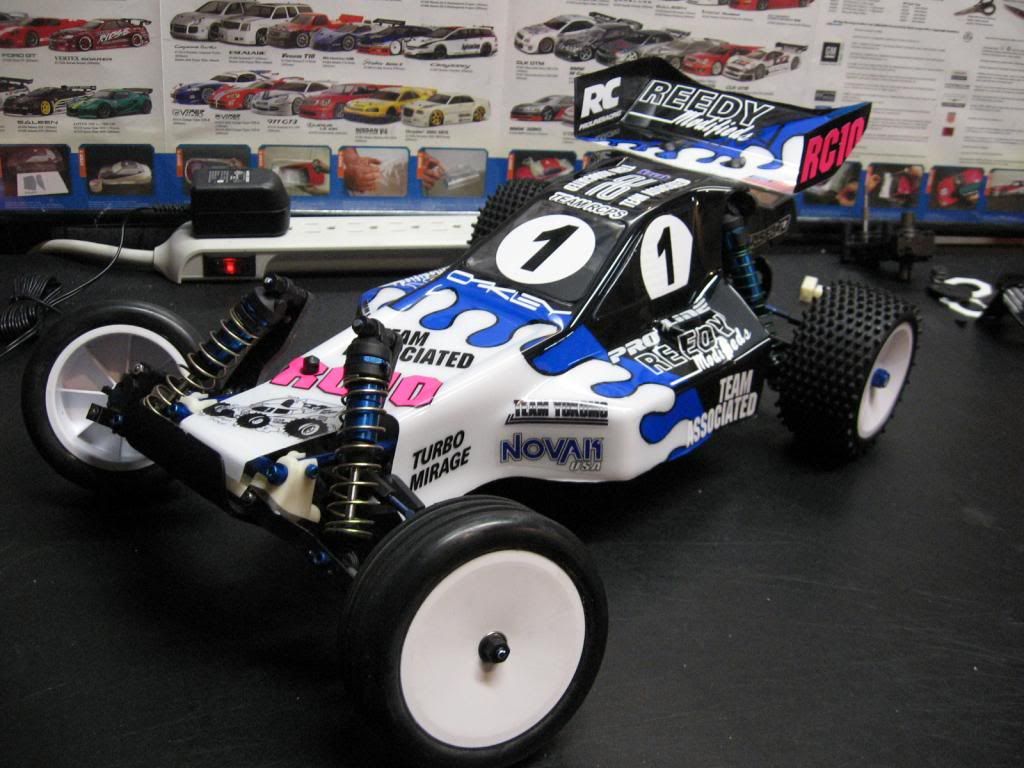
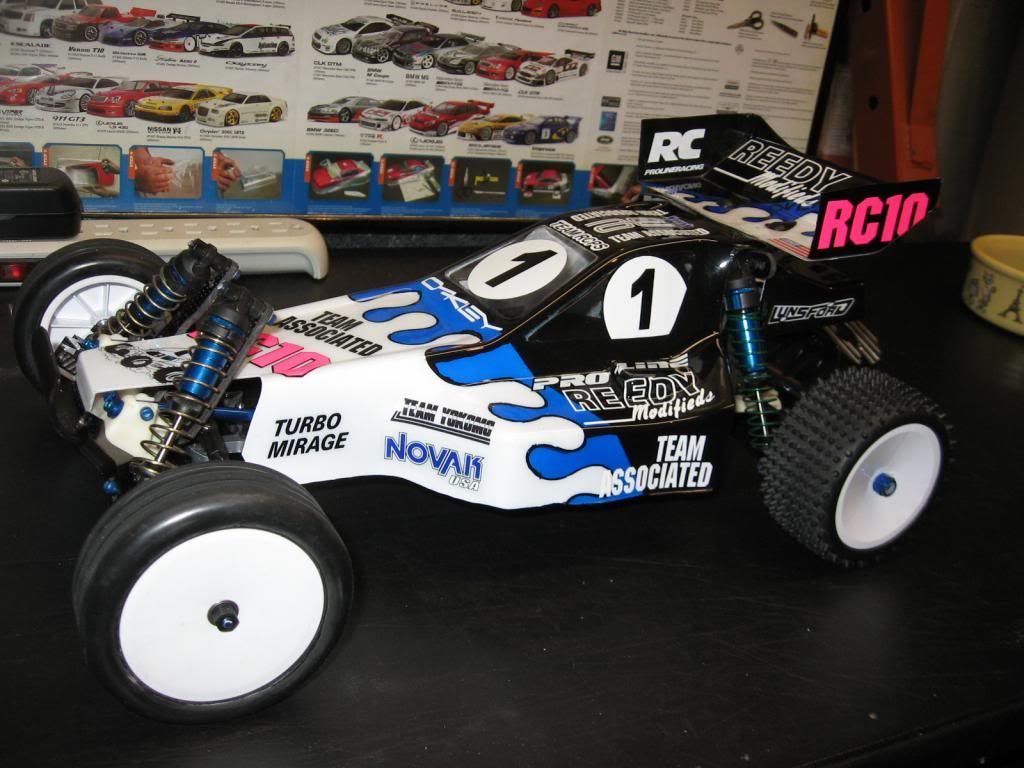
I also had to cut down the wing tubes by about a 1/4 inch, so the wing could sit low on the body.
Image
Image

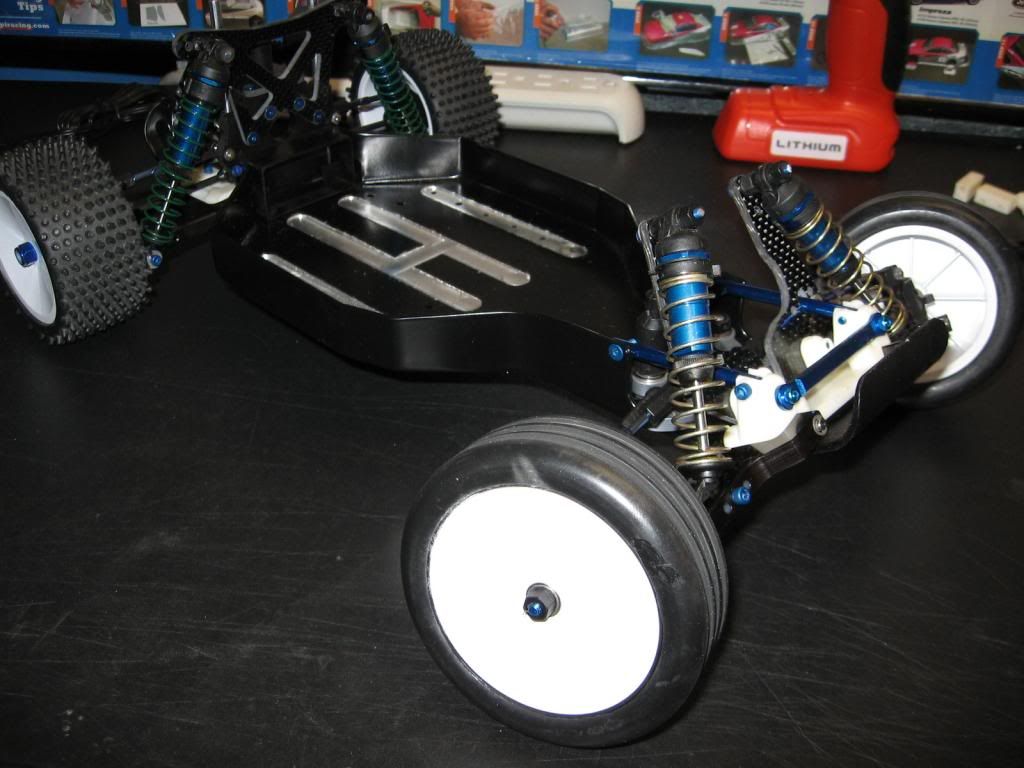
Some pics of the rolling chassis:
Image
Image
Image
Image
Image
Image
Image

Off to the gym, then the stealth build:
Image

User avatar
8rad
Approved Member
Posts: 799
Joined: Fri Feb 13, 2009 3:29 pm
Location: Ottawa, Canada

Re: Showcase's Kinwald Worlds inspired WOIN build

Post by 8rad »

WOW! Nice job. Looks remarkably similar to my build. Although mine doesnt have a cool theme like yours.

What size is the slipper nut? I cant seem to find a nut that fits and I am too lazy to go to the LHS. It must be metric eh?

And the chassis and motor plate milling is sweet. Love it!
"It's not broken, it's British!"

User avatar
JK Racing
Super Member
Posts: 4603
Joined: Thu Jul 19, 2007 2:32 pm
Location: Placentia, CA
Has thanked: 103 times
Been thanked: 200 times

Re: Showcase's Kinwald Worlds inspired WOIN build

Post by JK Racing »

slipper is 5-40 :(

I think you have a couple combinations that are making things look off overall....worlds wide arms w/B4 carriers/knuckles to start, then the GT wide axles just exaggerate it.

::EDIT:: Those look like stock carriers...maybe just the axles are goofin' it?
--Joey --
Vintage A&L and Factory Works
Old School Racer & Vintage RC Car nut
JKRacingRC.com

User avatar
Showcase1186
Approved Member
Posts: 221
Joined: Tue May 15, 2012 3:56 pm
Location: Saratoga Springs NY
Been thanked: 3 times

Re: Showcase's Kinwald Worlds inspired WOIN build

Post by Showcase1186 »

JK,

They certainly are stock carriers. Do you know what the degree the stock caster blocks are on the old team car?

Post Reply

Create an account or sign in to join the discussion

You need to be a member in order to post a reply

Create an account

Not a member? register to join our community
Members can start their own topics & subscribe to topics
It’s free and only takes a minute

Register

Sign in

  • Similar Topics
    Replies
    Views
    Last post

Return to “RC10 Buggy Forum”

Who is online

Users browsing this forum: User avatarXLR8 and 53 guests