RC10 Buggy but 3D printed

General discussion, builds/restorations, etc...

Moderators: scr8p, klavy69

User avatar
Oblivious1984
Regular Member
Posts: 10
Joined: Wed Apr 12, 2023 1:27 pm
Has thanked: 8 times
Been thanked: 10 times

RC10 Buggy but 3D printed

Post by Oblivious1984 »

Intro & Background
Hello everyone - I'm new here (as you can probably tell) so forgive me if I commit any infractions to unspoken rules. I read the forum rules and I think I've got everything down correctly.

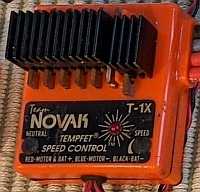
The background to this is that my dad gave me his RC10 buggy that we had last ran about a decade ago and I gave it a bit of a refresh (a new speed controller, battery, motor, and fresh fluids were all it needed). I believe it's an early Edinger model since the chassis has no stamp and it still has the original gear cover that's so thin I'm afraid ever to touch it. The car is in beautiful condition with all of the original non-electrical parts except the wing and tires. In order to protect it I whipped up some scrape bars in CAD that I was able to 3D print which attach to the bottom of the chassis and the nose and don't require any modifications to the car. I'm a mechanical engineer so making these things and finding odd solutions to save money comes naturally to me.
2.jpg

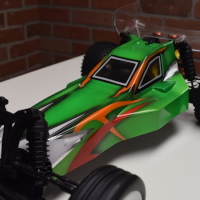
The problem - and the reason that I'm making this topic - is that the 40-year-old RC10 just isn't something that I want to drive like a maniac. I managed to burn out the brand-new brushed motor that I put in within 48 hours of purchasing it (checked to see if I made mistakes that lead to its early demise but didn't find anything). I'm more used to brushless systems and higher voltages so I figured I could make a similar car with parts that I wouldn't care about breaking and could drive the way I wanted. I realized that with a few key parts being pre-made, there were still a lot of injection-molded parts that I might be able to 3D print. So - I decided to take a crack at it.

Initial Progress & Where I'm Headed
I've managed to model a lot of the key parts that I want and adapt them to be 3D printable. The rear bulkhead has been the most challenging part to print properly so far so I'll likely modify that more than other components. Here are the parts that I've bought or already had so far:
-A-stamp chassis scratched to hell on the bottom
-Stealth X transmission (I believe this is meant for trucks, not buggies)
-Protector shell from Jconcepts
-2.2" wheels for 3/16 axles from Jconcepts
-Shock Towers from Ebay
-Shocks from Ebay
-Hinge Pins from Ebay
-Focbox VESC Speed Controller (I come from the electric skateboarding world where these are common)

The next step is to 3D print all of the other parts I can which is anything that was injection molded from the original car with the exception being the transmission. I think with some strategically modeled adapters I can make that transmission work, though it will be lacking a differential which isn't a big deal to me. I also need to buy a few more parts like a remote (2.4GHz, right?). I have access to a machine shop and may end up just making my own axles, dogbones, and front nose (along with nose tubes). The goal for this is to go gold, black, and silver but I'm not married to the idea. As you can see below I’ve had some challenges getting the parts to work with screws without layer delamination. My solution to that will likely be copper inserts - that’ll come soon.
1.jpg
Questions for you all
1) How bad is it to not have a differential? Has anybody else tried adapting one of these truck transmissions to work with a buggy before?
2) I'd like to ideally run this on a 4s Lifepo4 battery (so 14.4V). Is this too much? Should I aim lower?
3) What motor would you guys recommend running on something like this? Ideally I'd like to get a brushless motor with sensors, and from what I was reading it seems like something in the range of 3000Kv would be a good option for this system.

I'm trying to have this running within the next 6 weeks since I'd like to show it to my dad next time I see him.

Thanks for any feedback and I’ll post here when I’ve got decent updates.
1) Early Edinger RC10
2) 3D Printed RC10 (In Progress)

JosephS
Super Member
Posts: 1530
Joined: Thu Mar 23, 2017 5:31 pm
Has thanked: 1003 times
Been thanked: 467 times

Re: RC10 Buggy but 3D printed

Post by JosephS »

Welcome!
If you indeed have an original no stamp edinger rc10 you should pick up an inexpensive used rc10 chassis. The no stamp is one of the rarest parts.

4s 14v is to much for just about any 1/10 buggy. It's a lot of power and could make just about anything undriveable. I'd recommend a larger chassis, such as a short course truck, drag racer or a larger buggy.

Elkcycles
Approved Member
Posts: 168
Joined: Tue Nov 08, 2022 10:04 am
Location: Maryland
Has thanked: 118 times
Been thanked: 94 times

Re: RC10 Buggy but 3D printed

Post by Elkcycles »

If you run 4s, gear it down low, and run the lowest KV motor you can. Ideally, you could try an outrunner motor just to be different. Somewhere in the 800kv range should work.

User avatar
morrisey0
Super Member
Posts: 1269
Joined: Wed Jan 13, 2021 2:45 pm
Location: Richmond, VA
Has thanked: 54 times
Been thanked: 1238 times

Re: RC10 Buggy but 3D printed

Post by morrisey0 »

Why would a priority be to run on 4S?
I build RCs like people would have done back in the '90s ..................................... if they had 3D printers.

User avatar
Frankentruck
Super Member
Posts: 2566
Joined: Fri Feb 19, 2021 9:59 am
Location: Texas, USA
Has thanked: 1574 times
Been thanked: 1739 times

Re: RC10 Buggy but 3D printed

Post by Frankentruck »

There's a lot of scuffed up chassis out there to use for runners. (oops, I missed that you already got one)

Are you drilling and tapping the holes? Print pilot holes then drill and tap. What material are you printing with?
Frankensteined RC10T3 / Franky Jr RC10GT-e (x2) / A+ stamp / Toy Story RC / Graphite replica / B1.5 BFG 5LTi / Clonewald / Hyper Hornet

"I love the effort, but it sure looks like you took the long way around to a tub again"

Dadio
Approved Member
Posts: 3868
Joined: Sun Apr 24, 2016 2:21 pm
Location: Guildford UK
Has thanked: 2280 times
Been thanked: 1993 times

Re: RC10 Buggy but 3D printed

Post by Dadio »

As above 4s lifepo will be undrivable in 1/10 , with a sensored motor I'd look at max 10.5 turn on 2s lipo , even that is overkill for a vintage chassis design and personally I max out at 13.5 turn as it just makes for more drivability .
I did basically the same thing with the Yokomo Dogfighter YZ-834b , look un the yo-clone-oh project thread I did , just about the only worthwhile material I found was CF Nylon , anything else and you'll be replacing parts every 2 minutes .
The probable cause for killing your brushed motor was overheating , a good lipo will give you maybe 30 min run time , in the old days you were lucky to get 5 min and even then motors got hot , running a brushed motor for 30 min will kill it fast , although 2s lipo is roughly the same voltage on paper as a 7.2v nicad in truth its way different , nicad battery's would drop voltage under load to maybe 6v , lipo battery's do not do this , also and fully charged 2s lipo is over 8v , a 2s lipo is more equivalent to 9.6v nicad in truth so what you are asking from the brushed motor is 6 times the run time with a 9.6v nicad , that's why they die .
If a jobs not worth doing then its certainly not worth doing well.
A problem shared is a problem halved but an advantage shared is no advantage at all.

User avatar
Oblivious1984
Regular Member
Posts: 10
Joined: Wed Apr 12, 2023 1:27 pm
Has thanked: 8 times
Been thanked: 10 times

Re: RC10 Buggy but 3D printed

Post by Oblivious1984 »

Thank you to everyone who replied! I'll respond to everyone here.
JosephS wrote: Mon Apr 17, 2023 7:04 pm Welcome!
If you indeed have an original no stamp edinger rc10 you should pick up an inexpensive used rc10 chassis. The no stamp is one of the rarest parts.

4s 14v is to much for just about any 1/10 buggy. It's a lot of power and could make just about anything undriveable. I'd recommend a larger chassis, such as a short course truck, drag racer or a larger buggy.
Perhaps I could have worded my first post better - with exception to adding some 3D printed parts for protection, I have not changed any of the non-electrical parts on the old rc10. My intention is to build this as a new, separate, also functional car and avoid changing the old one so that both can be driven together. The chassis pictured in the 2nd photo is a very scratched up A-stamp, similar to what you suggested.
morrisey0 wrote: Mon Apr 17, 2023 7:32 pm Why would a priority be to run on 4S?
Elkcycles wrote: Mon Apr 17, 2023 7:18 pm If you run 4s, gear it down low, and run the lowest KV motor you can. Ideally, you could try an outrunner motor just to be different. Somewhere in the 800kv range should work.
The reason I was thinking to go with 4s is just that I have access to a lot of 4s Life batteries at the moment. The VESC that I was thinking of using has an adjustable throttle curve so if it's too much power I had theorized I could just limit it with the speed controller. However, now that I think about it the weight savings of going lower voltage would be substantial. Would 3s LiFe be more reasonable?

The VESC does have an ERPM limit of 150k, so 3s LiFe with anything under 2200Kv would mean I don't have to worry about that limit. The gear reduction of the transmission is already pretty low (2.6:1) so I don't want to drop the Kv too low. I'd like to be able to beat the old rc10 in a drag race!
Frankentruck wrote: Mon Apr 17, 2023 7:57 pm There's a lot of scuffed up chassis out there to use for runners. (oops, I missed that you already got one)

Are you drilling and tapping the holes? Print pilot holes then drill and tap. What material are you printing with?
I'm running PLA. I have access to other materials but sadly the printers I can use are limited in their abilities. For the first go I had tried to slightly overcut the holes and tap using the screw itself - clearly this was a mistake. I will try pre-tapping next and if that doesn't work then I'll purchase some copper inserts.
Dadio wrote: Tue Apr 18, 2023 6:45 am As above 4s lifepo will be undrivable in 1/10 , with a sensored motor I'd look at max 10.5 turn on 2s lipo , even that is overkill for a vintage chassis design and personally I max out at 13.5 turn as it just makes for more drivability .
I did basically the same thing with the Yokomo Dogfighter YZ-834b , look un the yo-clone-oh project thread I did , just about the only worthwhile material I found was CF Nylon , anything else and you'll be replacing parts every 2 minutes .
The probable cause for killing your brushed motor was overheating , a good lipo will give you maybe 30 min run time , in the old days you were lucky to get 5 min and even then motors got hot , running a brushed motor for 30 min will kill it fast , although 2s lipo is roughly the same voltage on paper as a 7.2v nicad in truth its way different , nicad battery's would drop voltage under load to maybe 6v , lipo battery's do not do this , also and fully charged 2s lipo is over 8v , a 2s lipo is more equivalent to 9.6v nicad in truth so what you are asking from the brushed motor is 6 times the run time with a 9.6v nicad , that's why they die .
Thanks for the comment about the burn-out - I didn't realize that running brushed motors for too long would overheat them so quickly. Whenever we ran the car when I was younger the motor would always get too hot to touch so I had assumed that it was normal for them to just run hot. For a bit of background, the old rc10 currently has a 20T motor and runs on a 7.2V 3500mah NiMh battery. I'll be more careful with it from now on but I don't feel the need to necessarily change it.

For the new car, as mentioned above, I'm somewhat restricted in material and will try to make this work with some carefully designed PLA parts. I've taken a look at some of your posts about 3d printing and will draw on what you've learned to make changes.

As far as motors go, if I'm looking at lowering the Kv and going with 3s Life then I'd really like something that's got sensors since the VESC does well with those. I've looked on amazon and hobbyking and there seem to be some options in this area. Would you recommend something like this motor?
https://hobbyking.com/en_us/turnigy-trackstar-1-8th-sensored-brushless-motor-1900kv.html

Lastly, the bulkhead managed to print well but I can already tell that it's too weak to really to the job. I've decided I'm going to redesign it with a lot more material around any holes that might be tapped, and I'll also probably fill the lower compartment that some people store the battery in for more strength. I didn't really see myself using that anyways. Some changes I plan to make to the next round of prints are to use organic supports and 4 layers of wall around every hole to prepare for tapping and add some more rigidity. I'll also modify the parts that I've already printed to make room for the transmission - this will involve lengthening the wheelbase by about 10mm.
1) Early Edinger RC10
2) 3D Printed RC10 (In Progress)

User avatar
Frankentruck
Super Member
Posts: 2566
Joined: Fri Feb 19, 2021 9:59 am
Location: Texas, USA
Has thanked: 1574 times
Been thanked: 1739 times

Re: RC10 Buggy but 3D printed

Post by Frankentruck »

I don't think PLA is going to give you the strength and flexibility properties you need for the suspension parts, for a runner that might get used enthusiastically.
Frankensteined RC10T3 / Franky Jr RC10GT-e (x2) / A+ stamp / Toy Story RC / Graphite replica / B1.5 BFG 5LTi / Clonewald / Hyper Hornet

"I love the effort, but it sure looks like you took the long way around to a tub again"

Dadio
Approved Member
Posts: 3868
Joined: Sun Apr 24, 2016 2:21 pm
Location: Guildford UK
Has thanked: 2280 times
Been thanked: 1993 times

Re: RC10 Buggy but 3D printed

Post by Dadio »

I've had good luck with tapping holes in printed parts , if your stuck with pla then use lube and cut slowly or the friction will soften or melt the plastic , generally if I'm tapping PLA ill do several holes at a time cutting only one turn in a hole then moving to the next to let it cool , it's laborious and time consuming but it works , otherwise you'll feel the plastic turning gooey as it gets hot .
If a jobs not worth doing then its certainly not worth doing well.
A problem shared is a problem halved but an advantage shared is no advantage at all.

JosephS
Super Member
Posts: 1530
Joined: Thu Mar 23, 2017 5:31 pm
Has thanked: 1003 times
Been thanked: 467 times

Re: RC10 Buggy but 3D printed

Post by JosephS »

Oblivious1984 wrote: Mon Apr 17, 2023 6:57 pm

Questions for you all
1) How bad is it to not have a differential? Has anybody else tried adapting one of these truck transmissions to work with a buggy before?
2) I'd like to ideally run this on a 4s Lifepo4 battery (so 14.4V). Is this too much? Should I aim lower?
3) What motor would you guys recommend running on something like this? Ideally I'd like to get a brushless motor with sensors, and from what I was reading it seems like something in the range of 3000Kv would be a good option for this system.

I'm trying to have this running within the next 6 weeks since I'd like to show it to my dad next time I see him.

Thanks for any feedback and I’ll post here when I’ve got decent updates.
For drag racing diff lockers are an upgrade. You'll lose performance when you need to turn, but it's not like anything will explode. I think just about everything has been tried when bolting stuff up to a gold pan. If it's a scratch runner you might as well just cut mountings into the chassis to make it work.

the 3s Life should be fine if that is what you have access to. I have been curious about them, but they are much more expensive then the Lipo
s typically used.

3000kv at 10v seems about right. Older RTR cars came with 30,000 rpm brushed motors so that doesn't seem out of line.

If you are good with 3d printing you may have better luck than I did. I was able to make bulky components, even wheels work ok enough. Any of the thinner parts, like steering knuckles or the outer side of front arms, would split apart along the grain. Rear arms, suspension mounts and bulkheads all worked fine in my very novice experience.

Dadio
Approved Member
Posts: 3868
Joined: Sun Apr 24, 2016 2:21 pm
Location: Guildford UK
Has thanked: 2280 times
Been thanked: 1993 times

Re: RC10 Buggy but 3D printed

Post by Dadio »

Just about all the suspension parts are free downloads on Thingiverse
If a jobs not worth doing then its certainly not worth doing well.
A problem shared is a problem halved but an advantage shared is no advantage at all.

mikea96
Approved Member
Posts: 3296
Joined: Thu Oct 01, 2009 4:34 pm
Location: Puyallup, WA
Has thanked: 183 times
Been thanked: 576 times

Re: RC10 Buggy but 3D printed

Post by mikea96 »

If the gold chassis you show is from the car you are referring to you can see the A stamp at the back of the chassis so I wouldn't worry to much about running it.

User avatar
morrisey0
Super Member
Posts: 1269
Joined: Wed Jan 13, 2021 2:45 pm
Location: Richmond, VA
Has thanked: 54 times
Been thanked: 1238 times

Re: RC10 Buggy but 3D printed

Post by morrisey0 »

Printing with PLA is like working with Portland Cement in the real world. As a base, it is easy to work with, but is not strong and does not have any other real redeeming qualities. But if you take that base material, and mix it with great fillers/strengtheners, it can become quite a great product overall. I work with a "tough" PLA material all the time, and I love it, and it is my go-to filament.

You can thread into the filament, but if there is enough surrounding material, you can use brass inserts and your threads will be super strong. In my experience, as long as there is about 6mm of material around a hole (3m in all directions), I can design a 4mm hole in the middle, and insert a brass insert for 3mm hardware.
I build RCs like people would have done back in the '90s ..................................... if they had 3D printers.

User avatar
Oblivious1984
Regular Member
Posts: 10
Joined: Wed Apr 12, 2023 1:27 pm
Has thanked: 8 times
Been thanked: 10 times

Re: RC10 Buggy but 3D printed

Post by Oblivious1984 »

JosephS wrote: Tue Apr 18, 2023 1:21 pm
For drag racing diff lockers are an upgrade. You'll lose performance when you need to turn, but it's not like anything will explode.

3000kv at 10v seems about right. Older RTR cars came with 30,000 rpm brushed motors so that doesn't seem out of line.
Glad to hear that I can run without the diff. I've found a motor from Castle that seems like it'll work at 2800Kv, so I'll likely order that in the next day or two.
Dadio wrote: Tue Apr 18, 2023 11:27 am I've had good luck with tapping holes in printed parts , if your stuck with pla then use lube and cut slowly or the friction will soften or melt the plastic , generally if I'm tapping PLA ill do several holes at a time cutting only one turn in a hole then moving to the next to let it cool , it's laborious and time consuming but it works , otherwise you'll feel the plastic turning gooey as it gets hot .
Tried your strategy with tapping - it worked like a charm! I have had a lot of parts arriving yesterday and today so this should be continuing to come together this week. Below is a photo of progress so far - the hinge pins are playing nice with the 3d prints which is wonderful. I still have to order 1/8 c-clips though. I also modified the bulkhead design to print better and that has showed major improvements in durability compared to the first run. I don't intend to use this with a rear wing so the new design is great for me.

Thing's I've noticed that have helped with print stability:
- Using at least 4 perimeter walls on everything
- Printing in layer orientations that won't split when threaded
- Using 20-40% infill
- Using organic supports where needed
photo4.png
1) Early Edinger RC10
2) 3D Printed RC10 (In Progress)

Dadio
Approved Member
Posts: 3868
Joined: Sun Apr 24, 2016 2:21 pm
Location: Guildford UK
Has thanked: 2280 times
Been thanked: 1993 times

Re: RC10 Buggy but 3D printed

Post by Dadio »

Minimum 4 walls is good , I often go to 7 or more as well as similar numbers of top and bottom layers , infill generally does not add any strength , the void space is actually what helps , in structural terms a tube is often more robust than a solid rod as it can flex better , the semi hollow space of infill makes a part act like tube as it can flex rather than snap , hard to get you're head around some of the structural stuff but as you've noticed like wood grain it's all about correct orientation on the build plate .
If a jobs not worth doing then its certainly not worth doing well.
A problem shared is a problem halved but an advantage shared is no advantage at all.

Post Reply

Create an account or sign in to join the discussion

You need to be a member in order to post a reply

Create an account

Not a member? register to join our community
Members can start their own topics & subscribe to topics
It’s free and only takes a minute

Register

Sign in

  • Similar Topics
    Replies
    Views
    Last post
  • RC10 B2/3 wheels Shapeways 3D printed as used at 95 Worlds
    by Welshy40 » » in RC10 Buggy Forum
    5 Replies
    1727 Views
    Last post by Welshy40
  • - RC10 Graphite: a runner with long printed arms -
    by Asso_man! » » in RC10 Buggy Forum
    32 Replies
    6804 Views
    Last post by jwscab
  • 3d printed 4-10
    by myfordcnc » » in RC10 Buggy Forum
    54 Replies
    7307 Views
    Last post by Dcast
  • 3D printed 1:1 car
    by R Cane » » in Off-Topic / Chit-Chat
    4 Replies
    739 Views
    Last post by Lowgear
  • 3D Printed RC Parts
    by Carknowledge101 » » in R/C Off-Topic / Chit-Chat
    17 Replies
    4103 Views
    Last post by Carknowledge101
  • Cool 3-D Printed Arm
    by limestang » » in Off-Topic / Chit-Chat
    3 Replies
    894 Views
    Last post by limestang
  • 3D printed suspension parts?
    by KidAgain » » in R/C Off-Topic / Chit-Chat
    9 Replies
    2222 Views
    Last post by KidAgain
  • 3D printed parts you would like to see made
    by mytimac » » in Printed Parts
    50 Replies
    10830 Views
    Last post by mytimac

Return to “RC10 Buggy Forum”

Who is online

Users browsing this forum: User avatarRogueIV and 49 guests