At last, a TopCat for Dan!
-
naushad
- Approved Member
- Posts: 404
- Joined: Sun Apr 15, 2012 1:00 pm
- Location: Cardiff, Wales, UK
- Been thanked: 12 times
Re: At last, a TopCat for Dan!
Dan what's happen to this...ended here with the suspense like a "to be continued" episode of Sunset Beach...
-
jamin

- Approved Member
- Posts: 1157
- Joined: Thu Dec 16, 2010 5:58 am
- Location: Suffolk, UK
- Has thanked: 3 times
- Been thanked: 28 times
Re: At last, a TopCat for Dan!
Great job on the chassis Dan, keep it polished, it looks ace and different to all the powder coating and anodising we all use. Good work, now get it built 
Team Losi: XX-CR | XXT | XXT-CR Graphite+ | XX4 | Street Weapon IWC Edition
-
DerbyDan
- Approved Member
- Posts: 1837
- Joined: Tue Sep 08, 2009 8:04 am
- Location: Northampton UK
- Has thanked: 2 times
- Been thanked: 19 times
Re: At last, a TopCat for Dan!
naushad wrote:Dan what's happen to this...ended here with the suspense like a "to be continued" episode of Sunset Beach...
Haha - sorry, i'm afraid the chassis polishing is THE only notably thing that has happened with this project.... so yes this project is very much 'to be continued'
I have actually dissmantled the shocks for this car & started to clean & polish these up too - but only using Brasso - they have come up quite nicely... but not to quite the lustre of the chassis. The rear shocks I have for this car are some used items I brought from ebay soon after purchasing the car... now I understand that the later standard 'silver' Schumacher shocks were 'plated' (I have a pair of these too where the plating is quite clearly flaking off) but these shocks that I have selected polish up just like the pair of front shocks - like raw aluminium, but are quite clearly a slightly different (darker) shade
@ Ben - the TopCat came with either a polished chassis or the dull silver annodised finish that this car obviously came with (what you got appears to have been 'luck of the draw') my original TopCat Bitd had the polished chassis (on which I discovered the joys of the effect of Brasso
My T.C Showroom; http://www.tamiyaclub.com/member.asp?id=28990
-
naushad
- Approved Member
- Posts: 404
- Joined: Sun Apr 15, 2012 1:00 pm
- Location: Cardiff, Wales, UK
- Been thanked: 12 times
Re: At last, a TopCat for Dan!
Great!
I wait with baited breath....looks to be a goodun though!!
Regards
Naushad
I wait with baited breath....looks to be a goodun though!!
Regards
Naushad
-
DerbyDan
- Approved Member
- Posts: 1837
- Joined: Tue Sep 08, 2009 8:04 am
- Location: Northampton UK
- Has thanked: 2 times
- Been thanked: 19 times
Re: At last, a TopCat for Dan!
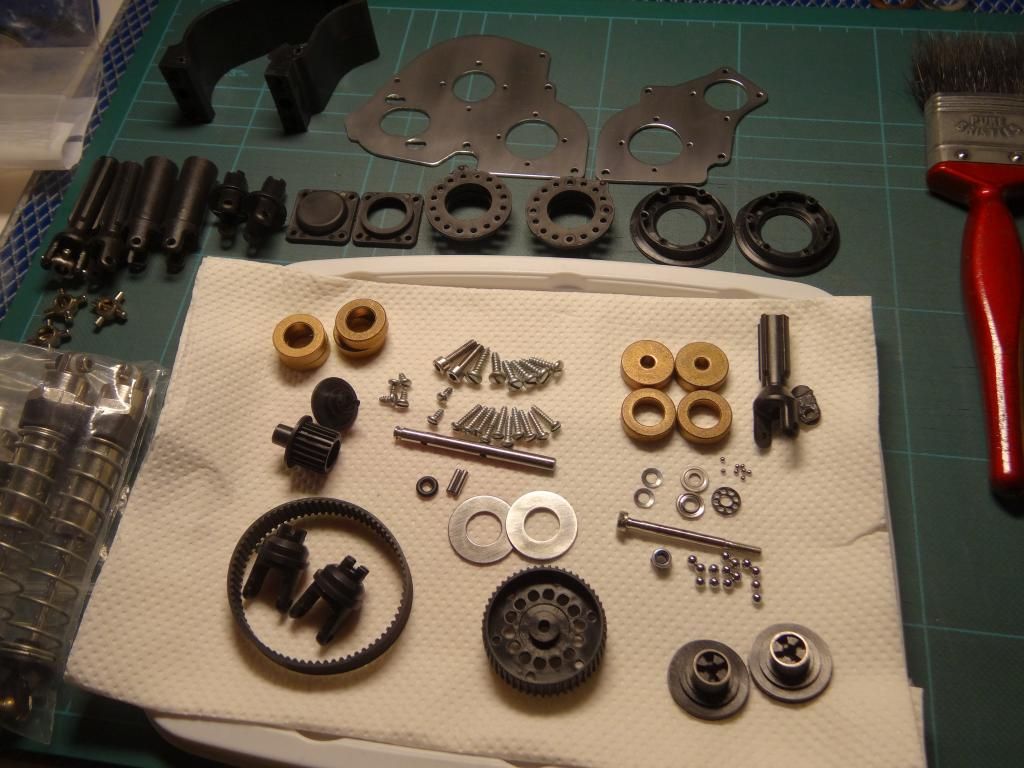
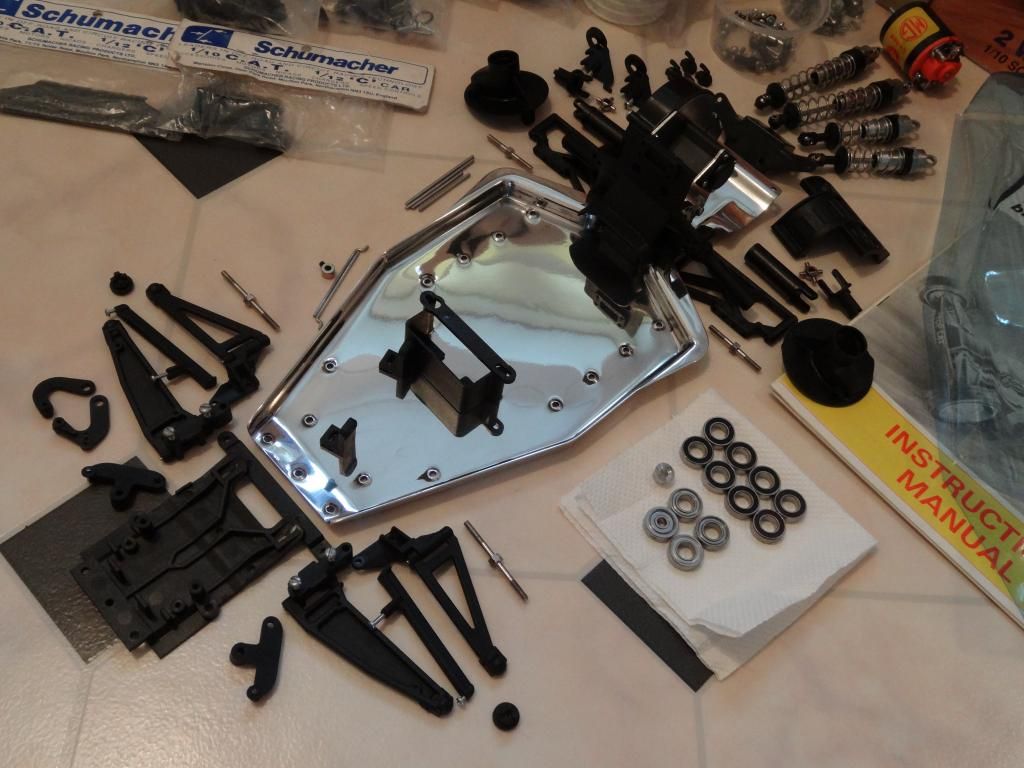
Managed to get a bit of work done on this over the Christmas break... I must admit that despite being an un-run car i'm finding the clean-up & re-build of this car very slow going. The car was obviously built by someone who had little idea on the best way of putting together a competition R/C car.... the diff & gearbox was completely filled with grease & all the plastic parts have been crudely cut from their sprues so extra trimming has been required to neaten up the mouldings, along with the extra flashing/imperfections that came as standard on these early Schumacher parts. Anyway here's some pics to show the build process so far;
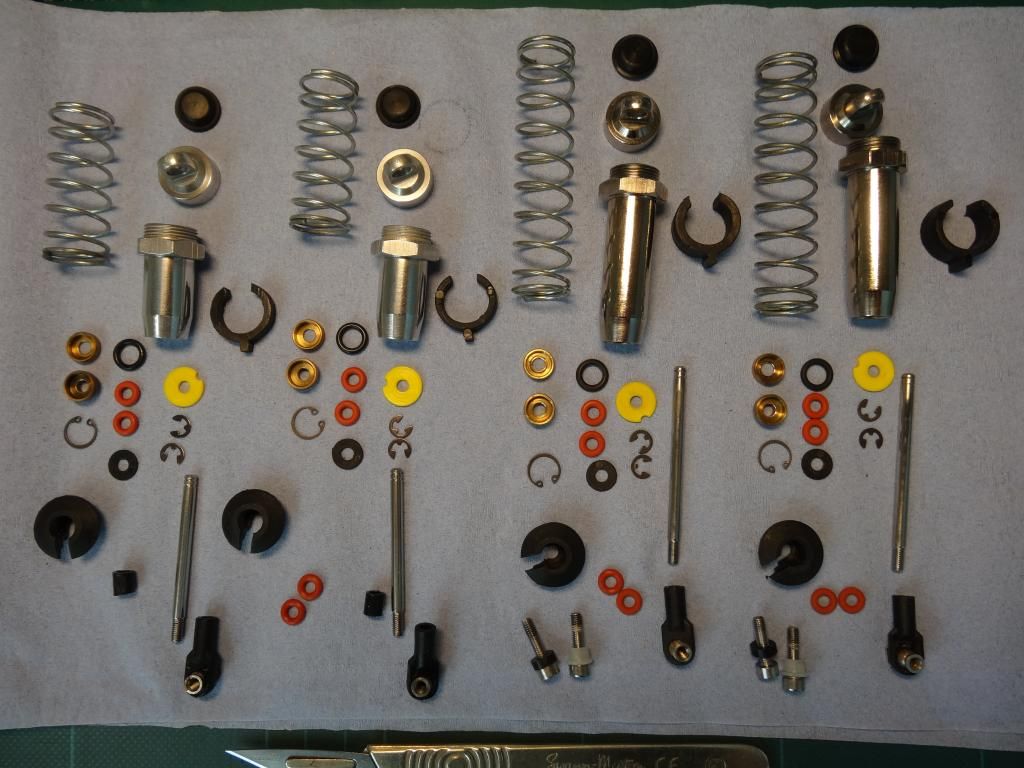
Shocks polished & parts cleaned ready for re-build with new 'red' seals
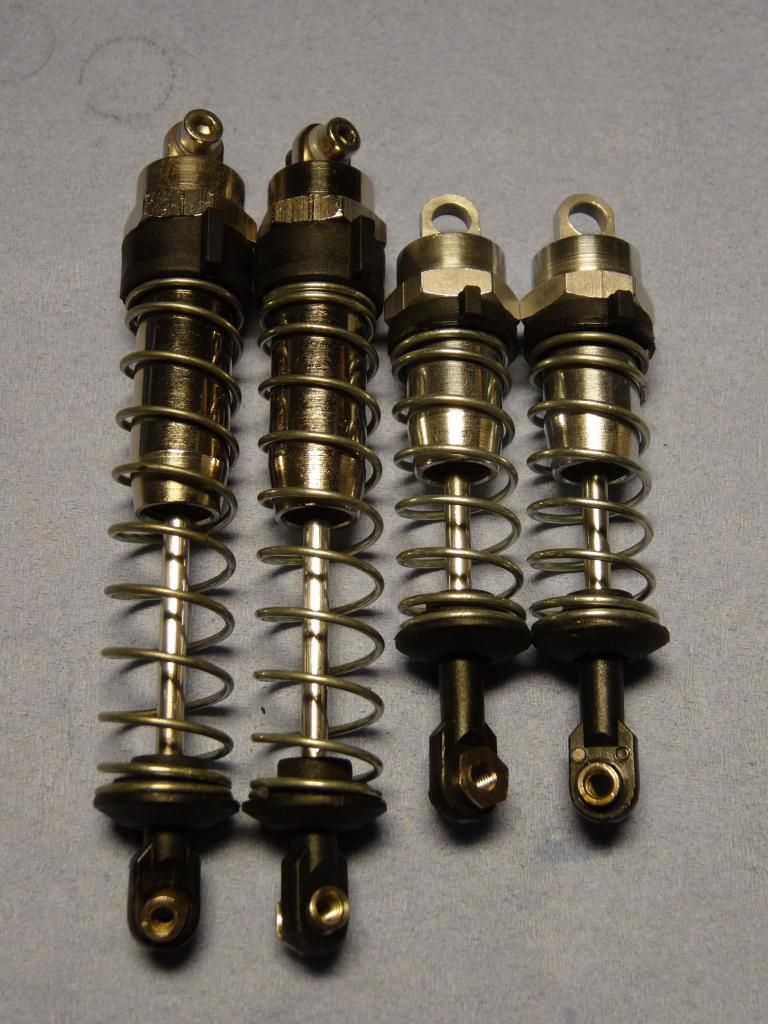
Shocks built - note my 'new' ebay rear shocks are the plated type so have a different level of 'sheen'
Gearbox & diff parts cleaned ready for re-build. The diff rings had just previously been superglued to the outdrives, but a dip in acetone cleaned off the old glue. I then honed & glued the rings to a sheet of wet & dry paper, then cut the paper with a scapal, using the washers/rings as a template - giving me perfect circles of the grippy paper on the rear of the rings for gripping against the diff outdrives - as per the original method described in the manual.
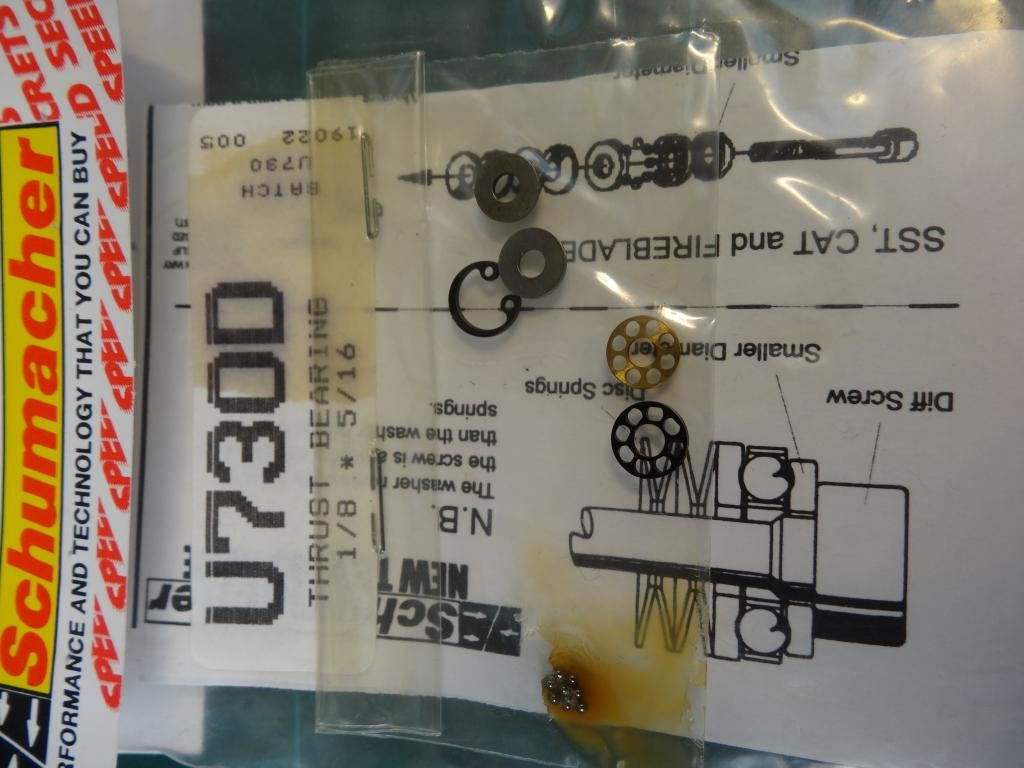
The original plastic cage for the diff thrust race had started to break-up, but I found a replacement thrust kit in a bunch of parts I had left over from my days when I drove either the Fireblade or Axis/SST cars - the cage part being brass rather than plastic and the same dimensions as the original, so my diff was re-assembled using the new part. I remember the plastic cage being weak Bitd & I remember buying an aftermarket parts where the thrust balls were held captive with a pressed brass cage (an SRM or Wasp part perhaps?)
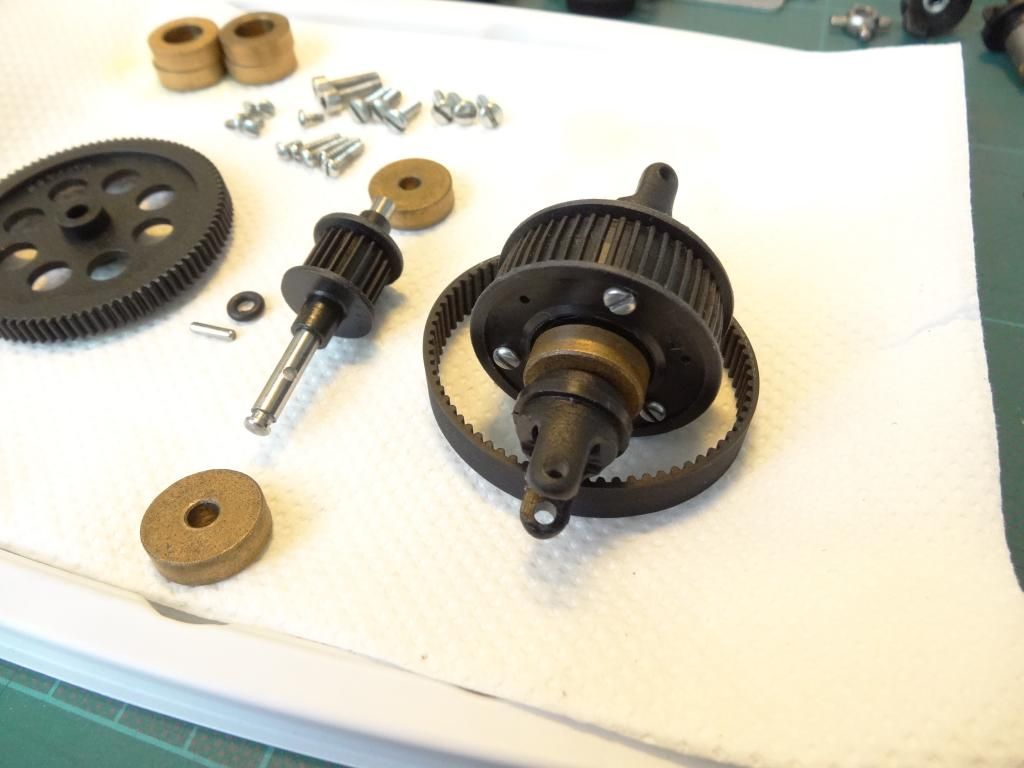
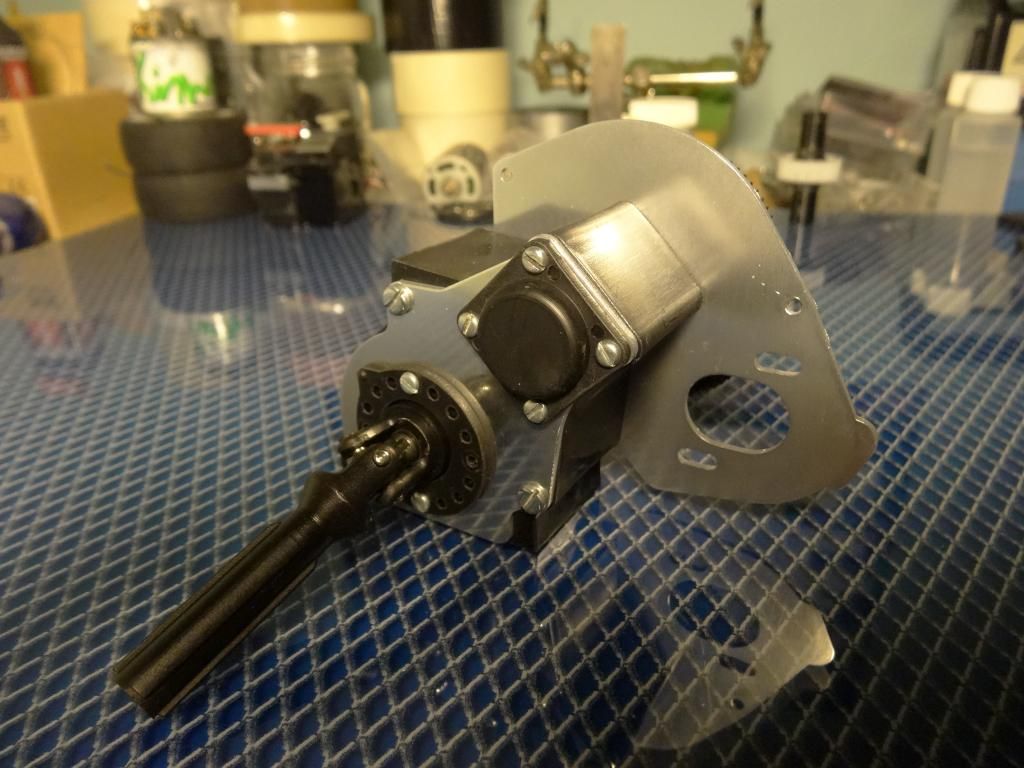
Diff & layshaft assemblies complete
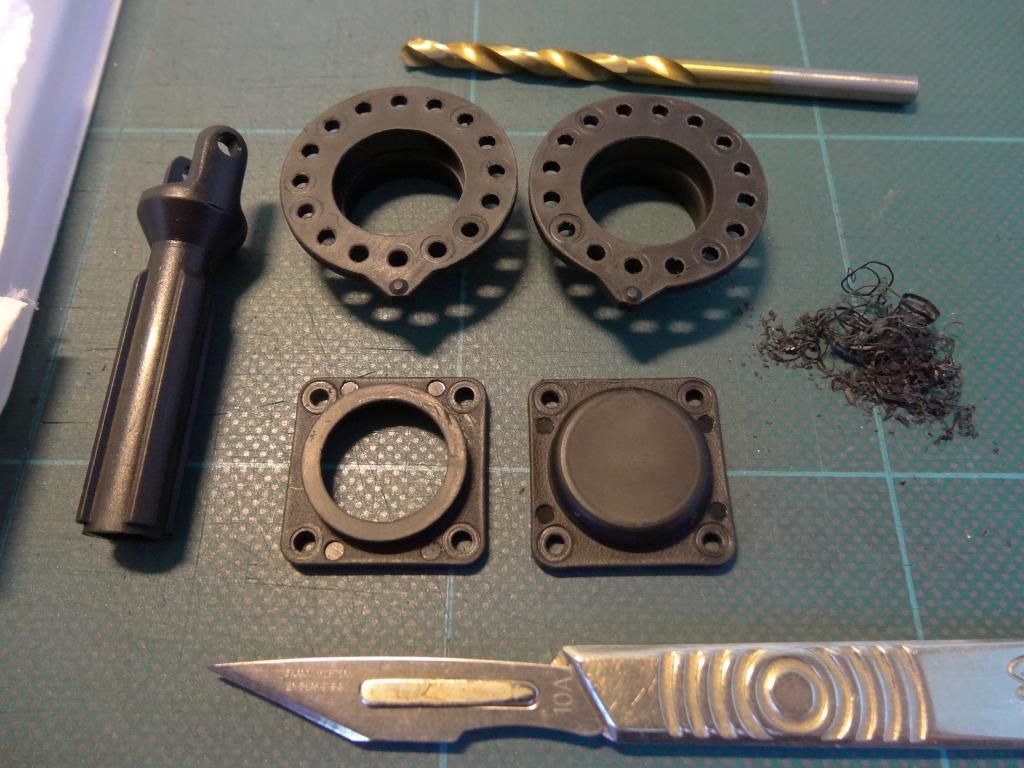
Trimming flashing from plastic parts is very time consuming!
Gearbox complete - I polished the ali side plates with varying grades of wet & dry paper, then a final buff with good ol' Brasso - they don't have quite the same 'lustre' as the chassis but it was the best I can achieve without using a mop that will 'dub'-over the edges.
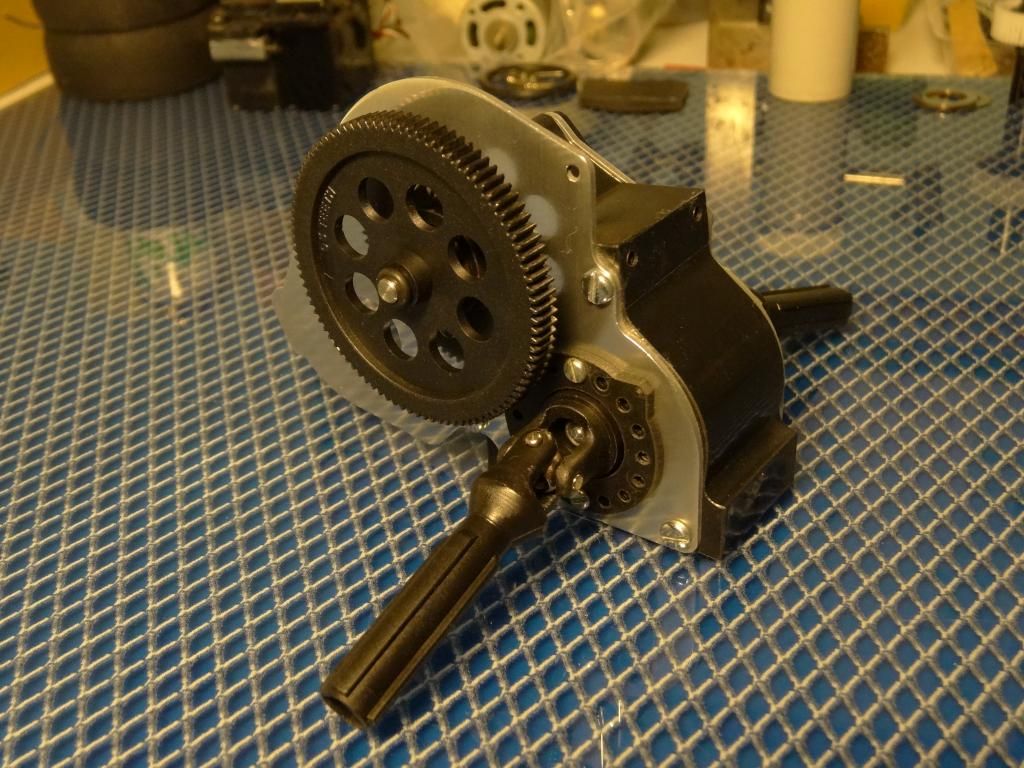
So, now onto the suspension parts & more plastic trimming!
Shocks polished & parts cleaned ready for re-build with new 'red' seals
Shocks built - note my 'new' ebay rear shocks are the plated type so have a different level of 'sheen'
Gearbox & diff parts cleaned ready for re-build. The diff rings had just previously been superglued to the outdrives, but a dip in acetone cleaned off the old glue. I then honed & glued the rings to a sheet of wet & dry paper, then cut the paper with a scapal, using the washers/rings as a template - giving me perfect circles of the grippy paper on the rear of the rings for gripping against the diff outdrives - as per the original method described in the manual.
The original plastic cage for the diff thrust race had started to break-up, but I found a replacement thrust kit in a bunch of parts I had left over from my days when I drove either the Fireblade or Axis/SST cars - the cage part being brass rather than plastic and the same dimensions as the original, so my diff was re-assembled using the new part. I remember the plastic cage being weak Bitd & I remember buying an aftermarket parts where the thrust balls were held captive with a pressed brass cage (an SRM or Wasp part perhaps?)
Diff & layshaft assemblies complete
Trimming flashing from plastic parts is very time consuming!
Gearbox complete - I polished the ali side plates with varying grades of wet & dry paper, then a final buff with good ol' Brasso - they don't have quite the same 'lustre' as the chassis but it was the best I can achieve without using a mop that will 'dub'-over the edges.
So, now onto the suspension parts & more plastic trimming!
My T.C Showroom; http://www.tamiyaclub.com/member.asp?id=28990
-
Groomi
- Approved Member
- Posts: 256
- Joined: Thu Aug 23, 2012 6:11 pm
- Location: Kent, UK
- Has thanked: 1 time
- Been thanked: 2 times
-
DerbyDan
- Approved Member
- Posts: 1837
- Joined: Tue Sep 08, 2009 8:04 am
- Location: Northampton UK
- Has thanked: 2 times
- Been thanked: 19 times
Re: At last, a TopCat for Dan!
Yup! - Its only a shelfer & I only have enough ballraces for the axles. Also If I had the ballraces for the gearbox I would also need to find the little sleeves that fill out the difference between the layshaft & the internal dia of the bearings... I don't have theseGroomi wrote:Oilites!
My T.C Showroom; http://www.tamiyaclub.com/member.asp?id=28990

Re: At last, a TopCat for Dan!
Nice work so far.
Those oilites.. yeah the first thing i bought for my Cougar when i was a kid was a bearing set
Those oilites.. yeah the first thing i bought for my Cougar when i was a kid was a bearing set
-
zoomzoombang

- Approved Member
- Posts: 73
- Joined: Thu Aug 20, 2009 12:35 am
- Location: HK
Re: At last, a TopCat for Dan!
Dan, did you polish the inside of the shocks too? If so what did you use? I have some cougar 2 shocks that I'd like to try and get more life out of. Brasso is the only one I could think of. Thanks.
-
DerbyDan
- Approved Member
- Posts: 1837
- Joined: Tue Sep 08, 2009 8:04 am
- Location: Northampton UK
- Has thanked: 2 times
- Been thanked: 19 times
Re: At last, a TopCat for Dan!
Must admit I ran my original TopCat with the oilites for quite a while before getting the bearings - I blew all my spare pocket money on a second hand Speedmaster Gold Star ESC just to get it up & running (my previous car - a Mardave Meteor, still ran a mechanical speedo!) My car racing was run on a real shoe-string budget so priorites were more about what kept the car going rather than optimum performance. However I think the next purchase was the bearing set as I knew what a difference they could make.CAT3K wrote:Nice work so far.
Those oilites.. yeah the first thing i bought for my Cougar when i was a kid was a bearing set
PS; I still have that Gold Star ESC, it will find its way back into this TopCat & be connected up to an MG Orange dot motor that I found for sale - the MG was the first motor that I installed into the original TC
@ zoomzoombang - no I didn't polish the insides of the shocks - just the visible faces. I would have thought a good clean up & rebuild with fresh oil & seals is all that you will need - if the bores are scoured then fine wet & dry paper rolled into a tube is what you'll need
My T.C Showroom; http://www.tamiyaclub.com/member.asp?id=28990
Re: At last, a TopCat for Dan!
I've managed to find a Nosram International for my Topcat. It was the top spec speedo i could never afford bitdDerbyDan wrote:
Must admit I ran my original TopCat with the oilites for quite a while before getting the bearings - I blew all my spare pocket money on a second hand Speedmaster Gold Star ESC just to get it up & running (my previous car - a Mardave Meteor, still ran a mechanical speedo!) My car racing was run on a real shoe-string budget so priorites were more about what kept the car going rather than optimum performance. However I think the next purchase was the bearing set as I knew what a difference they could make.
PS; I still have that Gold Star ESC, it will find its way back into this TopCat & be connected up to an MG Orange dot motor that I found for sale - the MG was the first motor that I installed into the original TC
I probably have those sleeves and bearings kicking around here somewhere Dan, if you ever decide the oilites just won't do
Paul.
-
DerbyDan
- Approved Member
- Posts: 1837
- Joined: Tue Sep 08, 2009 8:04 am
- Location: Northampton UK
- Has thanked: 2 times
- Been thanked: 19 times
Re: At last, a TopCat for Dan!
So I had a little time over the weekend to take some pre-assembly pictures... all the plastic parts have been cleaned & gone over with a sharp scapal blade to remove any unsightly flashing to ensure correct assembly & free moving of parts.
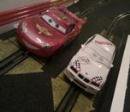
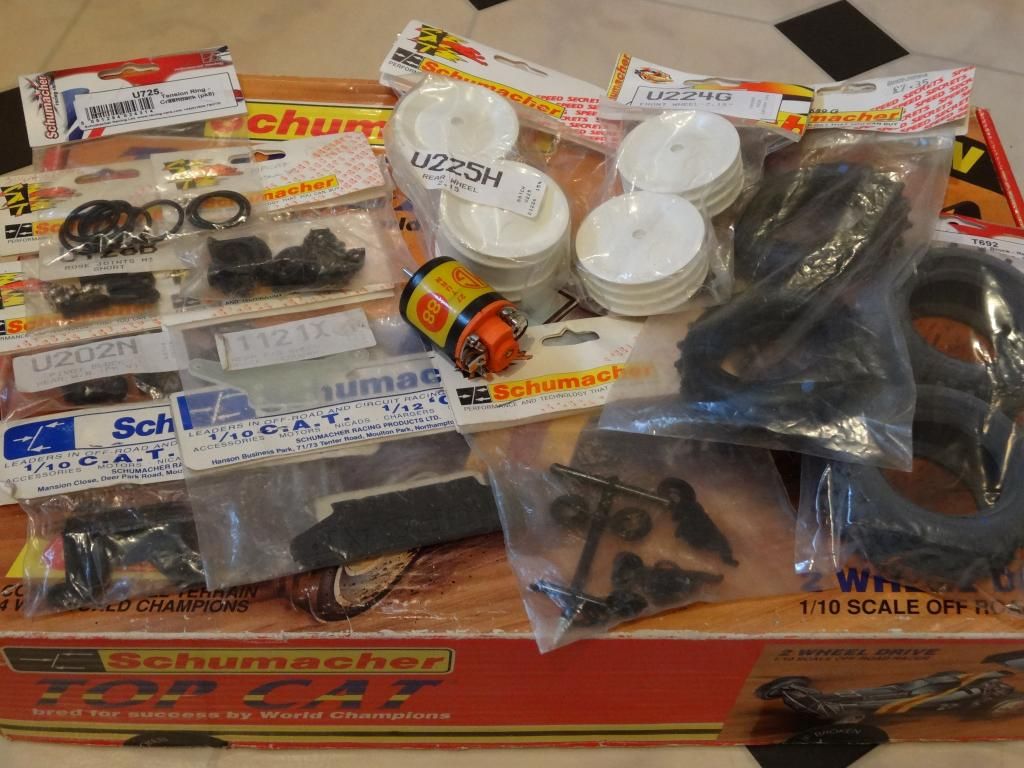
The box is what my original TopCat came in all those years ago, it survived through being the storage box for my Scalextric cars
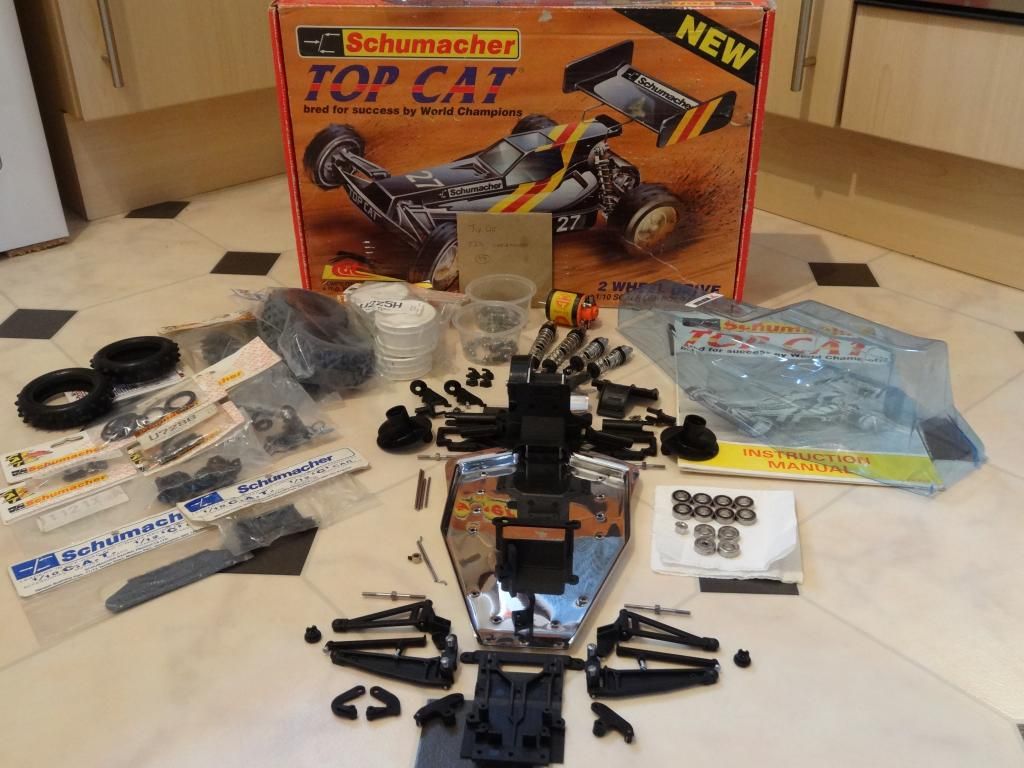
Some NIP parts inc a front bumper & wing mounts/buttons (Thanks to DennisM for the mounts) The MG Orange dot motor was the first 'proper' (non silvercan RS540) race motor that I owned Bitd - this one I found on ol'ebay, it appears to have had little run time & in great condition so will be perfect for this build. Likewise I have opted for the 2" block rear tyres which were 'the' tyres to run on the mixed carpet + polished wood floor track at the club where I raced the original car
The box is what my original TopCat came in all those years ago, it survived through being the storage box for my Scalextric cars
Some NIP parts inc a front bumper & wing mounts/buttons (Thanks to DennisM for the mounts) The MG Orange dot motor was the first 'proper' (non silvercan RS540) race motor that I owned Bitd - this one I found on ol'ebay, it appears to have had little run time & in great condition so will be perfect for this build. Likewise I have opted for the 2" block rear tyres which were 'the' tyres to run on the mixed carpet + polished wood floor track at the club where I raced the original car
My T.C Showroom; http://www.tamiyaclub.com/member.asp?id=28990
Re: At last, a TopCat for Dan!
Looks ready to assemble now It'll be almost like building a new kit.
Have you decided on a paint scheme?
Paul.
Have you decided on a paint scheme?
Paul.
-
jamin
- Approved Member
- Posts: 1157
- Joined: Thu Dec 16, 2010 5:58 am
- Location: Suffolk, UK
- Has thanked: 3 times
- Been thanked: 28 times
Re: At last, a TopCat for Dan!
Great display of parts Dan, and just love that polished chassis! Are you going to do it box-art colours? I think that would look cool
Team Losi: XX-CR | XXT | XXT-CR Graphite+ | XX4 | Street Weapon IWC Edition
Create an account or sign in to join the discussion
You need to be a member in order to post a reply
Create an account
Not a member? register to join our community
Members can start their own topics & subscribe to topics
It’s free and only takes a minute
Sign in
-
- Similar Topics
- Replies
- Views
- Last post
-
- 11 Replies
- 1403 Views
-
Last post by markt311
-
- 4 Replies
- 2248 Views
-
Last post by Heffay
-
- 14 Replies
- 2152 Views
-
Last post by Peakey
-
- 93 Replies
- 18638 Views
-
Last post by Coelacanth
-
- 51 Replies
- 9164 Views
-
Last post by mikea96
-
- 15 Replies
- 2151 Views
-
Last post by Bormac
-
- 7 Replies
- 2633 Views
-
Last post by Synergy
-
- 7 Replies
- 1596 Views
-
Last post by RCveteran
Who is online
Users browsing this forum: No registered users and 0 guests