My new litter of.....
My new litter of.....
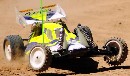
.....CATs. Finally, got my SWB repro shells from Mr Lexan which I fitted to the SWB from my previous post. Also, on the verge of finishing my NIP XLS - just waiting for the new shocks to arrive which will replace the existing ones (which need a polishing!). Hope you enjoy the pics:
Re: My new litter of.....
Wow.........what a nice Cat........ 
Atomic carbon S44,S4,S2,CR2,Ultra 410,SS4.

Re: My new litter of.....
Thanks, Chris. Must admit to never being overly confident in the painting department (was never any good at art at school). However, was thinking of doing a boxart for the SWB as I've never seen one done that way before (other than on the box, that is  ). Might have to wait for the weather to improve over here as the mrs won't let me do any painting indoors.....!
-
Bormac
- Approved Member
- Posts: 3113
- Joined: Wed Sep 05, 2007 3:52 pm
- Location: CENTRAL COAST, NSW AUSTRALIA
- Has thanked: 21 times
- Been thanked: 11 times
Re: My new litter of.....
Lucky you Charles! There aren't many people that own such nice old Schueys (even me-LOL). Looking forward to seeing the SWB in full painted trim too. 
-
QuackingPlums

- Approved Member
- Posts: 85
- Joined: Mon Dec 21, 2009 8:21 am
- Location: Oxfordshire, UK
Re: My new litter of.....
Gorgeous! 
I just got home from the opening of a new raceway in the east midlands and met up with some of my old racing buddies from 20 years ago - some of the old cars they brought with them brought tears to my eyes! One of them had his old XLS, ProCat, Cougar, Shotgun and two Losis - all in the same racing colours (well, exact same shells actually!)he had when we were racing... all running! Next time I see him I'm gonna have my camera with me!
I just got home from the opening of a new raceway in the east midlands and met up with some of my old racing buddies from 20 years ago - some of the old cars they brought with them brought tears to my eyes! One of them had his old XLS, ProCat, Cougar, Shotgun and two Losis - all in the same racing colours (well, exact same shells actually!)he had when we were racing... all running! Next time I see him I'm gonna have my camera with me!
-
uzzi
- Approved Member
- Posts: 374
- Joined: Tue May 27, 2008 12:29 am
- Location: Perth, Western Australia
- Been thanked: 1 time
Re: My new litter of.....
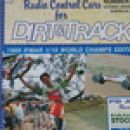
The box art reminds me of Team Haskell colours in F1 but should be very do-able.....I thought of doing that too when I was restoring my SWB. Point of interest, if you look carefully at the picture you may notice it has Brimod shocks on it. This was a bit of a surprise considering Schumacher produced their own shocks. As far as I know Brimod did come out with aftermarket option shocks for the CAT but this was on the original box....hmmm. Charles you do not need to be good in art to lay a decent paint job....just a keen eye for detail and know a few tips. I am by no means a gun sprayer but to do any decent paint jobs the basics are still there. Once you have done a few your confidence will grow and you will want to try new stuff. Practise on a few lexan scraps or old plastic containers first if you wish.
Preparation is the key to any forms of painting and RC shell painting is no different. I prefer to cut and trim my shells out first this allows me to sometimes visualise where certain lines go but also ensure everything fits well. It is very difficult to trim a shell once it is painted and you may also scratch up your nicely painted shell. It is really a personal choice as some peeps will paint the shell first because it is easier to handle and less masking when it is not cut up. When it comes to cutting I normally start with trimming of the bottom sections first…use a straight scissor to cut these lines. Use masking tape as a guide if the cut lines are not evident. For any large to semi large curved sections, I prefer to use a craft knife (the ones with the replaceable blades) with a #5 blade with the tip broken off (stops the blade from wandering). No need to press hard on the shell, just score the desired line and snap the lexan strip off (use a bit more force for the thicker 1/8 shells). For smaller holes use a reamer and hack the rest off with curved scissors. No need to be too exact I normally finish things off with a drum sander on a Dremel. The next step is to wash the body shell, use normally liquid dishwashing to remove any finger prints and any mould release agents that may still be on the shell….dry with a lint free cloth after. When it comes to masking tapes, each country has different brands that are good so I will not go into which brand is better. However, if you can get Tamiya masking tape they are pretty good. I normally use them for fine details and use standard industrial masking for covering large surfaces. First set of mask to go on are the window mask, if there are not included with the shell you have to do your own. There are a number of ways to do this but to keep things simple I will stick with the masking tape method. Cover the outside of one of the windows first and trace the outline of the window using a sharpie marker (hold it to a light if you can‘t see properly). Peel the mask off and place it on a cutting mat. With a steady hand, cut the window mask out and place it on the shell. This will be for the opposite window you have just traced…..repeat for the rest of the masks.
Next step is to slightly scuff the insides of the shell with fine wet and dry. For shelf queens it may not be necessary but if you handle the cars a lot it would be recommended. Good paints will adhere a lot better but I have also seen those peel off as well despite proper prep and cleaning of the shell. Some will argue that it is not required but I tend to do mine as a precaution. After all you have nothing to lose by doing it. When it comes to masking rub down hard on the applied mask….this is of utmost importance to ensure no paint creep (esp around tight curves). Another thing about masking tapes…no matter how good the brand, if you want a really crisp edge do not rely on the manufacturer’s edges. I prefer to lay a strip of masking on the cutting mat and use a steel rule for a guide cut the edge out my self. Now that you have a clean shell to work with, the patterns, colours and lines you choose are totally yours to choose of course. I like to mount the shell back on the car to visualise what will work and what will not. You might get your inspiration in other ways. The CAT is a pretty curvy car so long swoopy designs work rather than any blockish designs. With colours bear in mind certain colours work better than others check out real race teams for some inspiration but remember darker colours are hard to spot out in the RC track. So what might work on a real car might not necessarily work on an RC car I prefer to use a lot of white, simple lines and flouros for my racing colours. Simple lines because I know it will get hacked so no need to put too much effort into the shell…as long as it still looks good and stands out.
As far as spraying goes I will stick with rattle cans…you can get a lot more detail with an airbrush obviously but that would be for another day. Weather is another key to getting good results, obviously paint flows a lot better when it is warmer. The trick with rattle cans is to heat the cans up slightly to get the pressure up. You can do this by sitting them semi submerged in a pot of warm water (not boiling water!). Shake the cans for approximately 2 minutes and you should be pretty much ready. Some simple tips here,
• Hold the can about 7-10 inches away from the area you are spraying.
• Start the spray before the shell and hold the spray till after you have gone past…do not stop mid spray.
• First spray is very important keep it like a light mist (like it has barely any paint coming out) to seal the masking tape.
• Let each coat dry properly first, laying a coat in between the TV commercials are a good guide (15-20 min).
• Several light coats are better than one heavy coat.
• Check the masking after every shot.
• Check the paint coverage after each shot by holding the shell to a light
• If there are areas that are light after a shot let that coat dry first before going back on it.
• Some people give a day to dry on each change of colour but I normally just keep on going if I can. Sometimes it cannot be helped so it depends on the intricacy of your design.
• Once all coats completed let it dry overnight minimum…the longer the better esp with heavy coats.
A rule of thumb with colours is to spray the darker colours first but to do the boxart Schumacher you might want to mask of the striped area (the outermost lines) and roundel first. Spray the white well to ensure good coverage then back it with silver paint before you do the stripes. This would ensure the darker colours will not be seen through the white. Take your time with the prep work and don’t try to rush things. If you get a bit of overspray, this can be removed with nitro fuel on a soft rag. Hope this long winded blurb helps…any questions ask away.
Re: My new litter of.....
Chris - thanks a lot for that excellent post/tutorial on painting. I shall print if off and have it by my side as I paint the SWB.
Btw - don't know if anyone has noticed, but there are two different boxarts on the SWB box. The one on the front of the box is not the same as the one on the side. I'll post pics up once I've had the opportunity to take them. If anyone has any pics of the boxart they can post, please do.....
Btw - don't know if anyone has noticed, but there are two different boxarts on the SWB box. The one on the front of the box is not the same as the one on the side. I'll post pics up once I've had the opportunity to take them. If anyone has any pics of the boxart they can post, please do.....
-
mrlexan

- Approved Member
- Posts: 6250
- Joined: Wed Dec 06, 2006 6:49 pm
- Location: Upstate SC
- Been thanked: 12 times
Re: My new litter of.....
Body looks good on that SWB. Glad I could help (I am already out of them).
I am not here cause I am playing photographer and on my mountain bike.
www.gojammedia.com
www.gojammedia.com
-
mrlexan
- Approved Member
- Posts: 6250
- Joined: Wed Dec 06, 2006 6:49 pm
- Location: Upstate SC
- Been thanked: 12 times
Re: My new litter of.....
uzzi wrote:Any more to come Mr Lexan? with wings?
I am not here cause I am playing photographer and on my mountain bike.
www.gojammedia.com
www.gojammedia.com
Create an account or sign in to join the discussion
You need to be a member in order to post a reply
Create an account
Not a member? register to join our community
Members can start their own topics & subscribe to topics
It’s free and only takes a minute
Sign in
Who is online
Users browsing this forum: No registered users and 9 guests