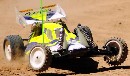
Hey all, I'm new here on the forum.. but not R/C. I was big into it in the mid 80's/early 90's and now after 20 years have got the bug again you could say. I had no idea there was a vintage R/C following until recently, so I dusted off the old collection and started going through everything. As my first project I'm going through the old Mugen Bulldog I got from a friend 20+ years ago. The car had hardly been ran, probably because there were a few errors made in the assembly process, so many things (like all of the diffs) didn't work at all.

I guess the manual isn't really the greatest. Anyway, I have fully torn the car down, cleaned everything up, and am now starting the reassembly process.
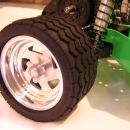
I have a question on the manual speed control resistor. One of the black wires on the resistors has come loose over the years and I just want to verify the correct placement before I resolder it. See attached photos.
Is is just the one white wire in the back and 2 black wires on the front one on each side? The resistors are twisted together and soldered where the white wire is, but I'm not sure that's how it was originally. I'm probably going to replace that wiring too as it appears to have got a little hot at some point in the past. There's even a scar on the center housing to prove it.

My friend did some weird things on this car that I'm having to undo to make completely original, like wiring the servo/receiver power directly to the main battery under the SC. I'm pretty sure that's not mentioned in the manual.

I'm thinking that's why the resistors got a little too hot perhaps.
Any tips/advice would be appreciated, thanks!
I've added a few more before/after pics to show the progress.
thanks,
Mike