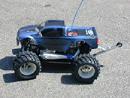
heres a pic of a raceco chassis i picked up from shodog awhile back. all the areas where a countersink would be are flat and i assume its up to the builder to countersink the holes.
do i just use a countersink on what i assume are plastic sleeves molded into the foam composite?
Do you have access to a dremel or similar drillpress?? One which has ability to clamp work down would be a bonus. Than matchup the bevel on your flathead with the counersink you will be using.
I'D use medium to slow drill speed and slow feed imput, don't force the counter sink, GOOD LUCK LMK RESULTS, GRIZZLY
IT'S BEEN A LONG, HARD ROAD. I HAVE RISEN FROM THE ASHES.
Those holes look like fiberglass grommets. The key is to use a real countersink cage with the right degree of angle and use a pilot shaft. at the bare minimum use a counter sink bit with a drill press. don't try to do it with a drill bit as it is the wrong angle.
With a drill press you can set the depth you need and all the holes would be consistant. you can do it by hand, but it will take alot longer, and Ide do a little at a time and try the screw till it sits flush. As long as you go slow and stay perpendicular you would be fine. Best to do with a press though.
badhoopty wrote:i guess i'll just not put that one together for awhile.
i really need to buy a house so i can buy some serious garage hardware.
I just tried that, and I got the house, but the garage hardware still isnt there. the big ass tool box I wanted, still not here. A stand up drill press, nowhere to be found. A nice Mill and lathe, isnt even a thought at this point.
Damn house isnt cheap. Buy the toys before you get a house!
I could always fix you up with a hobbydrill press that you mount your drill in, install your countersink. IT HAS A SMALLwork plaatform that adjust to height, angle. It'a what i used before I grabbed the dremel set. LMK IF IT'S OF ANY USE TO YOU. I'M sure a deal could be struck, GRIZZLY
IT'S BEEN A LONG, HARD ROAD. I HAVE RISEN FROM THE ASHES.
I countersank my CF chassis using #8 drill bit. Using bare hand with a slight pressure. Do it slowly so you have a nice cut and can measure if its sunk enough. You can try #10 drill bit for the typical rc10 counter sunk screws (those big ones). Before doing, you can compare the degree of between the screws and drill bit.
Hey guys, I just got a hot trick chassis for a build I am going to do and it seems it is missing holes for stuff like the servo. Am i supposed to drill some out?
Last post
I too love the shoo goo. It's amazing...until it's time to remove it! I have replaced gears with the servo still stuck to the chassis cause I didn't want to fight it! Lol
This was a recent Ebay win, all I saw at time of bidding was a nice A chassis, I didn't notice the holes that were obvious to see on further inspection :roll: , how does that happen :?: :? Anyway I guess they're for Nerf bars, the distance between...
Last post
proline made white plastic nerf bars, to go along with their front and rear bumpers. but i don't remember them being quite that long.
Rebuilding this gold pan I bought used. Does anyone have ideas on what the 2 side holes were used for? Not sure thread size yet. 8-32 screw pretty sloppy.
Last post
Maybe nerf wings or nerf bars-
Agreed.
Also could have been used as offroad body mounting.
I firmly believe that RC is the mother of invention. People get REALLY creative in this hobby/sport.
Hi all, as this is my first gold pan. I'm after a bit of advise on what I've actually got and what it needs.
IMAG0017.jpg
IMAG0022.jpg
IMAG0020.jpg
IMAG0019.jpg
IMAG0023.jpg
IMAG0026.jpg
IMAG0024.jpg
IMAG0028.jpg
IMAG0029.jpg...
Last post
Thanks guys.
So considering the condition of the car and the fact that it is such a mish mash, in your opinions, would you chase the correct parts? I would have no idea on how hard it would be to find them.
It would be nice to have it as period...
So I fully remember back in the day when guys took their gold pans and cut all kinds of holes in them to reduce weight. I had a buddy who raced a lot and I watched him do it. Thank god I wasn't much of racer so I never vandalized my gold pan in that...
Last post
I always thought these people should spend less time driling and more time driving. :lol: