Custom parts for RC10…
-
justinspeed79
- Approved Member
- Posts: 1679
- Joined: Sun Aug 13, 2006 10:54 pm
- Location: Houston Texas
- Has thanked: 2 times
- Been thanked: 5 times
I agree, super nice job. It certainly rivals any parts I would CNC. Outside of laser or water jet, the advantage you have in your manual method is the ability to cut sharp inside corners. Since the typical smallest CNC mill bit is 1/16", any inside corners I CNC would always be a 1/32" in radius. It may not seem like much, but you can see it.
Sometimes a little manual elbow grease is worth the final finish. Nice job!
-Alex
Sometimes a little manual elbow grease is worth the final finish. Nice job!
-Alex
My Collection: http://www.tamiyaclub.com/showroom.asp?id=5861
My Project Pics: http://www.InetRC.com/Album/
My AYK Museum: http://www.InetRC.com/AYK/
My Project Pics: http://www.InetRC.com/Album/
My AYK Museum: http://www.InetRC.com/AYK/
-
m_vice
- Approved Member
- Posts: 1312
- Joined: Fri Feb 23, 2007 12:46 pm
- Location: Dallas, TX
- Been thanked: 2 times
Yep, one of the reasons I decided to go manually with the parts (other than $) was because of the inside corners. I don’t think I have the time at the moment to create more parts to sell. The only way would be to make some new design and make it in a CNC. I think the only way I would do this is if at leas I can brake even in the $.
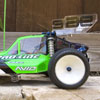
Here is my other RC10, custom chassis and towers. I used an RC10GT rear bulkhead, RC10T rear Hub with RC10B3 rear CVD bones and RC10B4 wheel axles. With this rear setup I can use B3 wheels and it gives me a wider rear ride than standard but still legal to race. In the front I have B4 block carriers with B4 inline steering blocks this give me a wider front. This all connects to a B3 steering servo saver with the RC10T screws.
Hope you like it.
- Attachments
-
- RC10X-01.jpg (38.22 KiB) Viewed 2571 times
- RC10X-01.jpg (38.22 KiB) Viewed 2571 times
-
- RC10X-02.jpg (53.79 KiB) Viewed 2571 times
- RC10X-02.jpg (53.79 KiB) Viewed 2571 times
-
- RC10X-03.jpg (39.18 KiB) Viewed 2572 times
- RC10X-03.jpg (39.18 KiB) Viewed 2572 times
-
- RC10X-04.jpg (45.52 KiB) Viewed 2571 times
- RC10X-04.jpg (45.52 KiB) Viewed 2571 times
-
- RC10X-front.jpg (59.73 KiB) Viewed 2571 times
- RC10X-front.jpg (59.73 KiB) Viewed 2571 times
-
- RC10X-front02.jpg (36.56 KiB) Viewed 2571 times
- RC10X-front02.jpg (36.56 KiB) Viewed 2571 times
-
- RC10X-rear.jpg (67.4 KiB) Viewed 2571 times
- RC10X-rear.jpg (67.4 KiB) Viewed 2571 times
-
- RC10X-rear02.jpg (35.92 KiB) Viewed 2571 times
- RC10X-rear02.jpg (35.92 KiB) Viewed 2571 times
-
- RC10X-rear-hub.jpg (36.47 KiB) Viewed 2571 times
- RC10X-rear-hub.jpg (36.47 KiB) Viewed 2571 times
-
- RC10X-body.jpg (33.49 KiB) Viewed 2571 times
- RC10X-body.jpg (33.49 KiB) Viewed 2571 times
-
templeofspeed

- Approved Member
- Posts: 2102
- Joined: Tue Aug 01, 2006 10:02 pm
- Location: Central Ohio
- Has thanked: 3 times
- Been thanked: 33 times
-
justinspeed79
- Approved Member
- Posts: 1679
- Joined: Sun Aug 13, 2006 10:54 pm
- Location: Houston Texas
- Has thanked: 2 times
- Been thanked: 5 times
-
Synergy

- Approved Member
- Posts: 1787
- Joined: Sat Dec 23, 2006 5:57 am
- Location: North East England
- Has thanked: 127 times
- Been thanked: 72 times
There are some top shelf cars on this site assembled from after market parts but to create something as individual and professional as these is ubecool 
Experience is that marvelous thing that enables you to recognize a mistake when you make it again.
Here's my TC Showroom
http://www.tamiyaclub.com/showroom.asp?id=18028
Here's my TC Showroom
http://www.tamiyaclub.com/showroom.asp?id=18028
-
scr8p

- Administrator
- Posts: 16816
- Joined: Tue Feb 07, 2006 9:46 pm
- Location: Northampton, PA
- Has thanked: 36 times
- Been thanked: 1318 times
-
m_vice
- Approved Member
- Posts: 1312
- Joined: Fri Feb 23, 2007 12:46 pm
- Location: Dallas, TX
- Been thanked: 2 times
Thanks guy I appreciate the comments.
I am still working on some other cars here is my list:
- Original RC10 disassembled.
- RC10 Team Car disassembled.
- RC10T in parts.
- RC10 B2 disassembled.
- RC10 B3 disassembled.
And I think I have all the parts new in bags or out of the bags but new.
The thing is I dotn have time at the momento to work on them. But it is probable going to be soon because you other post and pics makes me want to get them all out ans start building. THANKS FOR THE FORUM.
Here is a link to some pics of an old RC10 I had.
http://www.geocities.com/mvice22/RC_pro/OldRC10/old_rc10.htm
-
Tadracket

- Approved Member
- Posts: 1302
- Joined: Sun Feb 18, 2007 10:57 pm
- Location: Southport North Carolina
One thing I like about vintage, it is different than what everyone else has ('cept this forum  ) 'cause most are gone. I got into the T-Maxx craze a few years ago and everyone started buying the same aftermarket parts and they all started looking the same. To custom make your own parts is awesome. You truley have one of a kind artwork there.
He's an idiot. Comes from upbringing. His parents are probably idiots too.
-
AYKBOBCAT
- Approved Member
- Posts: 585
- Joined: Wed Nov 22, 2006 2:32 pm
- Location: Bas St-Laurent, Canada
OK I started this as a PM but I think everybody could benefit form the answers to my questions or add to it
Hello M_Vice, I love your thread and your parts...
you gave me the motivation to try building my own chassis.. something very simple. Not even close to what you show here... but I want to try.
I don't know how to do CAD drawing or anything about machining but seeing you doing it by hand means I could at least try...
If you don't mind, I have a few questions... verry rooky
1) what is that hacksaw? it seems very thin.
2) How thick is the aluminum plate you used? I'm in Europe so everything is metric but I can get similar stuff.
3) what did you use to bend the aluminum evenly?
that's it for now... thanks for any help.
-
m_vice
- Approved Member
- Posts: 1312
- Joined: Fri Feb 23, 2007 12:46 pm
- Location: Dallas, TX
- Been thanked: 2 times
Ok, here is how I work this thing. I use to do a los of craft sculptures of different materials so I have always loved the idea of designing and creating your own things. After some year of art in collage I ended up in architecture school (here come in the CAD drawings).
Learned this trick of fabricating from some guys in Japan that built custom r/c cars but most of the ideas come from the master JO YOON HO from craftlab.net he designs and builds custom rock crawlers, check this link out http://craftlab.net/epage/eworkshop%20racing.htm He works his prototypes by hand before using the CNC. I love his work.
We exchanged some e-mails and I found out about some of his tools and decided to go for it.
Main tools:
- A table vise. something like this http://cgi.ebay.com/ROTATING-SWIVEL-JEWELERS-TOOL-HOBBY-CLAMP-ON-TABLE-VISE_W0QQitemZ320089675951QQihZ011QQcategoryZ88440QQrdZ1QQcmdZViewItem
- A jeweler saw like this http://cgi.ebay.com/5-Saw-Frame-Jewelers-Silversmith-Tools-Jewelery_W0QQitemZ140093133034QQihZ004QQcategoryZ10323QQrdZ1QQcmdZViewItem the deeper the saw the better ( better to cuting bigger parts like the chassis).
- The blades (you will be replacing a lot of them). They come in many different sizes the smaller the smoother the cut but the more blades you will need and the more patient you well need to be. I bought a set that included different sizes to try them, like this http://cgi.ebay.com/144-Saw-Blades-Jewelers-Metalworking-Cutting-Frame-Tool_W0QQitemZ280089444659QQihZ018QQcategoryZ10323QQrdZ1QQcmdZViewItem
- A kit of files like this http://cgi.ebay.com/Nicholson-Files-File-8-Piece-Machinist-File-Kit_W0QQitemZ180091012961QQihZ008QQcategoryZ20762QQssPageNameZWDVWQQrdZ1QQcmdZViewItem The smaller the better.
- A drill or better yet a drill press.
- A counter sink bit.
This is mainly it, you will learn with some errors but that is part of it. I bought some fiberglass and carbon fiber sheets a little thicker than the ones in my original RC10 and a sheet of aluminum 1/8” think or 0.1250 decimal or 3.1750 mm. It is a lithe heavy because of the thickness but very strong. I think I would have gone with something thinner and add some bracing on top of the chassis.
The bent in front was after cutting it. Clamp it to the vise making sure it is 90 deg. And muscle it, compare it to the original RC10 chassis and done.
The saw will cut anything. I have cut fiberglass, carbon fiber, aluminum, stainless steel and plastic and it cut very nice.
I measure the original part to correctly place the holes for the parts in the CAD program and design the parts around the holes locations. Print them out and put some carpet double tape to past them in the material and after that fallow the lines with the saw.
Use gloves and a mask if you can especially if cutting carbon fiber or fiber glass.
It was really simple you can make some precise hand drawings and cut them to.
Don’t be afraid, get some tool and materials (the tools are not that expensive) and go for it.
Sorry for any confusing explanations (with the messiness) or miss spelled words.
Hope this helps and gets some people working.
- Attachments
-
- built-cut.jpg (58.4 KiB) Viewed 2360 times
- built-cut.jpg (58.4 KiB) Viewed 2360 times
-
AYKBOBCAT
- Approved Member
- Posts: 585
- Joined: Wed Nov 22, 2006 2:32 pm
- Location: Bas St-Laurent, Canada
This is really great. Thanks a lot!
One question... I already have similar tools... I am wondering. Would these blade fit on a regular hand hacksaw or do I really need a new one? I don't mind buying another one. It's just that I wouldn't do it if not necessary...
thanks for sharing your experience. I really appreciate it! Again congrats on your good work!!
Create an account or sign in to join the discussion
You need to be a member in order to post a reply
Create an account
Not a member? register to join our community
Members can start their own topics & subscribe to topics
It’s free and only takes a minute
Sign in
-
- Similar Topics
- Replies
- Views
- Last post
-
- 25 Replies
- 3030 Views
-
Last post by jsrracing
-
- 25 Replies
- 4879 Views
-
Last post by m_vice
-
- 25 Replies
- 2392 Views
-
Last post by Bugle
-
- 6 Replies
- 1388 Views
-
Last post by Jim85IROC
-
- 2 Replies
- 644 Views
-
Last post by GoMachV
-
- 1 Replies
- 1273 Views
-
Last post by KidAgain
-
- 3 Replies
- 894 Views
-
Last post by racingkids
-
- 15 Replies
- 1974 Views
-
Last post by scr8p
Who is online
Users browsing this forum: ![]() Amazon [Bot] and 4 guests
Amazon [Bot] and 4 guests