So slick, those arms look awesome, lovely car to drive too!
Lee
YZ10 Works Projects
-
flustorm99
- Approved Member
- Posts: 188
- Joined: Mon Dec 16, 2013 4:23 pm
- Location: Canberra, Australia
- Been thanked: 1 time
Re: YZ10 Works Projects
Lookin slick stick! I had the same issues with my delrin arms in that i had the modify them so the hinge pins fit...didnt go the 3mm though..
Also with your hubs and having screws as apposed to king pins, i have found that if you arent careful its very easy to strip the plastic thread in the hubs so for my runners i put a 4 mm button head stainless screw in them thats about 8-10 mm long and it fits like a glove, no free play and adds alot more strength and holding power then the smaller 3mm king pins... Also alot harder to over tighten the 4mm screws as apposed to the 3mm.
Anyway lookin gooooooooood!
-
stickboy007
- Approved Member
- Posts: 745
- Joined: Sun Sep 16, 2012 6:13 pm
- Location: Mahopac, NY
- Been thanked: 55 times
Re: YZ10 Works Projects
Thanks, guys.
Yes, I had noticed that one of the screw holes on the steering knuckles is already stripped or very close to it; however, I'd like to stay true to the '91 build for this part, but I don't know...maybe I'll put some blingy kingpins (blingpins?) in there instead. We'll see...
I already have a body painted for this from a few months ago with most of the decals applied. Waiting on a few more decals to show up before I show it. You're gonna like it
-
stickboy007
- Approved Member
- Posts: 745
- Joined: Sun Sep 16, 2012 6:13 pm
- Location: Mahopac, NY
- Been thanked: 55 times
Re: YZ10 Works Projects
New screws showed up in the mail. Wheels and tires mounted. Body coming soon-ish.
- Attachments
-
-
-
-
-
-

Re: YZ10 Works Projects
That looks great.. The color combo looks so clean and has a nice contrast.. now I'm on pins and needles waiting for the shell.. 
Shawn
Shawn
-
stickboy007
- Approved Member
- Posts: 745
- Joined: Sun Sep 16, 2012 6:13 pm
- Location: Mahopac, NY
- Been thanked: 55 times
Re: YZ10 Works Projects
Figured I'd get started on the '92 Works restoration while waiting on some finishing touches for the '91 Works to arrive. No bling on the '92, except for maybe the steering rack when I get to it. Just a nice, clean resto. Some parts are new (arms, rear diff pulley, front belt), while the rest was just cleaned up or taken from the other Works chassis which had some cleaner parts with less wear. Not really shown here, but the motor mount is from one of the '93 chassis and looks like it was bead blasted. Very nice, so it's going on this shelfer. (On another note, of the the '93 chassis appears to have magnesium bulkheads. Not good...they're supposed to be aluminum. I'll cross that bridge when I get to it.)
I decided to add a TCS unit to this drivetrain. The TCS didn't officially show up until the '93 Works, but I have a spare one in like new condition and figured I'd throw it on here. It was a bit of trouble at first, since the inside slipper hub was rubbing against the upper deck. This is because that little clamp piece that runs against the left side bearing on the layshaft gets pushed over when you tighten the slipper (sounds strange, but it happens because the tension on the slipper spring pushes the layshaft to the left side, which forces that clamp to slide, which then pushes the entire assembly over to the left). So I had to put a bearing and a thick washer between the center pulley and the left side bearing to make sure there is no open space there, so that the layshaft stays put and prevents the inner slipper hub from rubbing against the upper deck. You can kind of see that in the top-down image.
Top tip for removing tape gunk from the chassis without resorting to a hammer and chisel. Use Turtle Wax bug and tar remover. Apply to the affected area and let it sit for a while, and the goop literally just wipes right off. Worked like a charm on this chassis and others that I've worked on.
I'm in a bit of a bind on what to do about the springs on this chassis. I have the black body Works shocks in good enough condition, but I don't have a set of Works front springs that aren't rusted out. I might have to just spend some serious time on those springs with a brillow pad and/or a dremel. An alternate plan I was thinking of is to use Tamiya springs. In particular, the white springs that come with their buggy aeration shock set (I have a spare set) fit perfectly on these Works shocks and spring cups. I may have to do that if I can't deal with the rust on the Works springs that I have lying around.
- Attachments
-
-
-
aip47-2008
- Approved Member
- Posts: 1191
- Joined: Sun Feb 08, 2009 9:20 pm
- Location: Spokane, WA
- Has thanked: 170 times
- Been thanked: 23 times
-
stickboy007
- Approved Member
- Posts: 745
- Joined: Sun Sep 16, 2012 6:13 pm
- Location: Mahopac, NY
- Been thanked: 55 times
Re: YZ10 Works Projects
Yes, I could use those. The RC10 springs are actually a slightly smaller diameter than the Yokomo springs, though. At least that's what I've noticed when fitting them to a '94 YZ10.
Re: YZ10 Works Projects
Wow.. another nice build taking place there.. So jealous.. On the Turtle wax thing, I do the same thing.. It doesn't smell too bad either.. I also use goo gone for more stubborn stuff and then hit it with the bug and tar remover to get the rest.. Works great.. I love this thread.. 
Shawn
Shawn
-
stickboy007
- Approved Member
- Posts: 745
- Joined: Sun Sep 16, 2012 6:13 pm
- Location: Mahopac, NY
- Been thanked: 55 times
Re: YZ10 Works Projects
For the '91 Works, I wanted to do something that nicely complemented my '93 Works Senna body, but also went well with the colors of the '91 Works parts. So, I went for a pearl white/metallic black Marlboro McLaren scheme with Berger driver decals. The black/white boundary was not as well-masked as I would've liked, so there was a bit of leakage at the boundary. Rather than paint a new body (it's a TBG body), I figured I could line the boundary with a chrome decal strip. This proved rather difficult, and even the final product here is not perfect, as the chrome strip does not like bending or curving without lifting off of the body. The strips will sit long enough to take a few pictures, but over time, they will lift, and I may end up having to toss them in the long term.
Low light by the time I was able to take some pictures, so I had to drop the contrast on the images to compensate. Hence the slight graininess in the images. I'll try to take some daylight pictures later on, but for now, I think this illustrates what I had in mind for this body.
Low light by the time I was able to take some pictures, so I had to drop the contrast on the images to compensate. Hence the slight graininess in the images. I'll try to take some daylight pictures later on, but for now, I think this illustrates what I had in mind for this body.
- Attachments
-
-
-
-
-
-
-
Re: YZ10 Works Projects
Now that looks amazing.. I love the choice for the graphics.. So clean.. Great cars..
By the way, what did you use for the window "tint"? That looks really interesting..
Shawn
By the way, what did you use for the window "tint"? That looks really interesting..
Shawn
-
stickboy007
- Approved Member
- Posts: 745
- Joined: Sun Sep 16, 2012 6:13 pm
- Location: Mahopac, NY
- Been thanked: 55 times
Re: YZ10 Works Projects
Glad you like it...
The window "tint" is actually just gold paint. I painted that after putting the black paint down. Very light coats, because gold is very runny, then back it in white.
The window "tint" is actually just gold paint. I painted that after putting the black paint down. Very light coats, because gold is very runny, then back it in white.
Re: YZ10 Works Projects
Ohhh.. I like that.. in the pictures it looks like gold tint that you see on alot of helmets.. very slick.. may have to steal that Idea..
Shawn
Shawn
-
stickboy007
- Approved Member
- Posts: 745
- Joined: Sun Sep 16, 2012 6:13 pm
- Location: Mahopac, NY
- Been thanked: 55 times
Re: YZ10 Works Projects
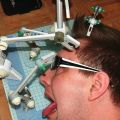
Helmets, indeed. I started thinking about the helmet theme after I put the gold on my Avante 2001 and Lazer ZX windows. I want to figure out a way to put **this** helmet on a YZ10 paint scheme...

-
rccars4sal
- Approved Member
- Posts: 1000
- Joined: Thu Aug 22, 2013 1:05 pm
- Location: USA
- Been thanked: 2 times
Re: YZ10 Works Projects
Back in my superbike days,, we payed extra bucks for iridium tinted helmet visors. They had a color changing purple/gold color,, probably the influence behind the video game charactor helmets.
Create an account or sign in to join the discussion
You need to be a member in order to post a reply
Create an account
Not a member? register to join our community
Members can start their own topics & subscribe to topics
It’s free and only takes a minute
Sign in
-
- Similar Topics
- Replies
- Views
- Last post
-
- 8 Replies
- 1833 Views
-
Last post by ralphee
-
- 18 Replies
- 3128 Views
-
Last post by stickboy007
-
- 11 Replies
- 2704 Views
-
Last post by DemZ
-
- 46 Replies
- 4742 Views
-
Last post by flustorm99
-
- 48 Replies
- 7198 Views
-
Last post by geeforce59
-
- 4 Replies
- 1400 Views
-
Last post by Alex B
-
- 31 Replies
- 7354 Views
-
Last post by olfrjf
-
- 10 Replies
- 2816 Views
-
Last post by aip47-2008
Who is online
Users browsing this forum: No registered users and 5 guests