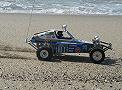
Rod have be a bag with a bag in it and I think there's a car in there too. I just threw everything I think I needed for a restoration into a tote with the buggy and hit the road. When I say hit the road, I mean to work in the field. I usually have periods of down time where I like working on RC related stuff, usually painting bodies.
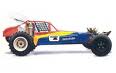
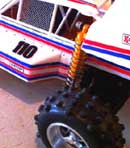
If anyone has any tips, I'm all eyes. I will do the normal, tear down, clean, sand, polish, and reassemble as per instructions.