The frankenbuggy build

General discussion, builds/restorations, etc...

Moderators: scr8p, klavy69

cautrell05
Approved Member
Posts: 209
Joined: Tue Feb 15, 2011 1:51 pm
Location: Norfolk Nebraska

Re: The frankenbuggy build

Post by cautrell05 »

Past month has been slow on this build. I dont quite have the cash for the electrical part of the build yet so I kinda slowed down on the rest. Ok fine Im lazy. Heres what I got so far.

Front bukhead is done.

Image

Image

The bottom mounts with the three factory holes in the middle of a buggy nose plate. Between those three screws and the sides of the bulkhead wrapping around the sides of the nose plate It should hold up. Still plan to make a hingepin brace yet. I used an ond 10T tower for mockup and was going to transfer my measurements over to some .080 6061 aluminum. However it fits wellenough that I may just leave it on there for now. The stock tower only had 2 screws holding it on. This one has 4. Seemed to make more sense.

Can you tell I have way too much free time?

Image

Image

Image

I couldnt bring myself to send 30 or 40 bucks on a steering set. I was digging around in my hardware box and found 4 brand new 4x7 bearings still in the bag. Shave .007" off of an 8/32 bolt and they are a perfect fit. Little more delrin and probably more time than I will admit and Thats what I have. I need to trim the sides on the tub for a little more steering throw but other than that it should work just fine. Bump steer is close enough for rough assembly. I will dial it in a bit closer when I do the final assembly.

Image

An overall view of the nose. Everything fits in pretty good.

Image

The associated logo was one of the main reasons I used a buggy plate. Just something about that and the nose brace tubes that just scream vintage AE even if it isnt Vintage.

Image

Also did some comparing and nose to nose the front arms and bulkhead are the exact same width as a b4.

Nick

cautrell05
Approved Member
Posts: 209
Joined: Tue Feb 15, 2011 1:51 pm
Location: Norfolk Nebraska

Re: The frankenbuggy build

Post by cautrell05 »

Well its officially a runner now. Finished up enough this past week to take it out sunday and get it dirty. On to the pictures.

I couldnt bring myself to cut the sides of the chassis down because of the ebay notch that I was stuck with-

Image

I saw first hand how much it weakened the chassis on my 10T when I did it to that one years ago. Instead I took it down to the local weld shop and gave him $5.

Image

A little work with the sander and some JB weld for filler in the low spots and it turned out just fine. Strong as new and without that fresh hacked feeling.

Image

Image

And one with the body on it.

Image

yes I know its a losi body. I had every intention of running the viper body just because I love the look of it but I ran out of time and was having trouble getting it mounted. all the usual places for body posts were filled by something and I didnt have time to mess with it. The losi fits the T2 pan perfectly with a 1/4 inch gap all the way around. two 2 inch pieces of velcro and the bodys solid. I was even able to keep the rear section with the B4 wing mount. I still need to make a nose for it yet. The stock one wasnt long enough anyway and after cutting enough to go through the tower there wouldnt be much left. Was easier to just make a front and mount it solid.
I had to scrape for a motor and esc just to get out there and sure enough it bit me. The only motor I had that I thought was worth running was an old imbreed that I put together 10 years ago. I had a 27 turn stock motor that picked up a rock on the first run and ruined the conn. I also had an even older 14 turn trinity monster mash from my double dare that I had in gradeschool. I had taken the 14 turn armature and put it in the stock can. I think I ran it once or twice back then but took it out and it ended up in the closet. I threw a set of brushes in it and ran it with an old novak 410. with the 5000 2cell lipo it had plenty of power to keep up with the 13.5 brushless motors down the front stretch much to my suprise. However after 6 laps it just stopped moving. Motor wasnt that hot and neither was the esc. Checked all my connections and went out for the second heat. Same deal. around 5 or 6 laps it slowed and stopped. third heat I jumped it from a 21 to a 24 tooth just to see what happened. It made it 3 laps. Didnt even bother with the b main. To me though it handled pretty well. with some practice time , a good esc and some newer tires I think it can be plenty competetive for my driving abilitys anyway.

Nick

User avatar
Mr. ED
Approved Member
Posts: 5483
Joined: Thu Dec 21, 2006 1:30 am
Location: Back @ home: Belgium
Has thanked: 62 times
Been thanked: 62 times

Re: The frankenbuggy build

Post by Mr. ED »

First time to see a T2 buggybuild that actually doesn't stop dead at the point a body needs adding. Good of you! Looks very funky withe rear end covering the wing too. Me likey!

Jedi Master
Approved Member
Posts: 489
Joined: Thu Mar 10, 2011 10:35 am
Location: United Kingdom - Sraffs
Been thanked: 2 times

Re: The frankenbuggy build

Post by Jedi Master »

A great build, good job!!

How does it handle? Any video?

8)
Do, or do not! There is no 'try'!
RC; Boats, Buggies, Trucks, Bash's, Racing and of course 'VINTAGE'!
My Ebay Feedback: http://feedback.ebay.co.uk/ws/eBayISAPI.dll?ViewFeedback2&userid=jedimaster768&ftab=AllFeedback

cautrell05
Approved Member
Posts: 209
Joined: Tue Feb 15, 2011 1:51 pm
Location: Norfolk Nebraska

Re: The frankenbuggy build

Post by cautrell05 »

No video of it yet. Probably wouldnt be that great anyway. Im pretty sure this is the first buggy I have ever driven so it took a bit to get used to. Compared to my RC10T shortcourse it drives way different but easier at the same time. The shortcourse has a 17.5 in i so its a bit slower than the buggy. That alone took getting used to. There is two sets of doubles on the back stretch that the T clears pretty easily at 90% throttle. 50% throttle with the buggy makes it case the third jump pretty hard. I definatley need more track time with it and I think it will be fine. Biggest defference between the two is the buggy has trailing axles and the truck is inline. I like how the truck drives but the steering on buggy felt real lazy. I dialed alot of negative expo in to the steering to make it quicker around center and it helped alot. Now If I could find a speedo that will make it more than 6 laps.

Nick

cautrell05
Approved Member
Posts: 209
Joined: Tue Feb 15, 2011 1:51 pm
Location: Norfolk Nebraska

Re: The frankenbuggy build

Post by cautrell05 »

Quick update. Made a few upgrades to the electronics on the car. The novak speedo that crapped out after 6 laps is gone. Picked up a tekin rs and a redline 10.5. Stupidly overpowered comes to mind. Also changed out the servo for one of the stubby savox servos. Still need to get rid of the trailing axles but for now its not too bad. lap times are getting lower as I get used to the car and work on the setup. One of the other guys that has raced forever (the same guy with a dozen RC10s in his basement including a shrinkwrapped 6035 teamcar NIB) took it around the track for a few laps and was pretty impressed with it. Need to get some newer tires on it and tweak the springs and oil but all in all it handled pretty good. Only other change I made for the last weekend was to tweak the wing mounts a bit. because of the battery location it balances out at 65/35. Not bad but a little nose heavy and it required a lot of throttle to keep the nose up over the bigger jumps. I wasnt about to add lead to the back of a car thats already 100g over weight to get the rear weight up so I took a different aproach. The B4 wing mounts came up 1/8 inch short of reaching the rear tower. I simply made a small spacer block with two screws for the mounts and one in the center that hooks to the tower. I took the center screw out and lowered the front about 1/4 inch and drilled a new hole. That put a little more angle in the wing and made a noticable improvement in keeping the nose up.

Only real plans for next season are new tires and the inline blocks and axles off of my short course truck. Its geting 12mm hexes all the way around for next year and I hate the trailing axles. Might also look into one of the 96mm lipos too. A couple of companys have them for around $50 now. Its about 60g lighter than whats in there now and It gives me room to move it around if I need to also.

Image

Because everybody likes pictures

Nick

User avatar
Y'ernat Al
Approved Member
Posts: 920
Joined: Wed Jan 14, 2009 1:15 am
Location: Spokane WA
Has thanked: 7 times
Been thanked: 17 times

Re: The frankenbuggy build

Post by Y'ernat Al »

cautrell05 wrote:....When I started measuring on the bulkhead I found the two inner a-arm mount holes were the perfect width to use. I chopped up an old 10t front bulkhead for mockup and rechecked my width....

Image

...I will just screw the two bottom ones in place and use the holes to mark the upper holes. Easy enough.

Nick
:!: :!: Nick. This is bizarre but I have a similar fab going on a buggy and I did the same thing a few months ago with the inner noseplate holes :shock: Funny how two guys can run through the same process. My built involves 10T arms and RC10 casters to get it at 250mm. Mine ended up a bit different. My build is still in the mock up stages, and it's almost far enough along to tear down and photo as I build it back up.

Nice work with the mill! Wish I had one of those! :D :D
- Brian -

My Gallery

cautrell05
Approved Member
Posts: 209
Joined: Tue Feb 15, 2011 1:51 pm
Location: Norfolk Nebraska

Re: The frankenbuggy build

Post by cautrell05 »

Y'ernat Al wrote:
cautrell05 wrote:....When I started measuring on the bulkhead I found the two inner a-arm mount holes were the perfect width to use. I chopped up an old 10t front bulkhead for mockup and rechecked my width....

Image

...I will just screw the two bottom ones in place and use the holes to mark the upper holes. Easy enough.

Nick
:!: :!: Nick. This is bizarre but I have a similar fab going on a buggy and I did the same thing a few months ago with the inner noseplate holes :shock: Funny how two guys can run through the same process. My built involves 10T arms and RC10 casters to get it at 250mm. Mine ended up a bit different. My build is still in the mock up stages, and it's almost far enough along to tear down and photo as I build it back up.

Nice work with the mill! Wish I had one of those! :D :D
I thought about building one with the 10T arms but figured why not go full nuts and see what happens.
Image

Lost xxx-sct arms I think are the longest possible to put on a buggy and still be legal. The xxx-t arms are 5 mm longer but put it 3 mm over with the insides almost touching. After watching tech at the ROAR regional this past weekend I dont think 3mm would be a big deal. Several of the cars had to be hammered in to the tech box but still pass. As it sits its 245. Gives me room for different tire widths. I will start a build thread for this one when I get farher on it. There is a race the first week of january that I need to get the Frankenbuggy and my 10T short course ready for first.

Nick

User avatar
soniccj5
Approved Member
Posts: 1210
Joined: Thu Jan 10, 2008 3:23 pm
Location: Massachusetts
Been thanked: 2 times

Re: The frankenbuggy build

Post by soniccj5 »

This is a great build!! I bet you get a lot of questions at the track about what kind of buggy you have. :lol:

User avatar
hawgfanman
Approved Member
Posts: 279
Joined: Sat Dec 10, 2011 3:05 pm
Location: Midlothian, TX
Has thanked: 13 times

Re: The frankenbuggy build

Post by hawgfanman »

Thanks for pointing me over here from your other thread. Great build and ingenuity using the "mish mash" of parts!

CUDDZILLA
Approved Member
Posts: 85
Joined: Sat Dec 10, 2011 12:51 am

Re: The frankenbuggy build

Post by CUDDZILLA »

Great build! I really like your custom fabrication work. Not everyone has the patience to make parts from scratch like that. Very very nice!

cautrell05
Approved Member
Posts: 209
Joined: Tue Feb 15, 2011 1:51 pm
Location: Norfolk Nebraska

Re: The frankenbuggy build

Post by cautrell05 »

Thanks for the compliments guys. I have always had a much bigger urge to build my own rather than buy what everybody else is running. I just really dont have any intrest in a b4 or sc10. I would much rather have something different.
Ok short update. The Novak race in omaha is this weekend and Its slowly getting closer to ready. Not a whole lot to change on the buggy. First off the rear tower had to go. Im not sure what happened to the old one but it is severely warped to the point that the shock mounts are binding.

Image

Picked up a NIP team graphite one from the bay for $9 shipped. I will keep the old one for a spare if I need to.

The other thing that got changed was the rear arm mounts. Although the modified GT rear arm mounts were working, they didnt give me any options for toe and took a bit of trimming to work with the bandit arms. I had no spares and it was kind of a headache to make them work. A couple of weeks ago I was down at hobbytown and stumbled across these- Tower ad but you get the idea
http://www3.towerhobbies.com/cgi-bin/wti0001p?&I=LXJJ60&P=7
Dug a little farther and found these also-
http://www3.towerhobbies.com/cgi-bin/wti0001p?&I=LXJJ61&P=7.
Both are currently available, fit the bandit arms with no mods and are dirt cheap. For $2 i figured id give them a try. If I had a regular 10 pan I could have used one of the existing holes and just drilled the front ones. Or if the T2 pan I had was a virgin I could have just drilled both holes inbetween the existing ones with no problems. However The front hole that I had drilled offset to make the GT mounts work was Just a little too far forward for the shocks to line up. Back to the weld shop, another $5 and the old holes were filled in. Drilled 4 new holes and things were looking good. They do need about a .080 spacer between the chassis and the mount to move them up and there is no antisquat built into them but both of those are easy enough to resolve.
Image

Also traxxas does still offer these-
http://www3.towerhobbies.com/cgi-bin/wti0001p?&I=LXYTH8&P=7

For those that want to bling it out a bit.

I dont know how the arms would line up with a stock rear tower and bulkhead but I think the mounts, arms and custom works hubs would be a good option for the old is new back half. More updates to come.

Nick

cautrell05
Approved Member
Posts: 209
Joined: Tue Feb 15, 2011 1:51 pm
Location: Norfolk Nebraska

Re: The frankenbuggy build

Post by cautrell05 »

First off im going to start with a retraction. DO NOT BUY THE TRAXXAS PLASTIC ARM MOUNTS!!!!!

Image

That was after 7 races and 3 rounds of practice. By the end of the weekend I was getting very frustrated with them. Granted they usually broke after a cartwheel but it did not seem to take much. Heck my 10t has probably cartwheeled a mile or so in the first 18 years I owned it. Broke one mount. I stretched a few but nothing like this. I dont think it helped that they were made from very hard plastic with no flex at all. After the first two broke I thought maybe the screws were too big causing excess pressure and helping the break. I was using an 8-32 tap and cutting half way through to relieve some of the stress. The last set of 0 mounts I put on I ran the tap all the way through except for the last 1/16 inch. Still broke. After the last round of qualifying on saturday I switched from the 0 to the 1 degree mounts just so I had a fresh set of mounts for the main on sunday. At least I finished that one. Looks like im making arm mounts this spring. :roll:

As for the Novak race, it was at the Omaha hobbyplex.
Track pictures are here- http://www.rctech.net/forum/nebraska-racing/582643-hobbyplex-track-layout-pictures.html
and a vid of the track - http://www.youtube.com/watch?v=0bhhq4x6o3E&feature=player_embedded

I went down for the club race thursday night and seriously underestimated how hard it is (for me anyway) driving on a bigger track than I was used to. That combined with the lighting and elevation changes made it pretty obvious I was in over my head. Im sure most of you have heard the expression with the monkey and a football? Sadly I was the monkey. The car however handled great. When I could see it clearly and wasnt clipping pipes it would run right with the 22s and B4s no problem. Im sure it would have went better if I had went down on friday for practice but I had to work and couldnt make it. It was fun and I would definatley go back but with a lot more practice though.

On a positive note I didnt walk away empty handed. Bob Novak was there for the weekend. Got to talk with him briefly and got a few door prizes.
Image
Cant complain there.

Nick

User avatar
soniccj5
Approved Member
Posts: 1210
Joined: Thu Jan 10, 2008 3:23 pm
Location: Massachusetts
Been thanked: 2 times

Re: The frankenbuggy build

Post by soniccj5 »

Sounds like the race was a lot of fun. Nice to see these old cars still out there on the tracks.

cautrell05
Approved Member
Posts: 209
Joined: Tue Feb 15, 2011 1:51 pm
Location: Norfolk Nebraska

Re: The frankenbuggy build

Post by cautrell05 »

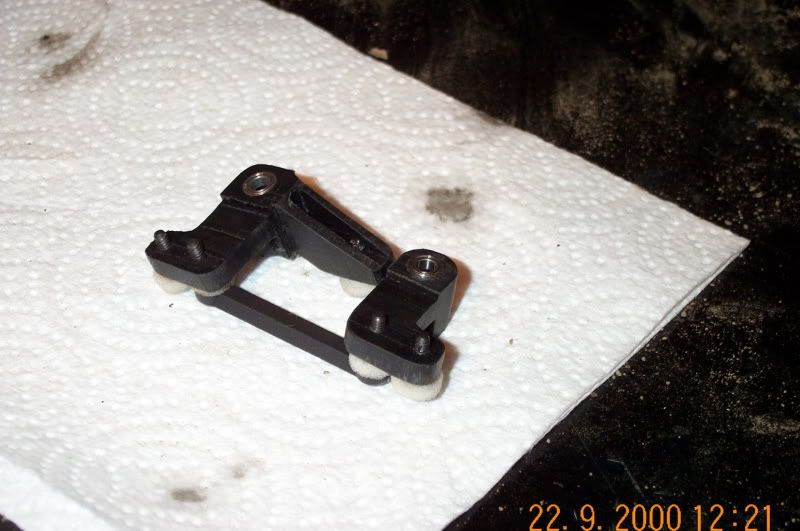
Ok spring update time. After the rear arm mount nightmare in omaha a while back it was time to get new mounts. Originally I was just going to make them. Its just a block with 3 holes drilled in it. I tried several places to see if i could get some precut blocks so I didnt have to wast 30 min each cutting them square but they all wanted a fortune for them or didnt want to mess with them at all. So much for that plan. Plan b was 0 degree mounts. Last summer there was a guy on ebay that had a whole pile of t2 rear arm mounts selling them BIN for 3 or 4 bucks a set. I bough 4 sets. I happened to be sorting through them 6 months after I bought them and noticed that one had a 0 on it. sure enough it was a 0 degree mount. Luckily the match for it was also there. One set down. I found two more sets on here in the BST section. That gave me 3 sets. On with plan b.

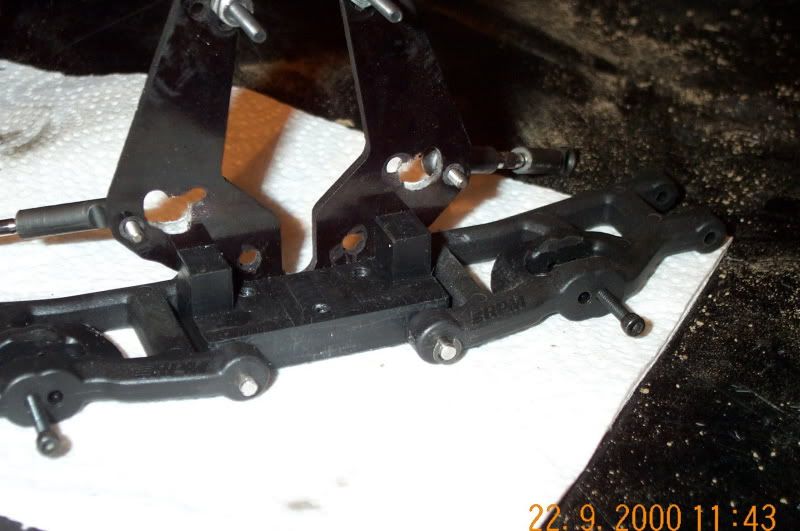
First step was to narrow up where the arm mounts. Not much, about 3/16 or so.

Image

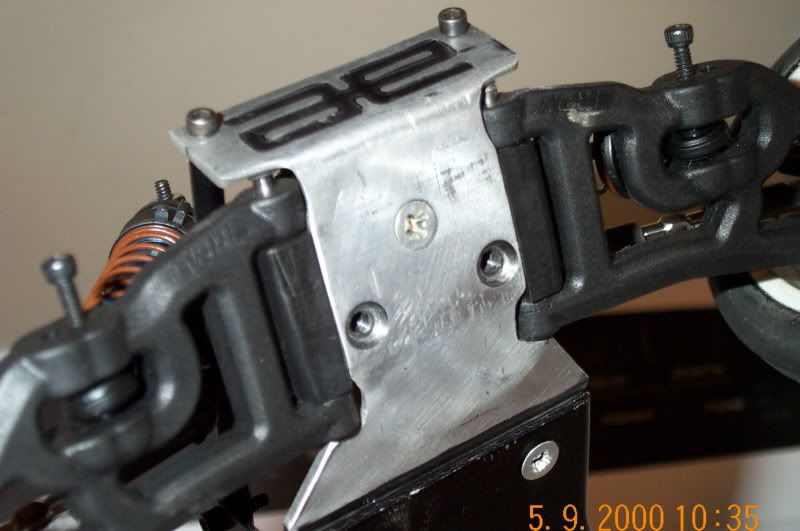
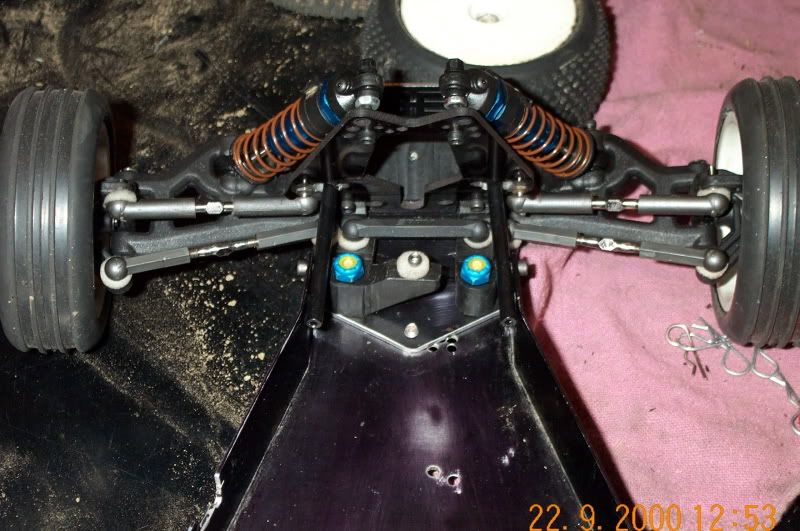
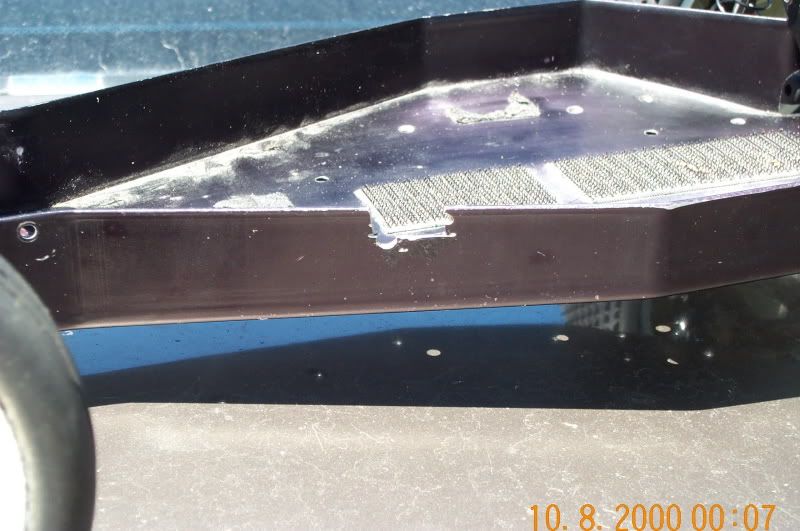
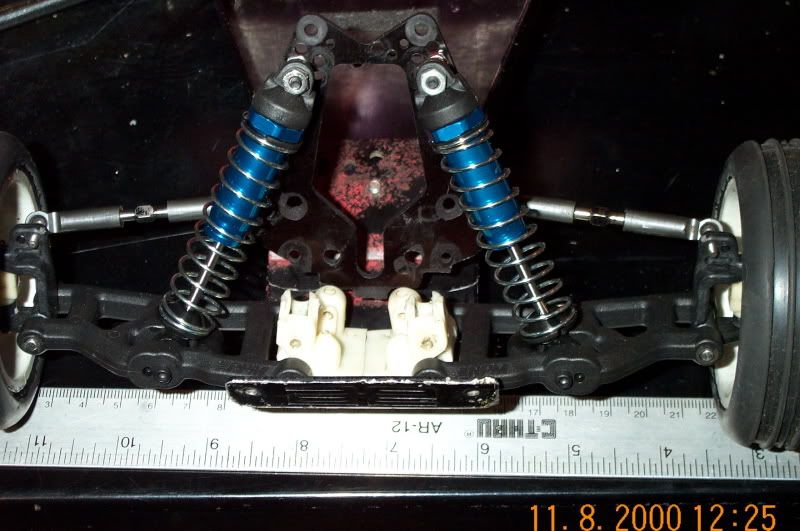
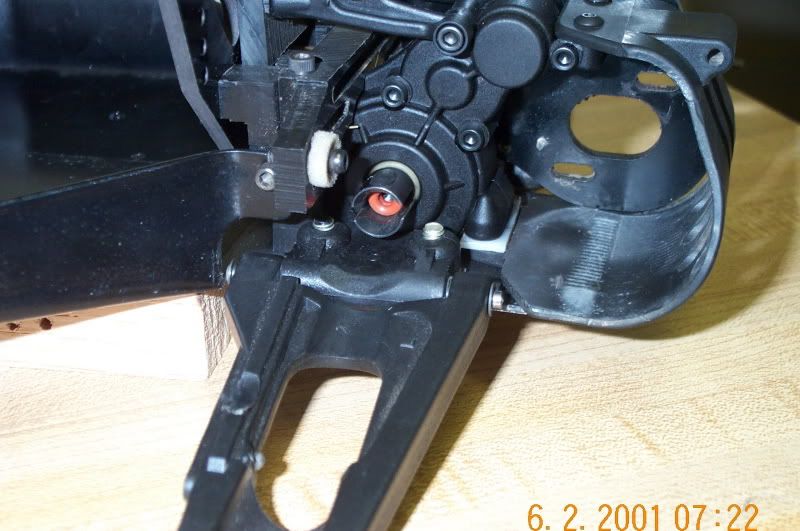
Second step was to bolt them on. I should have done that in the first place. My rear end track stayed exactly the same and they are alot stronger than the traxxas ones. Heres a clear shot of them on a different chassis just for visuals.

Image

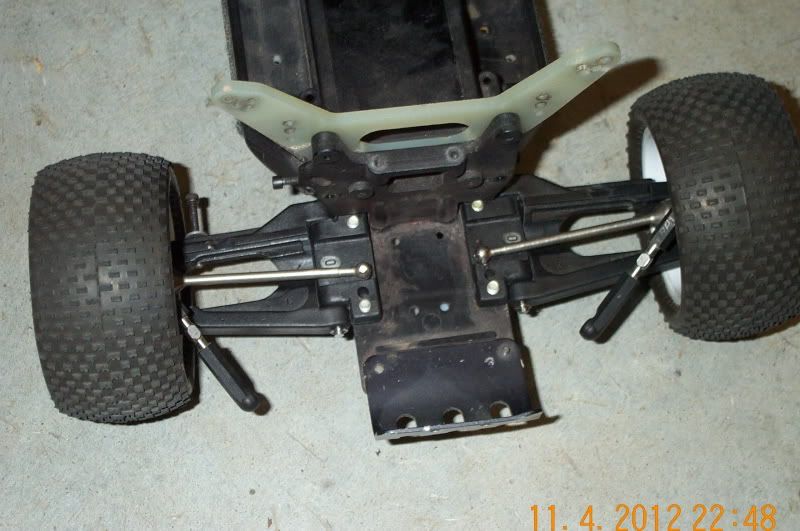
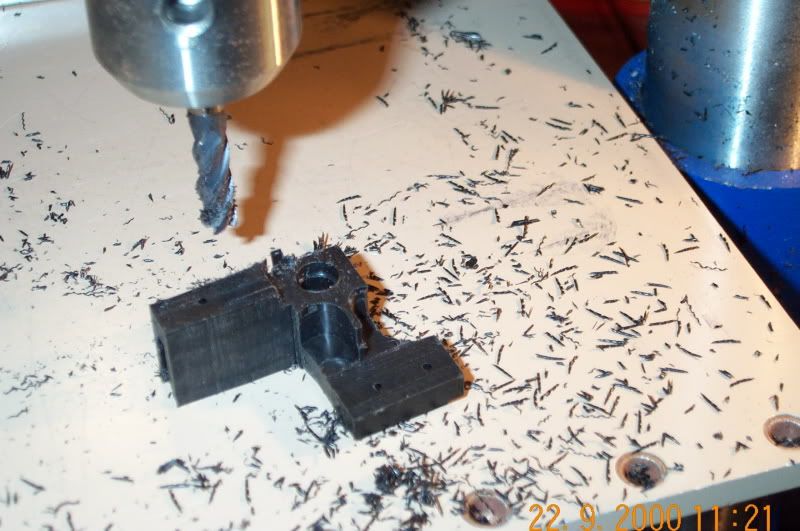
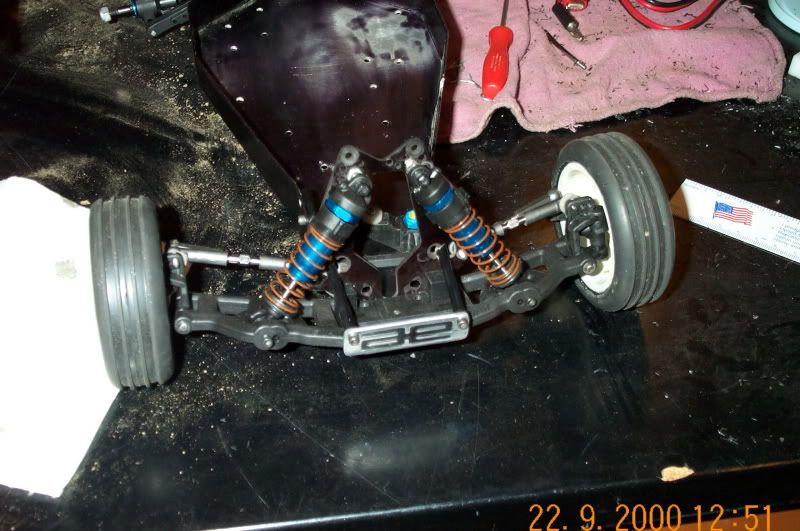
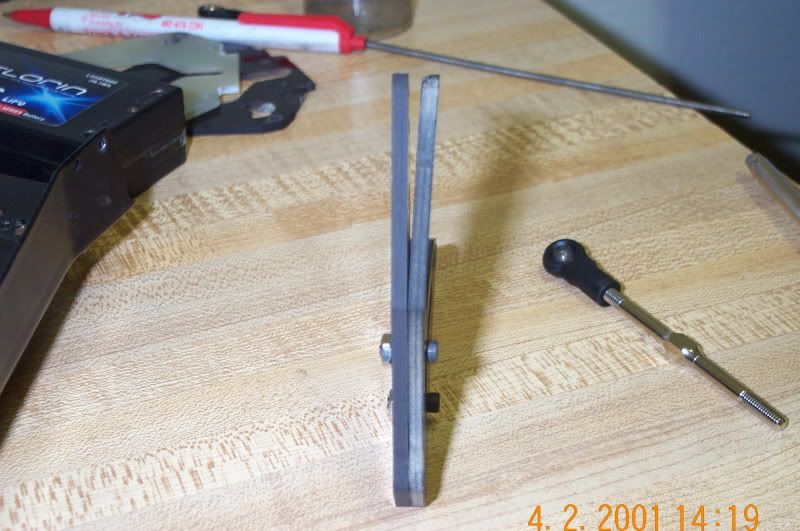
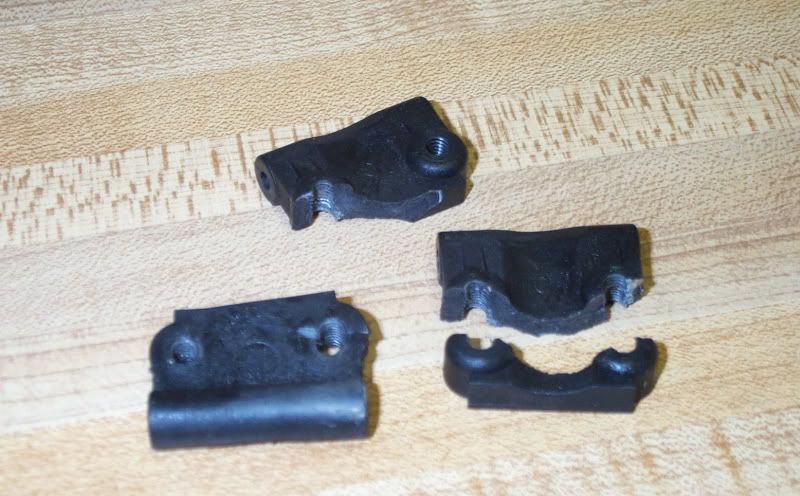
And heres what happens when you drill holes right next to other holes.

Image

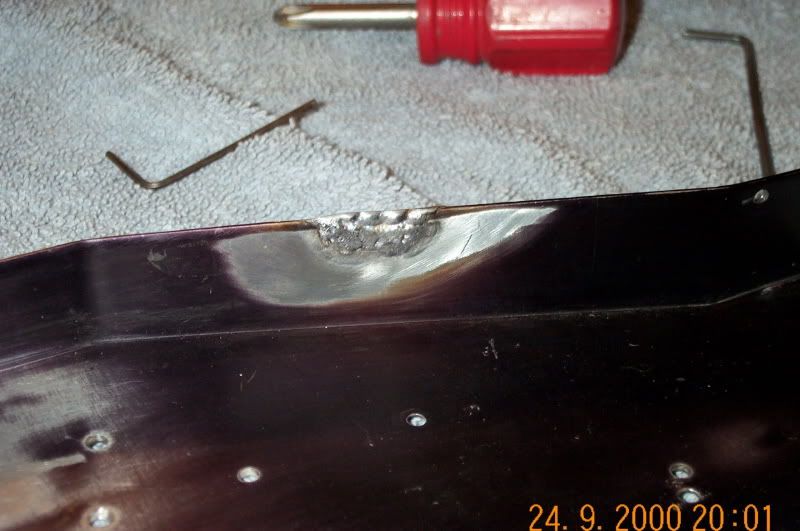
Go ahead and say it. Dumb idea. I know. Back to the weld shop.

Image

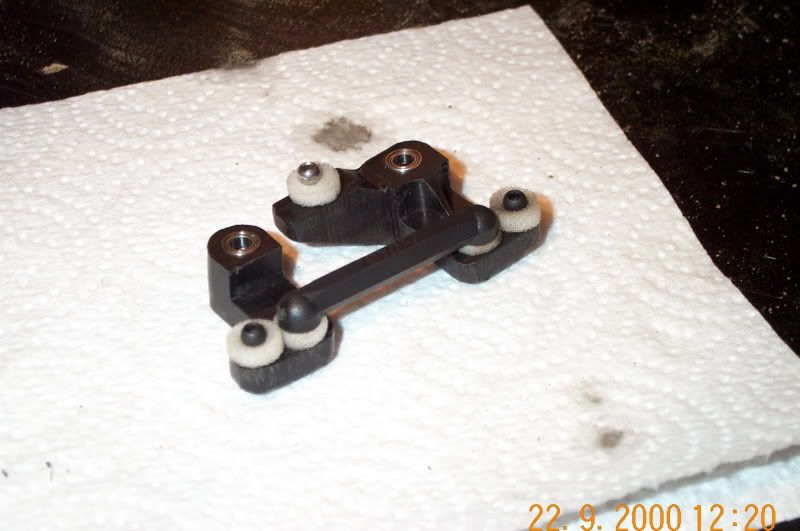
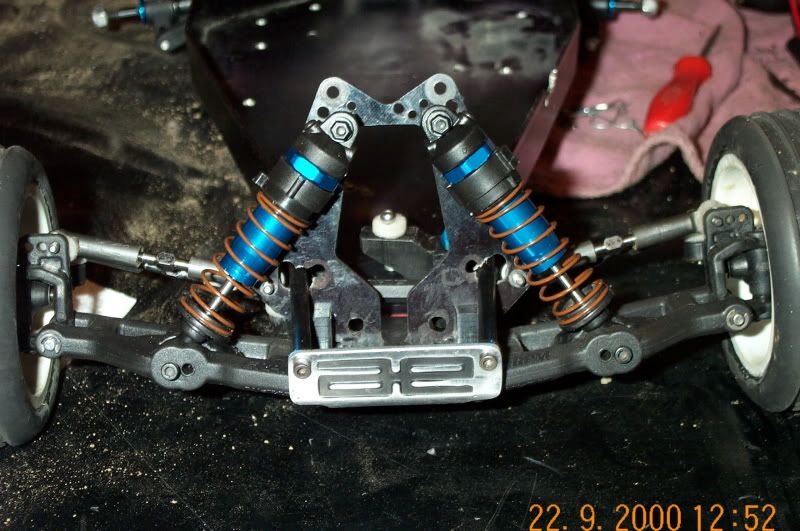
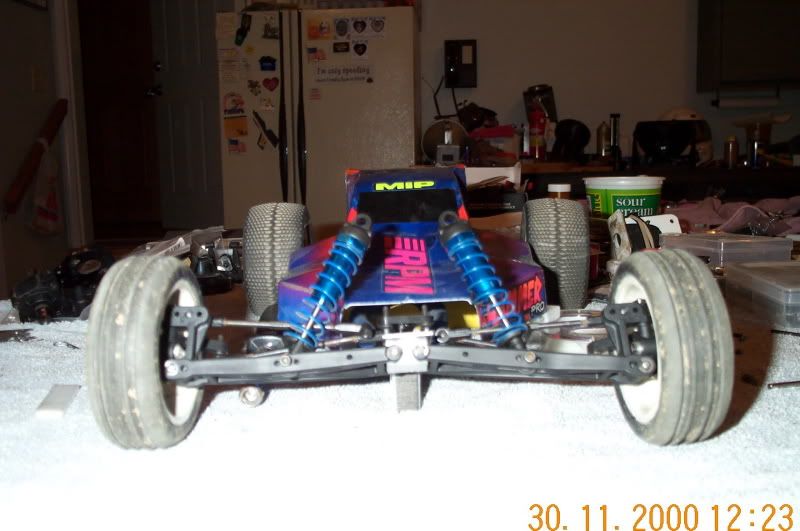
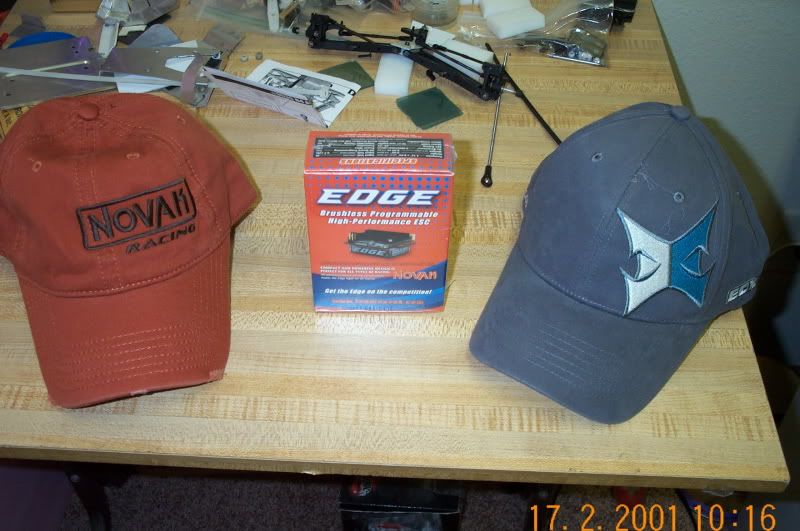
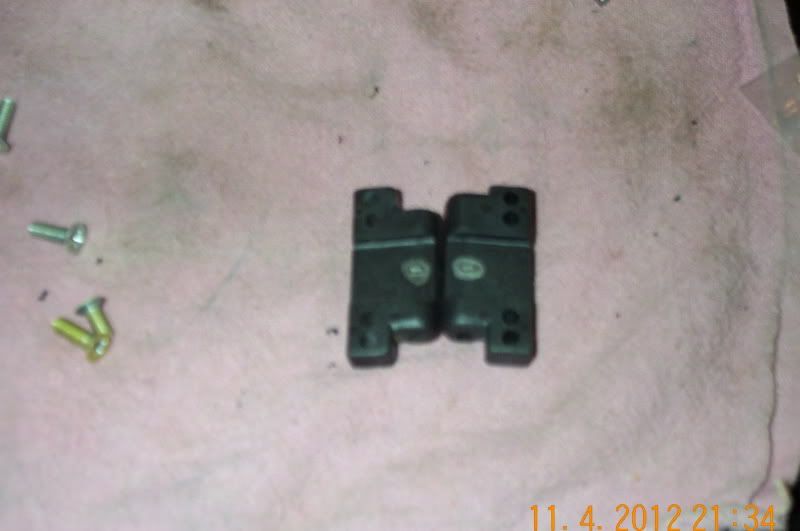
This time its a little thicker around the front holes. If I pulls out again Im going to have to look for a fresh chassis. The front spindles were swapped out for the inline ones off of my shortcourse. I also found out that I had sc10 front axles in the buggy last year. I bought a new set of b4 inline axles to go in and noticed that there is about 2-3 mm difference in length with the b4 ones being shorter. Not a biggie but it works. The steering now feels a little more responsive. After omaha I had the viper 17.5 from the shortcourse in the buggy and was just going to boost that this year. It was plenty quick with it in there. Untill the RS let the smoke out in practice. Changed the sensor lead and motor and no luck. So it came out and the edge that I won in omaha went in with the 10,5 from last year. I dont need boost for a 10.5 anyway.

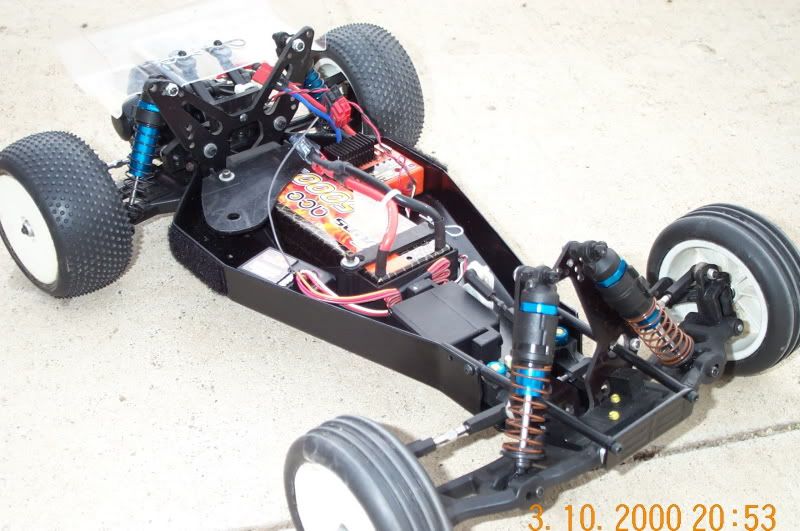
I also made a few setup changes from last year. I upped the shock oil from 25 to 30 front and rear with #2s and went from the brown buggy fronts and black rears to green truck fronts and green rears. The green truck fronts are rated at 3.0 which is right in between the browns, 2.8 and the black, 3.2. That mellowed it out and took some of the twitchyness out of it. The other change was going to the losi shorty packs. I didnt notice much power difference but it showed up on the scales.

Image

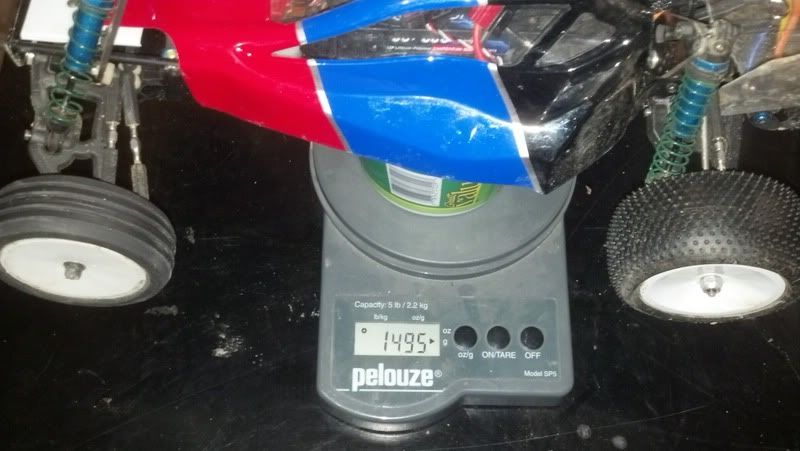
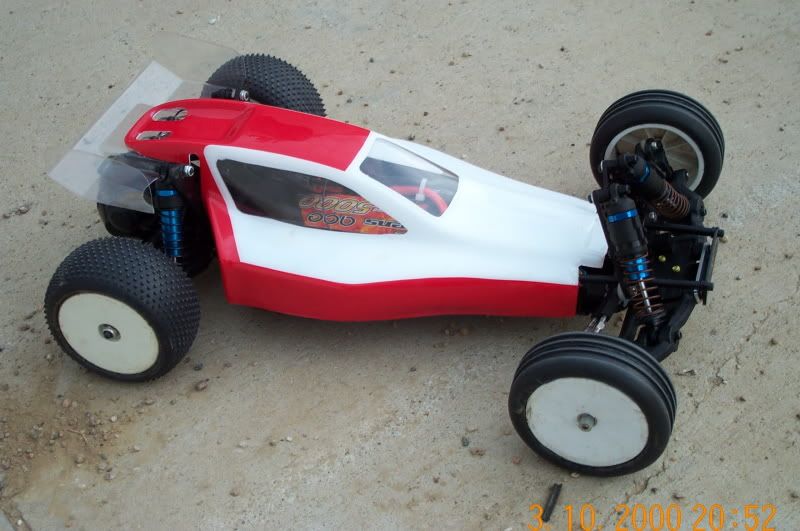
With the new body its 5g underweight and with the red and white one its 7 over. Very nice. My daughter was begging me to get her a car to drive this year and rather than get a whole nother car going it just seemed easier to get a body and let her paint it how she wants and then just swap bodies. And turn the throttle end point down alot. Kyosho RB5 bodys seem to be a perfect fit for the T2 pan. Just an FYI guys.

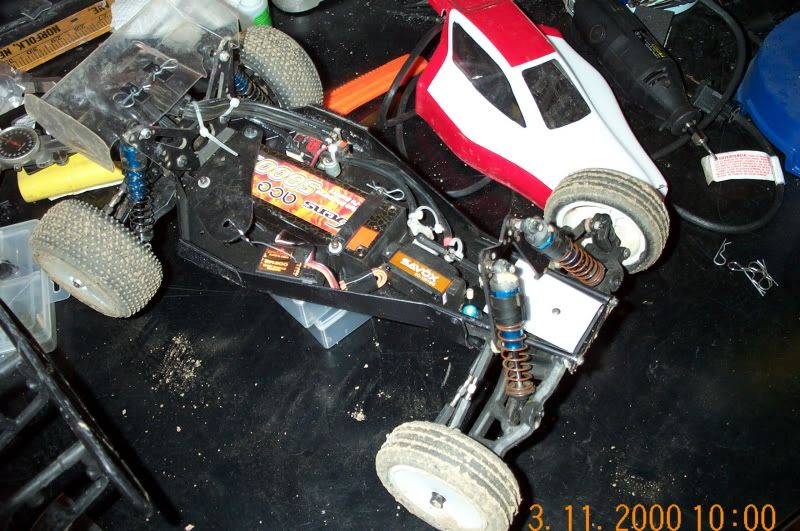
Last pic for tonight is both of them ready for the races that got rained out yesterday. Now I have two weeks with pretty much nothing to do. At least everything is ready to go. The truck is down to 2140g now thanks to the shorty pack and some wheel changes. The slash body in the cabnet will put it about 3/4 ounce under weight if I go that route. This years gonna be fun.

Image

Nick

Create an account or sign in to join the discussion

You need to be a member in order to post a reply

Create an account

Not a member? register to join our community
Members can start their own topics & subscribe to topics
It’s free and only takes a minute

Register

Sign in

  • Similar Topics
    Replies
    Views
    Last post

Return to “RC10 Buggy Forum”

Who is online

Users browsing this forum: No User AvatarAmazon [Bot], No User AvatarTbot [Bot] and 14 guests