The frankenbuggy build

General discussion, builds/restorations, etc...

Moderators: scr8p, klavy69

cautrell05
Approved Member
Posts: 209
Joined: Tue Feb 15, 2011 1:51 pm
Location: Norfolk Nebraska

The frankenbuggy build

Post by cautrell05 »

After my 10T shortcourse build I figured it was time for another build. I likes scr8p's b1.5 build and figured id do something similar but still different. I wanted it to be associated as much as practical, light enough to be competative, some modern upgrades, durable, and minimal discontuned parts.
Parts list so far
ebay T2 pan, noseplate and shock tower
GT rear arm mounts
Traxxas bandit rear arms
Custom works rear hubs
B4.1 axles, bearing spacer, dogbones
Sc10 gear diff trans
B4 1.18 blue shocks
RPM Traxxas bandit front arms
B4 caster blocks
1.02 blue shocks
B4 wheels front and rear
Hand made front and rear bukheads
Losi XX turnbuckles

On to the pics
Image

Image

The joys of ebay :roll: The only pic was straight down from the top. Didnt notice the notch untill after I bid on it. It came with a noseplate with a stripped out hole, a broken off ball stud in the rear bulkhead and a usable rear tower. Good thing it was only $11 with shipping. I still have no idea what they were doing. Wasnt originally planning on cutting the sides down but it looks like I dont have much choice.

Image

I went with the SC10 trans just to see how the gear diff was. I have heard of a lot of people that like how it works and if I dont like it I can always change it out for a ball diff. The transmission went on pretty easy. Open the square in the pan up a bit and slot out the two rear holes and its in.

Image

The bandit arms are just a little narrower at the inner mount than the RC10 arms. I forgot to measure but I think it was only about 1/8 inch difference. Nothing a scroll saw and a sander cant fix. I really dont understand why traxxas uses all metric screws and bearings but the hinge pins are all 1/8 inch. Thats fine with me. Less parts to modify that way. They do however have toe in built in to the arms. A couple of options are 0 degree inner mounts, not easy to find, or simply run 1.5 or 3 degree hubs with them switched side to side. I figured it would just be easier to spread the arm mounts before I drilled the front holes to take some toe in out. I might make some inner mounts later and just run the stock frame holes and a 0 mount. thats something for later though.

Image
Image
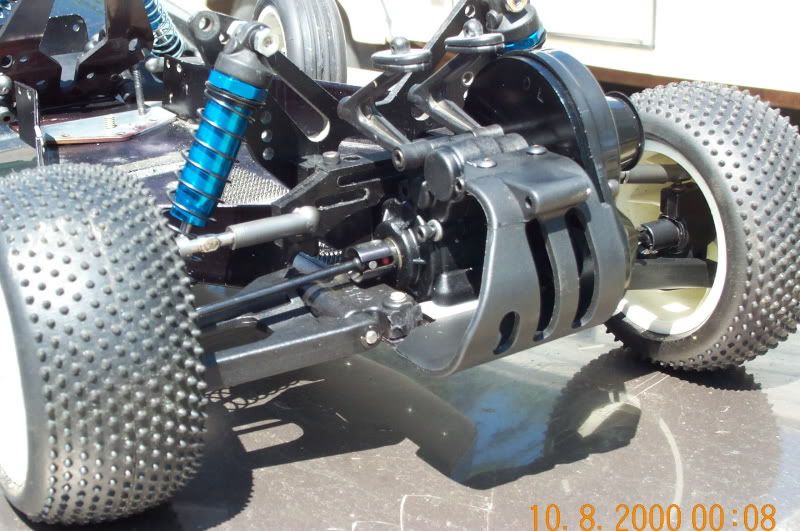
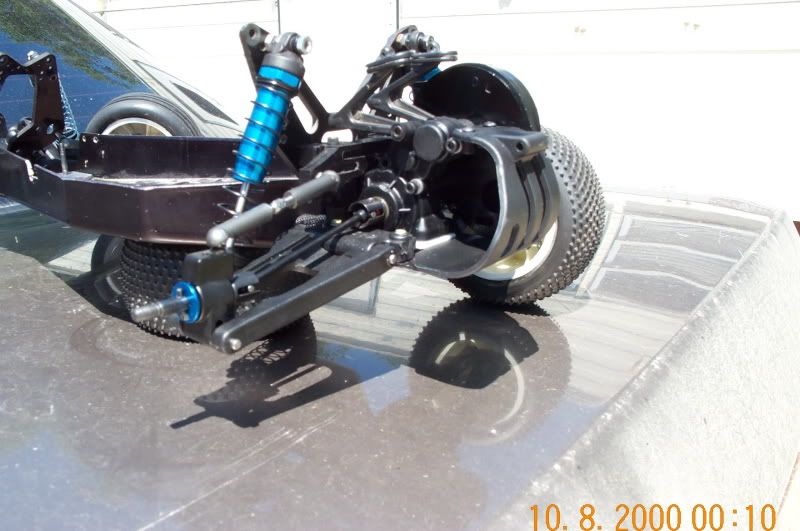
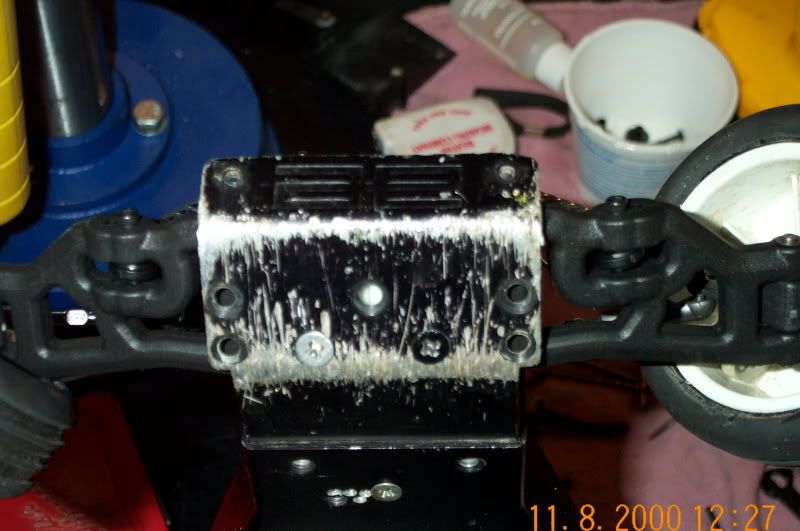
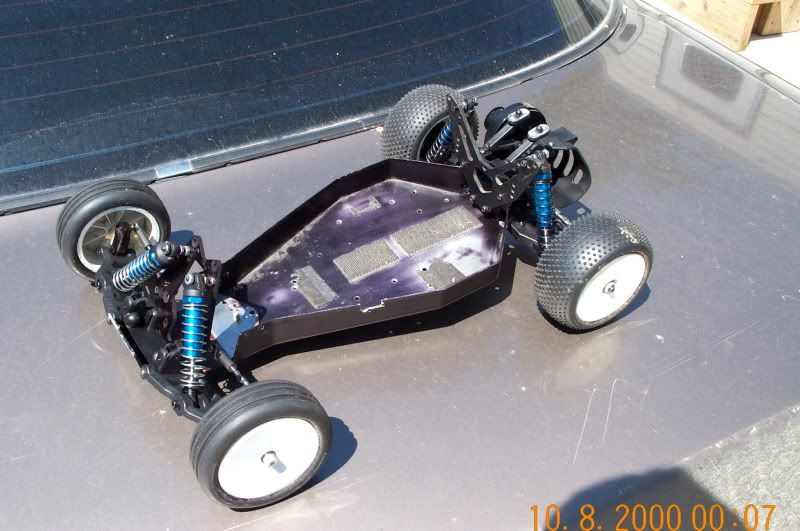
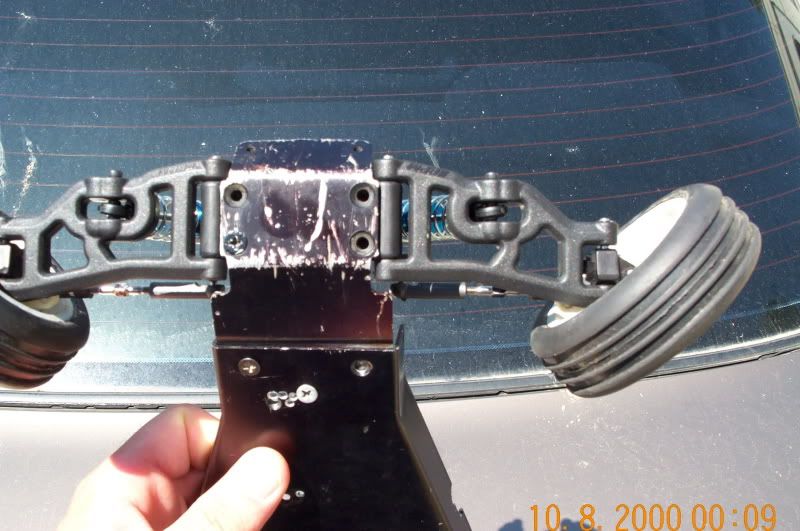
Couple shots of the rear to show off the traxxas arms and the custom works hubs(thanks scr8p). The b4 bones fit perfectly and the T2 tower actually fits really well. The shock spacing is just right and I dont have to make a rear shock tower. They are discontinued but they are on ebay alot. I did recess the outer bearing in the hub another .025 so that the bearing spacer worked. I could have used shims on the inside but I needed to narrow the back up just a bit.

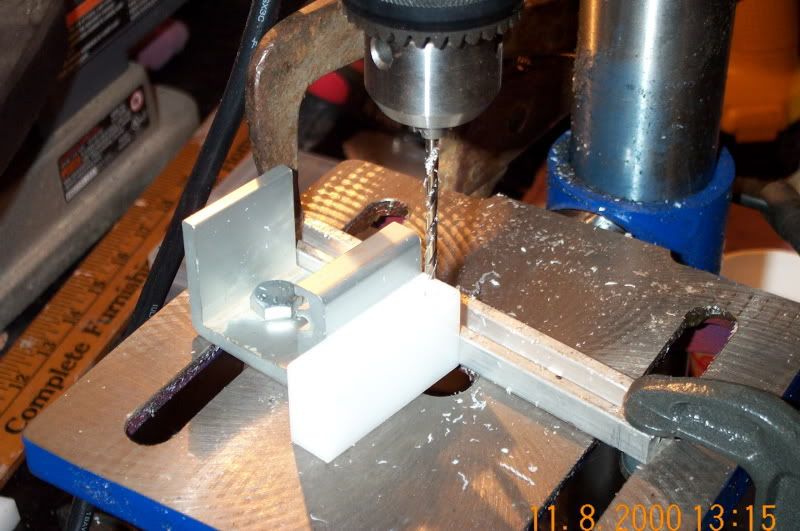
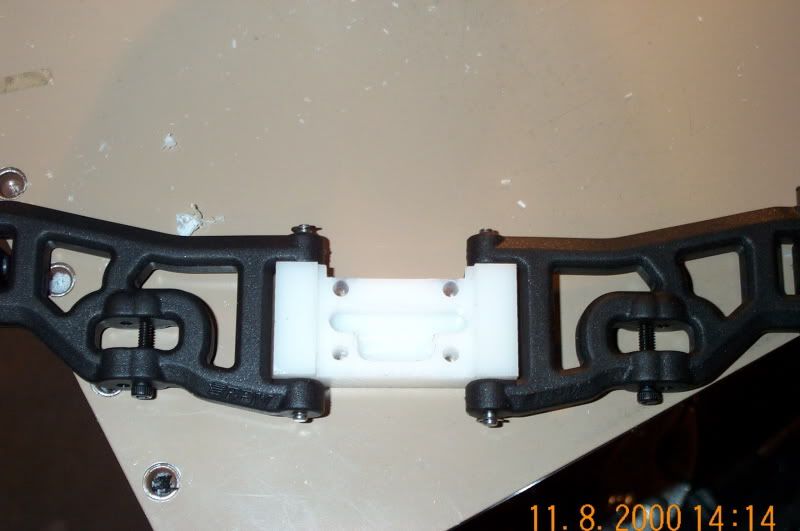
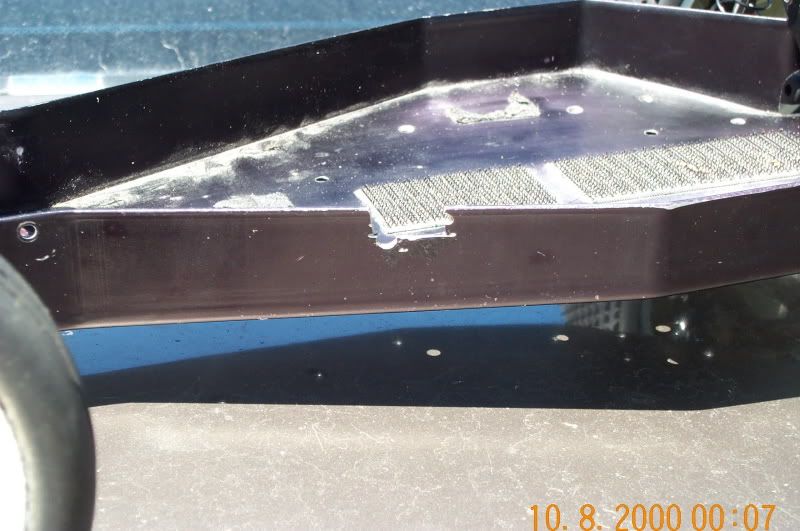
The rear bulkhead had to be full custom in order to support the transmission and give me some usable rear link positions as well as mount the shock tower. The T2 bulkhead gave me no camber change at all and wasnt going to work for me.

Image
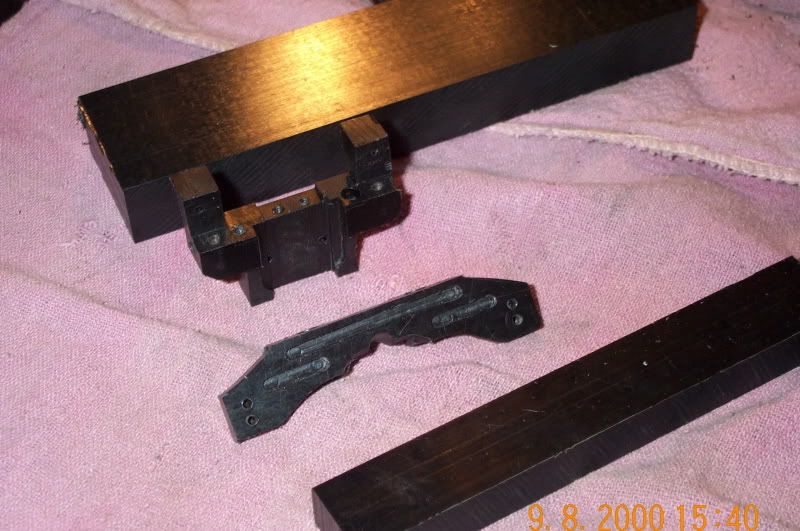
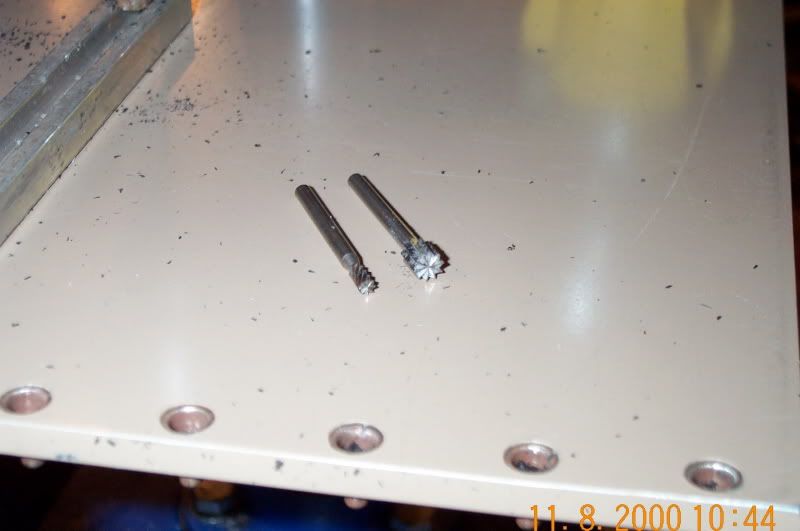
The lighting in my garage sucks so these didnt show up very well. They started as two blocks of delrin and after a few hours I had a bulkhead and link mount. The two are only 7 grams more than the t2 bulkhead so I can live with that. I will get some better pictures for all of you.

Image

Image

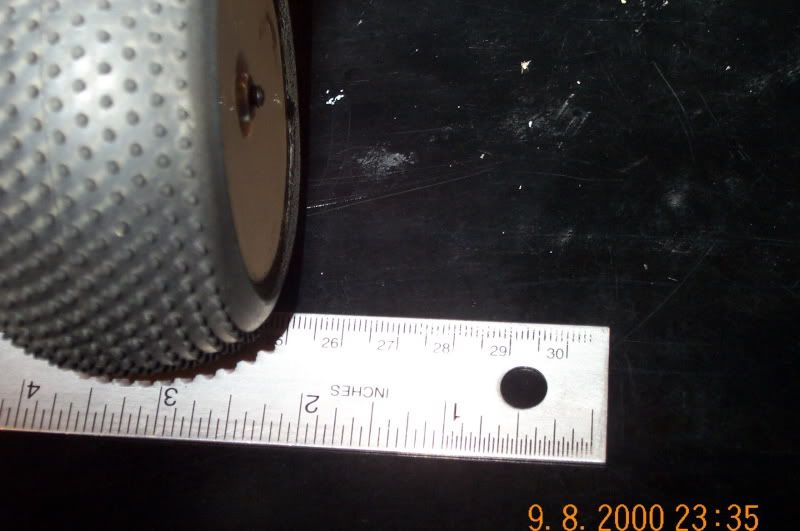
Right where it needs to be.

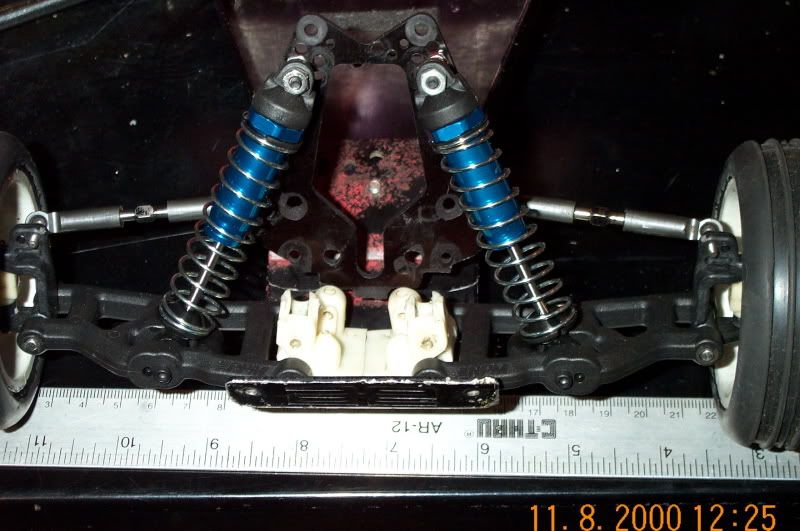
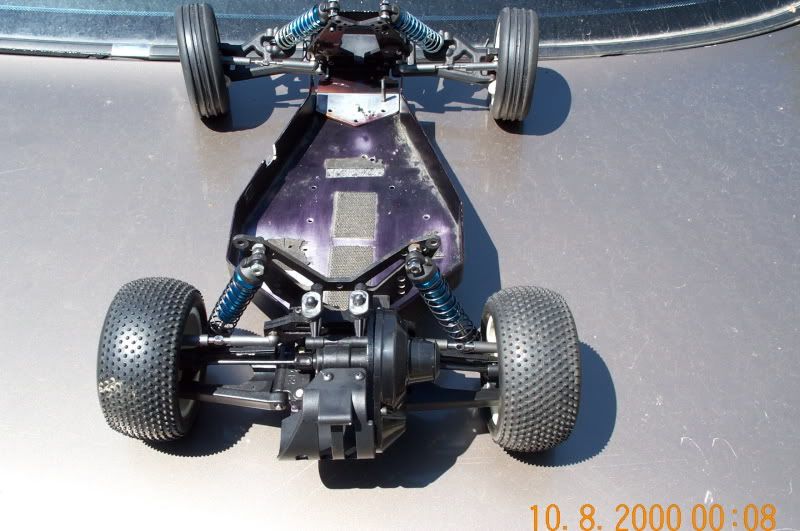
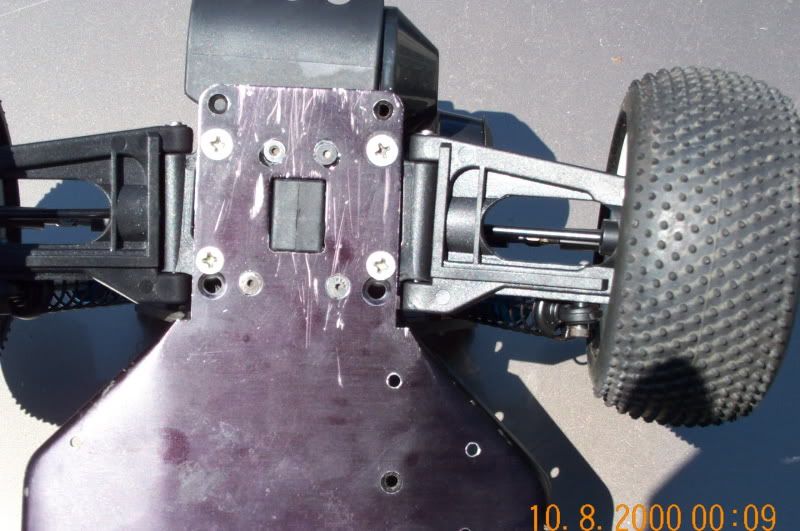
I didnt luck out as well in the front.
Image

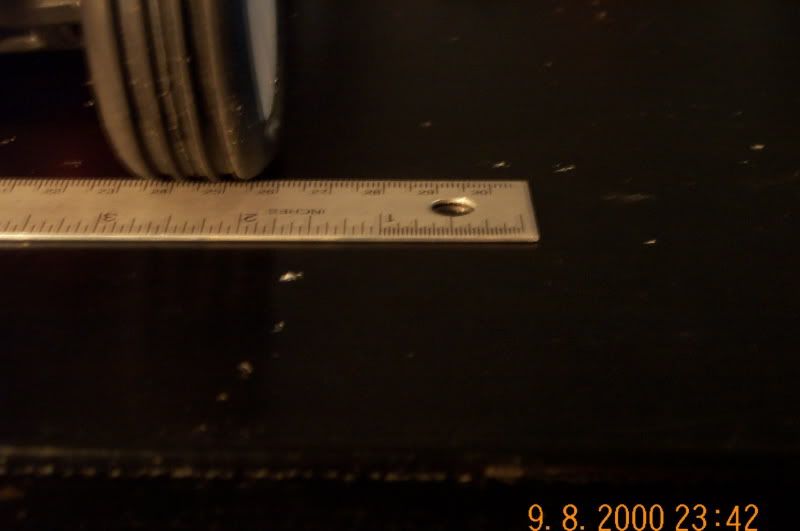
With the old style caster blocks it came out 10 mm too wide. If I go with the b4 caster blocks it will be wider yet. I didnt really feel like spending $20 on another pair of arms so a new front bulkhead is in the works. I need to get it mocked up with the b4 caster blocks to see how much I need to narrow it up. For right now heres how it sits.

Image

Image

They use 1/8 hinge pins and fit the stock 10T bulkhead perfectly. Too bad they are just a bit long.

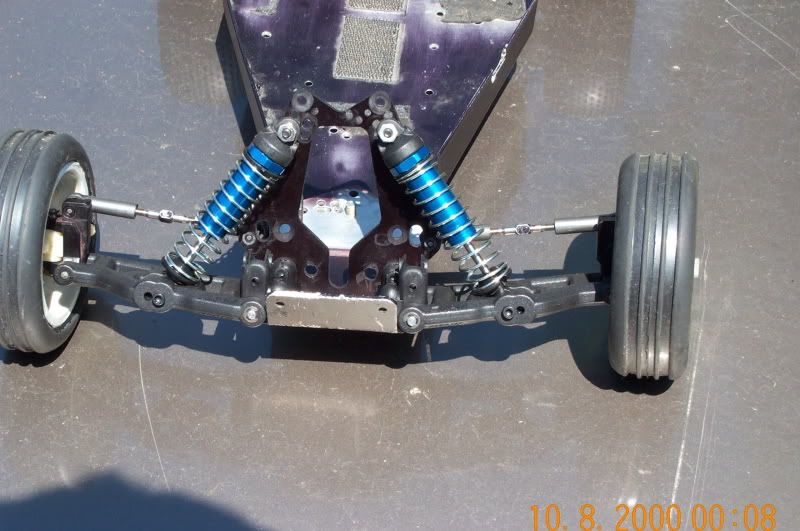
I think I have a buggy nose plate found that I can trim down and then I will tear into the front end. Back half is actually done as far as fab work with the exception of a spacer for the wing mounts. Compared to my short course build this one is going real fast.

Nick

User avatar
Mindwarp
Approved Member
Posts: 515
Joined: Mon Mar 14, 2011 6:14 pm
Location: Kingston, Ontario, Canada

Re: The frankenbuggy build

Post by Mindwarp »

Excellent! I really enjoy seeing custom fab work. Where did you pick up the Delrin? Do you find it easy to work with? Also, does it hold screw holes well?

cautrell05
Approved Member
Posts: 209
Joined: Tue Feb 15, 2011 1:51 pm
Location: Norfolk Nebraska

Re: The frankenbuggy build

Post by cautrell05 »

I got the delrin from ebay. It came in an assortment of various sizes.
http://cgi.ebay.com/Plastic-Asst-Black-Delrin-acetal-blocks-7-pcs-109-/180689182111?pt=LH_DefaultDomain_0&hash=item2a11ea1d9f
http://cgi.ebay.com/Plastic-Asst-Black-Delrin-acetal-blocks-7-pcs-110-/180690121679?pt=LH_DefaultDomain_0&hash=item2a11f873cf

It cuts like hardwood and takes screws well. I will try to get pics of my redneck mill that I used to cut it but it was very easy to work with. Should be just about bombproof too.
Nick

User avatar
Mindwarp
Approved Member
Posts: 515
Joined: Mon Mar 14, 2011 6:14 pm
Location: Kingston, Ontario, Canada

Re: The frankenbuggy build

Post by Mindwarp »

Yes please, I'd like to see your mill.

User avatar
ROH73
Approved Member
Posts: 623
Joined: Sun Feb 10, 2008 12:07 am
Location: State College, PA
Has thanked: 2 times
Been thanked: 22 times

Re: The frankenbuggy build

Post by ROH73 »

Delrin (generic name acetal) is just about the easiest plastic to machine. It tends to chip very well when machining (almost like aluminum), instead of "smearing" like softer plastics such as nylon, pvc, polypropylene and polyethylene. Delrin is also easy to tap. On the downside, it's quite dense as compared to nylon and therefore heavier. Strength and wear resistance is great, but it's less flexible then nylon.

User avatar
losiXXXman
Approved Member
Posts: 935
Joined: Sat Aug 29, 2009 9:53 am
Location: Cary, NC
Been thanked: 5 times

Re: The frankenbuggy build

Post by losiXXXman »

Excellent work! Good to see someone innovating with this stuff. Someone (I'm not saying who :D ) posted recently that ever since the "old is new" formula - dynotech arms and such, there hadn't been as much experimentation going on. Refreshing to see something NEW that isn't "Old is New" :lol:

BTW - What's the hinge pin to hinge pin length of those front arms, if you don't mind. They may be just the ticket for widening up an Ultima, and they are easy to source /replace.

User avatar
Lonestar
Approved Member
Posts: 4270
Joined: Wed Dec 12, 2007 5:17 am
Location: Switzerland, yannow, in Europe (or almost)
Has thanked: 623 times
Been thanked: 171 times

Re: The frankenbuggy build

Post by Lonestar »

Congrats on a cool build - respect :!:

Paul
AE RC10 - Made In The Eighties, Loved By The Ladies.
Blue Was Better - now, Blue Is Bankrupt.
Facebook affiliate program manager: "They go out and find the morons for me".
Life is short. Waste it wisely.

User avatar
jwscab
Approved Member
Posts: 6571
Joined: Wed Jan 28, 2009 9:42 am
Location: Chalfont, PA
Has thanked: 16 times
Been thanked: 498 times

Re: The frankenbuggy build

Post by jwscab »


User avatar
losiXXXman
Approved Member
Posts: 935
Joined: Sat Aug 29, 2009 9:53 am
Location: Cary, NC
Been thanked: 5 times

Re: The frankenbuggy build

Post by losiXXXman »

Thanks Joe! Seems they might make a suitable replacement for Ultima wide front arms. I think I'll have to use a modern narrow offset wheel (B4ish) to keep it in spec for width - but that would be the plan anyway.

cautrell05
Approved Member
Posts: 209
Joined: Tue Feb 15, 2011 1:51 pm
Location: Norfolk Nebraska

Re: The frankenbuggy build

Post by cautrell05 »

Heres my makeshift mill.

Image

Its closer to an inverted router than a mill but it works. The slab of aluminum makes a smooth even surface for the pieces to slide on and all the straight cuts use the other piece clamped there for a guide. I dont mess with the clamped piece much. Its easier to just losen the table and move it side to side to set where its going to cut.

My depth adjustment

Image

In original form both nuts were on the top. one for a depth stop and the other for a jamnut. With one over and one under I can pull the head down, turn the nut one flat or one turn depending on how deep I want to go and then release it and it will stay at that depth. It works pretty well actually.

Both the cutting bits I used were for a dremel

Image

The small one was mainly used for cutting slots. I used the larger one alot. It was brand new and has never seem metal so it cuts through plastic very well. I went fairly easy on it. most of my deep cuts were only 1/16 inch at a time. I changed the belts to speed the drill up as fast as it would go. Any other questions let me know.

Nick

cautrell05
Approved Member
Posts: 209
Joined: Tue Feb 15, 2011 1:51 pm
Location: Norfolk Nebraska

Re: The frankenbuggy build

Post by cautrell05 »

Got a bit more done tonight. A friend of mine came through with a buggy noseplate for me. It looks like it has seen more than enough curbs and concrete in its life but I can polish it out enough to work. Changed the caster blocks over to the b4 blocks and then remeasured my width. To get it in specs I needed to pull 16 mm out of the front bulkhead. When I started measuring on the bulkhead I found the two inner a-arm mount holes were the perfect width to use. I chopped up an old 10t front bulkhead for mockup and rechecked my width.

Image

Image

Its now 246 mm outside to outside. Im not going to worry about 2mm perside. Now that I had a pattern I made a practice bulkhead. I have a couple hundred of the white blocks so I used one of those.

I made a quick jig to line up the block. After I got my pin spacing from the edge set I drilled one side and then simply flipped it over and did the other side. No measuring needed. did the same thing for all 4 mounting holes.
Image

Im pretty happy with how the bulkhead turned out. I need to change a few minor things for the good one but not much.
Image

Image
I will just screw the two bottom ones in place and use the holes to mark the upper holes. Easy enough.

Nick

User avatar
Mindwarp
Approved Member
Posts: 515
Joined: Mon Mar 14, 2011 6:14 pm
Location: Kingston, Ontario, Canada

Re: The frankenbuggy build

Post by Mindwarp »

Man, I'm really digging the custom work. Nice.

User avatar
ROH73
Approved Member
Posts: 623
Joined: Sun Feb 10, 2008 12:07 am
Location: State College, PA
Has thanked: 2 times
Been thanked: 22 times

Re: The frankenbuggy build

Post by ROH73 »

I love the makeshift mill! I have $500 invested in a used Sherline mill and I don't get any better results :D . Nice work!

User avatar
losiXXXman
Approved Member
Posts: 935
Joined: Sat Aug 29, 2009 9:53 am
Location: Cary, NC
Been thanked: 5 times

Re: The frankenbuggy build

Post by losiXXXman »

That is bad a$$! I definitely need to make a drill press my next purchase for the garage. I bought a router and table about 3 months ago, but the more I thought about it, the more I wished I had gotten a new highe end dremel or a press. Took the router and table back to Lowes this weekend, but unfortunately a home project took precedence over new tools and I came home with lumber and some trim.... Keep up the good work..

cautrell05
Approved Member
Posts: 209
Joined: Tue Feb 15, 2011 1:51 pm
Location: Norfolk Nebraska

Re: The frankenbuggy build

Post by cautrell05 »

Not a lot of progress lately. It has ben in the 90s with high humidity for a while now and my garage is a bit too warm right now. I did get the front nose plate trimmed and the test bulkhead fitted.

Image

I narrowed up the front a bit but I am planning on running the screws for the nose tubes right in the corners. Gotta keep the style points in there dont we?
When it cools down a bit the bulkhead is next. I am a little dissapointed that it looks like a custom made b2/b3 front end. Oh well. Thats what im going with for now.

Nick

Create an account or sign in to join the discussion

You need to be a member in order to post a reply

Create an account

Not a member? register to join our community
Members can start their own topics & subscribe to topics
It’s free and only takes a minute

Register

Sign in

  • Similar Topics
    Replies
    Views
    Last post

Return to “RC10 Buggy Forum”

Who is online

Users browsing this forum: No registered users and 10 guests