Cougar 2 Team_Rebuild for racing

The place for all things Schumacher.

Moderators: scr8p, klavy69

User avatar
Groomi
Approved Member
Posts: 256
Joined: Thu Aug 23, 2012 6:11 pm
Location: Kent, UK
Has thanked: 1 time
Been thanked: 2 times

Cougar 2 Team_Rebuild for racing

Post by Groomi »

I managed to find a good deal on a Cougar 2 Team in the Oople classifieds which had been run in a club vintage series. It's in pretty good condition, but has more play in the suspension pivots than I would like and one or two other bits which I would want to tweak anyway.

A mate of mine has persuaded me to have a crack at racing again after a near 20 year hiatus, so this is going to be the car for my comeback (that makes it sound like I used to be good - I wasn't). It's going to be raced at Eden Park which is mostly astroturf, very bumpy with a couple of big jumps. My plan is to quickly sort the car out for my first race on 2nd December, then over time modify it drastically to bring performance up to towards the modern stuff.

My budget is small hence rehashing old kit and family commitments mean that racing won't be a regular thing and testing will be virtually non-existent, so changes and mods are down to (in no particular order) experience, knowledge, guesswork and gut feeling.

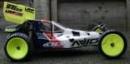
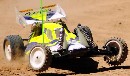
To kick things off with, this is how it arrived. The shell is new and just painted, but I won't be running (and wrecking) it, instead I'll run an old shell to start with and put this on a refurb to be sold.
Image

Under the skin, the roller driveshafts, slipper clutch and ballraced steering is all present. An old and battered Lipo cell was included and there's a carbon front brace to strengthen the lower mounts.
Image

Work needed to progress quite quickly as I have a lot to learn about modern electrics, so the car is not the only thing that needs preparation. First of all it was stripped down to the bare chassis which is straight and in relatively good condition, just a few scratches as you'd expect and two holes drilled for the servo.
Image

As I am about twenty years out of practice, I suspect there will be a lot of crashing going on to start with. So with budget in mind and after a long discussion with a mate, we decided I should start off with NiMh cells and a brushed motor and upgrade early next year if the bug continues to bite. So first issue is where to position the (very kindly loaned) cells. Being larger than the old NiCads, it obviously doesn't fit under the rear bulkhead, so the obvious position is widthways across the chassis:
Image

But I'm really not happy with the weight distribution like that, so it must be made to fit down the middle. I have worked out what I need to modify to make it fit, so this is how it will be configured:
Image

Next job is cleaning up various parts and to start reassembly. Basic spec will be:

* Replace roller driveshafts with plastic (don't want to damage those precious things!).
* Modify rear bulkhead to accept larger cells.
* Build up 2 or 3 sets of varishocks to different specs to allow fast setup changes.
* Reassemble with high tensile allen head screws wherever possible.
* Fit Cougar 1 front wishbones to lengthen the wheelbase.
* I'm toying with the idea of fitting the Bosscat Works rear suspension arms and hubs as they give the same wheelbase, but slightly longer links. Only concern about this is spares...

Anyway. Onwards with the build.
Using my son as an excuse to relieve my youth. :lol:

https://www.facebook.com/MuzzoomModels

User avatar
CAT3K
Approved Member
Posts: 641
Joined: Mon Dec 06, 2010 7:28 am
Location: UK

Re: Cougar 2 Team_Rebuild for racing

Post by CAT3K »

It's always cool when someone decides to race an old buggy :)

I would definately run the cells down the middle if you're running on astro. To get newer NiMh or lipos to fit you'll need to cut part of the bulkhead away. It's easy enough to dremel enough material away. I would give the Cougar 2 front arms a try first and see how it handles before trying the Cougar 1 versions.

I keep trying to talk myself into running one of my old buggies for a season, instead of my modern stuff :lol:

Keep us posted on its progress.

Paul

User avatar
Groomi
Approved Member
Posts: 256
Joined: Thu Aug 23, 2012 6:11 pm
Location: Kent, UK
Has thanked: 1 time
Been thanked: 2 times

Re: Cougar 2 Team_Rebuild for racing

Post by Groomi »

I trimmed the sides off the rear bulkhead and bolted through chassis for extra strength, using nylon spacers to allow larger battery fitment. Although the bulkhead will need to be re-drilled to mount to transmission housing later, this enables me to keep the brace across the top of the battery. It will also alter the suspension geometry slightly but this probably won't be much of an issue and is an area where I intend to make further changes at a later date anyway.
Image

You'll notice the use of washers and high tensile allen screws as part of my 'belt and braces' approach. It may not be the lightest car on track, but hopefully it will stand up to the anticipated number of crashes...
Using my son as an excuse to relieve my youth. :lol:

https://www.facebook.com/MuzzoomModels

User avatar
Groomi
Approved Member
Posts: 256
Joined: Thu Aug 23, 2012 6:11 pm
Location: Kent, UK
Has thanked: 1 time
Been thanked: 2 times

Re: Cougar 2 Team_Rebuild for racing

Post by Groomi »

Front end mounted with maximum caster angle in an anticipated battle with grip-roll. I've used a front section which had previously been drilled for a bumper as this may prove useful to start with!
Image
Using my son as an excuse to relieve my youth. :lol:

https://www.facebook.com/MuzzoomModels

User avatar
Groomi
Approved Member
Posts: 256
Joined: Thu Aug 23, 2012 6:11 pm
Location: Kent, UK
Has thanked: 1 time
Been thanked: 2 times

Re: Cougar 2 Team_Rebuild for racing

Post by Groomi »

Paul,
Thanks for your comments. I'm going to build up two complete front ends (C1 arms and C2 arms) so they can be quickly swapped over.

I'm playing 20 years of catch-up with finding the right setup!
Using my son as an excuse to relieve my youth. :lol:

https://www.facebook.com/MuzzoomModels

User avatar
Groomi
Approved Member
Posts: 256
Joined: Thu Aug 23, 2012 6:11 pm
Location: Kent, UK
Has thanked: 1 time
Been thanked: 2 times

Re: Cougar 2 Team_Rebuild for racing

Post by Groomi »

Rear wishbones and hub carriers from the Bosscat Works fitted. Only two holes to mount the shocks to, but geometry improvement should be worthwhile. Out of interest, does anyone know if these were fitted to the Cougar Works?
Image

Front and rear wishbones all fitted and slop free. Rear shock mount fitted and front one refitted in correct position.
Image
Using my son as an excuse to relieve my youth. :lol:

https://www.facebook.com/MuzzoomModels

Headling
Approved Member
Posts: 545
Joined: Tue Dec 06, 2011 6:17 am
Location: Kent , UK
Has thanked: 25 times
Been thanked: 29 times

Re: Cougar 2 Team_Rebuild for racing

Post by Headling »

Welcome to the forum, nice build you have going on there!

I race at Epr from time to time (regionals etc) so will come and say hi.

Iv got 2 x Cougars (build threads on here) one is a shelfer and the other is a racer (Oople race 2012 winner!)

If you need any set up help etc just ask
If in doubt go flat out!

User avatar
Groomi
Approved Member
Posts: 256
Joined: Thu Aug 23, 2012 6:11 pm
Location: Kent, UK
Has thanked: 1 time
Been thanked: 2 times

Re: Cougar 2 Team_Rebuild for racing

Post by Groomi »

Thanks Headling, I've read, re-read and re-read again your vintage winning C2 thread. If you are at EPR, I'll be the lost looking bloke trying to fix a badly crashed C2. :lol:

Final update for tonight is the front hub assemblies all built up and mounted.
Image

So far the only joints with any play are the front lower wishbones where they mount to the front bulkhead. I'll solve this by sleeving the joints but probably won't have time before the first race, so this will be a follow-on upgrade. All the other joints are completely slop-free although possibly a touch too tight in places - but that's far easier to solve.
Using my son as an excuse to relieve my youth. :lol:

https://www.facebook.com/MuzzoomModels

User avatar
DerbyDan
Approved Member
Posts: 1837
Joined: Tue Sep 08, 2009 8:04 am
Location: Northampton UK
Has thanked: 2 times
Been thanked: 19 times

Re: Cougar 2 Team_Rebuild for racing

Post by DerbyDan »

Groomi wrote:Rear wishbones and hub carriers from the Bosscat Works fitted. Only two holes to mount the shocks to, but geometry improvement should be worthwhile. Out of interest, does anyone know if these were fitted to the Cougar Works?
Image
Yes - this was the stock set-up for the 'Works' C2 :wink:

I saw this on Oople too - was a decent price considering it included those lovely roller driveshafts 8)

Loving what you are doing so far, I'm sure you'll have alot of fun with it, there's something quite satisfying running these old cars against the modern stuff. I started back racing off road after a 10yr or so hiatus with the RC10 in my Avatar (although I have been continuously racing Touring Cars in-between) I must admit it got my thumbs/brain back into the 3rd dimension of ramps & bumps... but the rear motor layout & short arms of the RC10 mean't I was at a dissadvantage on the bumpy astro of modern off road tracks, & I couldn't help but have to to join the mid-motor crew as I wanted to be competitive! However the RC10 was fun whilst it lasted & always caused a few raised eyebrows & complimentary comments at race meetings! 8)

User avatar
Groomi
Approved Member
Posts: 256
Joined: Thu Aug 23, 2012 6:11 pm
Location: Kent, UK
Has thanked: 1 time
Been thanked: 2 times

Re: Cougar 2 Team_Rebuild for racing

Post by Groomi »

DerbyDan wrote:... but the rear motor layout & short arms of the RC10 mean't I was at a dissadvantage on the bumpy astro of modern off road tracks, & I couldn't help but have to to join the mid-motor crew as I wanted to be competitive!
Don't worry - I have plans for this car. 8)
Using my son as an excuse to relieve my youth. :lol:

https://www.facebook.com/MuzzoomModels

User avatar
Bormac
Approved Member
Posts: 3113
Joined: Wed Sep 05, 2007 3:52 pm
Location: CENTRAL COAST, NSW AUSTRALIA
Has thanked: 21 times
Been thanked: 11 times

Re: Cougar 2 Team_Rebuild for racing

Post by Bormac »

Very glad to see another Cougar2 buggy up here with intentions for the race track.

Personaly I have had a lot of success with my CGR2 at various vintage meetings along the east coast of Australia over the past 6 odd years (when I was racing anyway).

I have never had any reliability isues with my car on any occassion and the car has always perfored better than my driving ability.

The WORKS rear suspension is a handy addition and will reduce the unsprung weight (did I get that right? :oops: ) and should improve handling characteristics over the standard items.

I run my cells down the chassis centre and this has worked well for me.

If I might suggest an absolute must- please search out a set of the purple alloy shock seal housings. With these I find the dampers work really well and leak very little if at all. Give the dampers a chance as they look as good as they should perform when built right.
-Jason.

Still known as- bormac

My collection-http://www.tamiyaclub.com/showroom.asp?id=10980

User avatar
Groomi
Approved Member
Posts: 256
Joined: Thu Aug 23, 2012 6:11 pm
Location: Kent, UK
Has thanked: 1 time
Been thanked: 2 times

Re: Cougar 2 Team_Rebuild for racing

Post by Groomi »

Using my son as an excuse to relieve my youth. :lol:

https://www.facebook.com/MuzzoomModels

User avatar
Bormac
Approved Member
Posts: 3113
Joined: Wed Sep 05, 2007 3:52 pm
Location: CENTRAL COAST, NSW AUSTRALIA
Has thanked: 21 times
Been thanked: 11 times

Re: Cougar 2 Team_Rebuild for racing

Post by Bormac »

Yes that's them.
-Jason.

Still known as- bormac

My collection-http://www.tamiyaclub.com/showroom.asp?id=10980

User avatar
Groomi
Approved Member
Posts: 256
Joined: Thu Aug 23, 2012 6:11 pm
Location: Kent, UK
Has thanked: 1 time
Been thanked: 2 times

Re: Cougar 2 Team_Rebuild for racing

Post by Groomi »

Tonights update - transmission.

First job was to completely strip down the pro diff. I bought an ultrasonic cleaner at the weekend and have been playing about with it trying to work out the best way to clean different types of components. Here are the diff components after cleaning (obviously the bearings weren't put through it):
Image

Then it was the job of rebuilding the diff. I used a new pro thrust bearing and added the cone washers (incidentally, any ideas where I can get these new?):
Image

I found it very satisfying to reassemble the whole transmission. It feels really solid as a unit and turns incredibly smoothly - I'd say this is hte best transmission I've built to date:
Image

And finally the whole assembly mounted to the chassis with just the re-drilling to do to mount it to the rear bulkhead:
Image

I'm very happy with progress and at this rate I should have a rolling chassis by the weekend, then it'll be installing unfamiliar electrics...
Using my son as an excuse to relieve my youth. :lol:

https://www.facebook.com/MuzzoomModels

User avatar
CAT3K
Approved Member
Posts: 641
Joined: Mon Dec 06, 2010 7:28 am
Location: UK

Re: Cougar 2 Team_Rebuild for racing

Post by CAT3K »

Looking good, i'm liking the eccentrics.

I think the thrust bearing new equivalent is this one : http://www.racing-cars.com/pp/Old_Cars_and_Parts/Cougar_95T/U1954.html

Create an account or sign in to join the discussion

You need to be a member in order to post a reply

Create an account

Not a member? register to join our community
Members can start their own topics & subscribe to topics
It’s free and only takes a minute

Register

Sign in

  • Similar Topics
    Replies
    Views
    Last post

Return to “Schumacher Forum”

Who is online

Users browsing this forum: No registered users and 2 guests