Name seemed Fitting. Just something I have been messing with for the last couple weeks in my spare time.
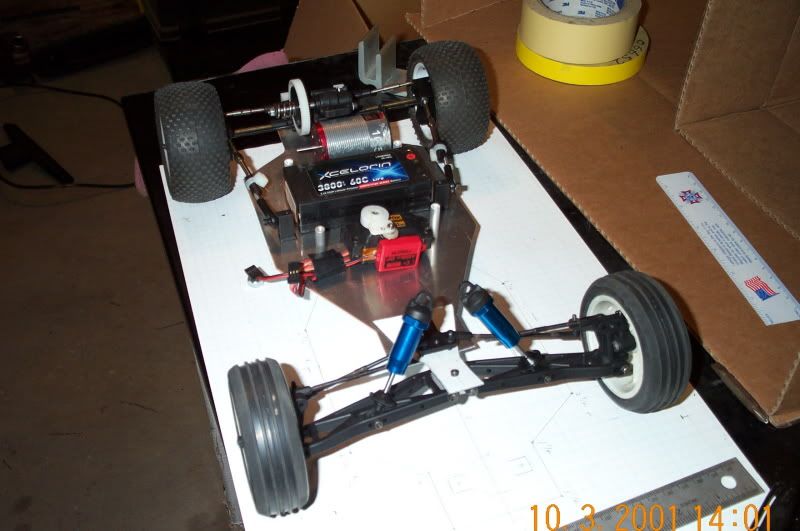
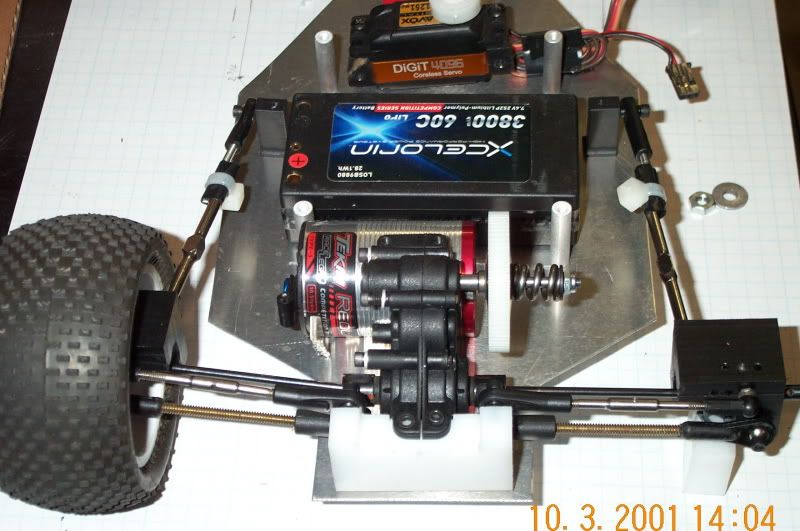
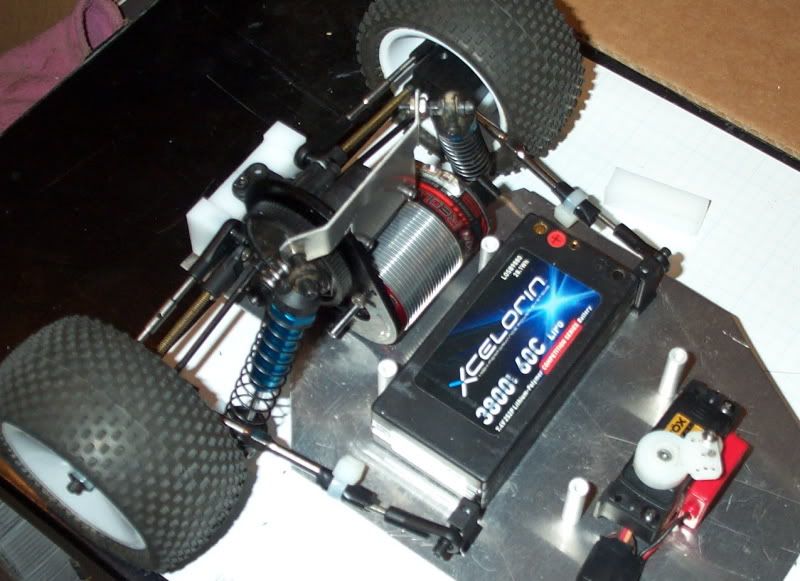
This is definatley my most in depth RC project yet but the other two worked out fine so I figured why not. The front arms and caster blocks are lost XXX-SCT arms as are the steering arms. Associated inline axles were tweaked to fit the losi carriers. I learned from the frankenbuggy and made sure that the ends of the axles are less that 250mm apart. It was 248 at the tires but 253 at the wheel nuts. Doesent fit through the tech box very well. Chassis will be a double deck with the lower being .080 6061 with the sides rolled up to give it some rigidity. Upper deck will be either another piece of .080 aluminum or some .125 fiberglass. Its setup for either a shorty sideways or a side by side saddle pack. Transmission is an sc10 transmission flipped for midmotor. The rear suspension is the real experiment. Its similar to the old losi jrx2 but a little different. All the links out back are temporary till I decide what I need. I made sure to plan enough clear chassis space that If I want to I can mount a normal set of rear arms If it comes to it.
Whats wrong with the zipties? They havent came apart yet lol. Those are there because The 4mm turnbuckles I got were too short. a longer set should take care of that.
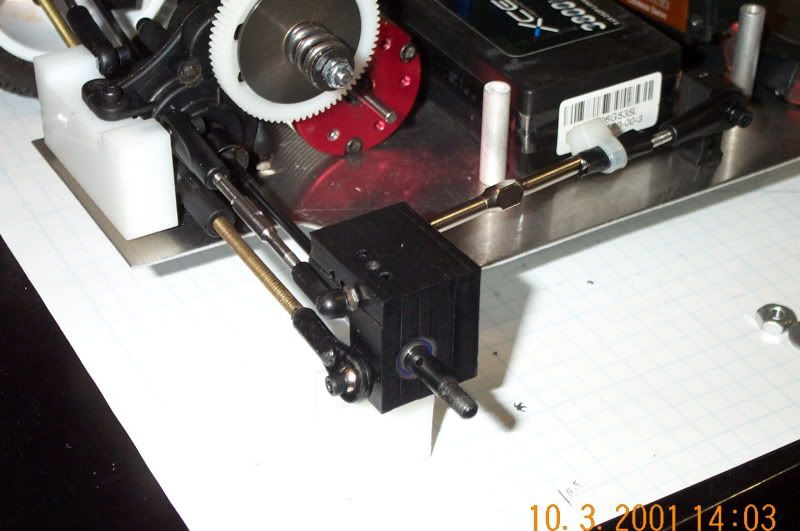
No more links. what you see is what you get. The original JRX2 had 20 pivot points in the rear end. this one has 10. Hopefully that should help with slop. Toe is controlled mainly through the trailing link being rigid to the hub. The upper and lower link take care of camber. The final version will have toe adjusted from the front trailing arm mount.
What's that white piece made of, that's holding on your front end? Looks like that could be a weak point unless that's some pretty strong material.
I'm planning something similar for my final project that will combine parts from a Kyosho Optima, Duratrax Nitro Evader & Tamiya DF03 to build a RWD car...maybe I'll call it the Kyosho Ulti-Mutt.
Coelacanth wrote:What's that white piece made of, that's holding on your front end? Looks like that could be a weak point unless that's some pretty strong material.
you can't be serious... or can you???
AE RC10 - Made In The Eighties, Loved By The Ladies.
Blue Was Better - now, Blue Is Bankrupt.
Facebook affiliate program manager: "They go out and find the morons for me".
Life is short. Waste it wisely.
Coelacanth wrote:What's that white piece made of, that's holding on your front end? Looks like that could be a weak point unless that's some pretty strong material.
you can't be serious... or can you???
Sure I am, I'm dead serious. What I see from the pics is a piece of white...fiberglass? sheetmetal?..that looks to be less than an inch wide and a millimeter or two thick, and the entire front suspension is attached to it--with control arms reversed so they angle forward instead of back. Does that look like it'll sustain a front collision or nose-dive off a jump? I realize it's incomplete, the front shock mount isn't there yet, but it looks like a potential weak spot to me.
I'm not sure where you're coming from with your question...
too me it looks like a piece of white poster board just used as a mockup piece for design purposes. note how it does not appears to even actually connect to the chassis.
LowClassCC wrote:too me it looks like a piece of white poster board just used as a mockup piece for design purposes. note how it does not appears to even actually connect to the chassis.
Ahh...well, I didn't read that anywhere, my apologies if that's the case. It looked like sheetmetal to me.
Bimdapogs wrote:Are you trying to save weight by mounting the motor directly to the chassis?
My dad works for a telephone instal company. I have acess to very large zipties.
Coelacanth wrote: It looked like sheetmetal to me.
Winner! Right now the entire chassis is a single sheet of .035 aluminum. After Idecide on where everything goes then I will transfer it over to the .080 for the main chassis and a piece of .125 for the nose. And technically it is connected. The single screw for the bellcrank is also holding the two pieces together. The reason the front is white is the aluminum I used was originaly for side panels on semi trailers. It has a white powdercoat on one side and mill finish on the other. The bottom of the chassis is white. It works well because I put a single scribe line down the center of the chassis for my center line. All measurements are based off of that to be square and even side to side. The piece for the nose just happended to be upside down.
I weighed it last night just for giggles. as it sits with body and wing missing the esc, rear shocks, towers and upper deck its 11.5 ounces underweight. Obviously it wont be that far underweight when its done but it gives me a goal.
One of the main reasons I went with the reversed front arms is that the frankenbuggy nose sticks out a bit and it seems like anything less than a level landing results in the front end digging in and it doing a lawn dart imitation. Plus they look cool. With that in mind the main front arm mount will be delrin with an aluminum block in front and behind the arms to brace the hingepins.
Ok first update. Not too much progress but the rear end is supporting its own weight. I wanted to stick with a flat tower but no matter where I put the upper shock mounts they would bind bigtime. ended up with them angled but at least there is no binding. Gives me a pretty good idea where the final tower will be. I am planning on running a brace from the tower down to the center of the chassis to take some of the weight off of the top of the gearbox.