Yokomo MX-4 SSG Special
-
naushad
- Approved Member
- Posts: 404
- Joined: Sun Apr 15, 2012 1:00 pm
- Location: Cardiff, Wales, UK
- Been thanked: 12 times
Re: Yokomo MX-4 SSG Special
Dual,
Lovely build photos and I like the high quality hop ups you've used - many hard to find indeed.
Would be a shame not to give a gentle run once finished.
Lovely build photos and I like the high quality hop ups you've used - many hard to find indeed.
Would be a shame not to give a gentle run once finished.
-
Dual
- Approved Member
- Posts: 353
- Joined: Sun Aug 20, 2006 3:47 pm
- Location: Perth, Australia
- Has thanked: 135 times
- Been thanked: 40 times
Re: Yokomo MX-4 SSG Special
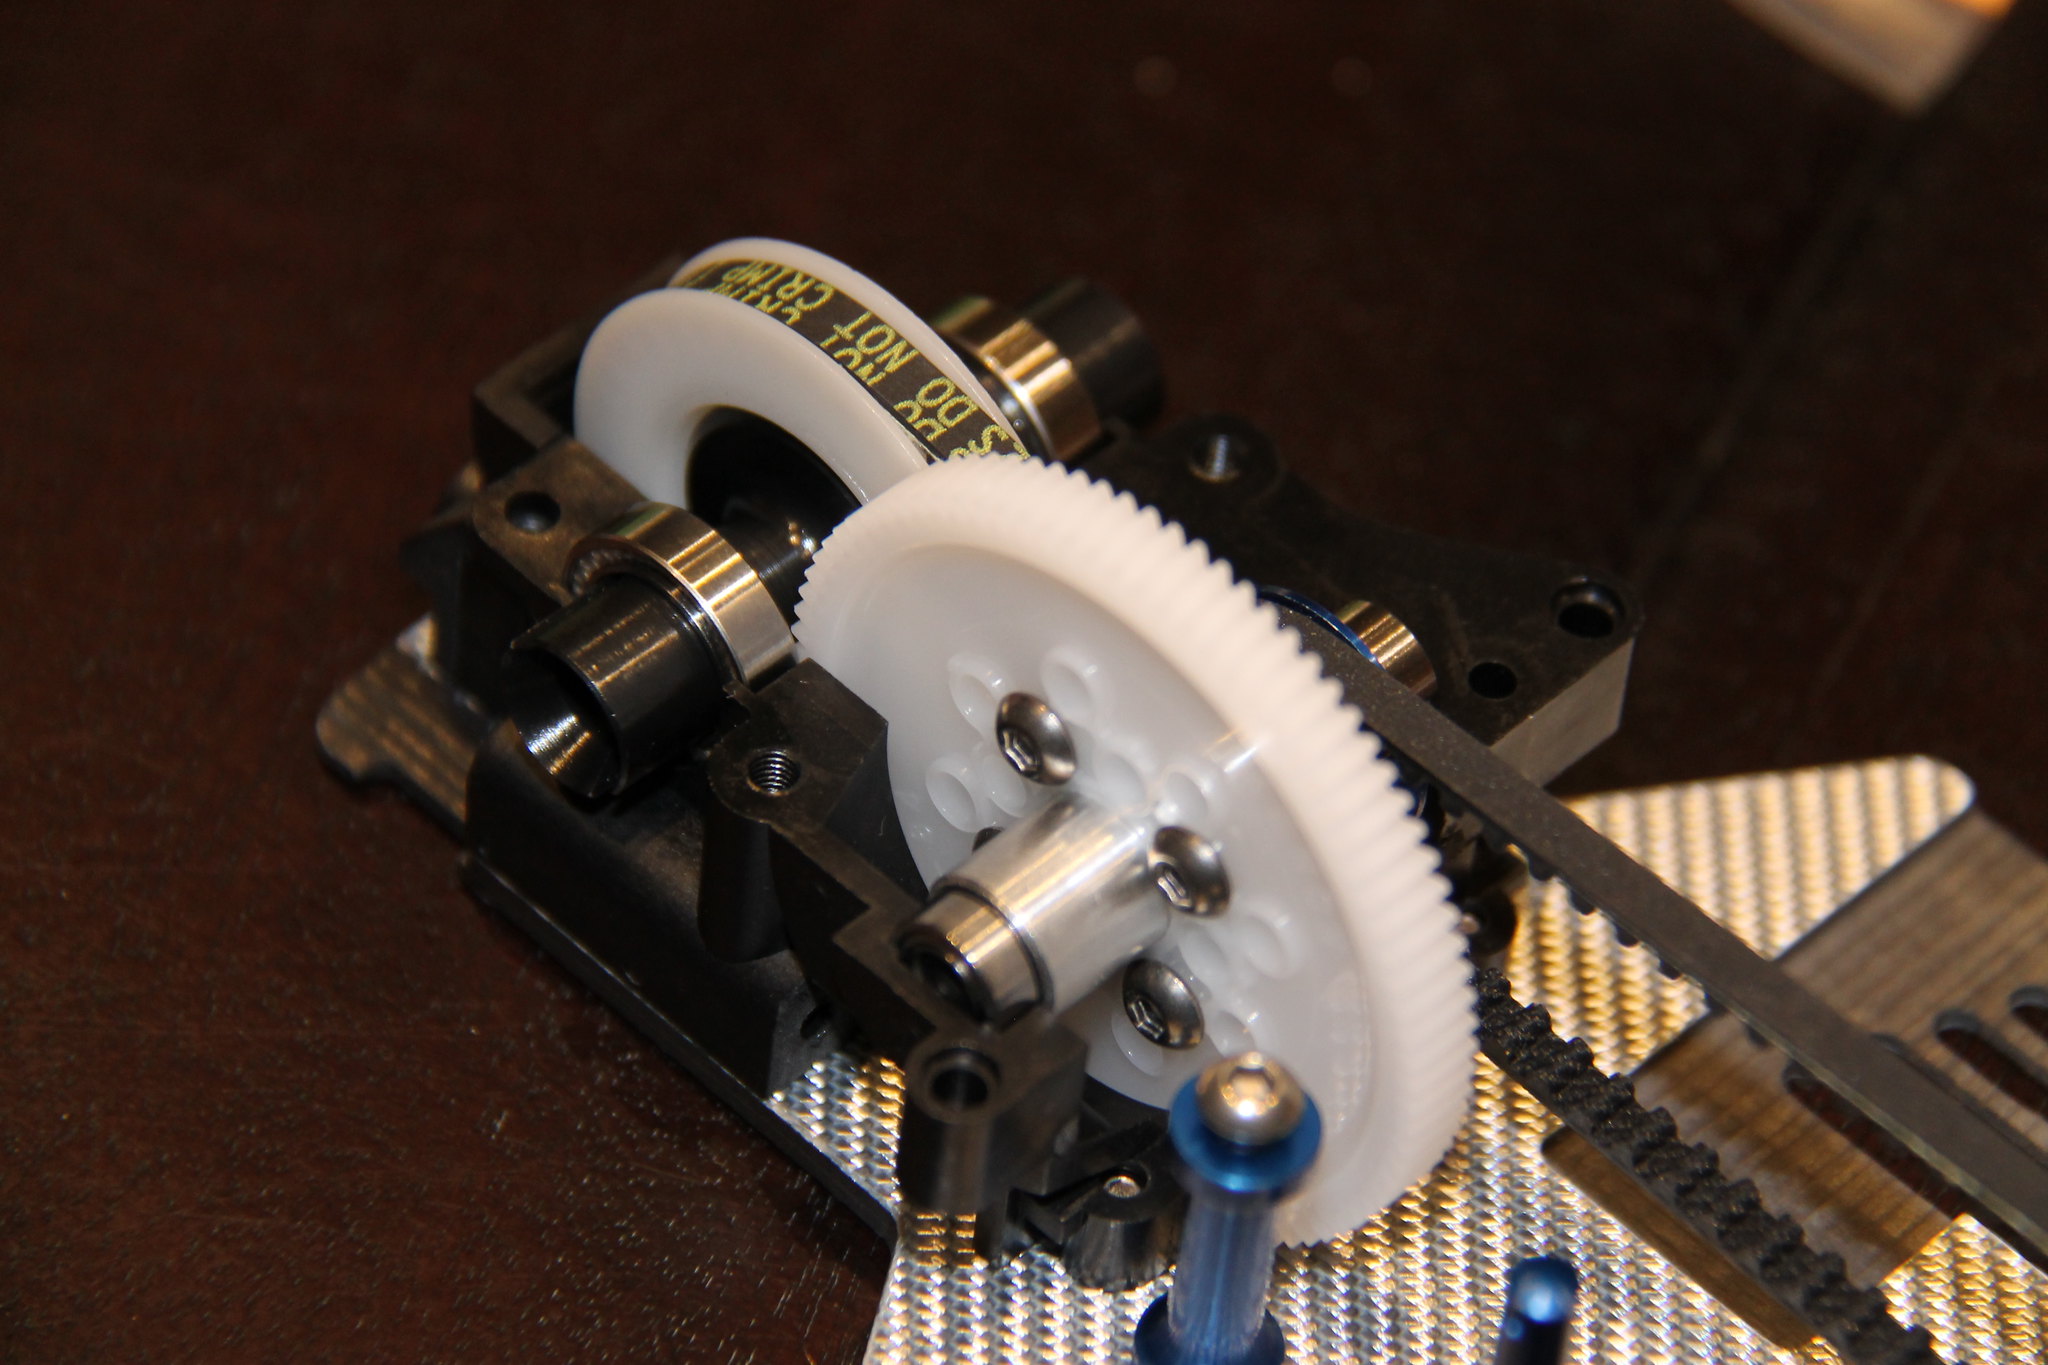
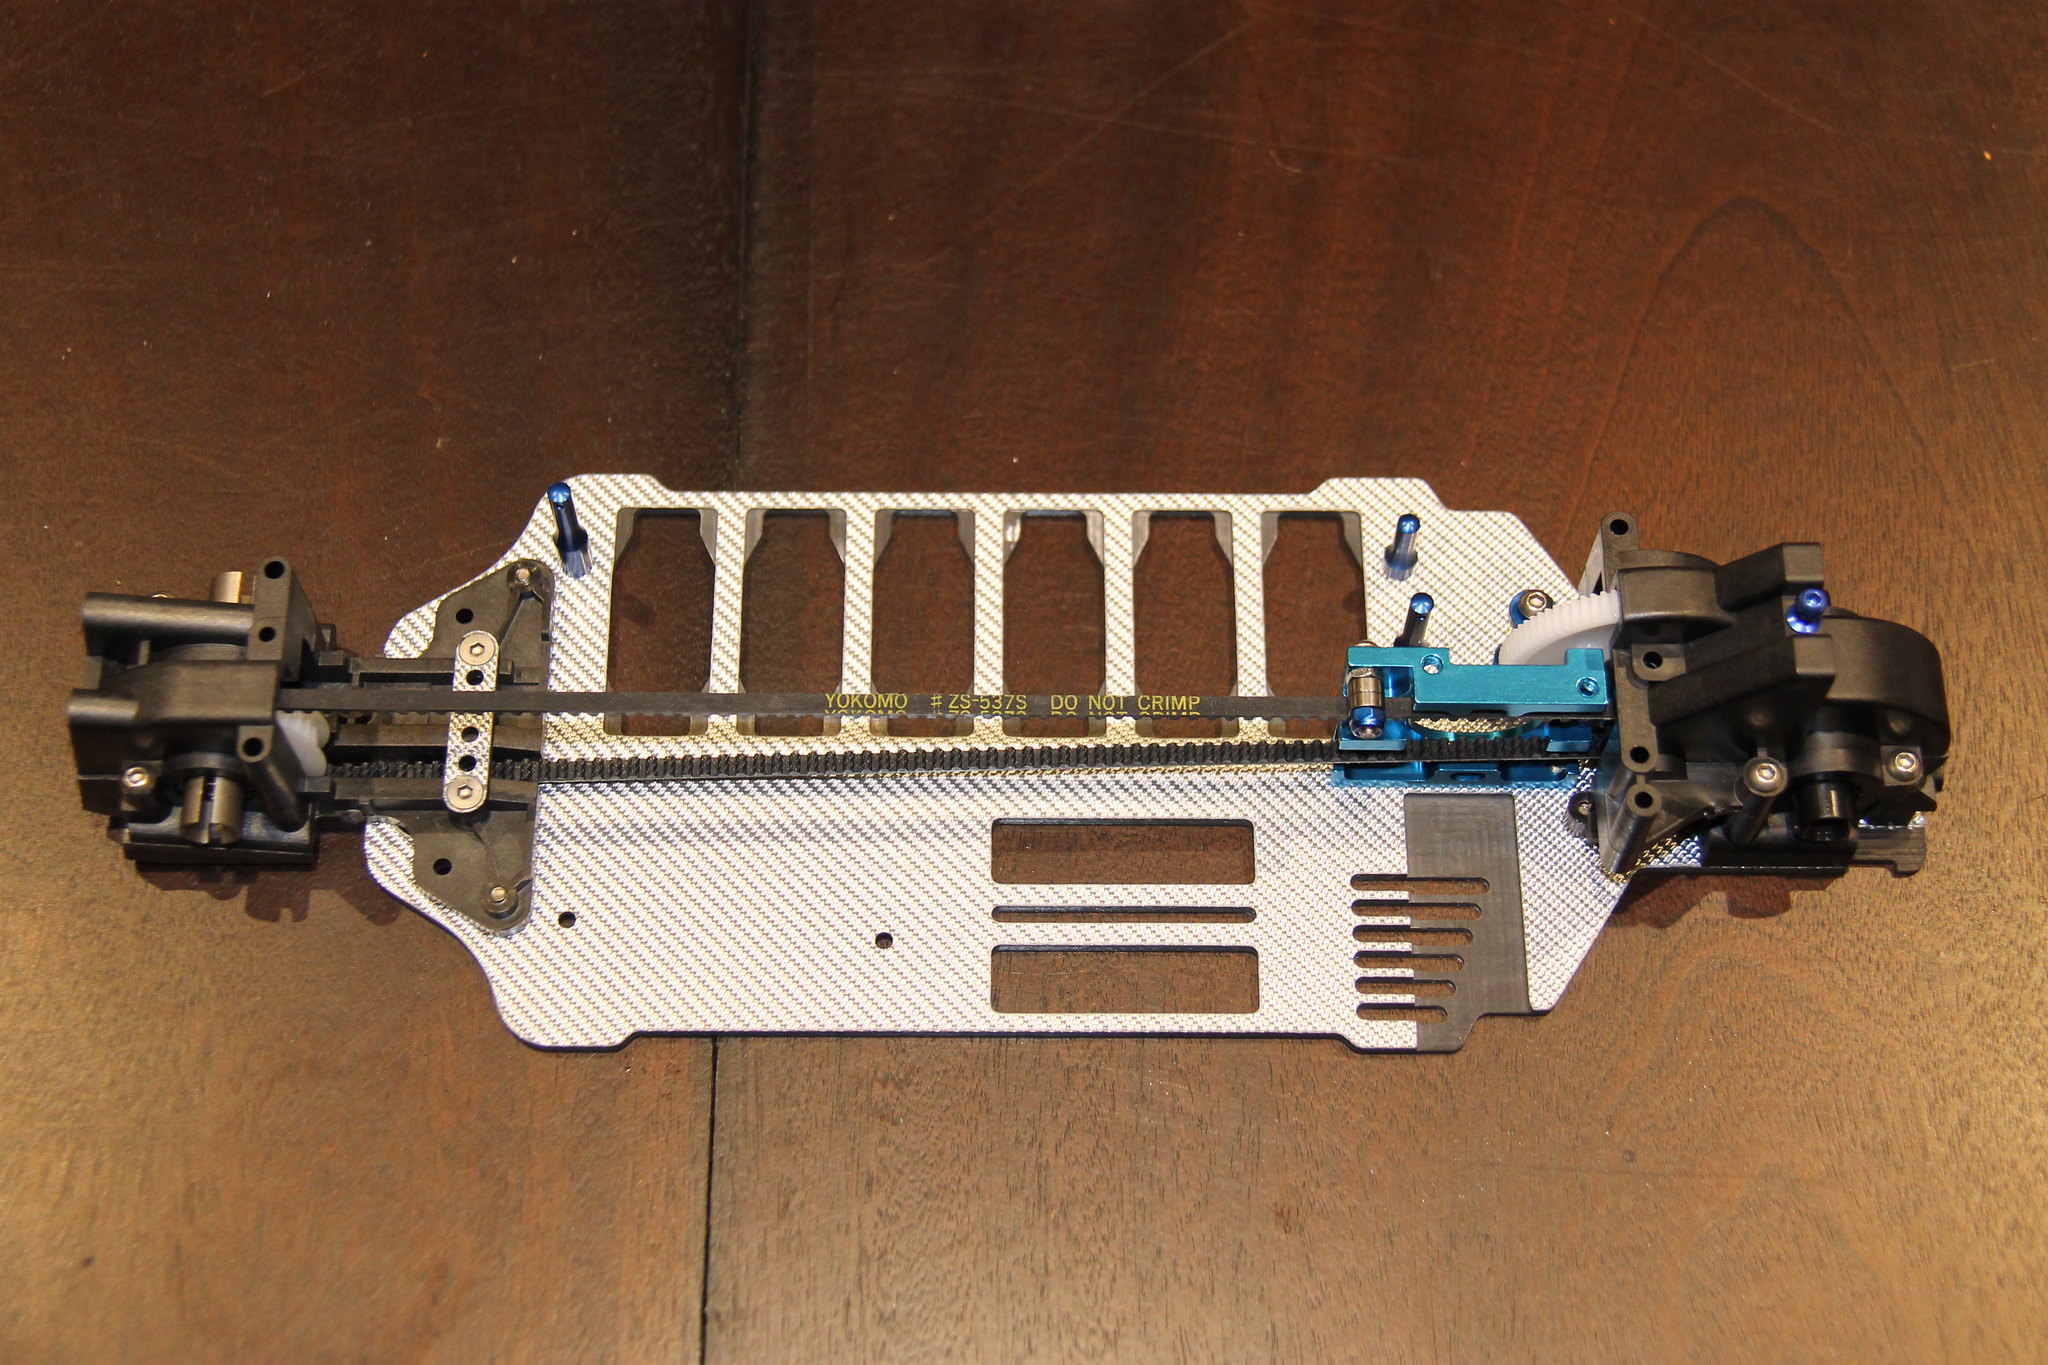
Parts have arrived to rectify the issue I had with the centre layshaft/front drive pulley not lining up with the motor mount that is specific to this YMP chassis/MR4-TC Special. The centre layshaft for the YMP/TC Special calls for a spacer to be used on the left side of the layshaft that moves the front drive pulley and one-way gear adapter to the right by a few mm which solves the issue I was having when using the layshaft for the earlier MR4-TC model. Along with the new layshaft setup, I installed the required ZS-132S thin rear drive belt and changed the rear differential pulley from the wide ZG-503 pulley to a Team Suzuki TS-2013 thin/standard width pulley.
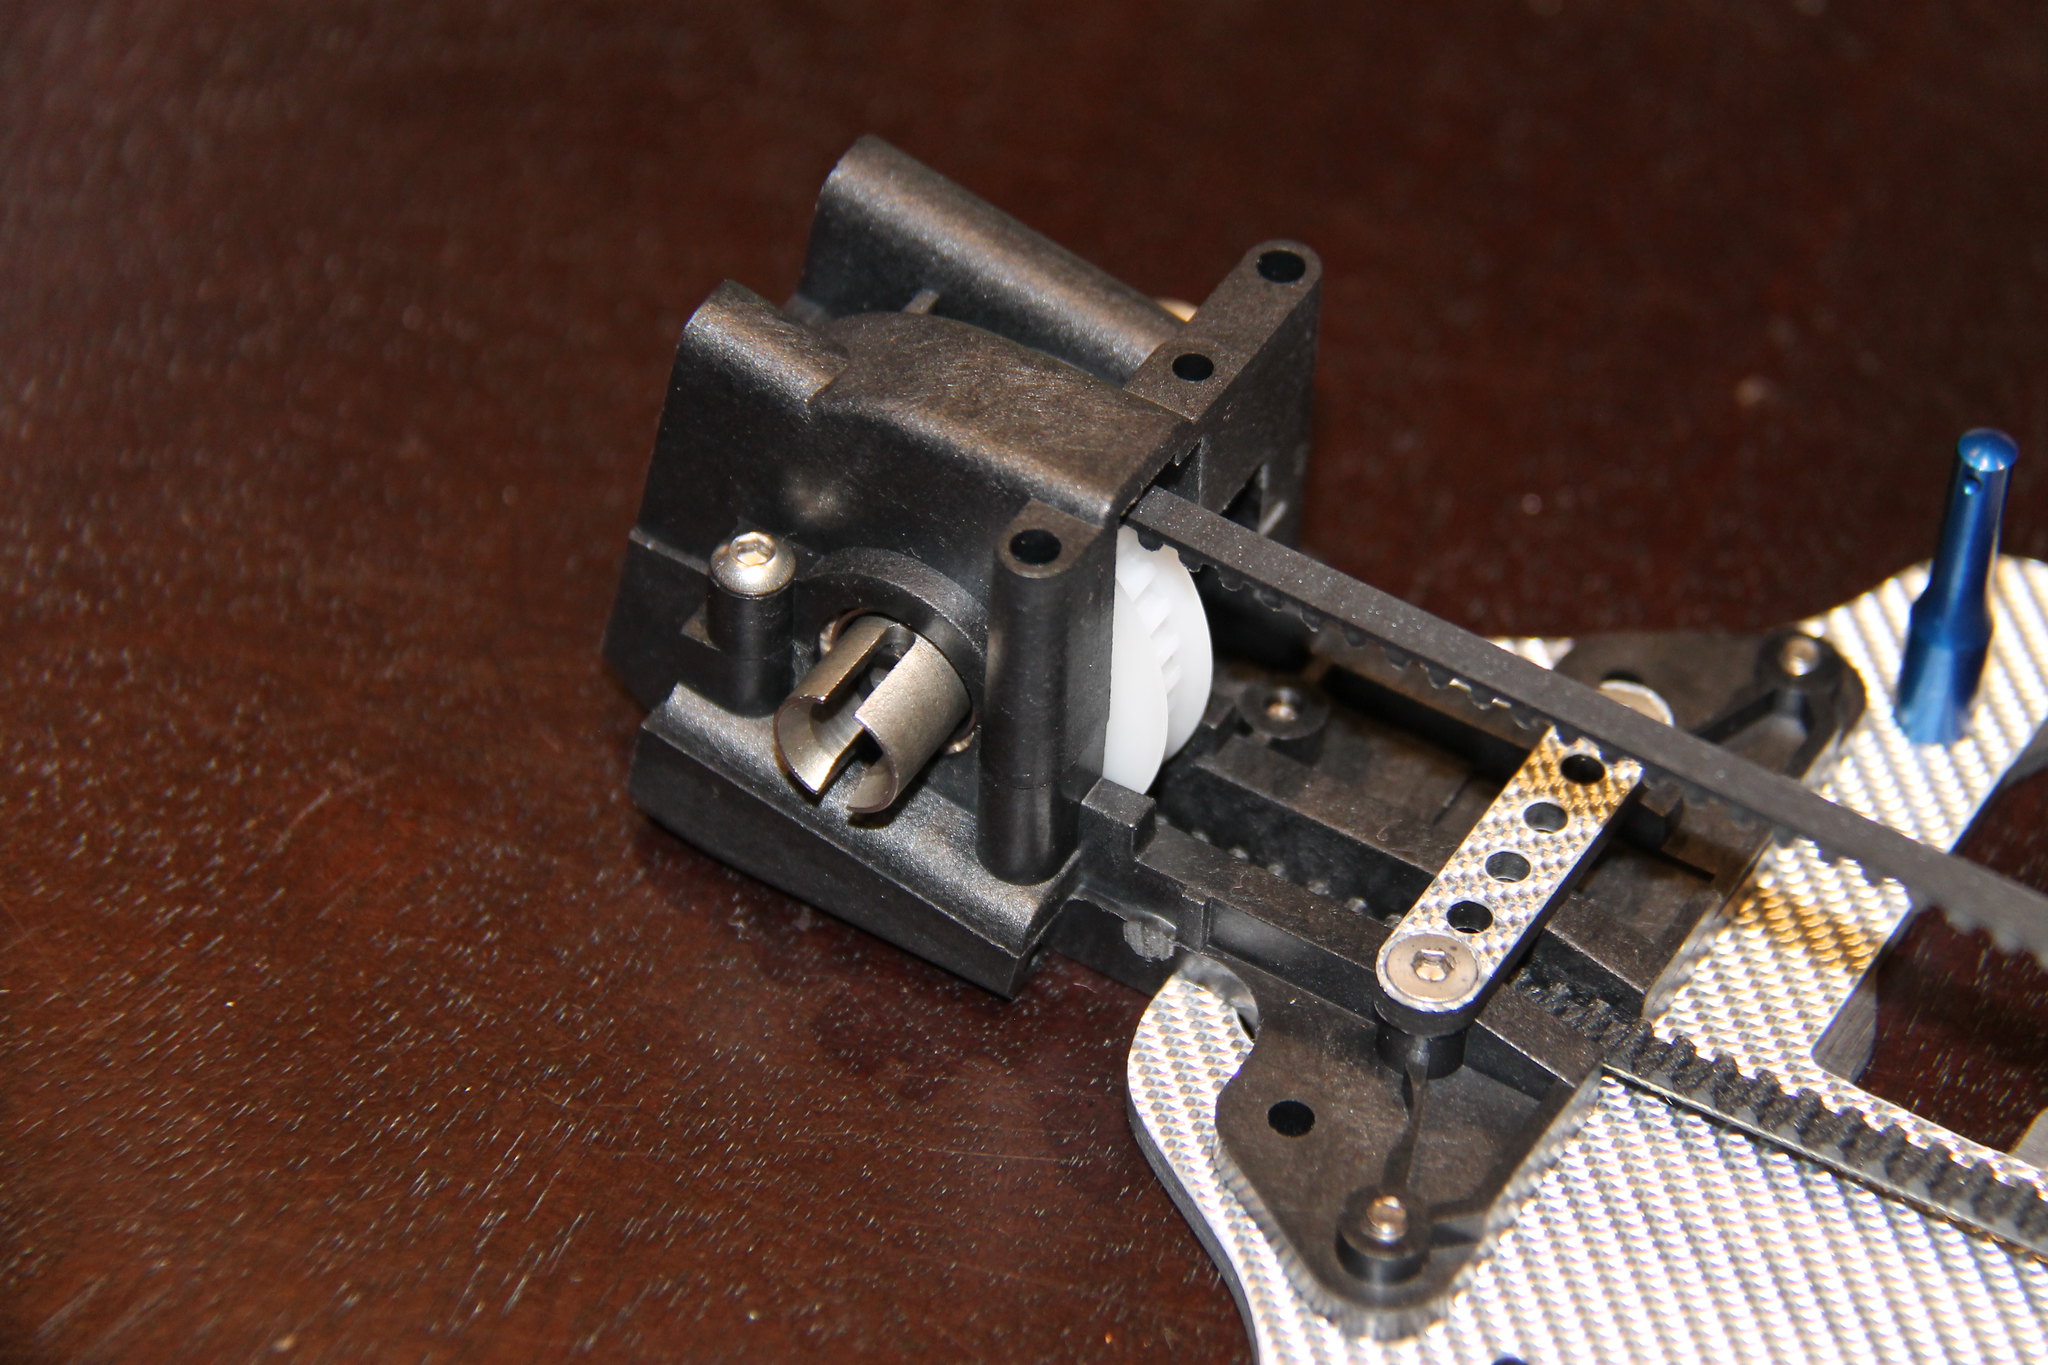
Having installed the centre layshaft and rear differential, I mounted the bulkhead caps and front SSG bulkhead brace. Lastly, I mounted the motor mount onto the chassis. Apart from the issue mentioned above with the centre layshaft, the fit and finish of all the parts has been exceptional so far.
Next up is installing the steering bellcranks and upper deck onto the chassis.
 IMG_3042 by Vincenzo Triventi, on Flickr
 IMG_3044 by Vincenzo Triventi, on Flickr
 IMG_3045 by Vincenzo Triventi, on Flickr
 IMG_3046 by Vincenzo Triventi, on Flickr
 IMG_3038 by Vincenzo Triventi, on Flickr
 IMG_3048 by Vincenzo Triventi, on Flickr
 IMG_3049 by Vincenzo Triventi, on Flickr
 IMG_3050 by Vincenzo Triventi, on Flickr
 IMG_3051 by Vincenzo Triventi, on Flickr
Having installed the centre layshaft and rear differential, I mounted the bulkhead caps and front SSG bulkhead brace. Lastly, I mounted the motor mount onto the chassis. Apart from the issue mentioned above with the centre layshaft, the fit and finish of all the parts has been exceptional so far.
Next up is installing the steering bellcranks and upper deck onto the chassis.
 IMG_3042 by Vincenzo Triventi, on Flickr
 IMG_3044 by Vincenzo Triventi, on Flickr
 IMG_3045 by Vincenzo Triventi, on Flickr
 IMG_3046 by Vincenzo Triventi, on Flickr
 IMG_3038 by Vincenzo Triventi, on Flickr
 IMG_3048 by Vincenzo Triventi, on Flickr
 IMG_3049 by Vincenzo Triventi, on Flickr
 IMG_3050 by Vincenzo Triventi, on Flickr
 IMG_3051 by Vincenzo Triventi, on Flickr
-
Dual
- Approved Member
- Posts: 353
- Joined: Sun Aug 20, 2006 3:47 pm
- Location: Perth, Australia
- Has thanked: 135 times
- Been thanked: 40 times
Re: Yokomo MX-4 SSG Special
Steering components ready to be installed onto the chassis.
 IMG_3055 by Vincenzo Triventi, on Flickr
Completed installation of the dual bellcrank system onto the chassis.
 IMG_3058 by Vincenzo Triventi, on Flickr
 IMG_3059 by Vincenzo Triventi, on Flickr
I have made a few changes since taking these photos which will be noticeable in future photo uploads. I changed out the blue anodised ball studs for a set of gold anodised versions, I replaced the stock steering kingpins for a set of Lunsford titanium units and I had Paul Sims machine a recess into the chassis to allow the steering servo to sit a little lower in chassis and allow a more secure fit. This was a modification that Masaaki Hirosaka did on Masami's touring cars in the early 2000's.
 IMG_3055 by Vincenzo Triventi, on Flickr
Completed installation of the dual bellcrank system onto the chassis.
 IMG_3058 by Vincenzo Triventi, on Flickr
 IMG_3059 by Vincenzo Triventi, on Flickr
I have made a few changes since taking these photos which will be noticeable in future photo uploads. I changed out the blue anodised ball studs for a set of gold anodised versions, I replaced the stock steering kingpins for a set of Lunsford titanium units and I had Paul Sims machine a recess into the chassis to allow the steering servo to sit a little lower in chassis and allow a more secure fit. This was a modification that Masaaki Hirosaka did on Masami's touring cars in the early 2000's.
-
Dual
- Approved Member
- Posts: 353
- Joined: Sun Aug 20, 2006 3:47 pm
- Location: Perth, Australia
- Has thanked: 135 times
- Been thanked: 40 times
Re: Yokomo MX-4 SSG Special
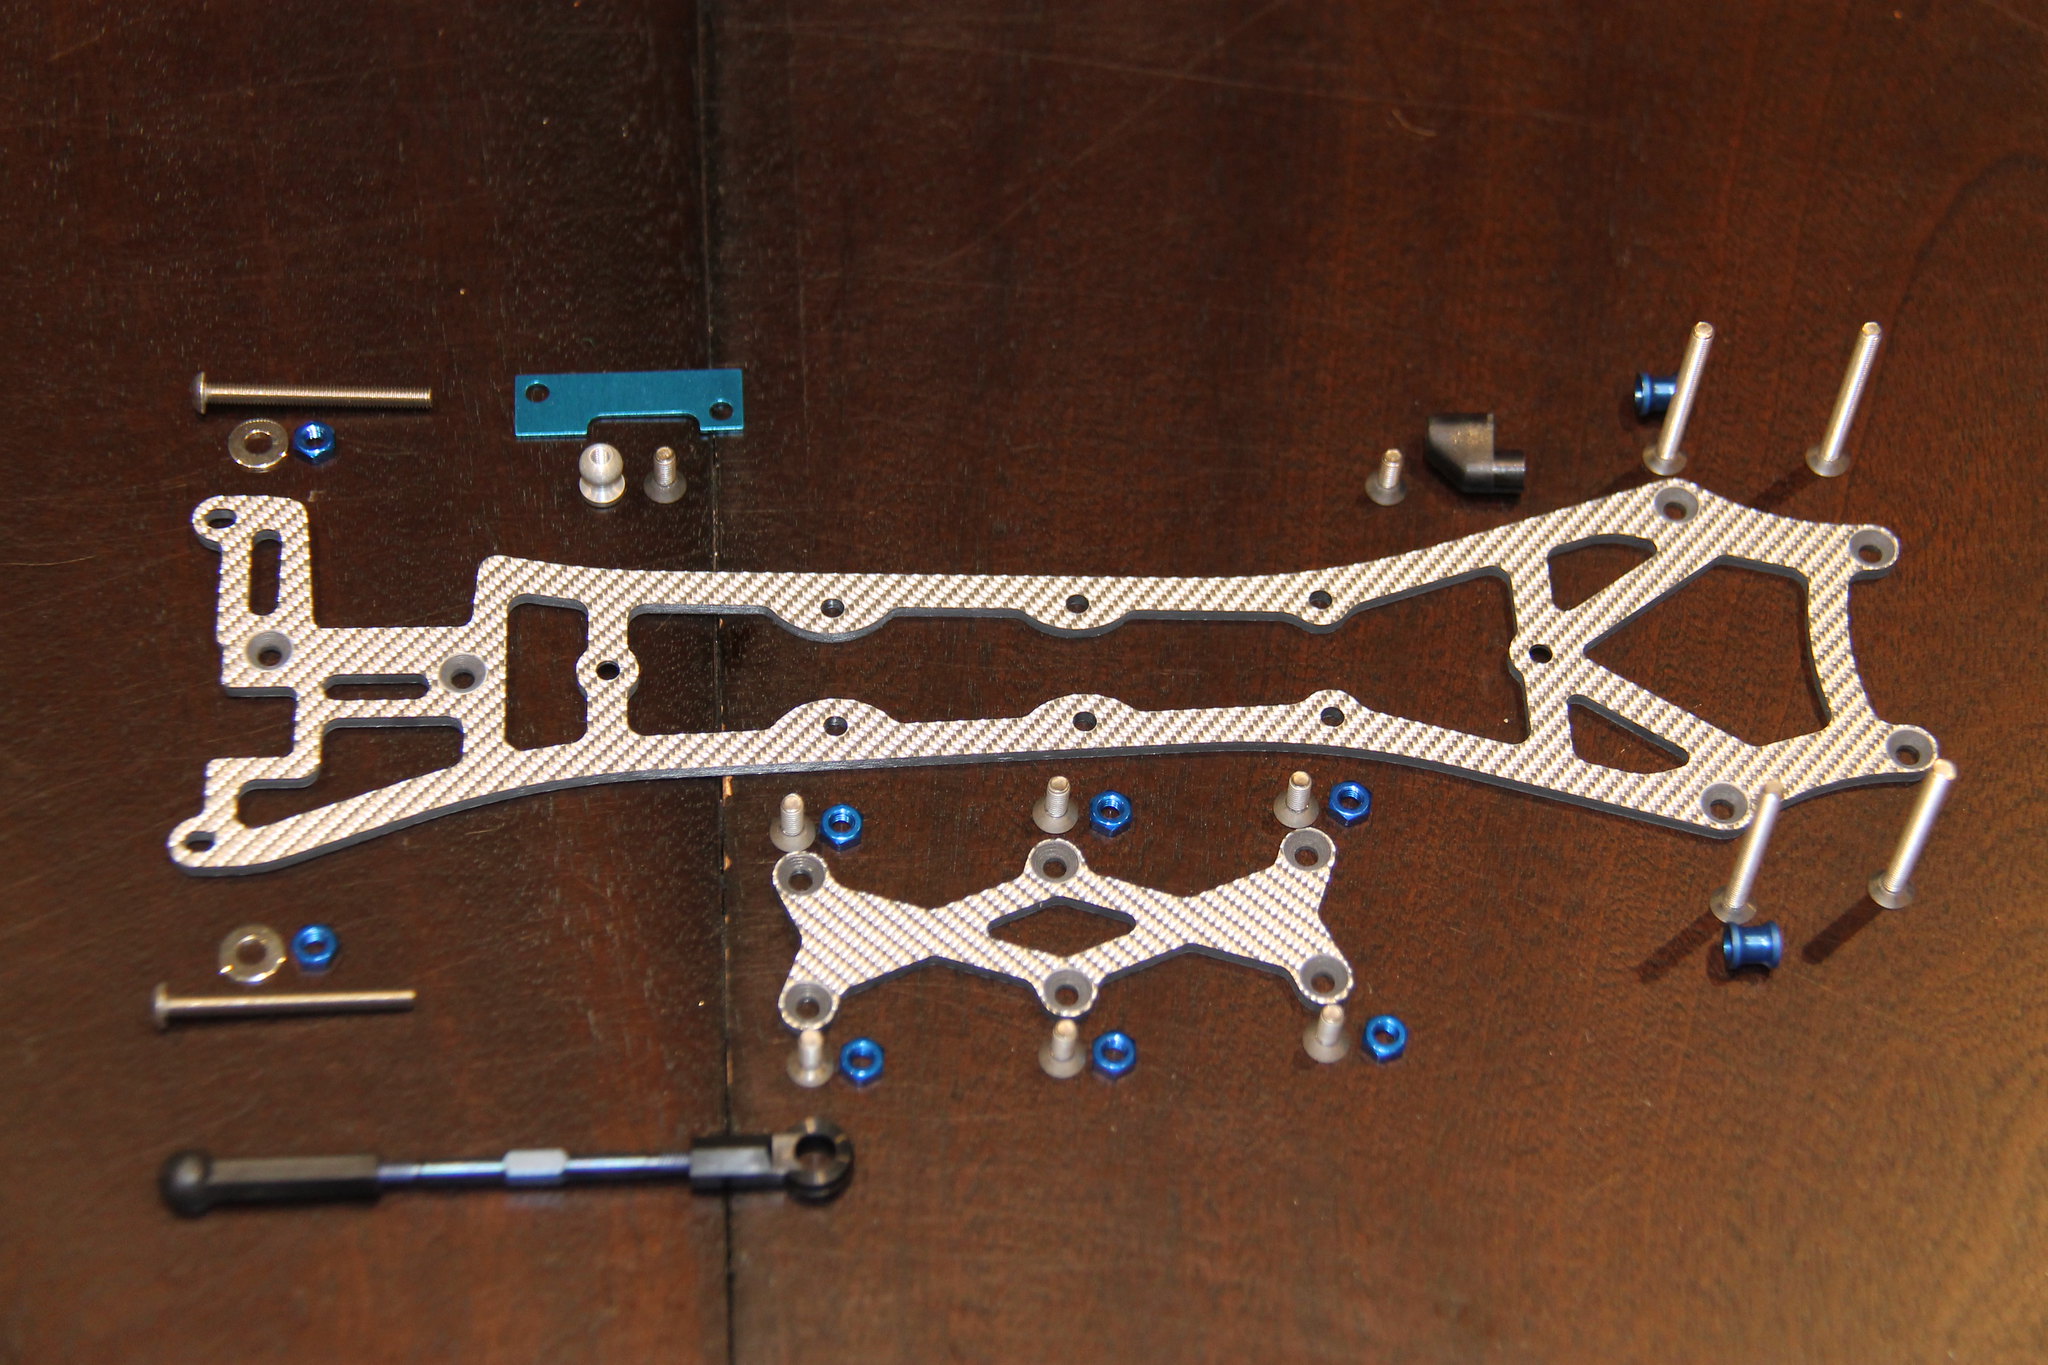
Topdeck components and hardware.
 IMG_3060 by Vincenzo Triventi, on Flickr
Topdeck installed onto chassis.
 IMG_3068 by Vincenzo Triventi, on Flickr
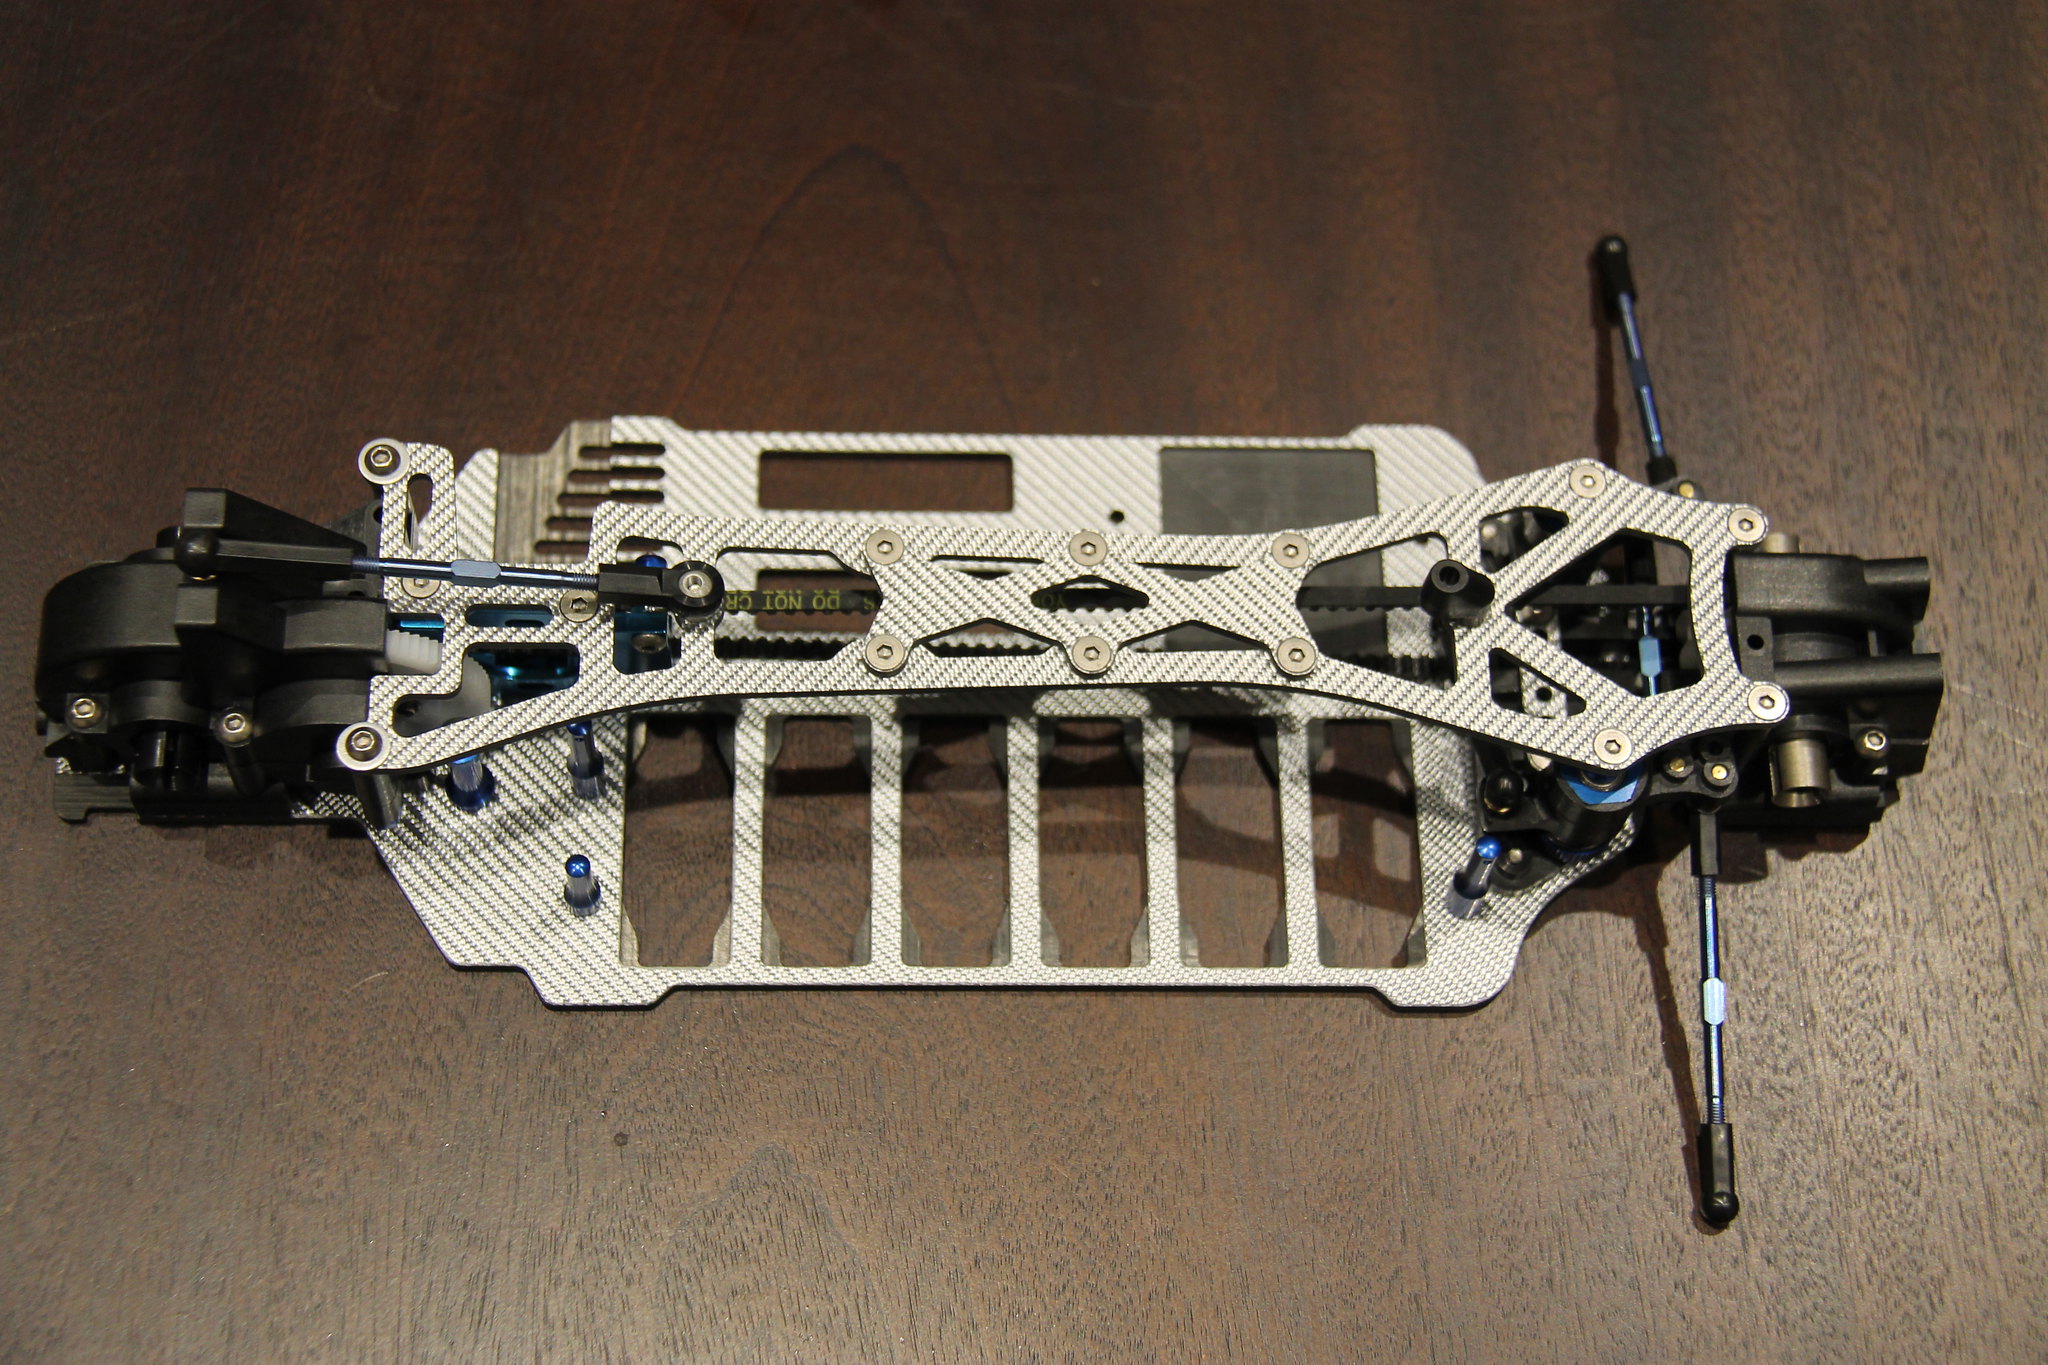 IMG_3062 by Vincenzo Triventi, on Flickr
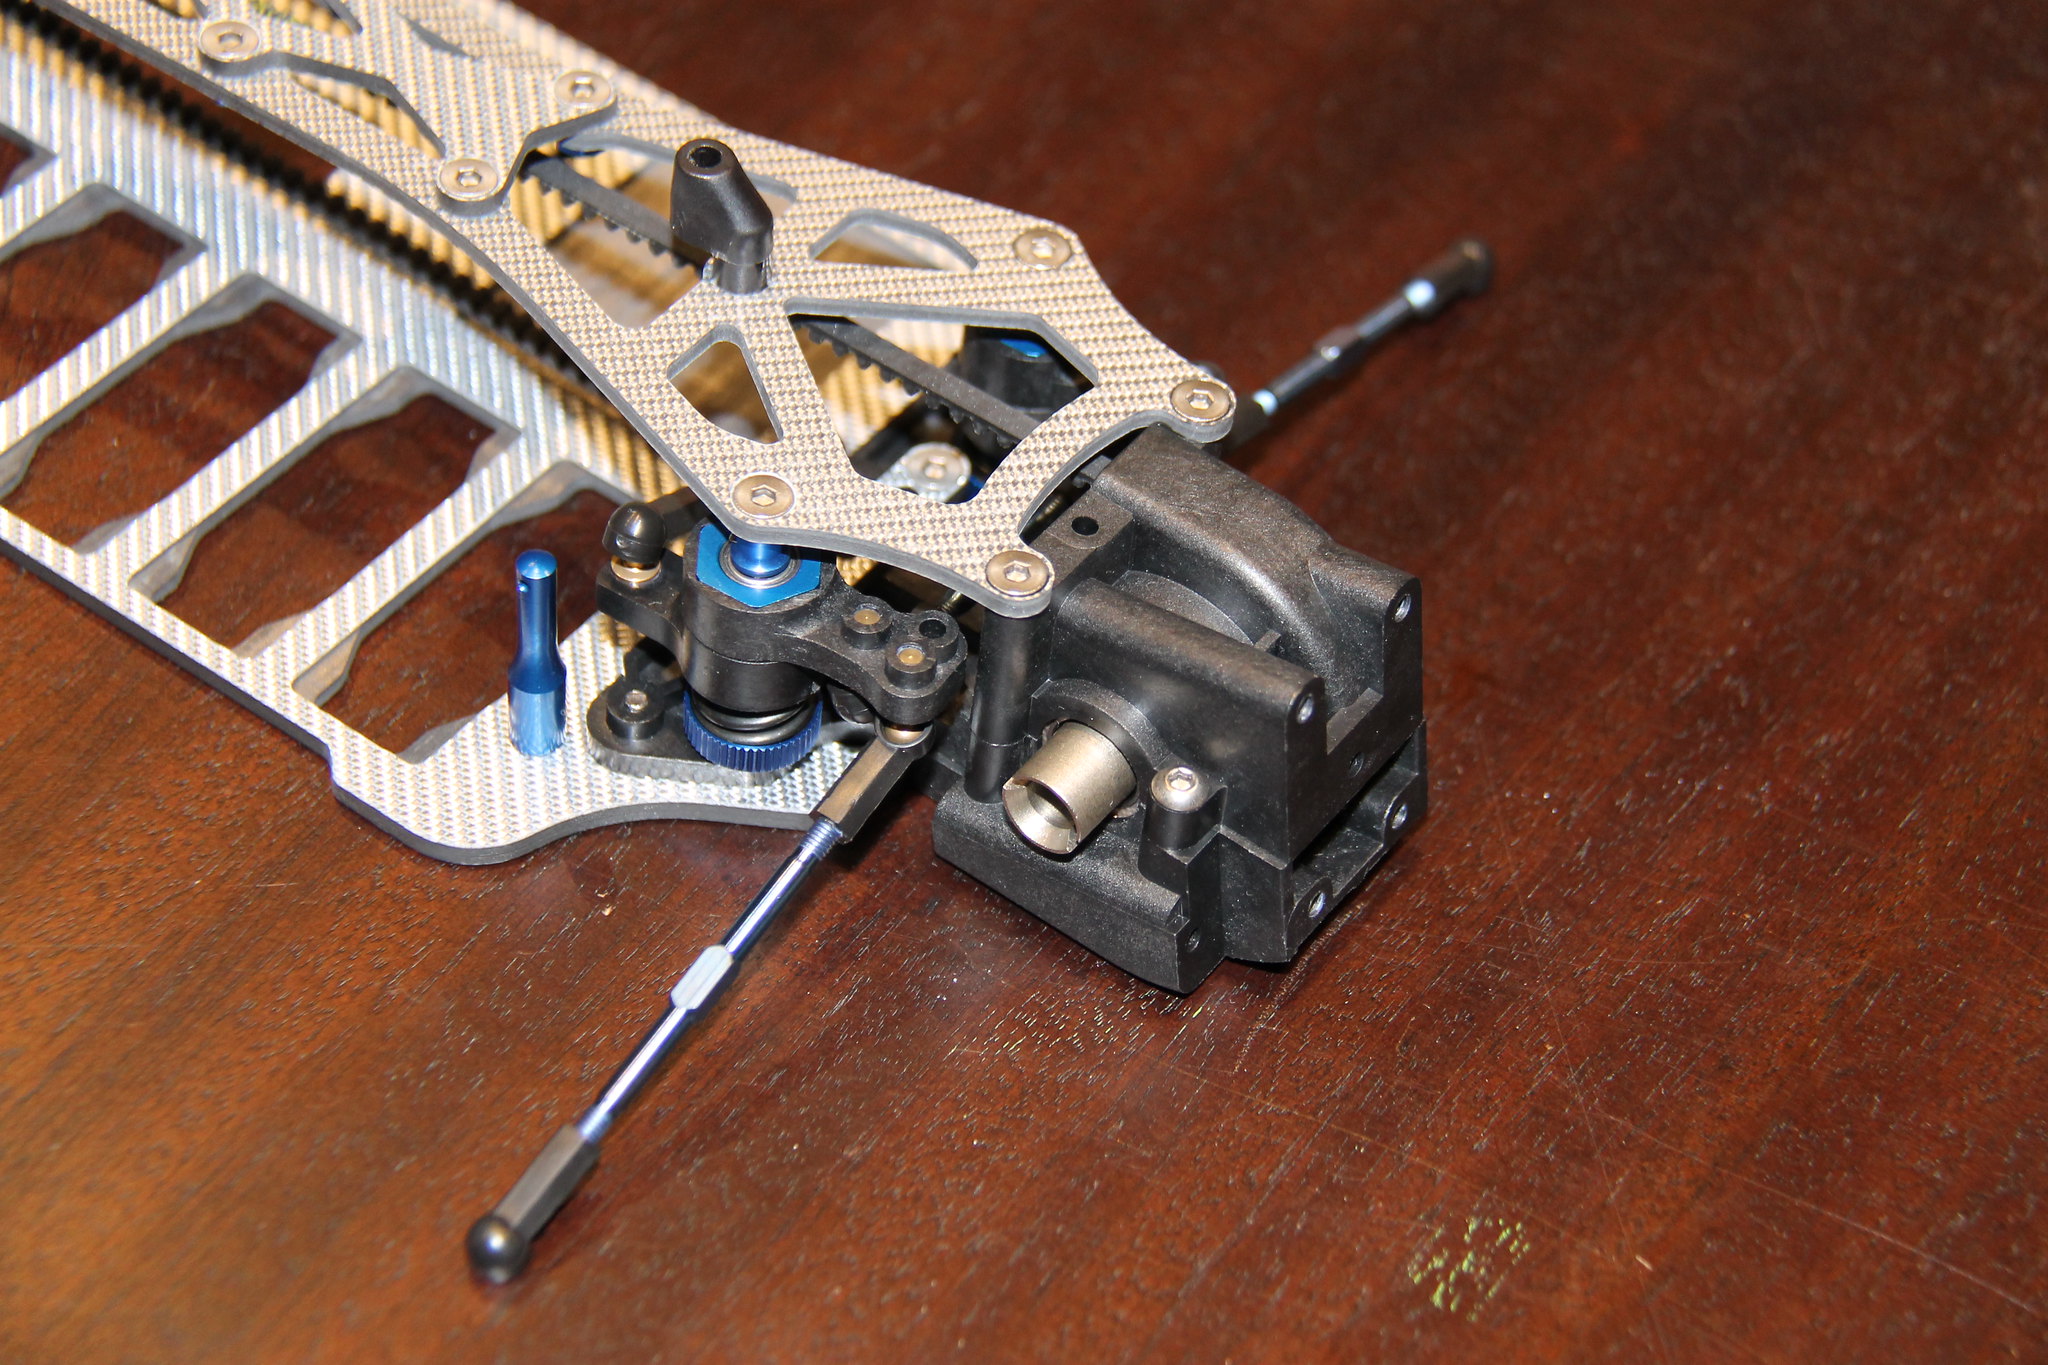 IMG_3064 by Vincenzo Triventi, on Flickr
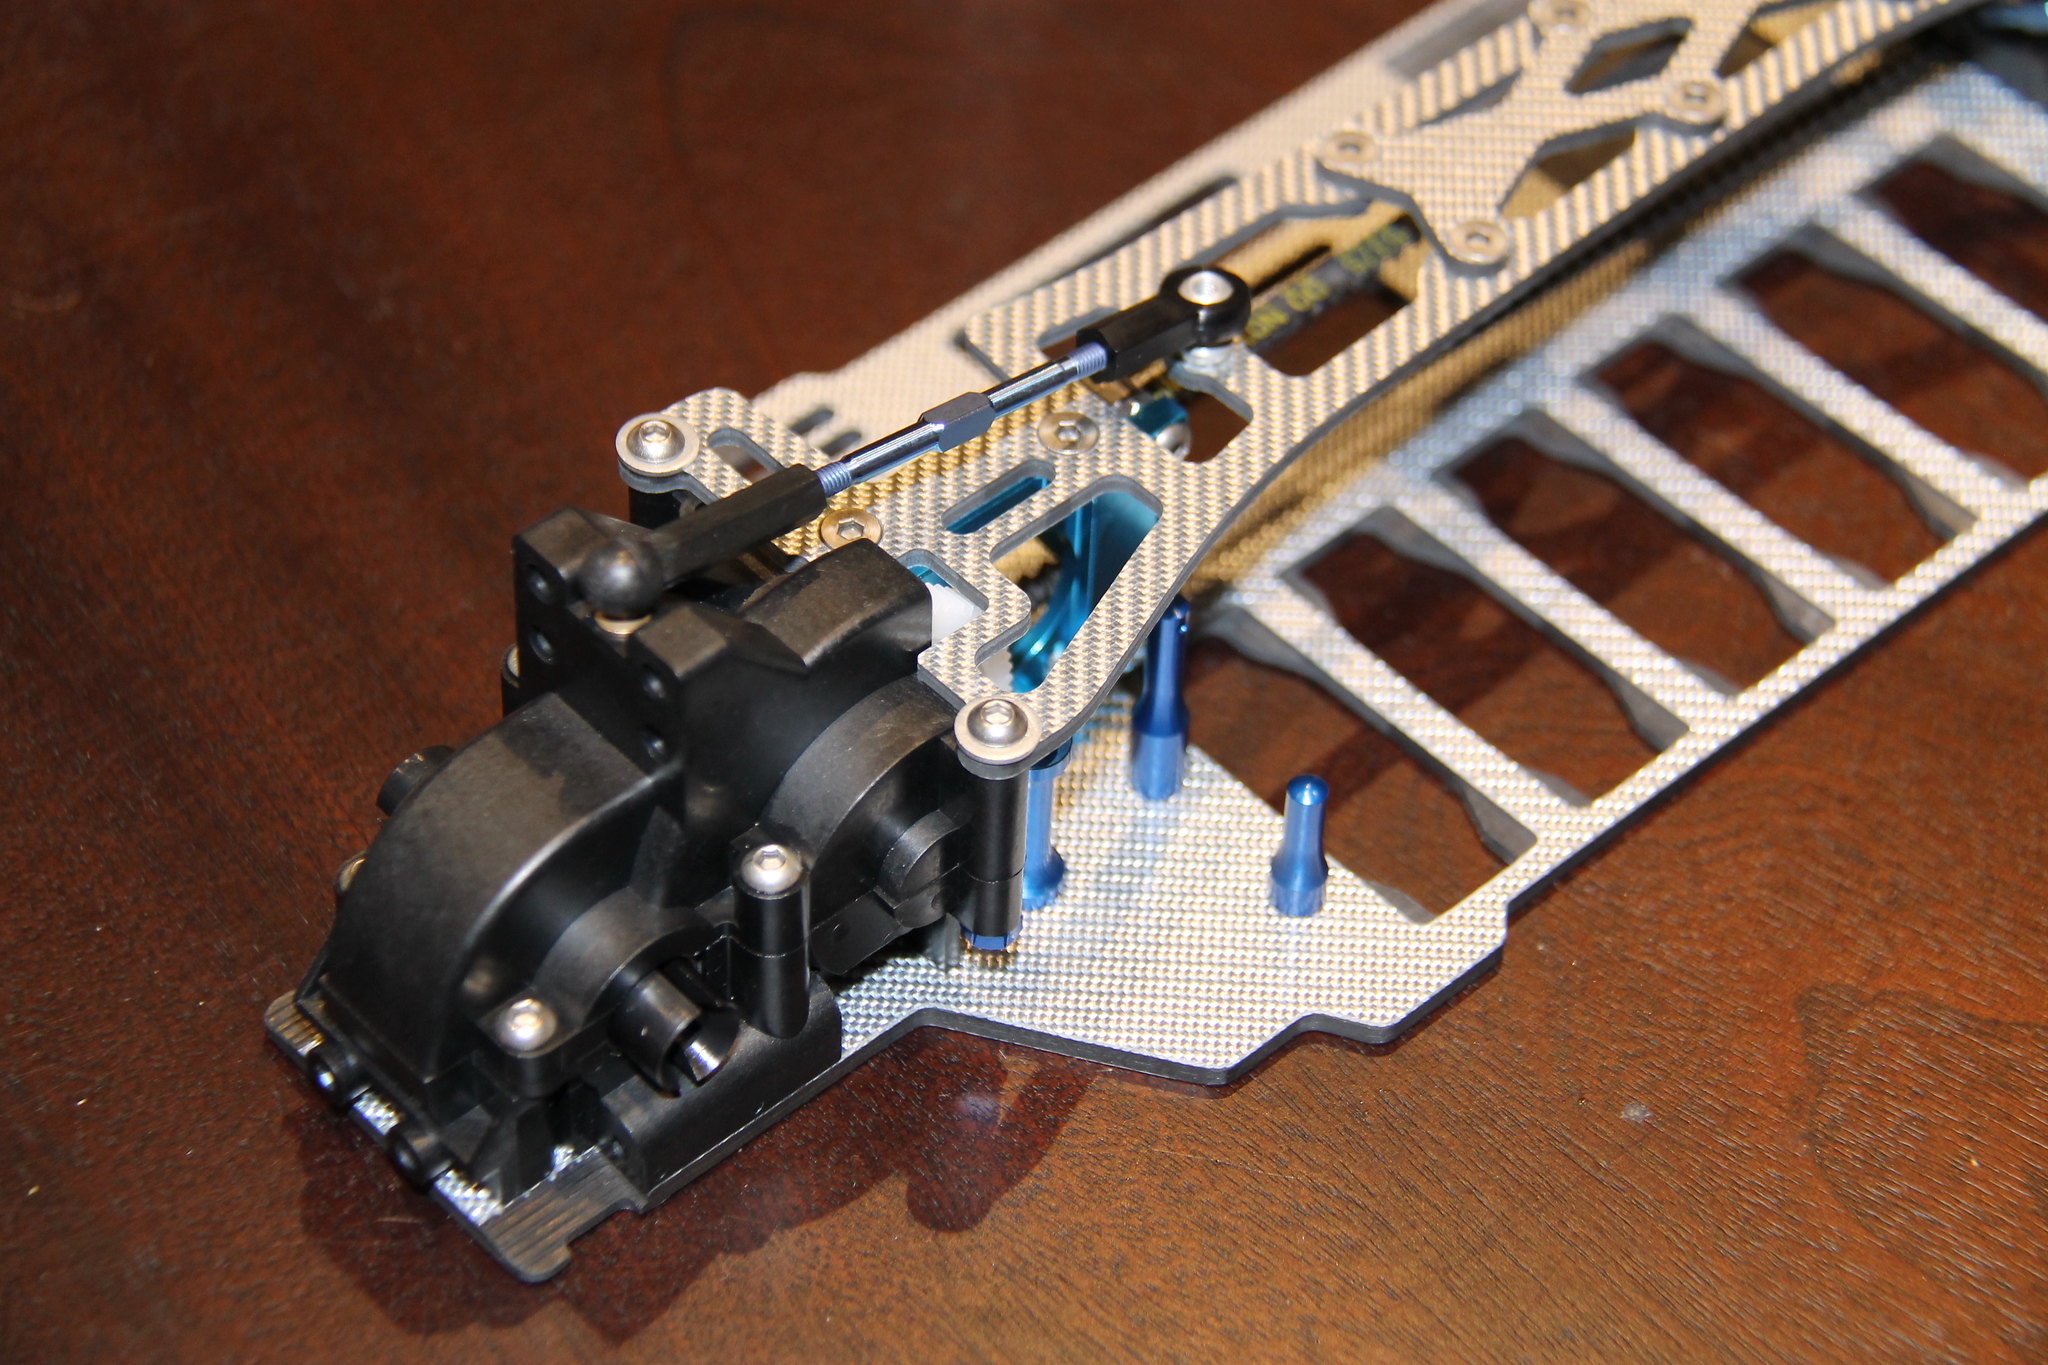 IMG_3065 by Vincenzo Triventi, on Flickr
 IMG_3066 by Vincenzo Triventi, on Flickr
 IMG_3067 by Vincenzo Triventi, on Flickr
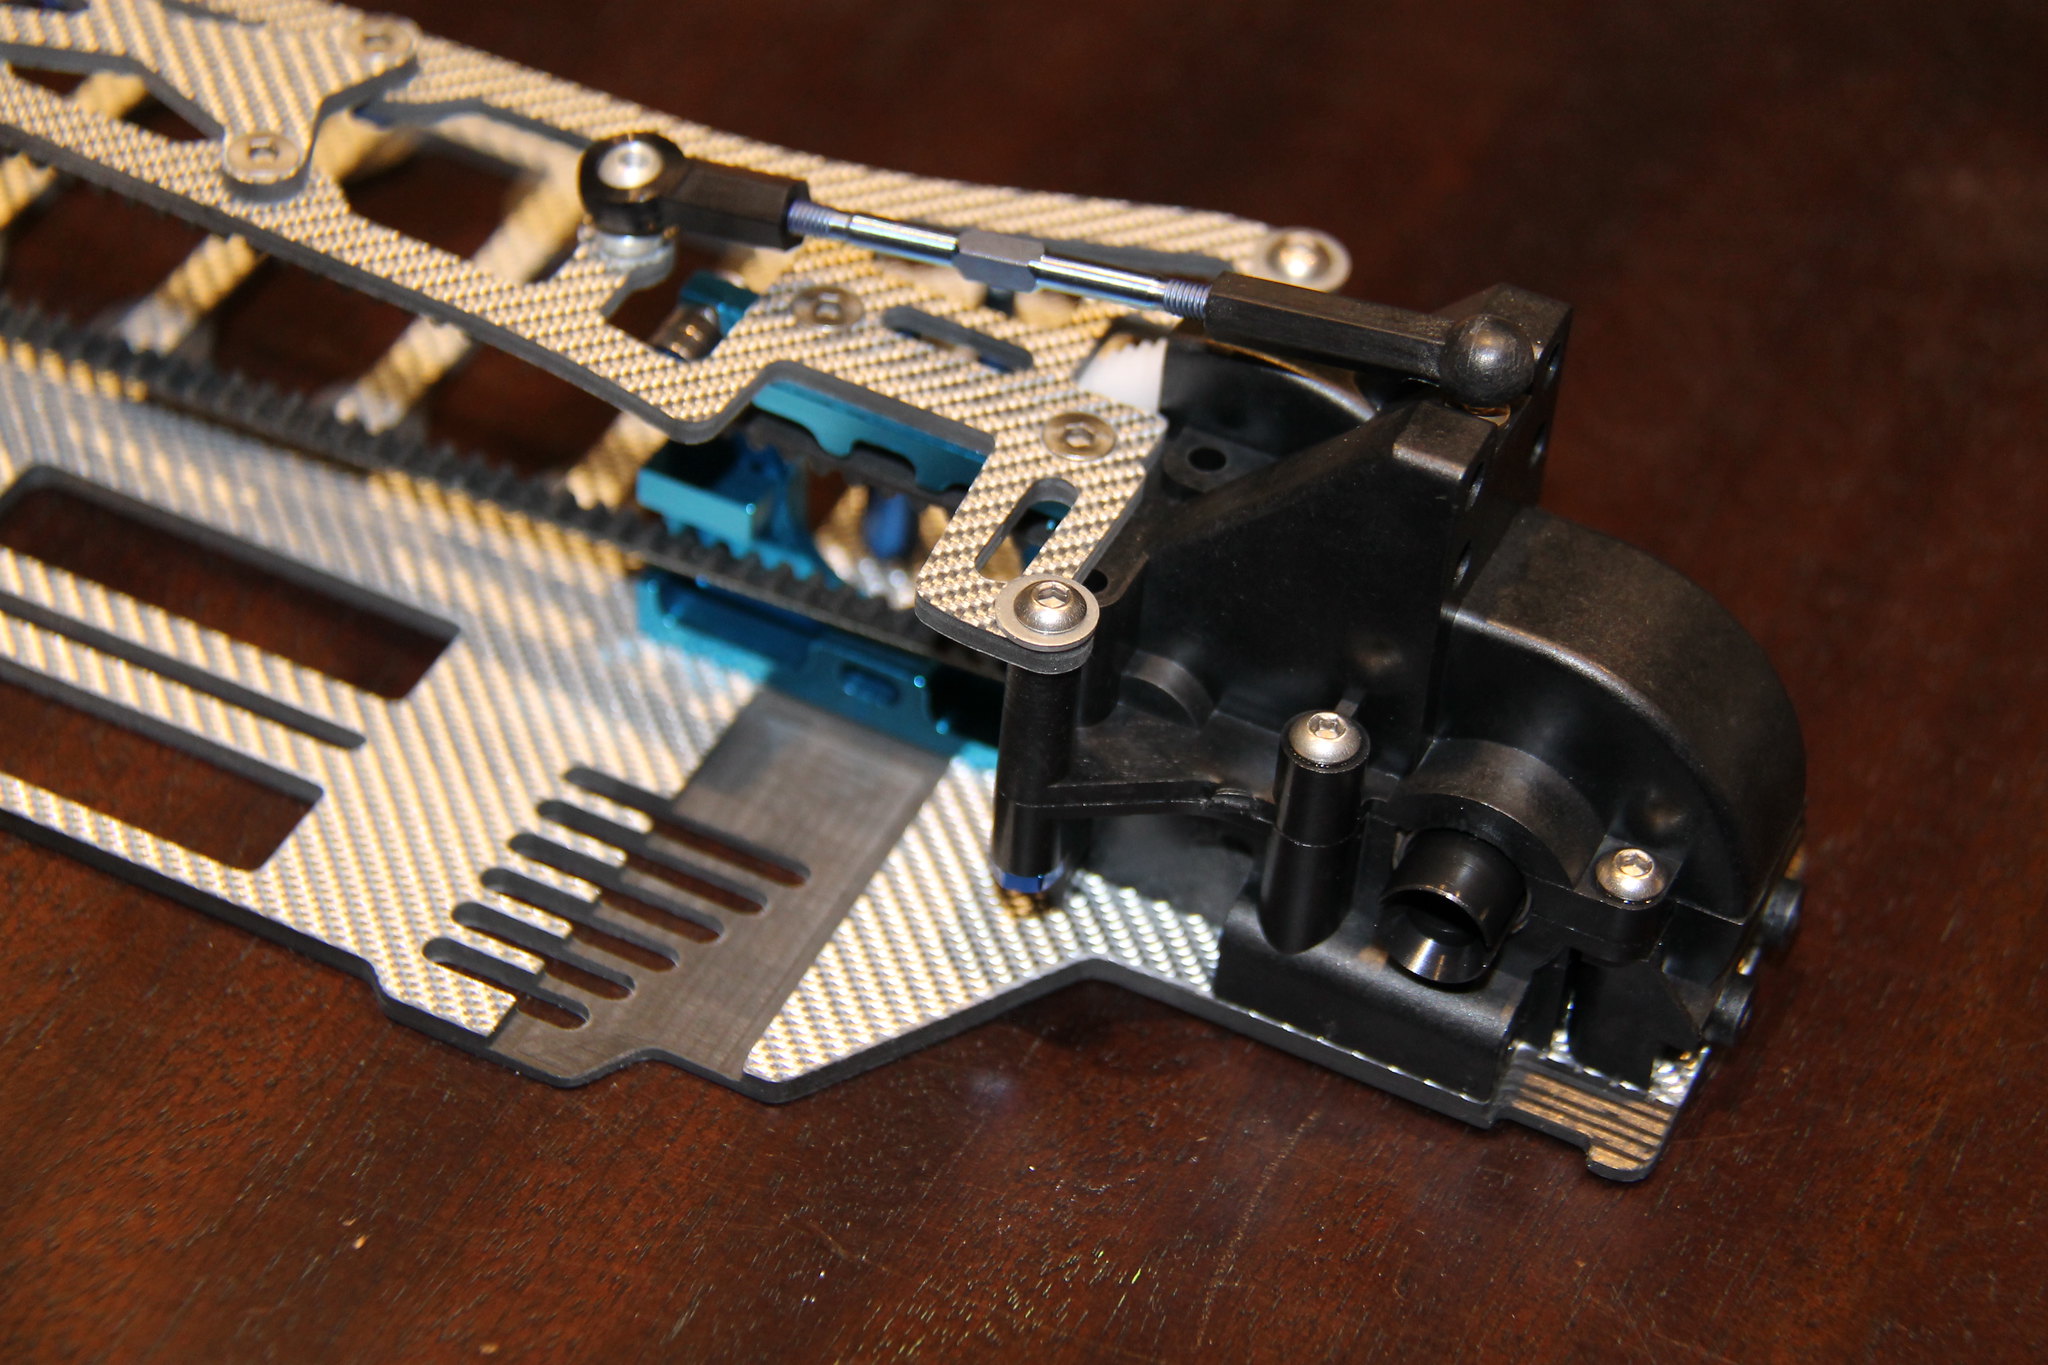 IMG_3069 by Vincenzo Triventi, on Flickr
 IMG_3060 by Vincenzo Triventi, on Flickr
Topdeck installed onto chassis.
 IMG_3068 by Vincenzo Triventi, on Flickr
 IMG_3062 by Vincenzo Triventi, on Flickr
 IMG_3064 by Vincenzo Triventi, on Flickr
 IMG_3065 by Vincenzo Triventi, on Flickr
 IMG_3066 by Vincenzo Triventi, on Flickr
 IMG_3067 by Vincenzo Triventi, on Flickr
 IMG_3069 by Vincenzo Triventi, on Flickr
-
Dual
- Approved Member
- Posts: 353
- Joined: Sun Aug 20, 2006 3:47 pm
- Location: Perth, Australia
- Has thanked: 135 times
- Been thanked: 40 times
Re: Yokomo MX-4 SSG Special
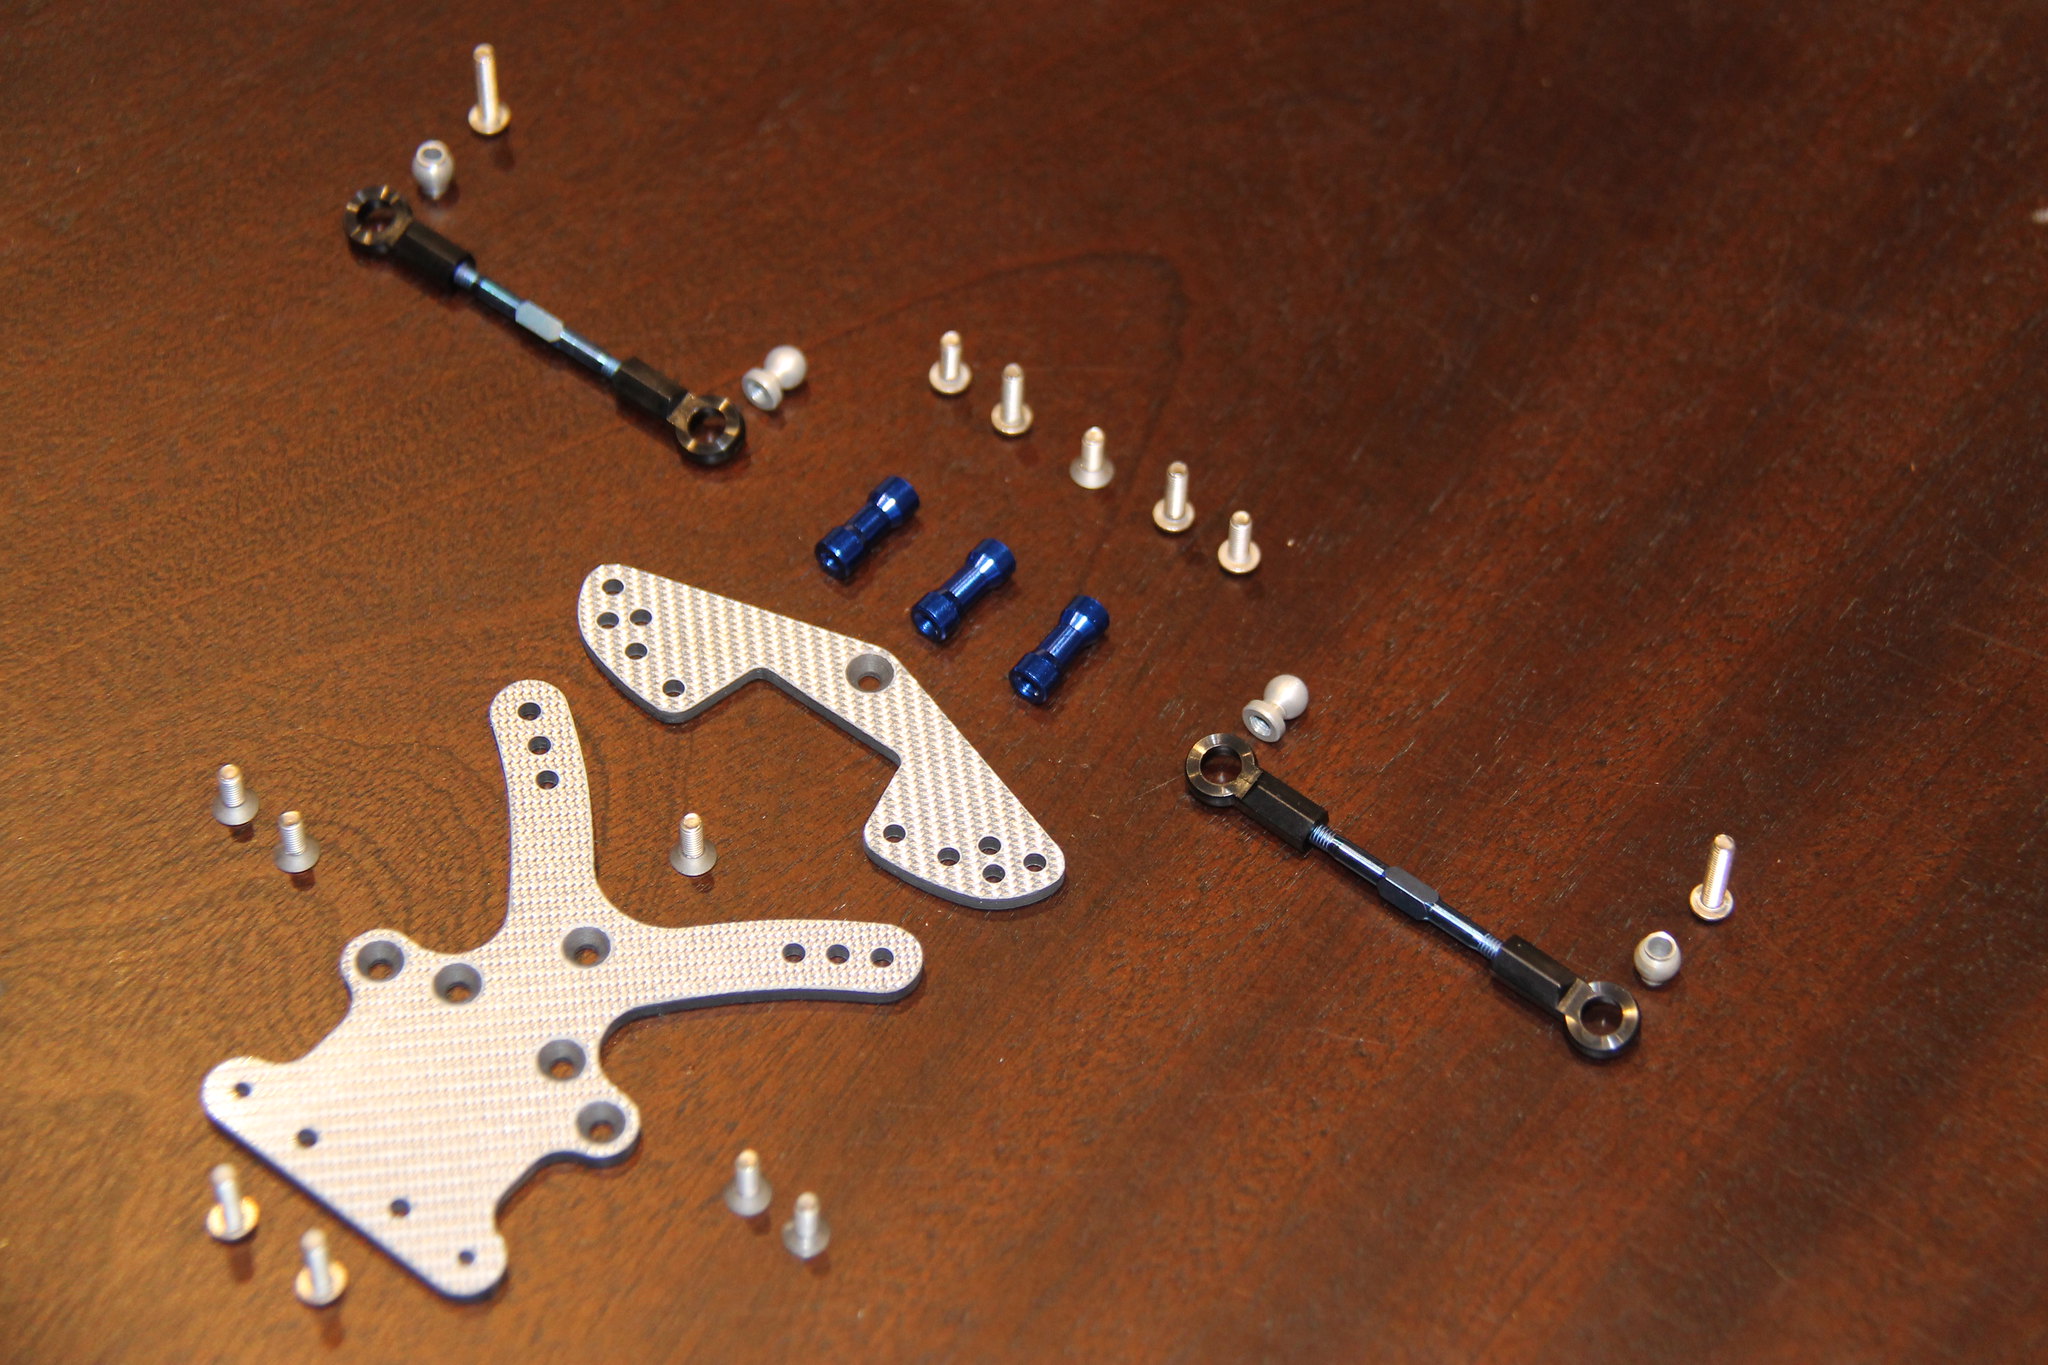
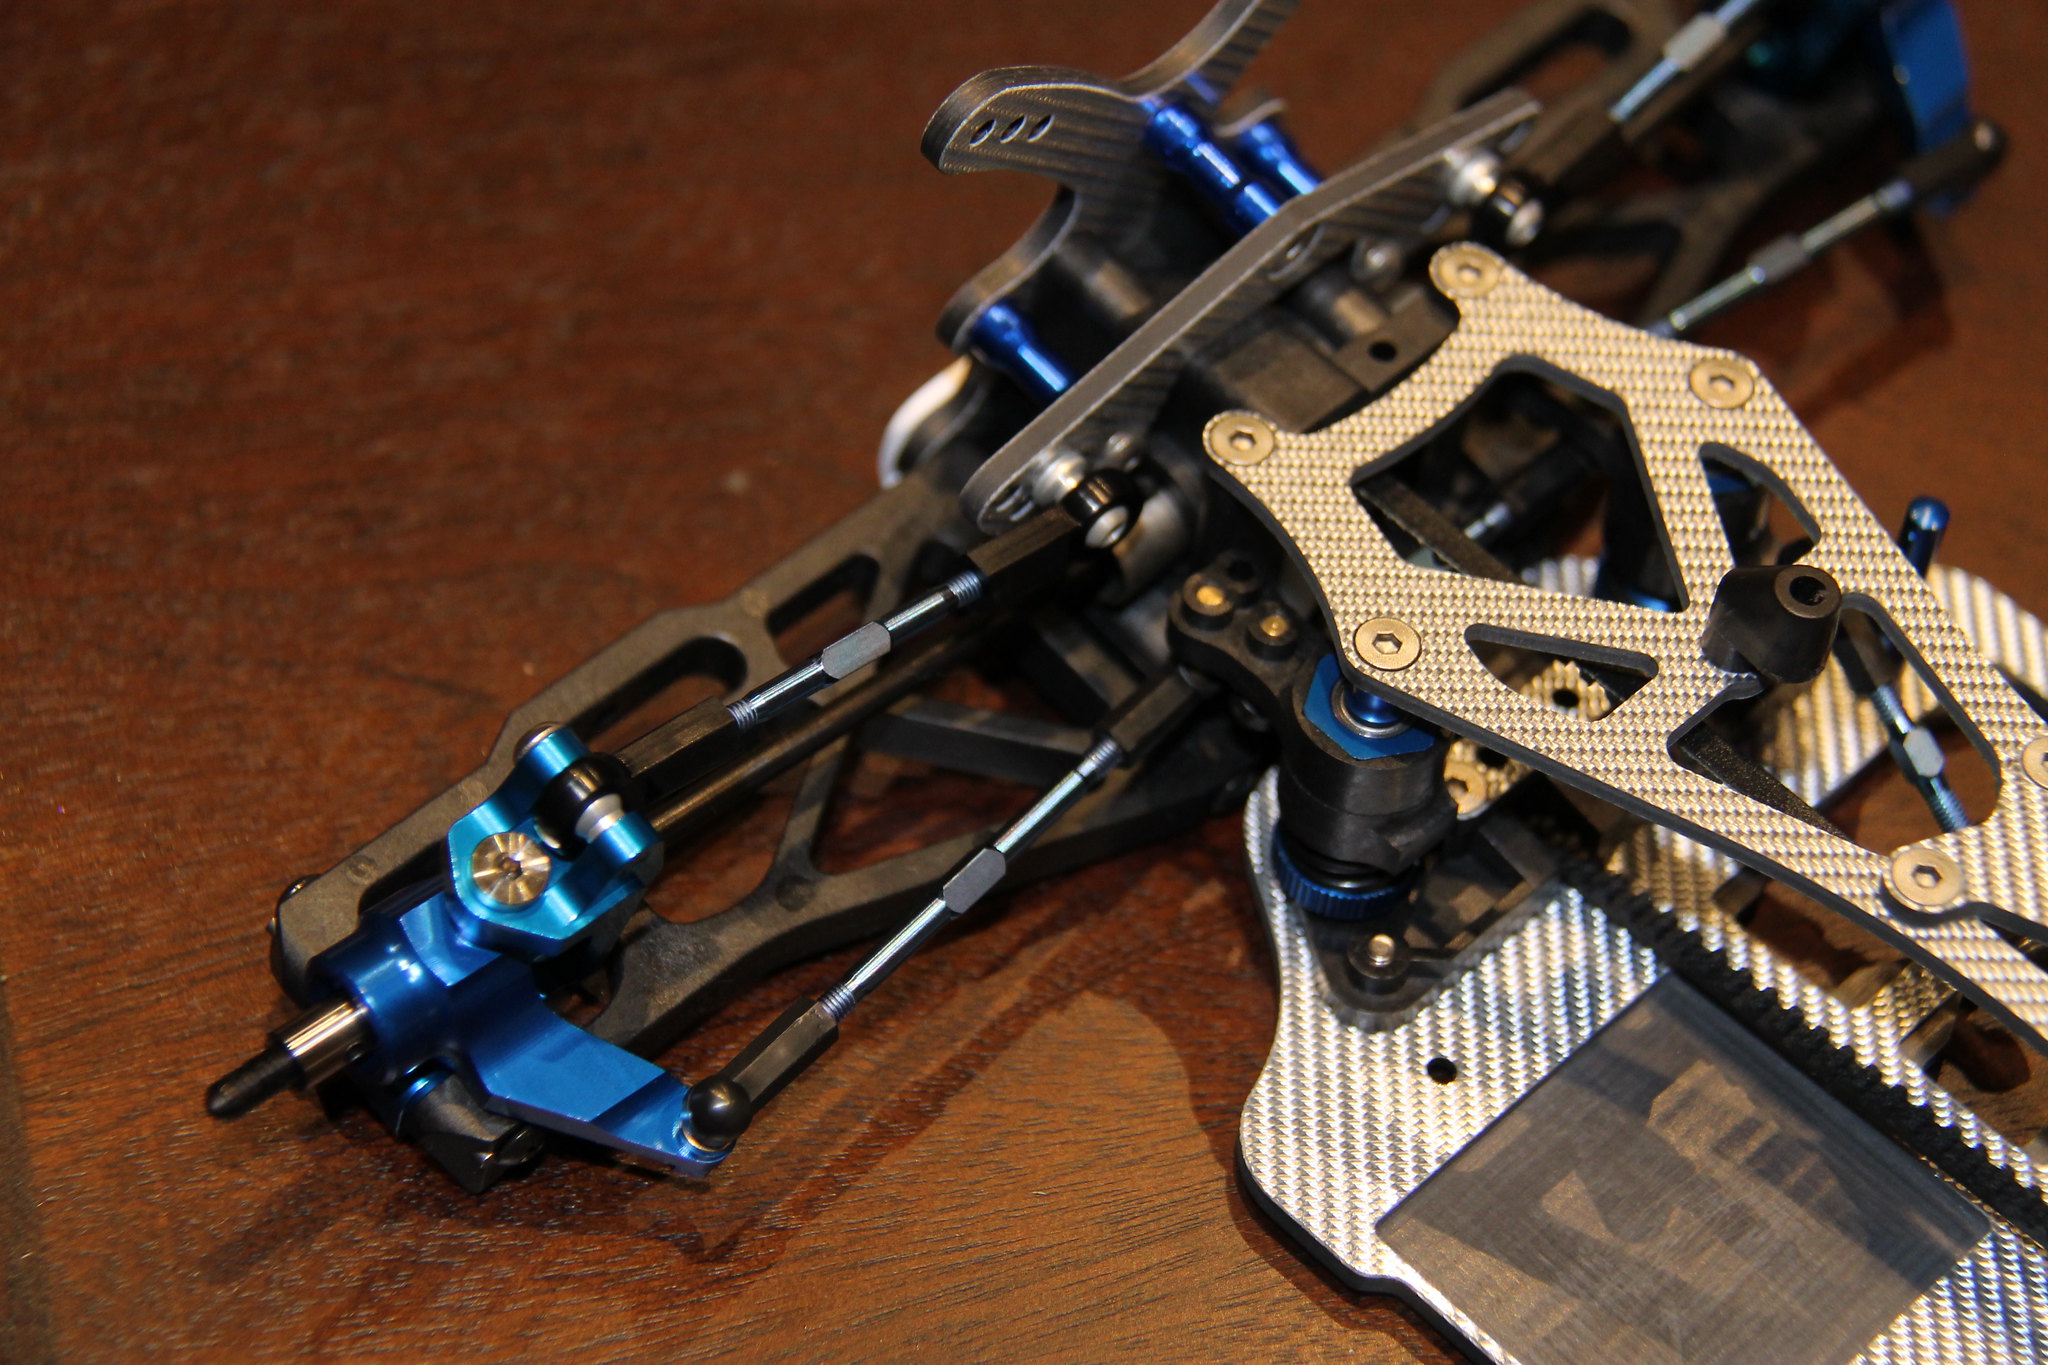
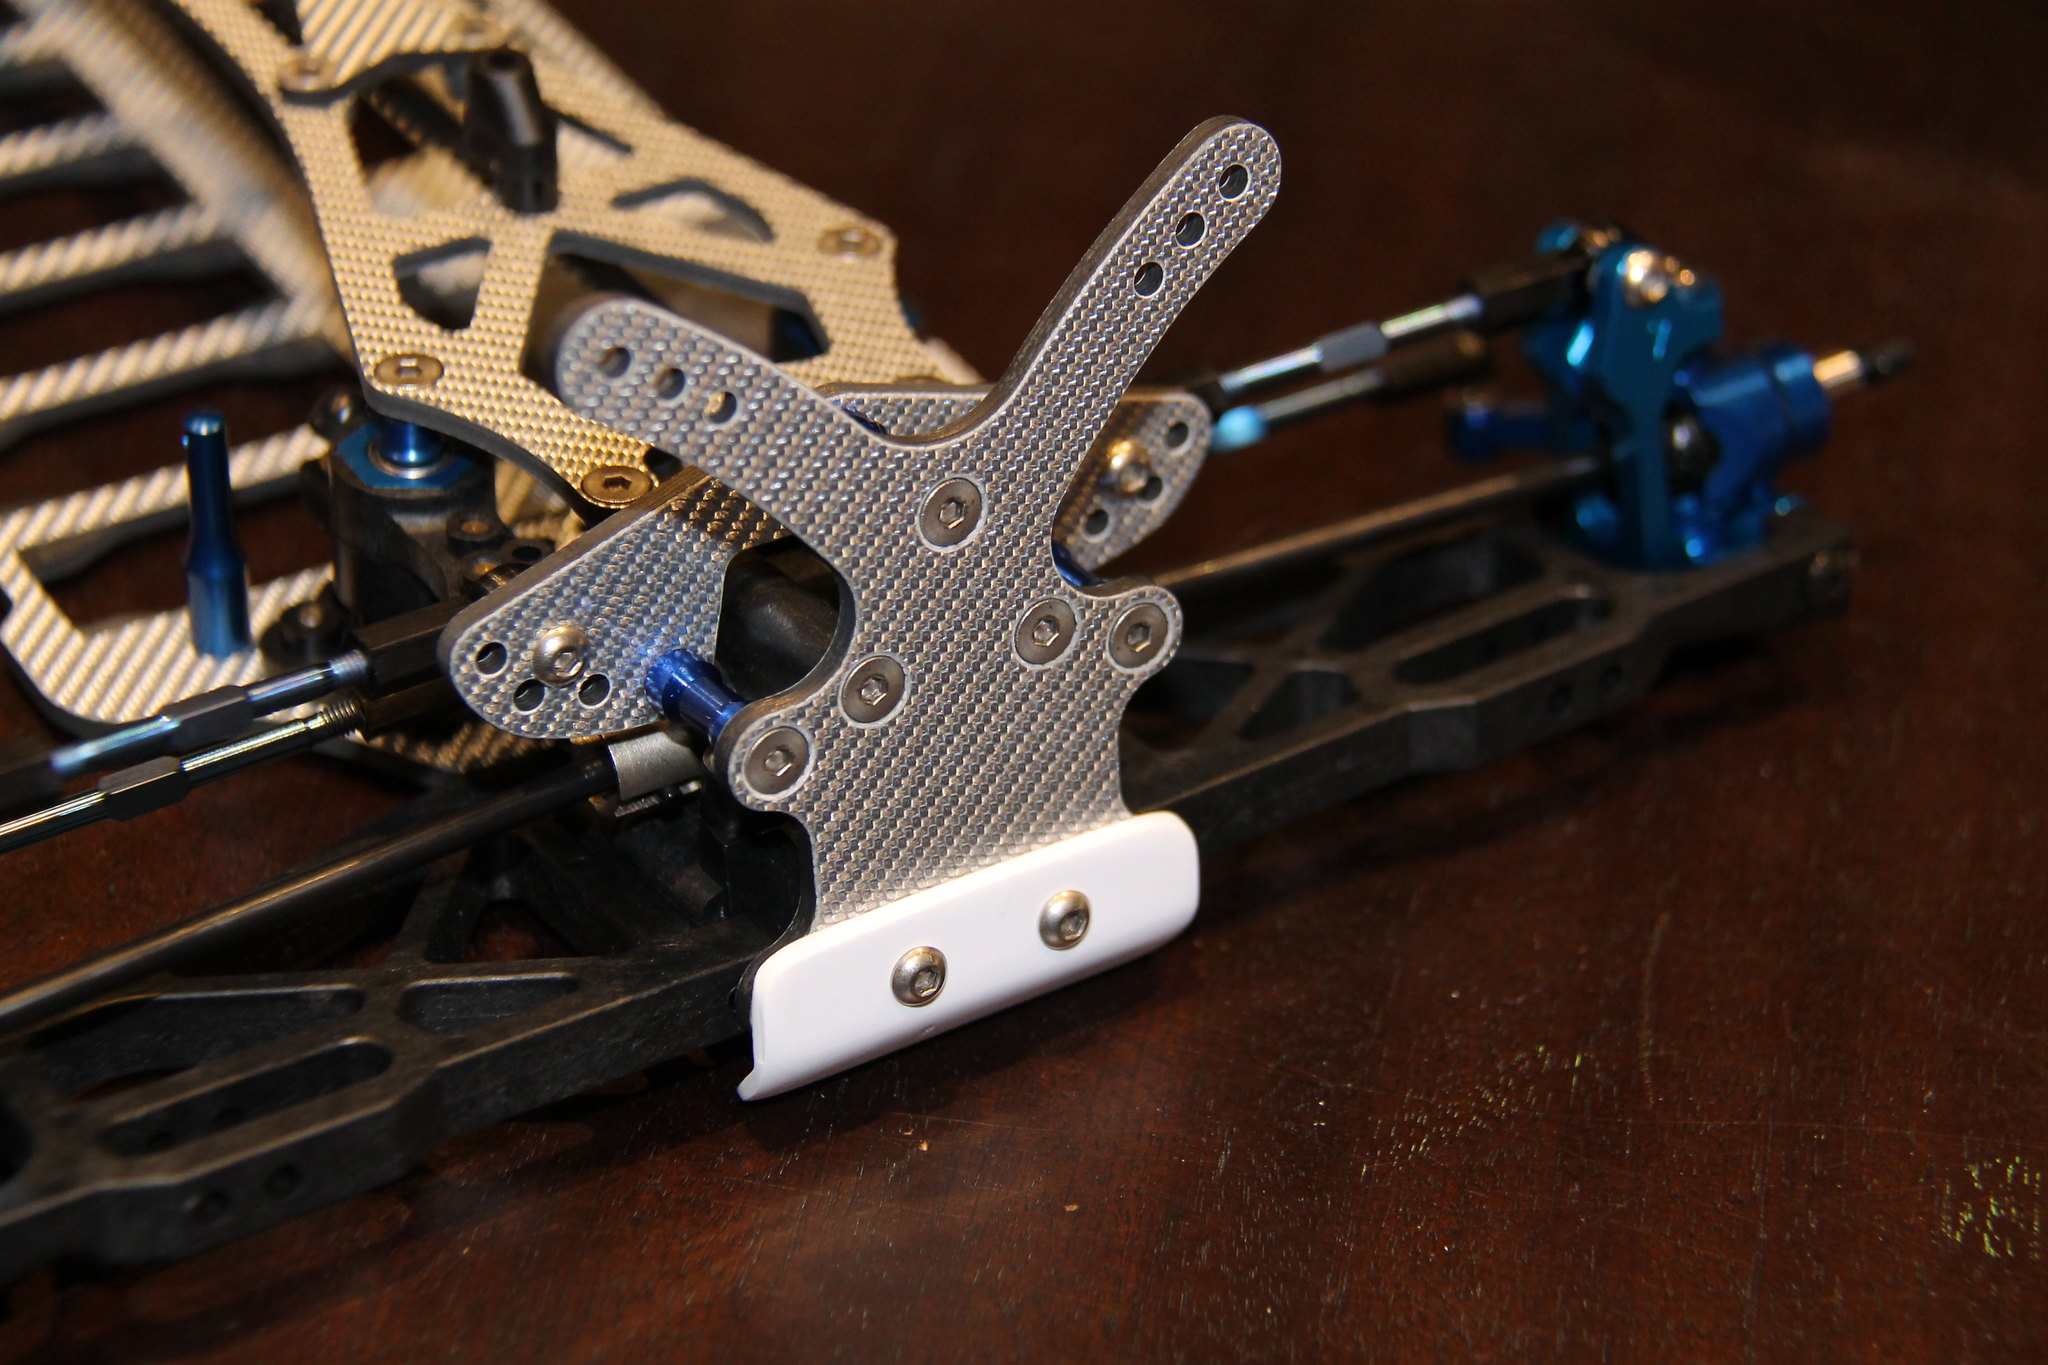
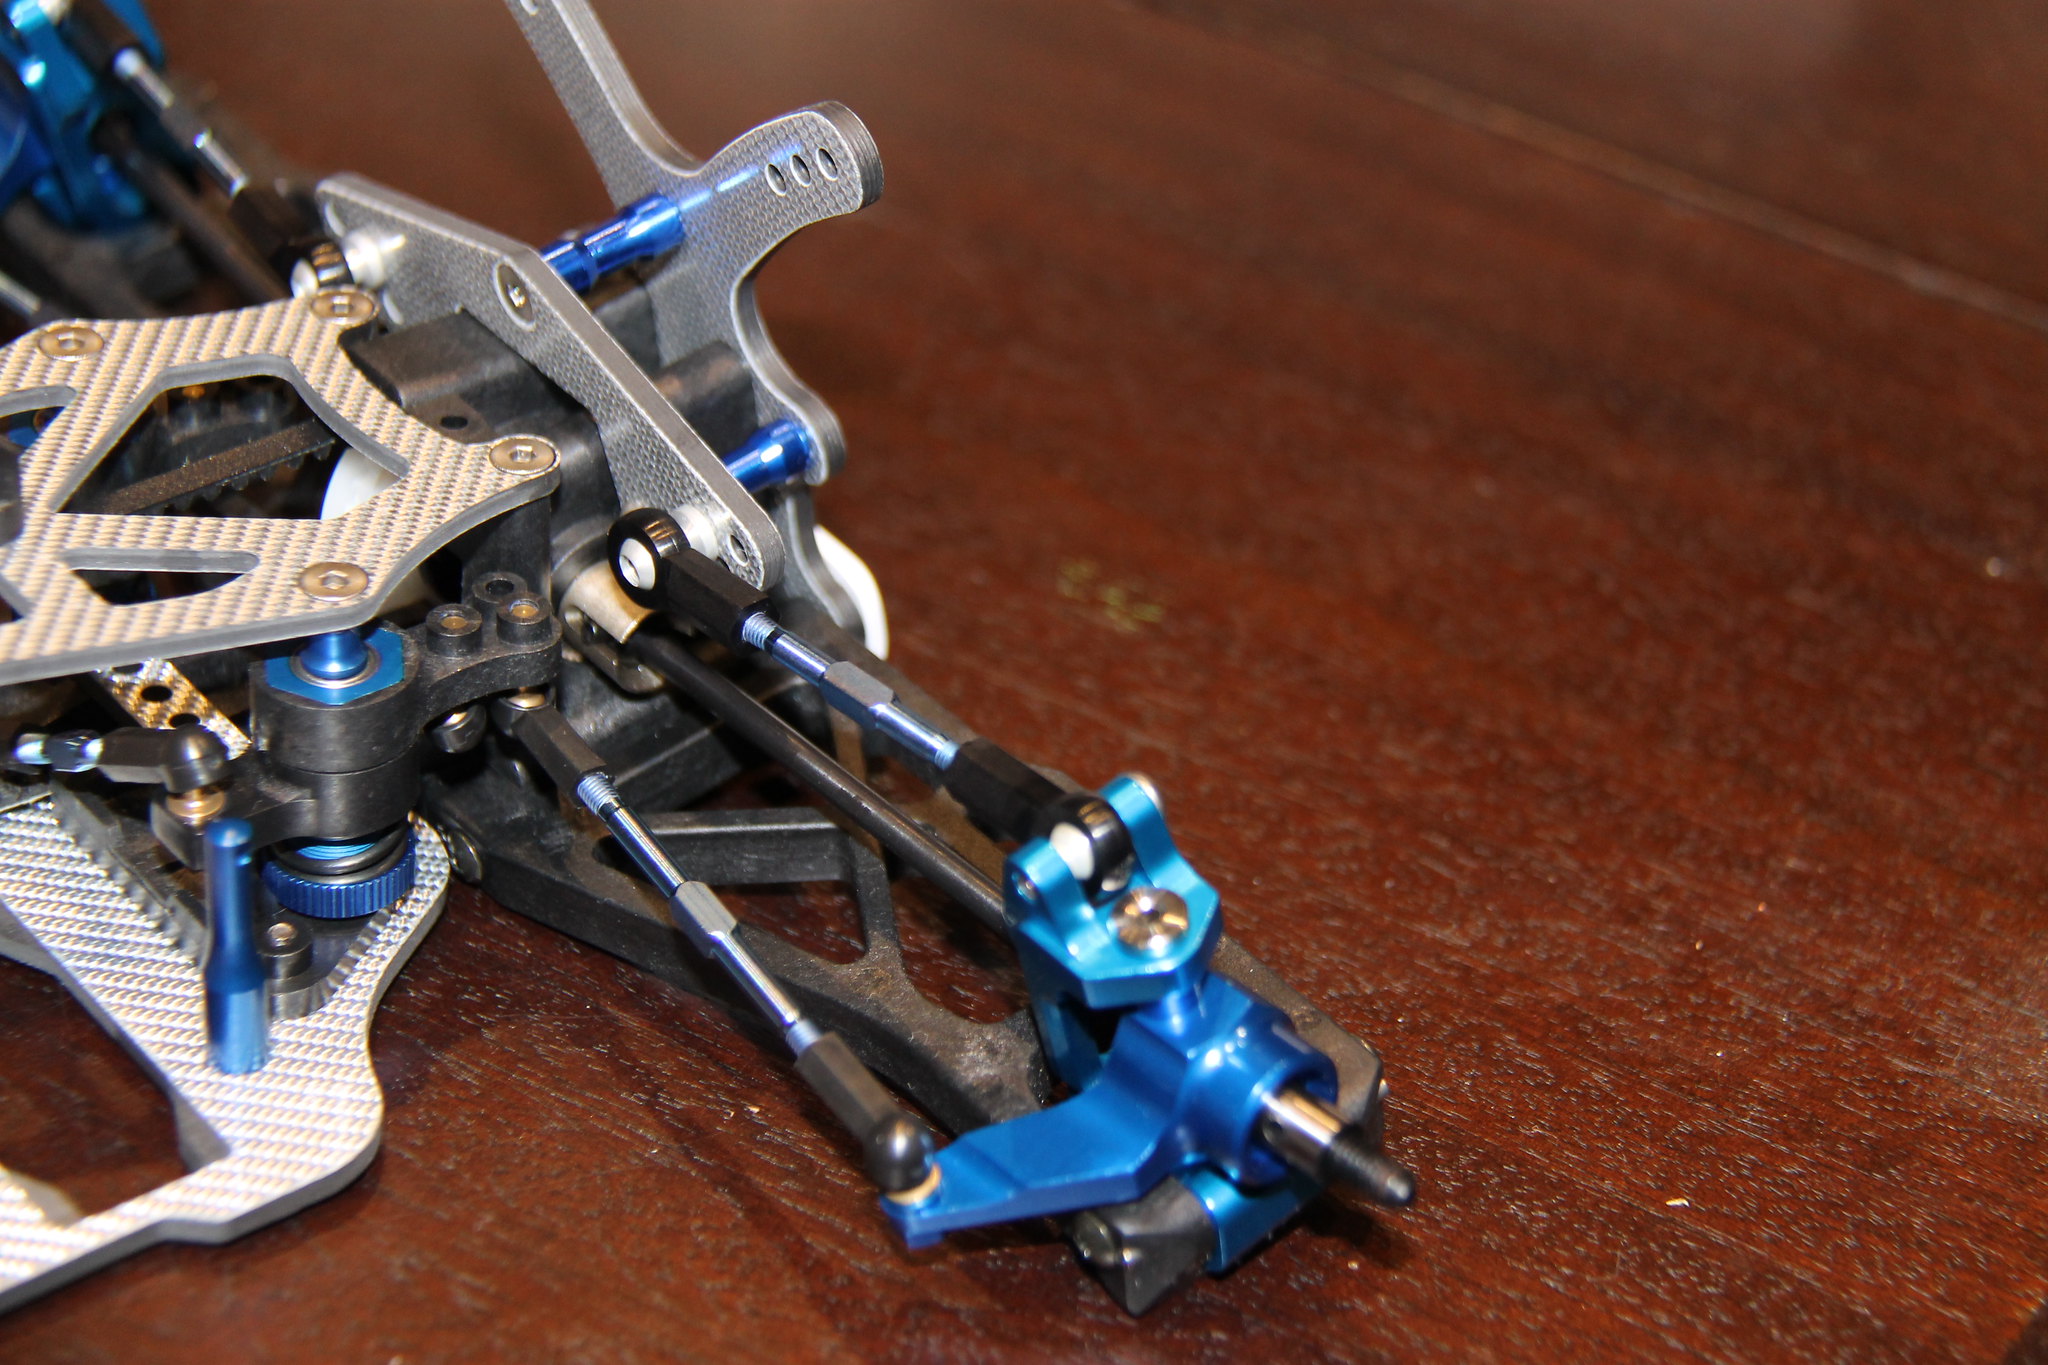
Next up is the installation of the front shock tower, I-arm brace and front suspension. No issues during installation and it is starting to look like an off-road buggy now. The Team Suzuki aluminium steering parts work very well and imo, look good against the silver surface material.
 IMG_3072 by Vincenzo Triventi, on Flickr
 IMG_3075 by Vincenzo Triventi, on Flickr
 IMG_3076 by Vincenzo Triventi, on Flickr
 IMG_3077 by Vincenzo Triventi, on Flickr
 IMG_3078 by Vincenzo Triventi, on Flickr
 IMG_3082 by Vincenzo Triventi, on Flickr
 IMG_3072 by Vincenzo Triventi, on Flickr
 IMG_3075 by Vincenzo Triventi, on Flickr
 IMG_3076 by Vincenzo Triventi, on Flickr
 IMG_3077 by Vincenzo Triventi, on Flickr
 IMG_3078 by Vincenzo Triventi, on Flickr
 IMG_3082 by Vincenzo Triventi, on Flickr
-
Dual
- Approved Member
- Posts: 353
- Joined: Sun Aug 20, 2006 3:47 pm
- Location: Perth, Australia
- Has thanked: 135 times
- Been thanked: 40 times
Re: Yokomo MX-4 SSG Special
Rear shock tower and anti-roll bar ready to be installed onto the chassis.
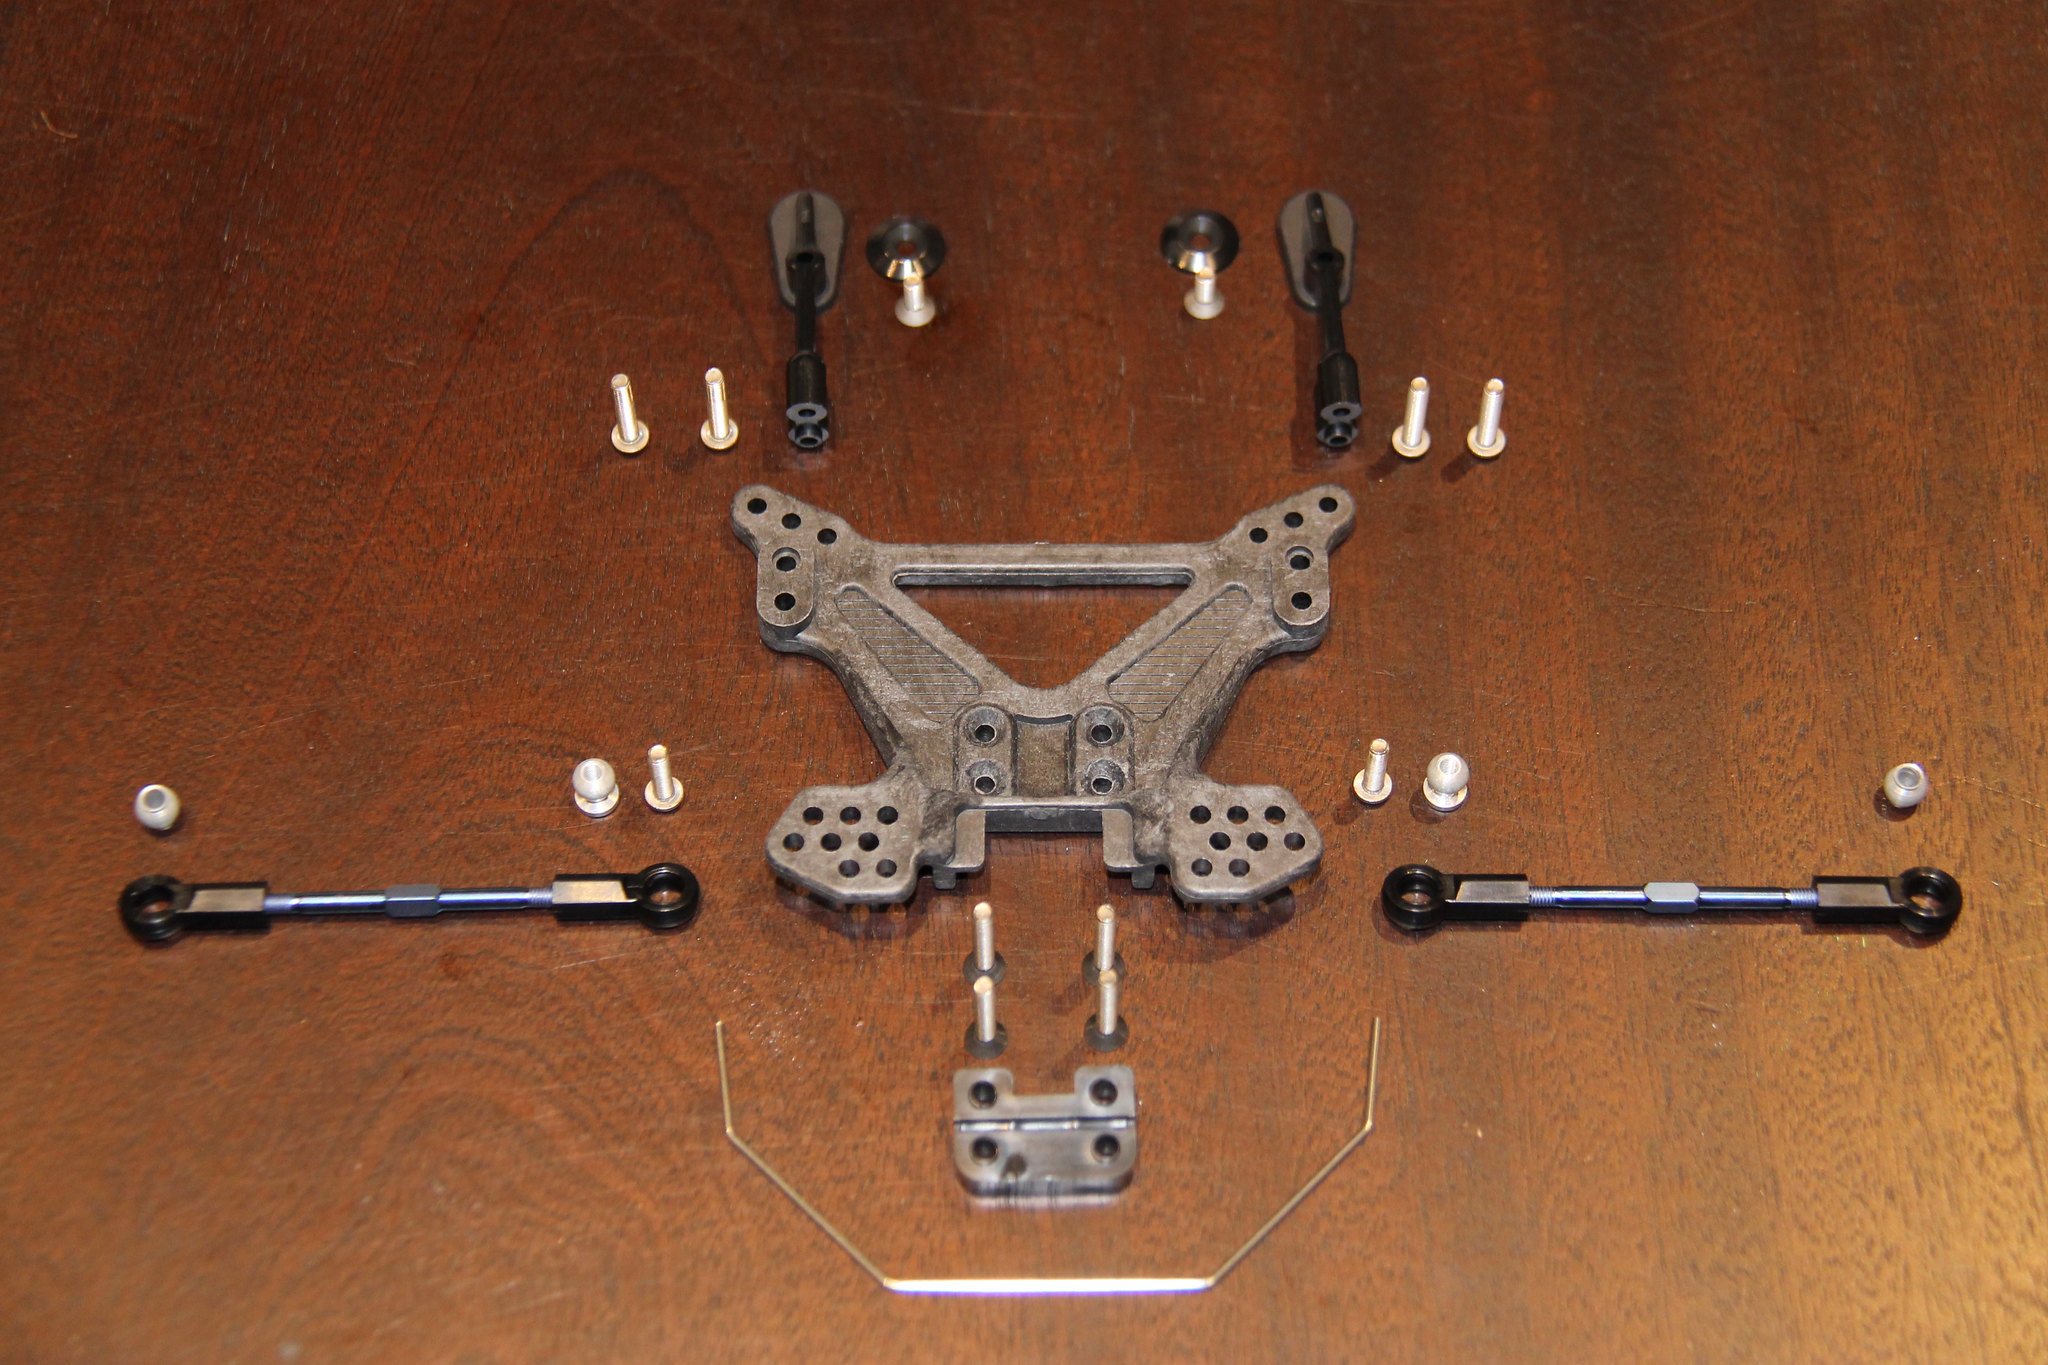 IMG_3084 by Vincenzo Triventi, on Flickr
Rear shock tower, long wheel base conversion kit, anti-roll bar and rear suspension installed onto chassis. The ZS-LWC long wheel base conversion kit was a popular option part for the Yokomo MR4-BC (came standard on the MR4-BC Special) as it extended the wheelbase by approximately 6mm and added some much needed stability over the standard length 'touring car' chassis that the MR-4BC used.
 IMG_3087 by Vincenzo Triventi, on Flickr
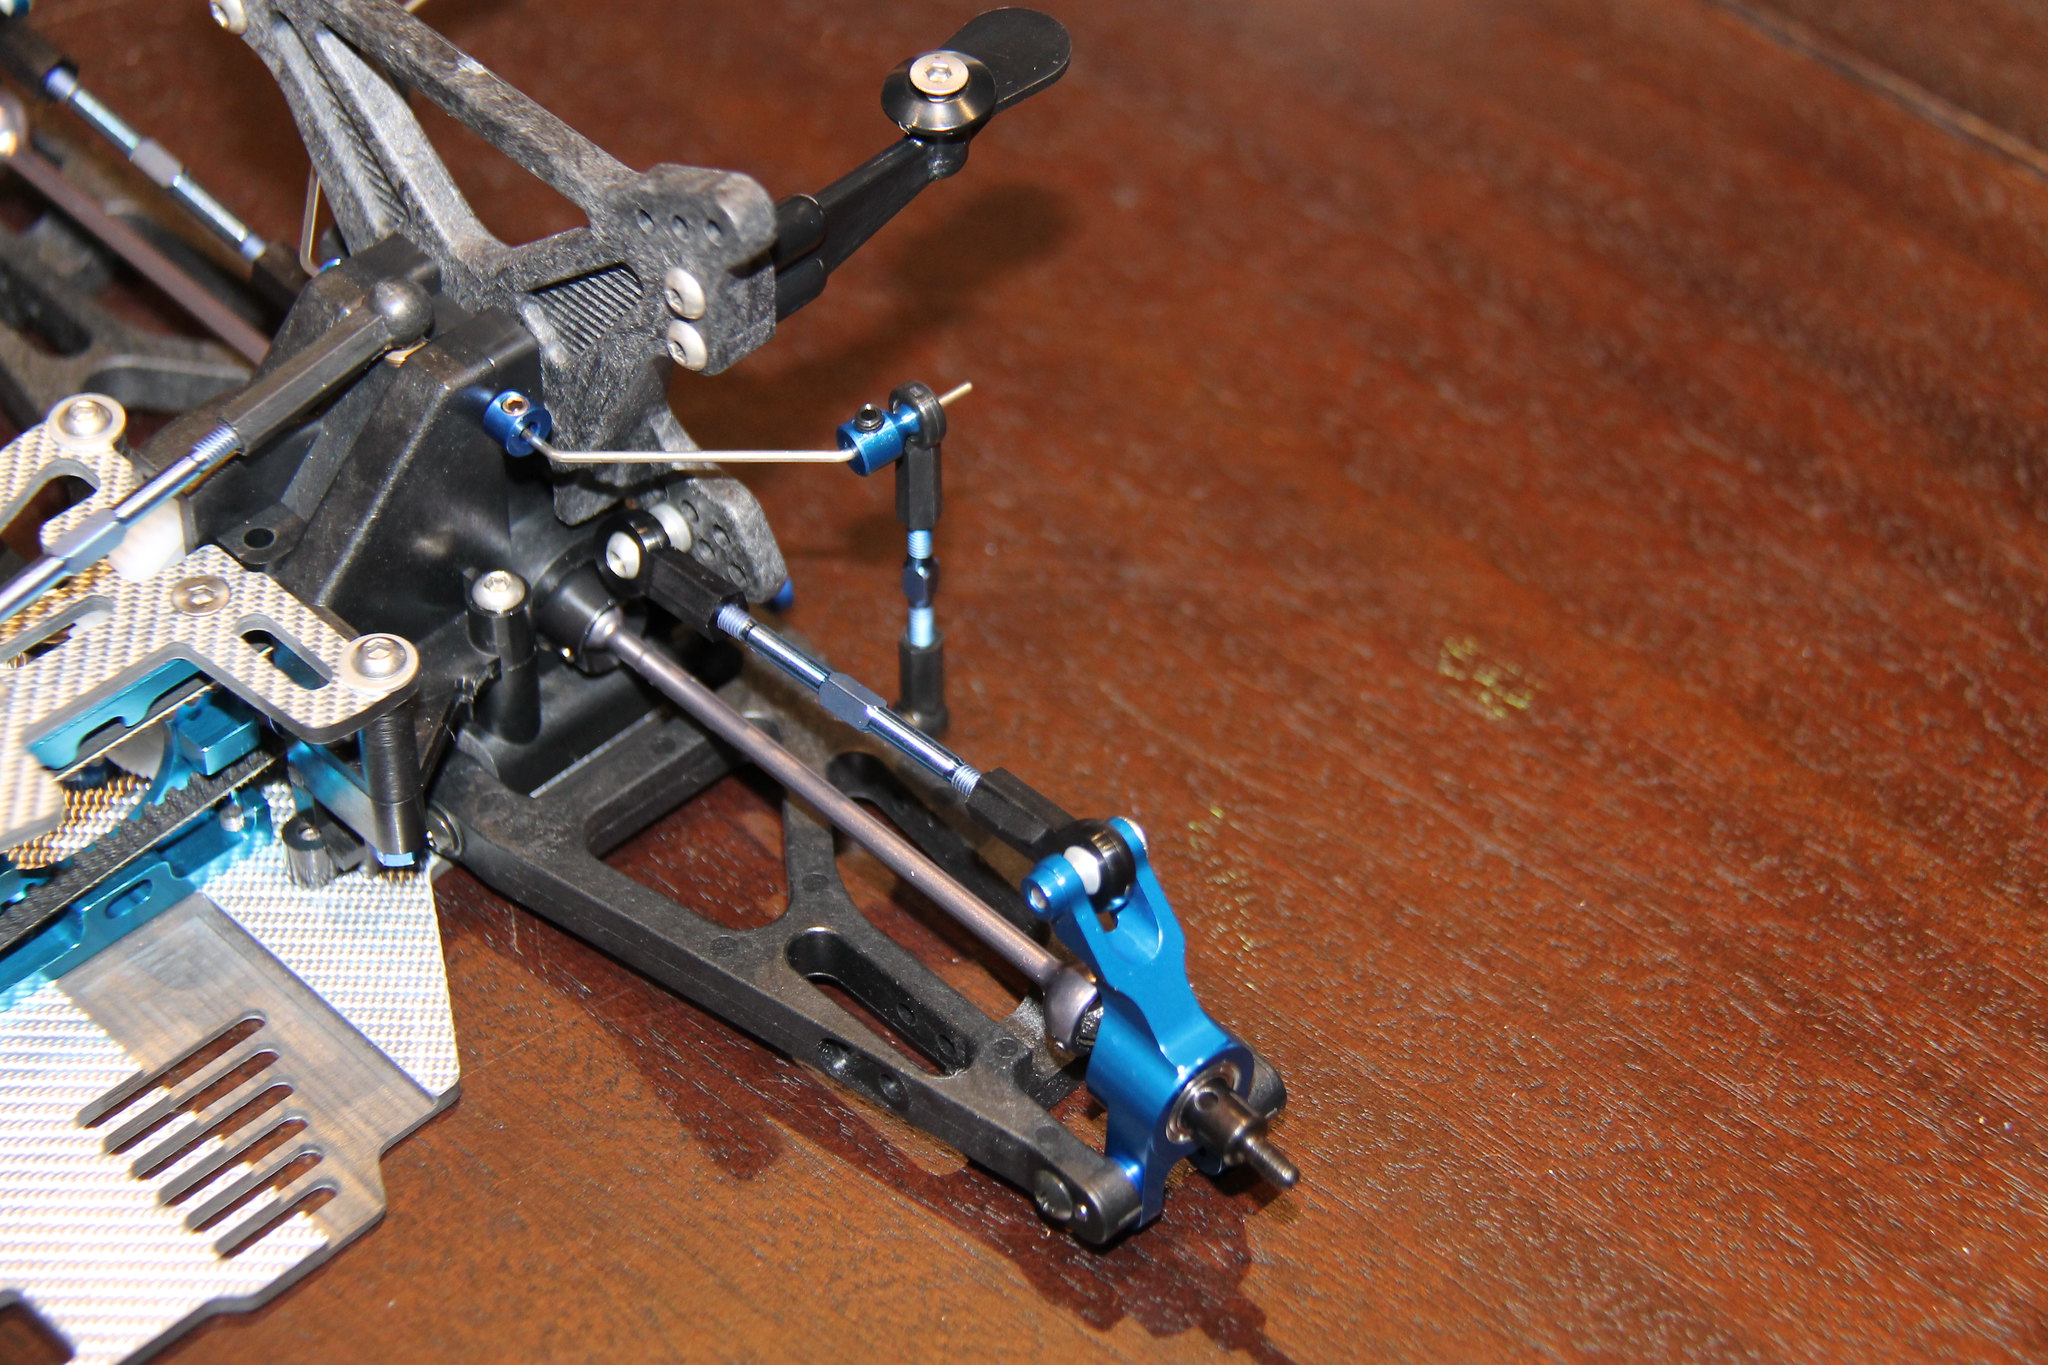 IMG_3086 by Vincenzo Triventi, on Flickr
 IMG_3088 by Vincenzo Triventi, on Flickr
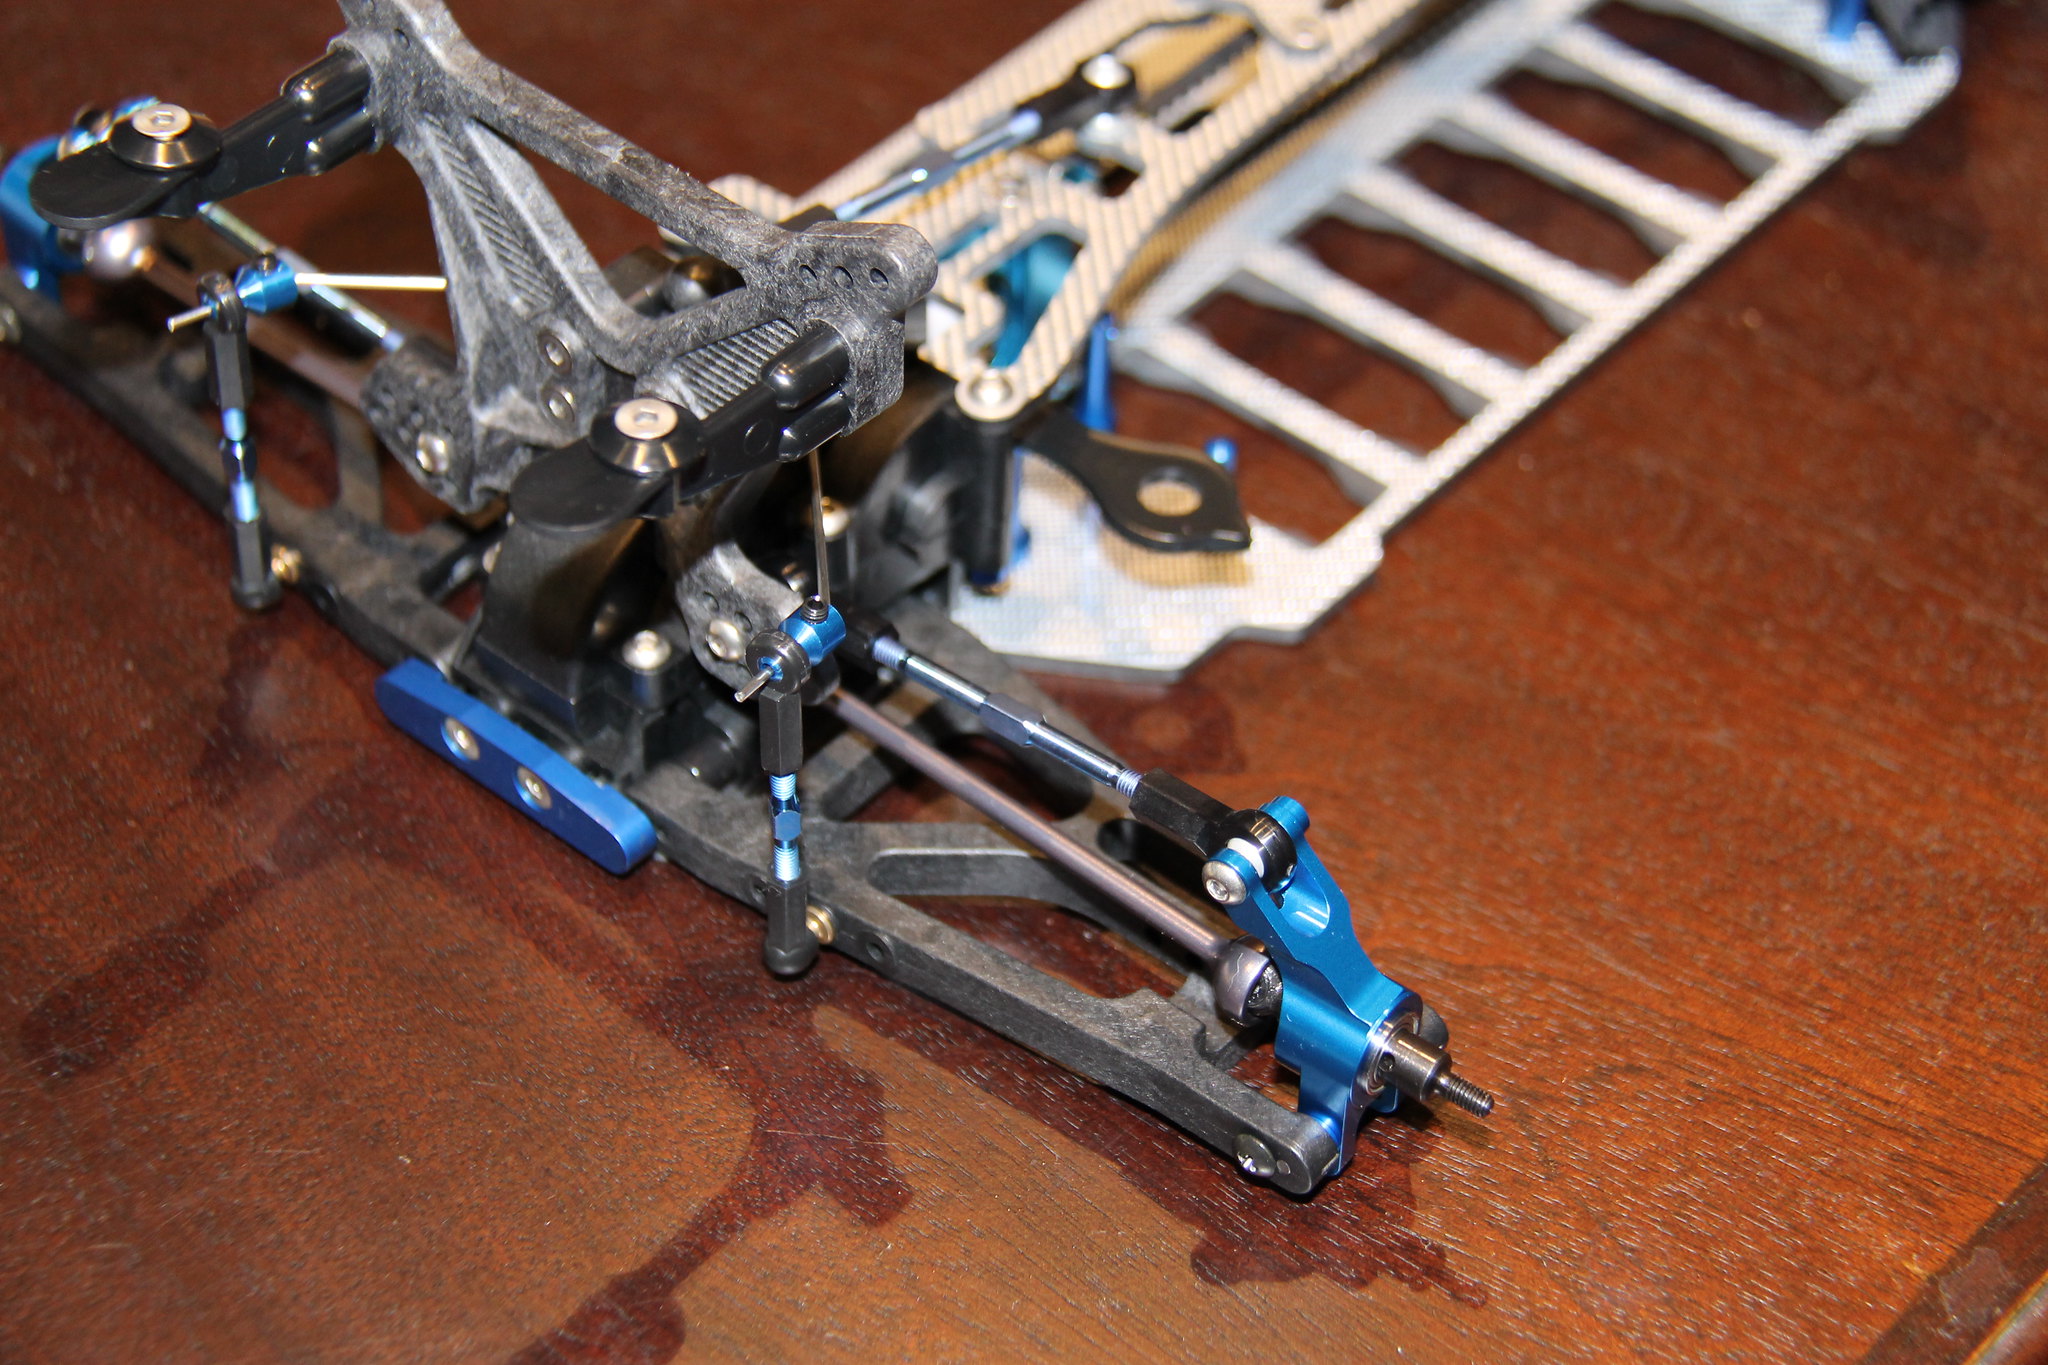 IMG_3089 by Vincenzo Triventi, on Flickr
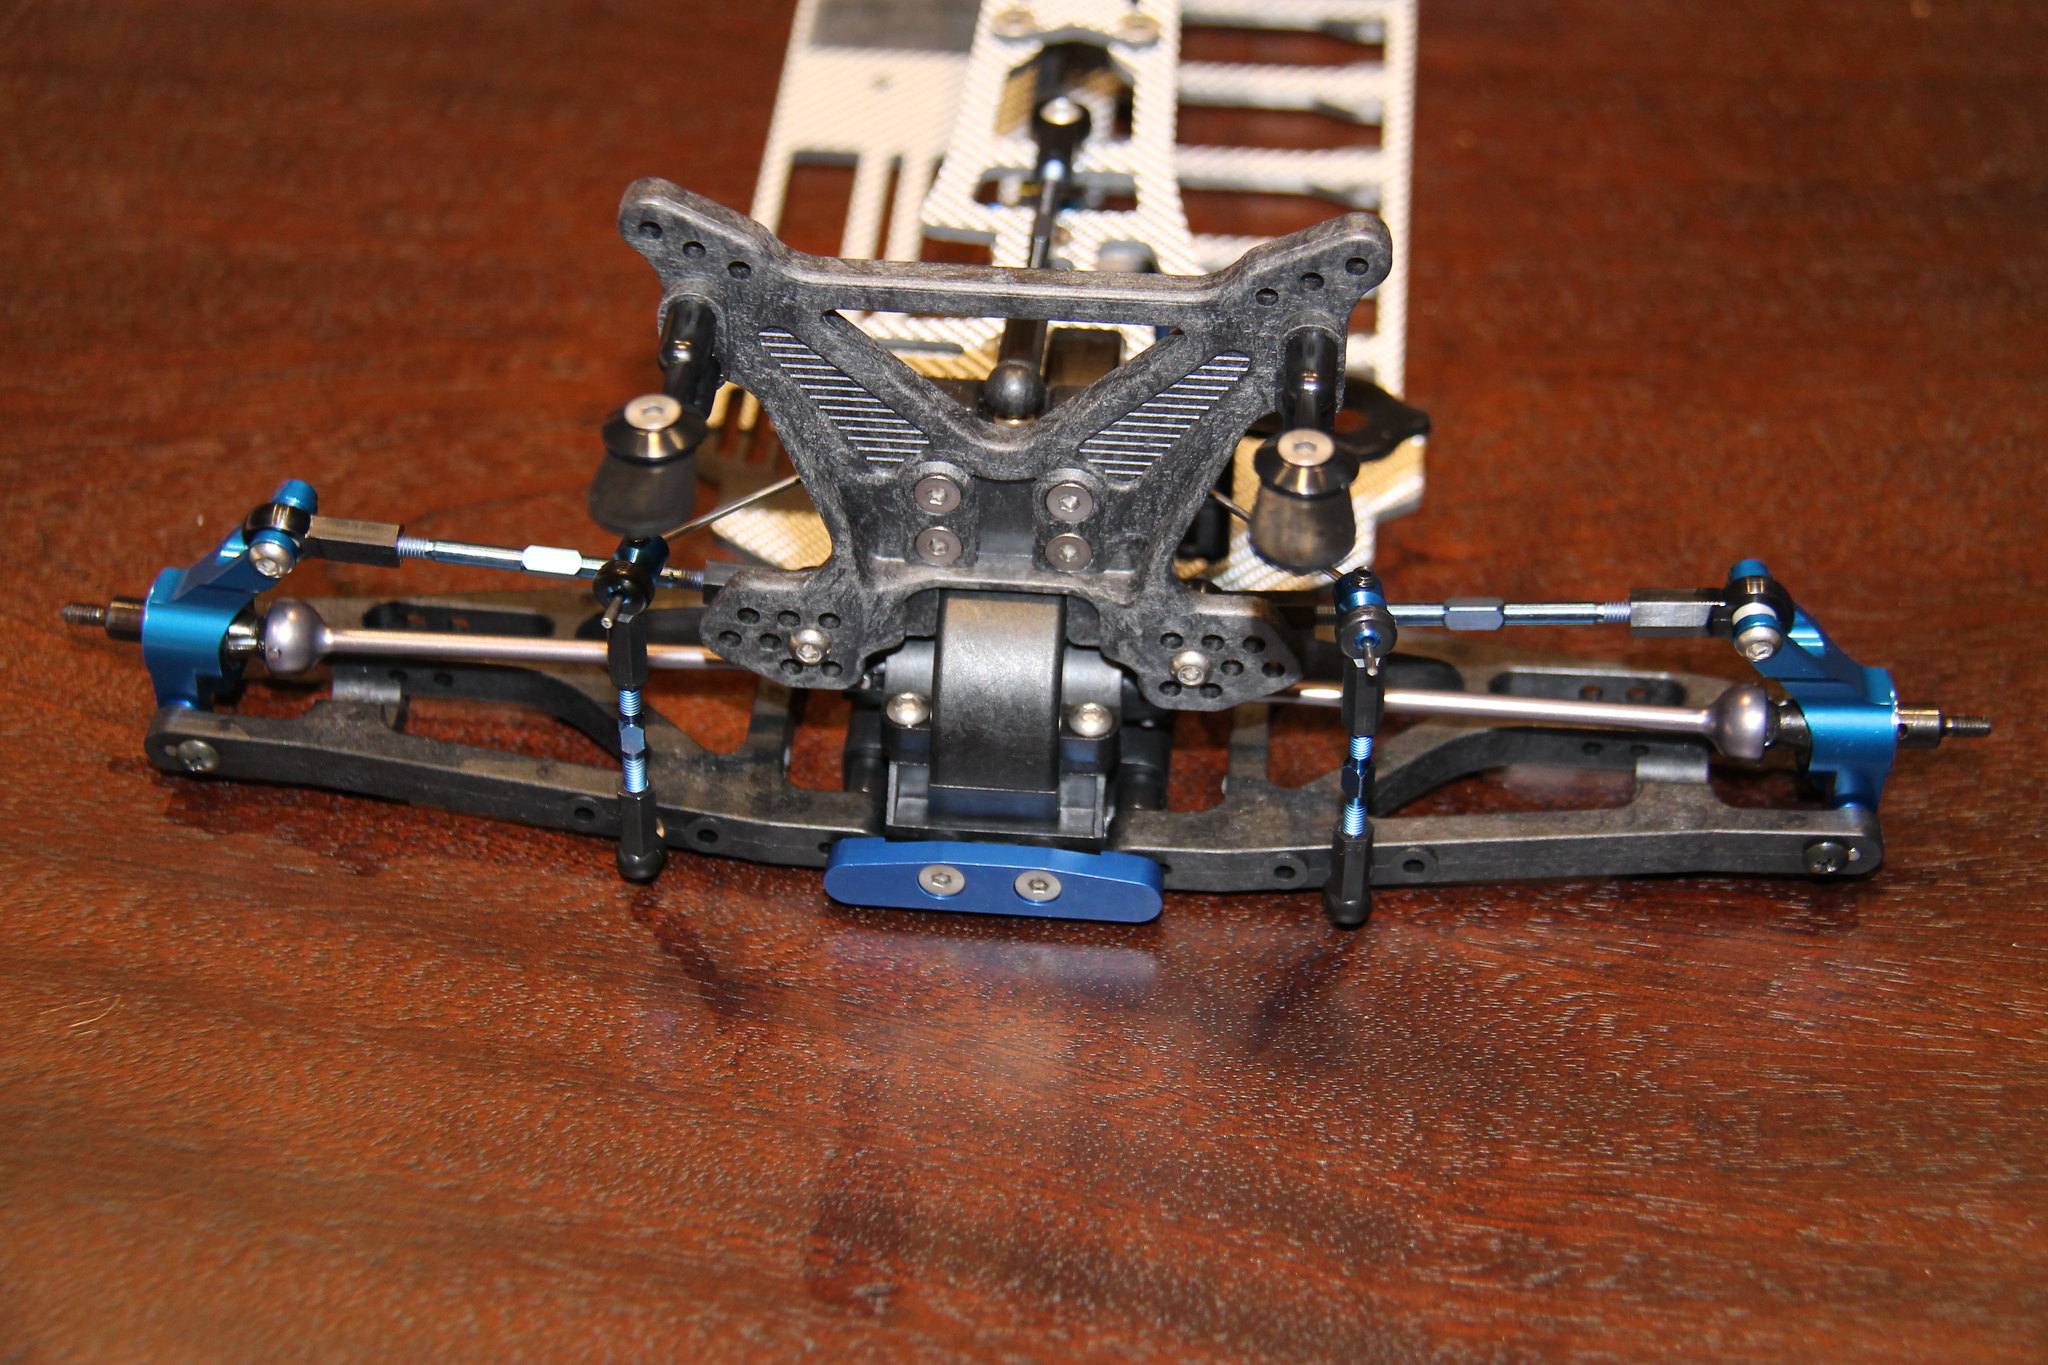 IMG_3090 by Vincenzo Triventi, on Flickr
 IMG_3084 by Vincenzo Triventi, on Flickr
Rear shock tower, long wheel base conversion kit, anti-roll bar and rear suspension installed onto chassis. The ZS-LWC long wheel base conversion kit was a popular option part for the Yokomo MR4-BC (came standard on the MR4-BC Special) as it extended the wheelbase by approximately 6mm and added some much needed stability over the standard length 'touring car' chassis that the MR-4BC used.
 IMG_3087 by Vincenzo Triventi, on Flickr
 IMG_3086 by Vincenzo Triventi, on Flickr
 IMG_3088 by Vincenzo Triventi, on Flickr
 IMG_3089 by Vincenzo Triventi, on Flickr
 IMG_3090 by Vincenzo Triventi, on Flickr
-
Dual
- Approved Member
- Posts: 353
- Joined: Sun Aug 20, 2006 3:47 pm
- Location: Perth, Australia
- Has thanked: 135 times
- Been thanked: 40 times
-
Dual
- Approved Member
- Posts: 353
- Joined: Sun Aug 20, 2006 3:47 pm
- Location: Perth, Australia
- Has thanked: 135 times
- Been thanked: 40 times
Re: Yokomo MX-4 SSG Special
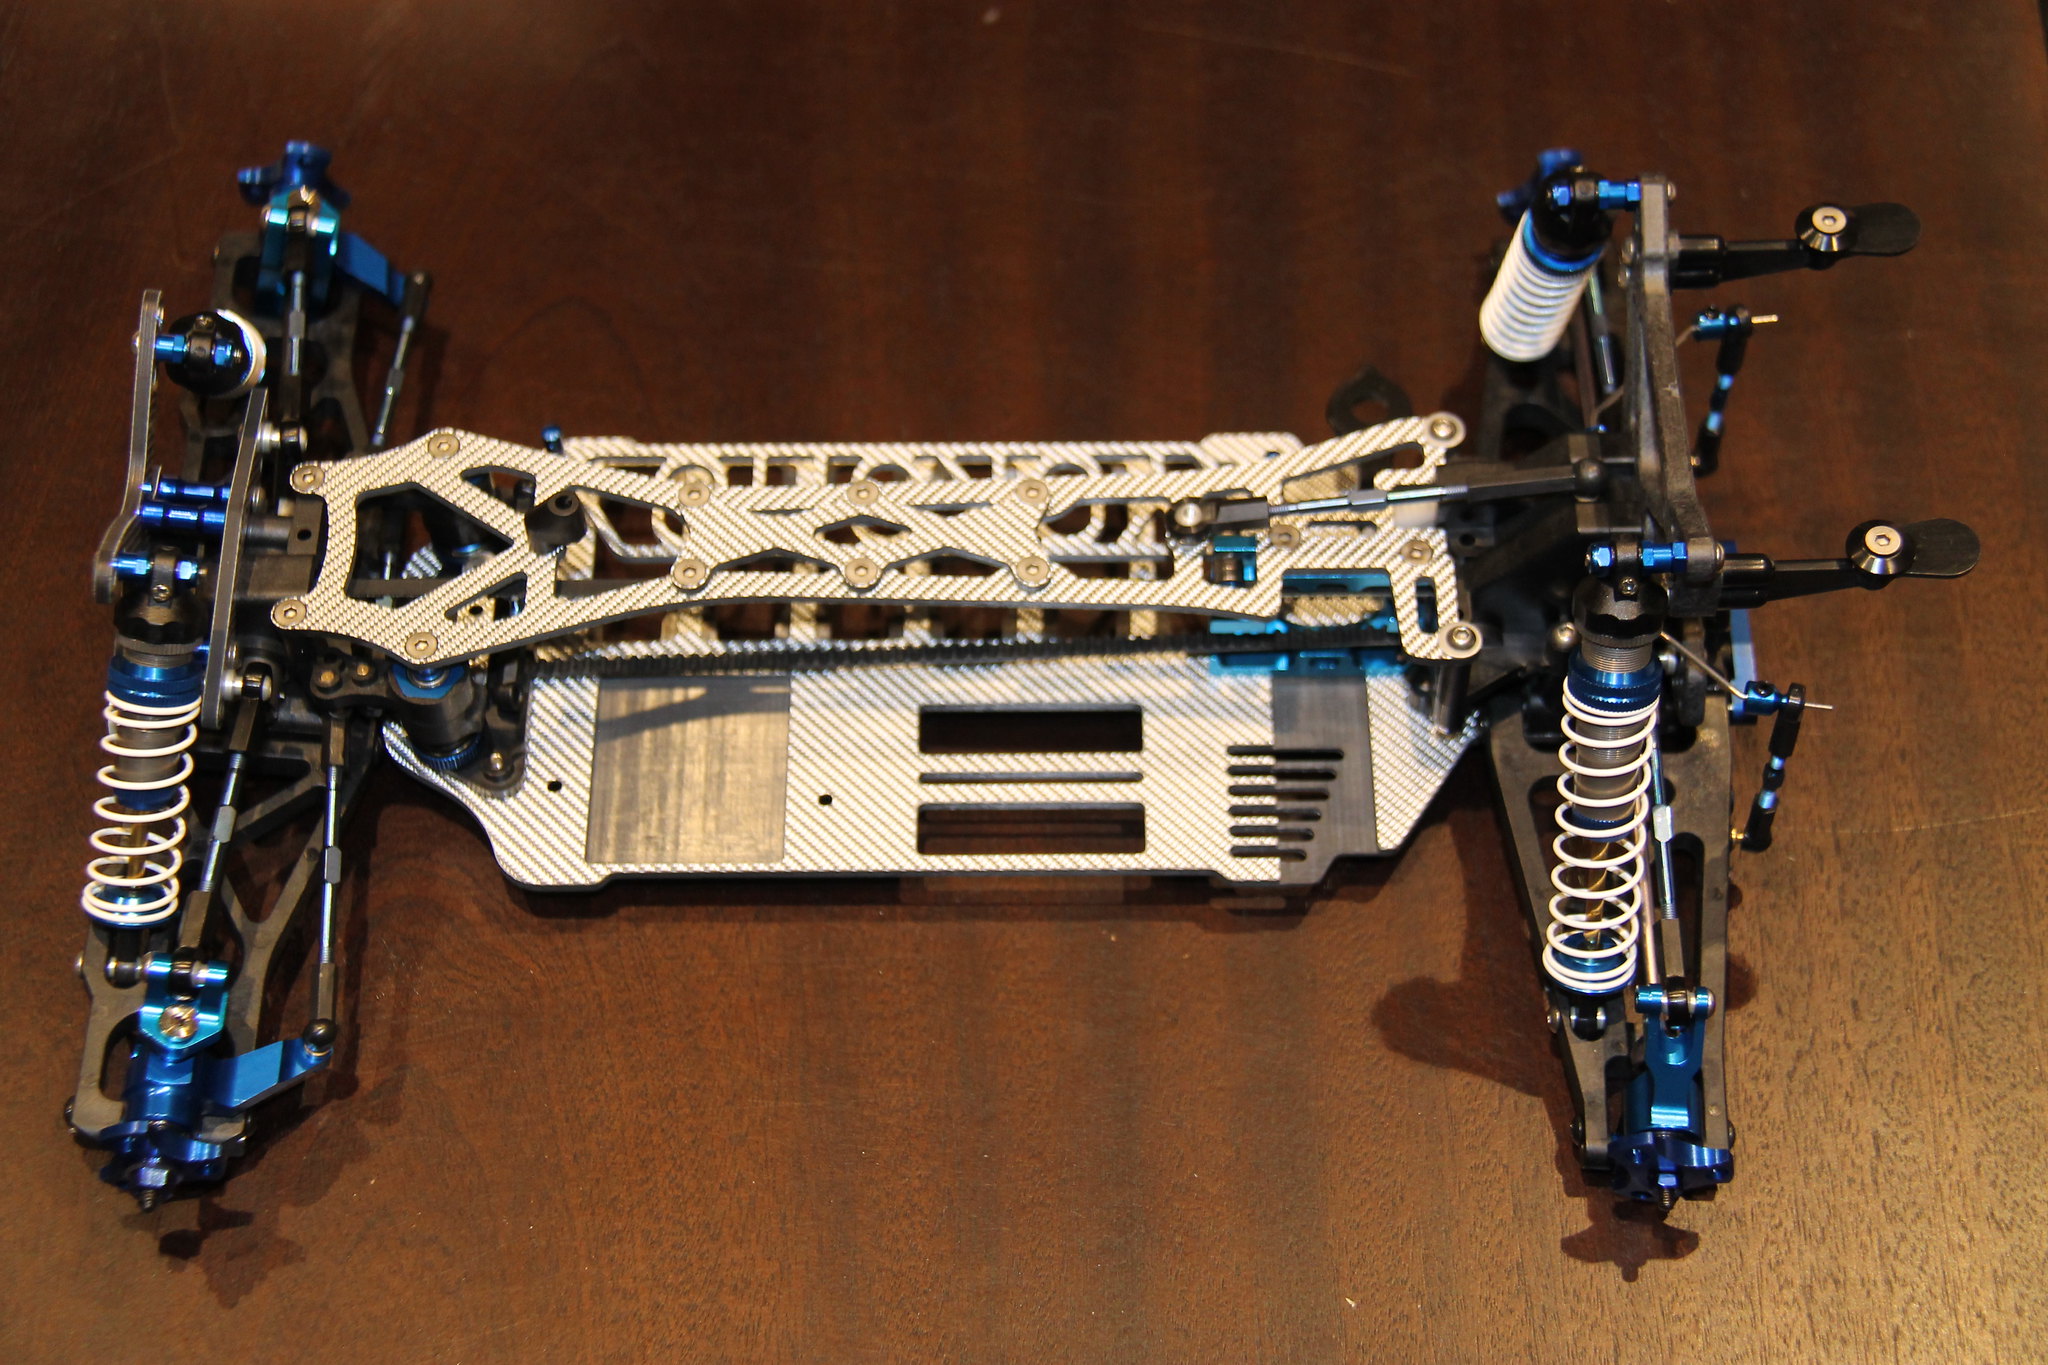
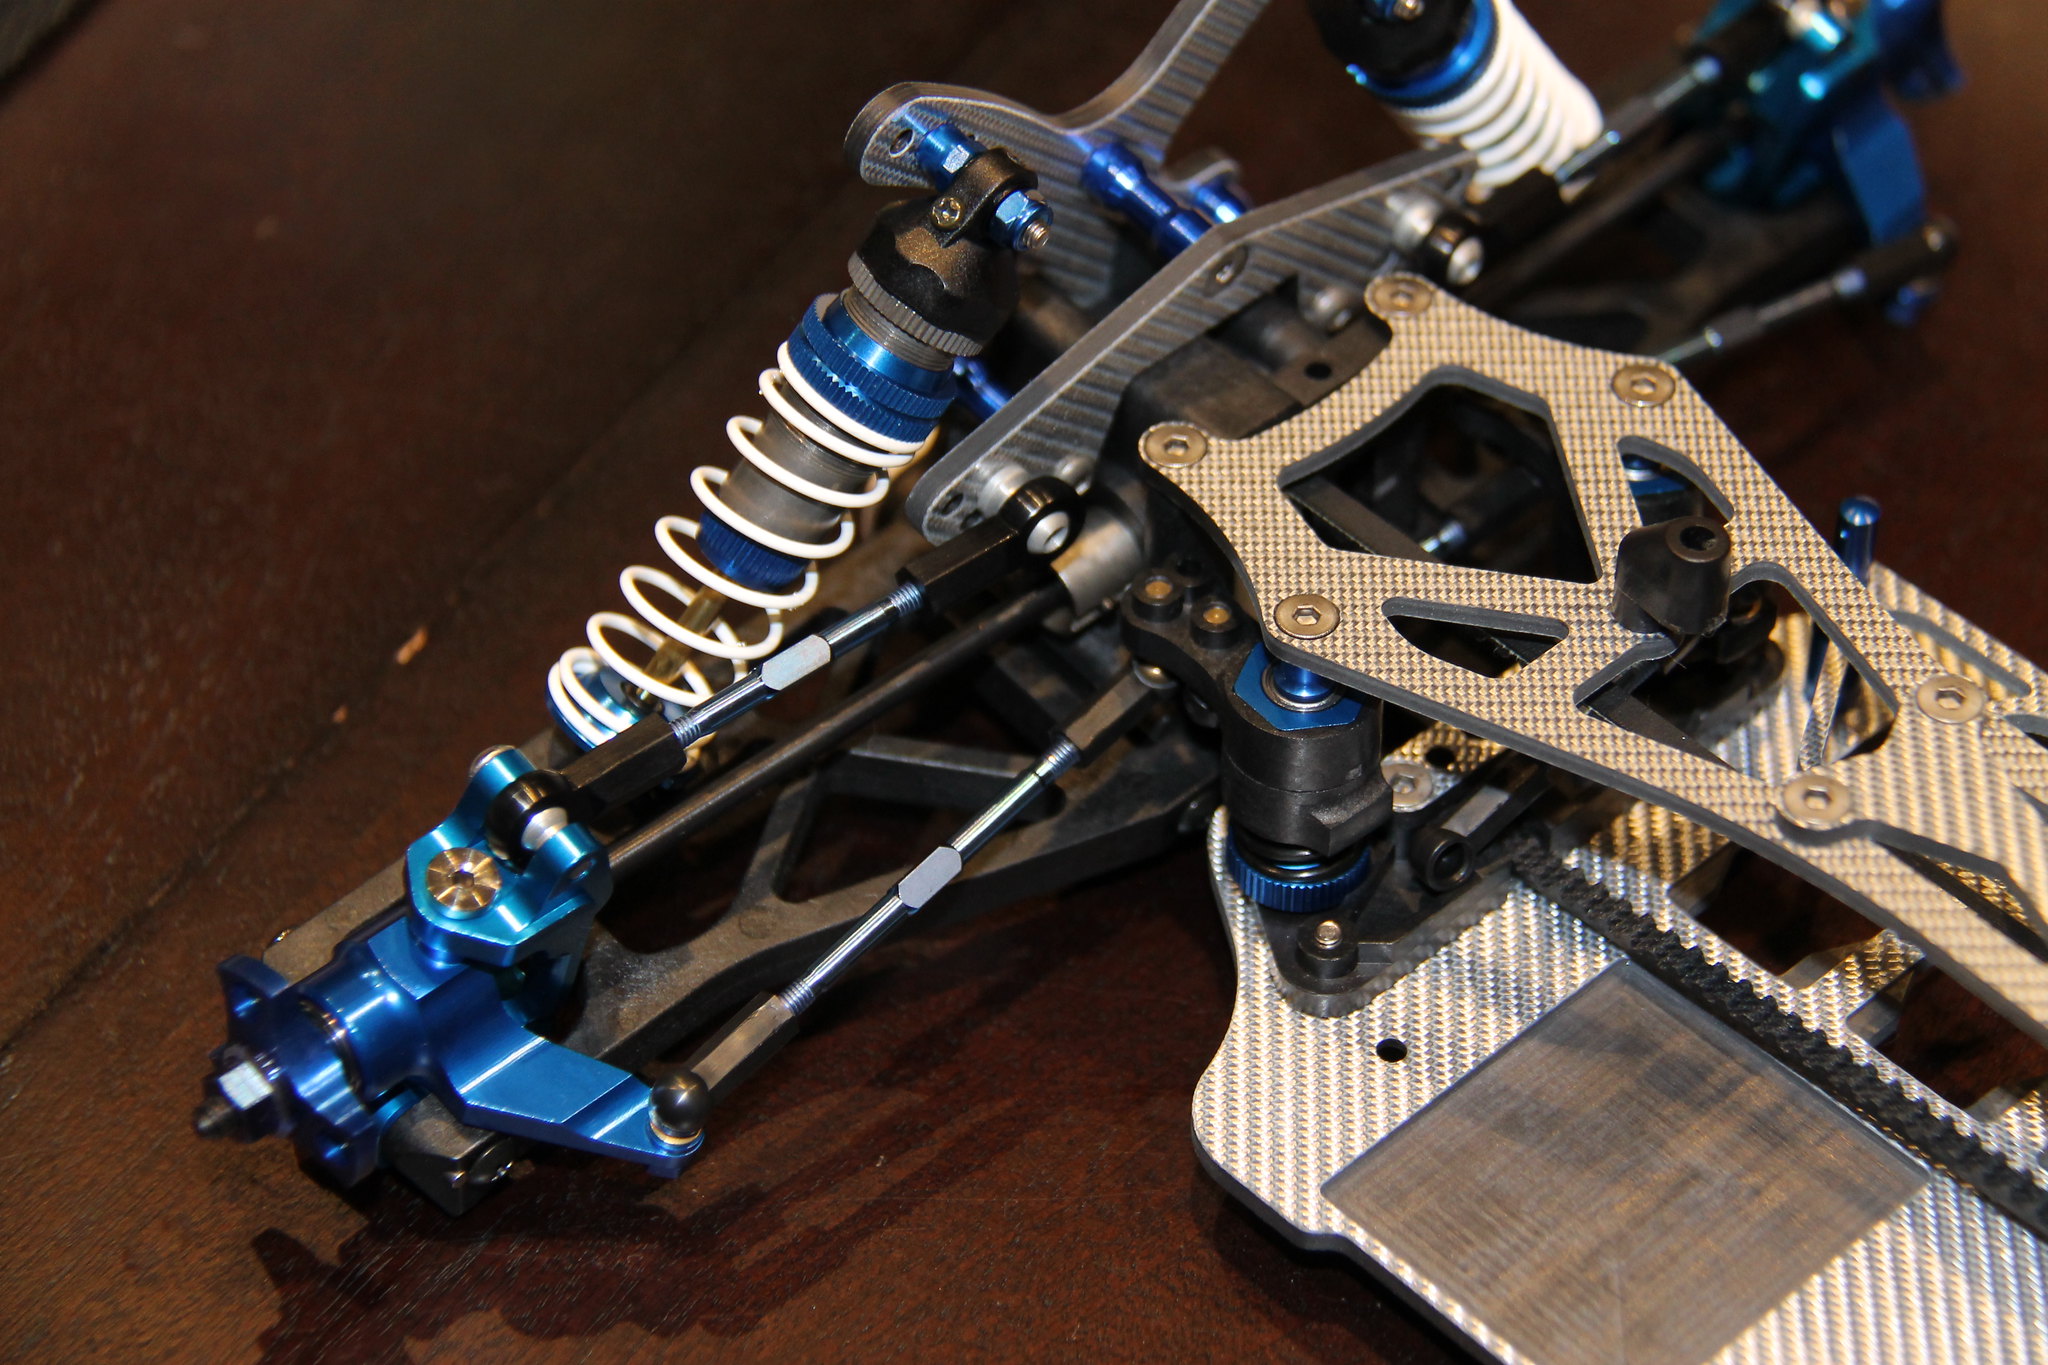
Last pieces to be installed apart from the rims, tires, body, wing and undertray. The shocks are from the Yokomo MR4-BC Special and are wonderful units. I am quite familiar with these style of Yokomo shocks as I have built and rebuilt the touring car versions many times over the years. The bleed screw on the shock cap makes controlling equal compression and rebound among all 4 shocks effortless. I added Yokomo titanium nitride shock shafts, Rayspeed o-rings and Rayspeed aluminium spring cups for a very smooth final shock assembly. The hubs are again from the Yokomo MR4-BC Special and although quite light in weight, they do require specific rims which will only mount on these hubs.
I am not sure what paint design I will be incorporating for this build but I have always liked Atsushi Hara's design. I will see how I go. I have a set of the Yokomo TR-20 Foam Tires already mounted on the specific BC Special Rims and once I have sorted the paint for the body, wing and undertray, I will post some photos of the completed machine.
Hope you enjoy the 'almost complete' Yokomo MX-4 SSG Special-
 IMG_3094 by Vincenzo Triventi, on Flickr
 IMG_3096 by Vincenzo Triventi, on Flickr
 IMG_3097 by Vincenzo Triventi, on Flickr
 IMG_3098 by Vincenzo Triventi, on Flickr
 IMG_3100 by Vincenzo Triventi, on Flickr
 IMG_3102 by Vincenzo Triventi, on Flickr
 IMG_3104 by Vincenzo Triventi, on Flickr
 IMG_3105 by Vincenzo Triventi, on Flickr
 IMG_3107 by Vincenzo Triventi, on Flickr
 IMG_3108 by Vincenzo Triventi, on Flickr
 IMG_3103 by Vincenzo Triventi, on Flickr
I am not sure what paint design I will be incorporating for this build but I have always liked Atsushi Hara's design. I will see how I go. I have a set of the Yokomo TR-20 Foam Tires already mounted on the specific BC Special Rims and once I have sorted the paint for the body, wing and undertray, I will post some photos of the completed machine.
Hope you enjoy the 'almost complete' Yokomo MX-4 SSG Special-
 IMG_3094 by Vincenzo Triventi, on Flickr
 IMG_3096 by Vincenzo Triventi, on Flickr
 IMG_3097 by Vincenzo Triventi, on Flickr
 IMG_3098 by Vincenzo Triventi, on Flickr
 IMG_3100 by Vincenzo Triventi, on Flickr
 IMG_3102 by Vincenzo Triventi, on Flickr
 IMG_3104 by Vincenzo Triventi, on Flickr
 IMG_3105 by Vincenzo Triventi, on Flickr
 IMG_3107 by Vincenzo Triventi, on Flickr
 IMG_3108 by Vincenzo Triventi, on Flickr
 IMG_3103 by Vincenzo Triventi, on Flickr
- Alex B
- Approved Member
- Posts: 431
- Joined: Tue Dec 30, 2008 5:23 am
- Location: Wales
- Has thanked: 23 times
- Been thanked: 47 times
Re: Yokomo MX-4 SSG Special
Awesome build Dual, just a quick question relating to the LWB conversion. What parts are actually used to allow for the conversion? I've studied the pics and can't quite understand how it works.
-
RS Chris
- Approved Member
- Posts: 149
- Joined: Mon Apr 18, 2016 7:31 pm
- Location: Pasadena, TX
- Has thanked: 1 time
- Been thanked: 19 times
Re: Yokomo MX-4 SSG Special
Nice build. Really wish I had held on to my MX4.
Current:RC10T, T3 FT, GT Blue Tub, GT FT, GT2 FT, GT5, RC28, SC28, Micro RS4.
Previous:B2, B3, B3 FT, 10T pink chassis, GT FT, TC3, TC3 FT, RS4MT
Tamiya TA02, Thunder Tiger TS4N pro, Kyosho VoneR, Emaxx, MX4, MP 7.5, 7.5 Kanai.
Previous:B2, B3, B3 FT, 10T pink chassis, GT FT, TC3, TC3 FT, RS4MT
Tamiya TA02, Thunder Tiger TS4N pro, Kyosho VoneR, Emaxx, MX4, MP 7.5, 7.5 Kanai.
-
Dual
- Approved Member
- Posts: 353
- Joined: Sun Aug 20, 2006 3:47 pm
- Location: Perth, Australia
- Has thanked: 135 times
- Been thanked: 40 times
Re: Yokomo MX-4 SSG Special
Hey Alex, happy that you like the build
Cheers Chris. The MX-4 can still be found for a good price. Just need a little patience
- Alex B
- Approved Member
- Posts: 431
- Joined: Tue Dec 30, 2008 5:23 am
- Location: Wales
- Has thanked: 23 times
- Been thanked: 47 times
Re: Yokomo MX-4 SSG Special
Hey Alex, happy that you like the build. The ZS-LWP Long Wheelbase Conversion Kit is based on moving the rear A-arms 6mm further back on the chassis. This is accomplished with the rear arm mounts being modified by having material machined off the front portion of the mounts thus allowing the a-arms to be mounted further back compared to the standard MR4-BC. This creates a gap which is made up with a 6mm spacer on the rear portion of the mounts. Quite a simple solution to the issues that the standard MR4-BC suffered from. The kit also uses different length hinge-pins, the rear portion of the bulkhead has also been modified/machined to allow for the altered length of the hinge-pins and the the whole assembly is tied together by an aluminium brace that is screwed onto the the rear bulkhead.
Thanks mate very helpful, I just picked up a MR4-BC after not doing anything Yokomo related since my WCS Build, doubt I'll get it to your standard but I have a few mods inline to bring it up a few notches. One other question is there a part number for the spacers you used to mount the MX-4 style shock tower and camber link?
-
Dual
- Approved Member
- Posts: 353
- Joined: Sun Aug 20, 2006 3:47 pm
- Location: Perth, Australia
- Has thanked: 135 times
- Been thanked: 40 times
Re: Yokomo MX-4 SSG Special
I remember your WCS quite wellThanks mate very helpful, I just picked up a MR4-BC after not doing anything Yokomo related since my WCS Build, doubt I'll get it to your standard but I have a few mods inline to bring it up a few notches. One other question is there a part number for the spacers you used to mount the MX-4 style shock tower and camber link?
Create an account or sign in to join the discussion
You need to be a member in order to post a reply
Create an account
Not a member? register to join our community
Members can start their own topics & subscribe to topics
It’s free and only takes a minute
Sign in
-
- Similar Topics
- Replies
- Views
- Last post
-
- 0 Replies
- 1061 Views
-
Last post by Paralell
-
- 5 Replies
- 2350 Views
-
Last post by GJW
-
- 13 Replies
- 3694 Views
-
Last post by stephenianjames
-
- 8 Replies
- 2711 Views
-
Last post by Erich Reichert
-
- 9 Replies
- 1720 Views
-
Last post by crusaderlyf
-
- 10 Replies
- 7855 Views
-
Last post by aip47-2008
-
- 10 Replies
- 4186 Views
-
Last post by Dual
-
- 0 Replies
- 1517 Views
-
Last post by GrePo
Who is online
Users browsing this forum: No registered users and 9 guests
