One of the worst things about the Coyote is the need to disassemble half the car to change a spur gear, this includes opening up the rear diff housing to access a single grub screw to slide the diff pinion off it's shaft allowing you to then get to the spur. This is my solution to the problem.
In this picture the stock 5mm shaft is the top one with the drive cup and shaft machined as one. I made the 5mm shaft on the bottom which utilises a separate modified Coyote drive cup.
Here's everything assembled in the chassis with the exception of the main drive shaft. The stock drive shaft is a 4mm steel unit. The front and rear drive cups were bored out to accept a 5mm aluminium drive shaft which I've yet to make. This was done so the rear drive cup could slide rearwards on it's shaft as you will see shortly.
To change the spur first remove the pinion and motor, then undo the grub screw in the drive cup followed by removing all four motor mount screws. The motor mount, shim and drive cup now all slide rearwards on their shaft butting up against the spur gear. At this point the main drive shaft would be free to move away from the drive cup and slide backwards allowing it to disengage from the front drive cup and be removed from the chassis.
Once the drive shaft is removed, the drive cup, shim and motor mount can now slide forwards off their shaft and be removed from the chassis exposing the two screws holding the spur to it's hub.
Change the spur then reverse the order for installation.
Chris.
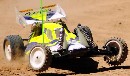
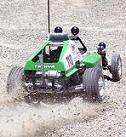
Toys.............they are!
 .
.