I think with a dremel you can smoothen out and polish the rails and underguard with a good finish.
See my build thread.
http://www.oople.com/forums/showthread.php?t=123939
Just be a little careful with the underguard as its a little on the thin side.
Kyosho Optima Teardown, Cleaning (, and rebuild...)
-
lifeIsAnalog

- Approved Member
- Posts: 75
- Joined: Tue Jun 04, 2013 11:56 am
- Location: Milky Way Galaxy, 3rd planet from the Sun
- Been thanked: 1 time
Re: Kyosho Optima Teardown, Cleaning (, and rebuild...)
Thanks. Love that Gold Turbo Optima. I do have a setup to polish metal, and I've done that with my YZ-10 bulkheads and hubs. But it does take away from the original "grain" look. I need to play with the process some.naushad wrote:I think with a dremel you can smoothen out and polish the rails and underguard with a good finish.
See my build thread.
http://www.oople.com/forums/showthread.php?t=123939
Just be a little careful with the underguard as its a little on the thin side.
Romans 5:8
-
lifeIsAnalog
- Approved Member
- Posts: 75
- Joined: Tue Jun 04, 2013 11:56 am
- Location: Milky Way Galaxy, 3rd planet from the Sun
- Been thanked: 1 time
Re: Kyosho Optima Teardown, Cleaning (, and rebuild...)
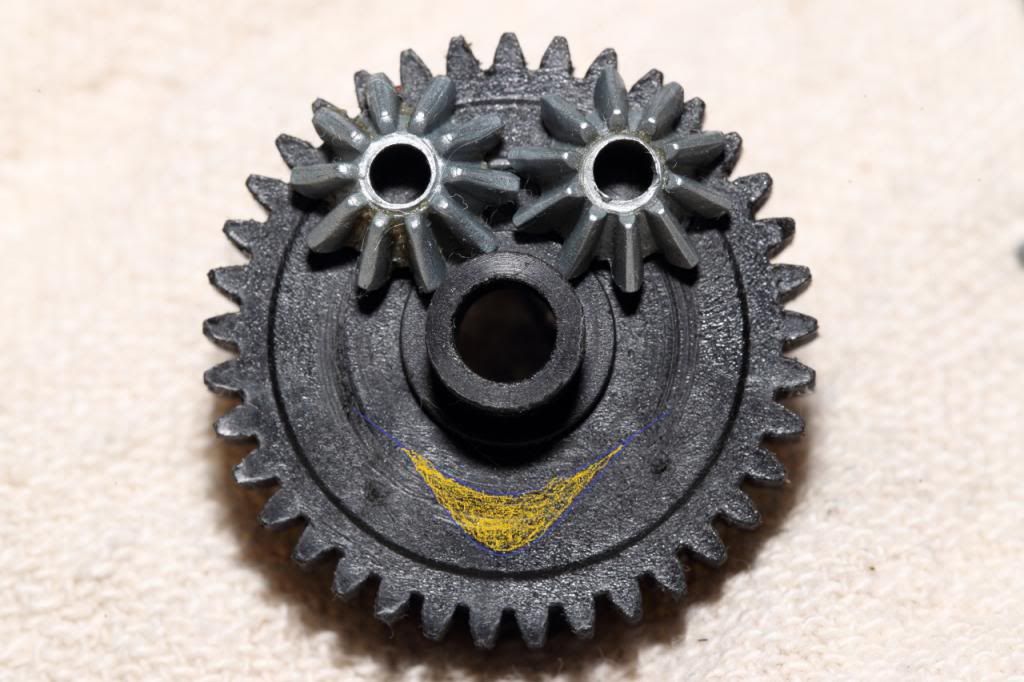
Next, I cleaned the gearbox and differentials, and of course I had to take pictures. There was some very sticky grease inside which definitely had that "old grease" / box of Crayons smell to it.
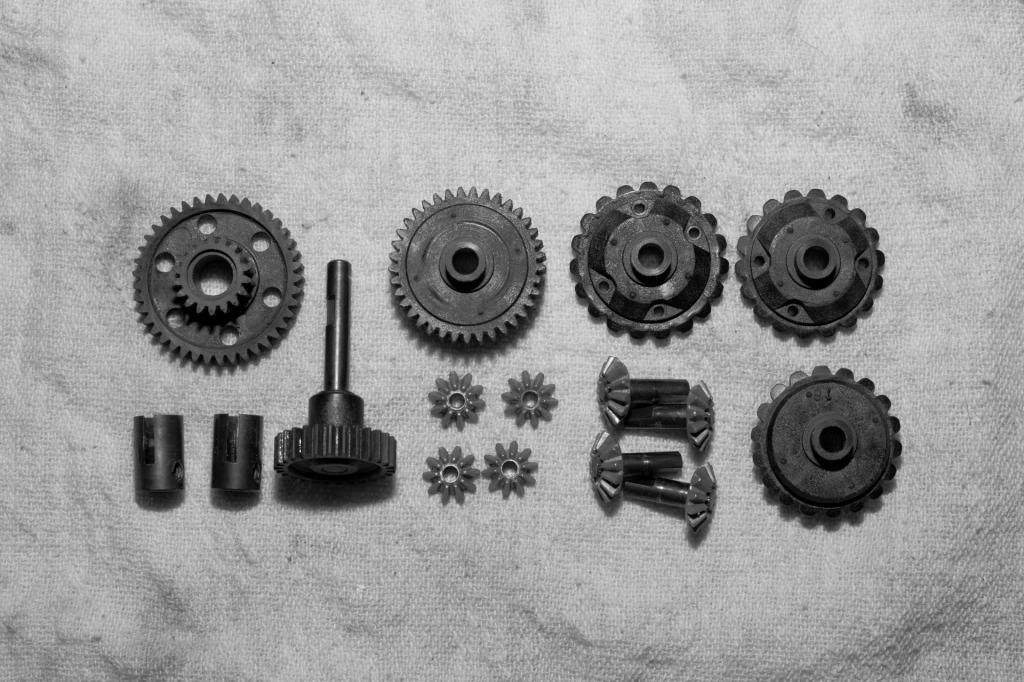
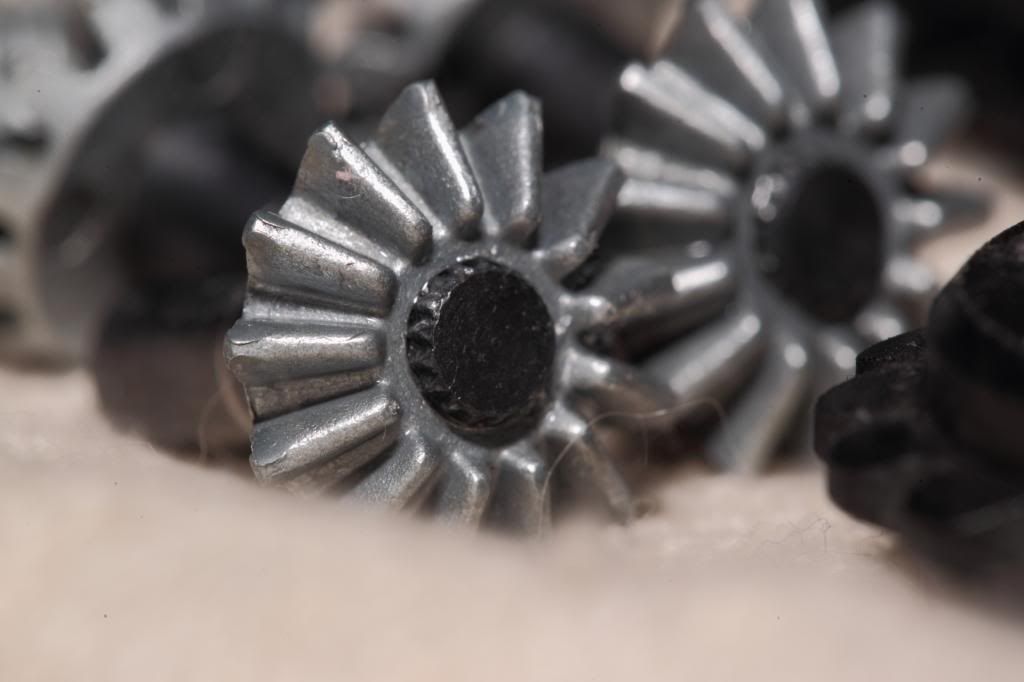
Need to replace this one:
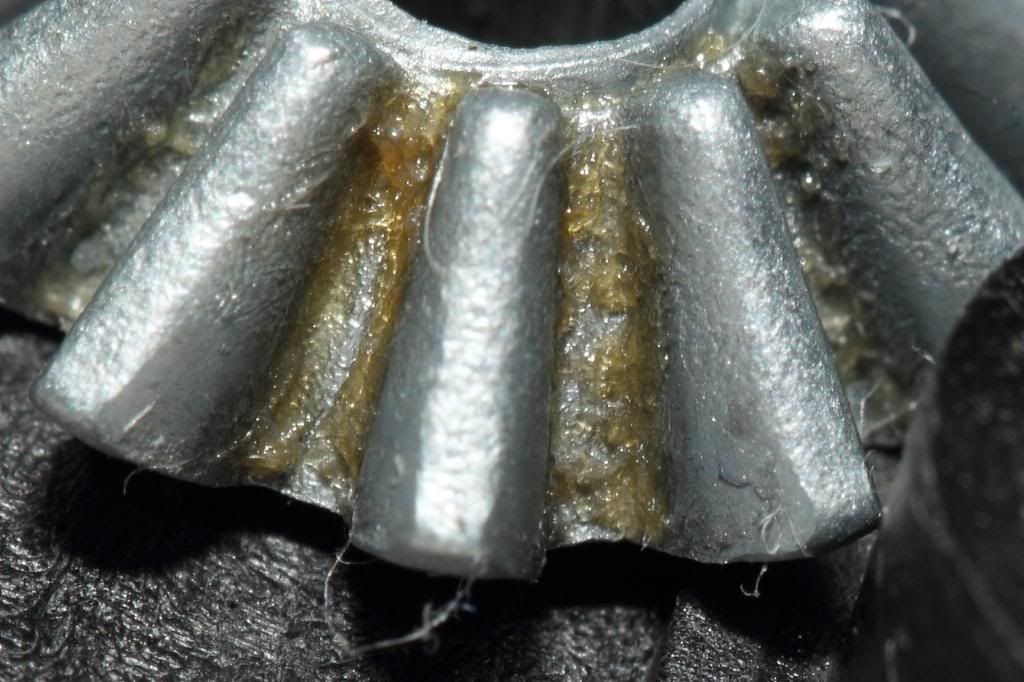
How did that get in there?


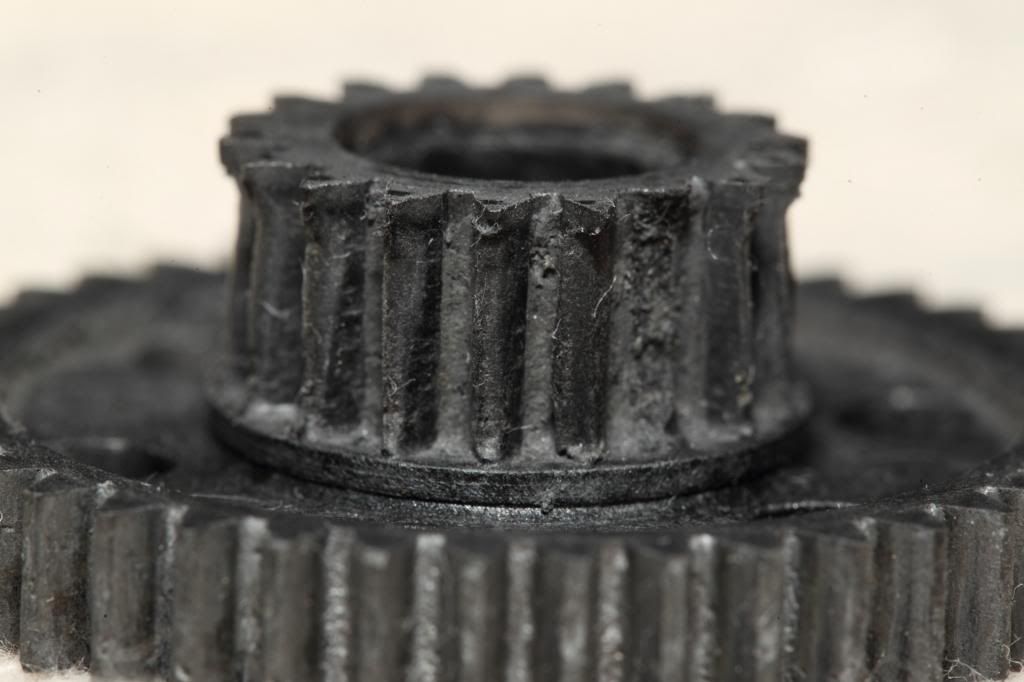
Need to replace this one:


How did that get in there?
Romans 5:8
-
klavy69

- Moderator
- Posts: 5208
- Joined: Thu May 29, 2008 4:11 pm
- Location: Fulton, IL (Land of one stop light but we DO have a windmill!)
- Has thanked: 639 times
- Been thanked: 294 times
Re: Kyosho Optima Teardown, Cleaning (, and rebuild...)
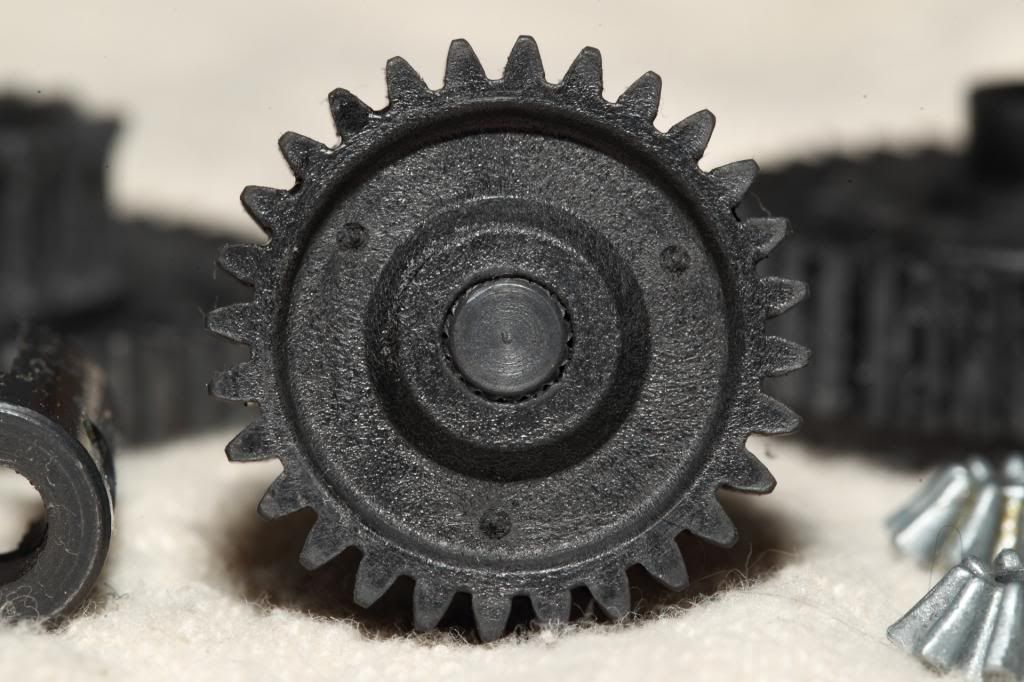
Uh...do you think you can get any better pix  .
.
Great thread so far. Wish I had a camera that could take closeups like that. Can't wait for the put-it-back-together stages.
Todd
Great thread so far. Wish I had a camera that could take closeups like that. Can't wait for the put-it-back-together stages.
Todd
Peace and professionlism.....Kabunga signing off!!!
-
lifeIsAnalog
- Approved Member
- Posts: 75
- Joined: Tue Jun 04, 2013 11:56 am
- Location: Milky Way Galaxy, 3rd planet from the Sun
- Been thanked: 1 time
Re: Kyosho Optima Teardown, Cleaning (, and rebuild...)
I'll try to do betterklavy69 wrote:Uh...do you think you can get any better pix
Great thread so far. Wish I had a camera that could take closeups like that. Can't wait for the put-it-back-together stages.
Todd
I started the reassembly, only to realize that I'm going to make myself go back and fix something.
Well I built both front and rear gearboxes:


And added in the siderails. I decided not to polish them but rather to wet sand until most of the blemishes were gone. I started with 400 grit and ended at 600, to leave a nice horizontal grain:


But... I'm kicking myself for not doing the same to the rear aluminum sideplates. Even after all the threadlocking of screws, I am going to dismantle the rear gearbox mounting so I can sand out the scratches. I'll sleep better.


But... everything is spotless, so I'm happy about that.
Romans 5:8
-
Mad Racer

- Approved Member
- Posts: 972
- Joined: Thu Apr 09, 2009 10:50 pm
- Location: Vintage at Boondal. Australia.
- Been thanked: 2 times
Re: Kyosho Optima Teardown, Cleaning (, and rebuild...)
Looking good.
Can't wait to see it finished & what paint scheme you end up with.
My Javelin has a cut bumper too & hate it. I think racers did the cut job to make them look more modern. I remember going from my Turbo Optima to my Mid & thought gee that tiny bumper will do nothing.
Keep the great pic's coming.
Can't wait to see it finished & what paint scheme you end up with.
My Javelin has a cut bumper too & hate it. I think racers did the cut job to make them look more modern. I remember going from my Turbo Optima to my Mid & thought gee that tiny bumper will do nothing.
Keep the great pic's coming.
Vintage . Older is Better !!!!!!! Vintage At Boondal, Australia.
http://www.rctech.net/forum/australian-racing/548133-off-road-vintage-boondal.html
http://www.rctech.net/forum/australian-racing/548133-off-road-vintage-boondal.html
-
Coelacanth

- Approved Member
- Posts: 7421
- Joined: Thu Jul 29, 2010 6:20 pm
- Location: Alberta, Canada
- Has thanked: 16 times
- Been thanked: 325 times
Re: Kyosho Optima Teardown, Cleaning (, and rebuild...)
Cutting down the JG Mfg aftermarket bumper really improves the appearance, as it's too bloody long to begin with--but I agree with Mark, leave the original Optima bumper alone. 
The build is coming along nicely. Too bad the front chin skidplate and bumper brace are borked, but then nearly all Optimas have the same issues with those parts.
The build is coming along nicely. Too bad the front chin skidplate and bumper brace are borked, but then nearly all Optimas have the same issues with those parts.
Completed projects: CYANide Onroad Optima | Zebra Gold Optima | Barney Optima | OptiMutt RWD Mid
Gallery - Coel's Stalls: Marui Galaxy & Shogun Resto-Mods | FrankenBuff AYK Buffalo | 1987 Buick GNX RC12L3
Gallery - Coel's Stalls: Marui Galaxy & Shogun Resto-Mods | FrankenBuff AYK Buffalo | 1987 Buick GNX RC12L3
-
lifeIsAnalog
- Approved Member
- Posts: 75
- Joined: Tue Jun 04, 2013 11:56 am
- Location: Milky Way Galaxy, 3rd planet from the Sun
- Been thanked: 1 time
Re: Kyosho Optima Teardown, Cleaning (, and rebuild...)
For now, I have to stick with the body that came with it. It looks ok, but I will be buying and painting a new one as time permits. Knowing me, I'll attempt a box art scheme.Mad Racer wrote: Can't wait to see it finished & what paint scheme you end up with.
Romans 5:8
-
lifeIsAnalog
- Approved Member
- Posts: 75
- Joined: Tue Jun 04, 2013 11:56 am
- Location: Milky Way Galaxy, 3rd planet from the Sun
- Been thanked: 1 time
Re: Kyosho Optima Teardown, Cleaning (, and rebuild...)
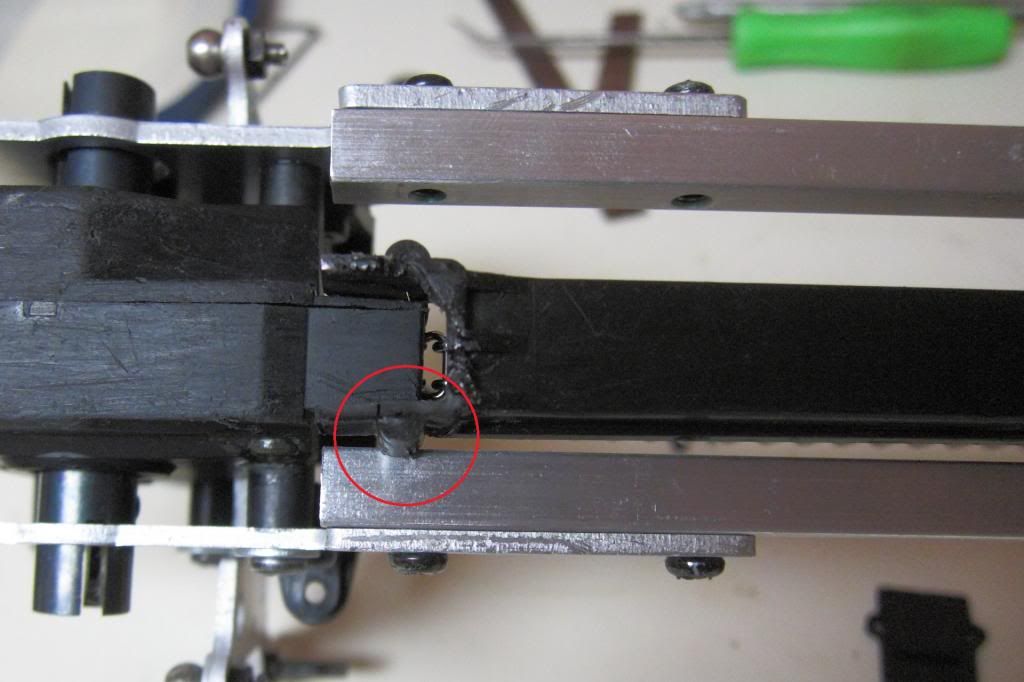
ok, I've ran into a snag. I don't think I have skipped any steps in the instructions, yet I have an interference with the chain guard and chassis tube (see areas circled in red). Have I done something wrong? I could of course bend things and squeeze it in there, but it doesn't seem right:
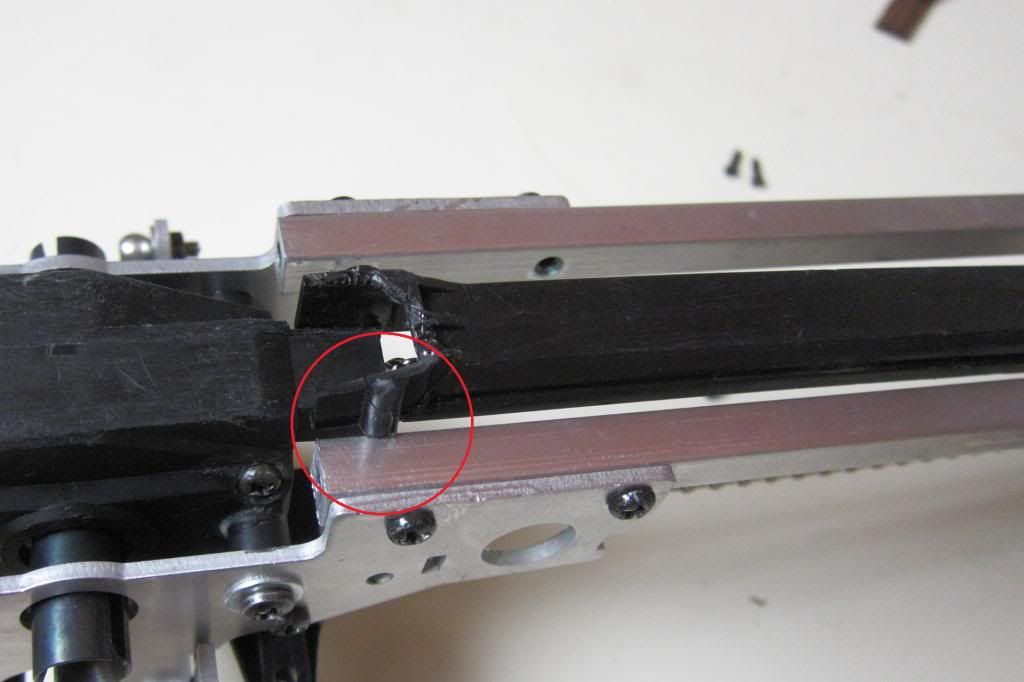
The instructions make it clear that the M3 spring washers go on the outside of the Left Rear plate (if they were on the inside, between the gearbox and plate, I would have enough clearance):


The instructions make it clear that the M3 spring washers go on the outside of the Left Rear plate (if they were on the inside, between the gearbox and plate, I would have enough clearance):
- OptimaStep7Crop.jpg (31.62 KiB) Viewed 1210 times
- OptimaStep7Crop.jpg (31.62 KiB) Viewed 1210 times
Romans 5:8
-
THUNDERSTRIKE1
- Approved Member
- Posts: 2022
- Joined: Sat Jan 20, 2007 4:41 pm
- Location: Cape Carteret.NC
- Been thanked: 4 times
Re: Kyosho Optima Teardown, Cleaning (, and rebuild...)
Mine appears to haave been filed down on side the trans case for that to fit properly .Im no exspert on thses but i have 3 or 4 them lol.don
-
lifeIsAnalog
- Approved Member
- Posts: 75
- Joined: Tue Jun 04, 2013 11:56 am
- Location: Milky Way Galaxy, 3rd planet from the Sun
- Been thanked: 1 time
Re: Kyosho Optima Teardown, Cleaning (, and rebuild...)
Good point... I need to get a few more so I can compare!THUNDERSTRIKE1 wrote:Mine appears to haave been filed down on side the trans case for that to fit properly .Im no exspert on thses but i have 3 or 4 them lol.don
I'll do the same and file a bit off the side of the screw mounting post. If someone forced it on, that may be why this area of the chain guard was broken when I got it (as shown in the pics).
Romans 5:8
-
DennisM

- Approved Member
- Posts: 2405
- Joined: Sun Feb 26, 2012 7:07 am
- Location: Denmark
- Has thanked: 30 times
- Been thanked: 62 times
Re: Kyosho Optima Teardown, Cleaning (, and rebuild...)
If You mount the transversed alloy "pipe" between the gearbox mount plates, I think it all falls into place?
Gone fishing
-
lifeIsAnalog
- Approved Member
- Posts: 75
- Joined: Tue Jun 04, 2013 11:56 am
- Location: Milky Way Galaxy, 3rd planet from the Sun
- Been thanked: 1 time
Re: Kyosho Optima Teardown, Cleaning (, and rebuild...)
Just eyeballing it, I believe you are correct. That pipe (Joint Collar) certainly doesn't fit in there now, so once it IS mounted, that should leave enough room. The strange thing is, that second joint collar doesn't get installed until step 24; I am only on step 16!DennisM wrote:If You mount the transversed alloy "pipe" between the gearbox mount plates, I think it all falls into place?
Romans 5:8
-
lifeIsAnalog
- Approved Member
- Posts: 75
- Joined: Tue Jun 04, 2013 11:56 am
- Location: Milky Way Galaxy, 3rd planet from the Sun
- Been thanked: 1 time
Re: Kyosho Optima Teardown, Cleaning (, and rebuild...)
The side plates sanded up nicely:
Before:
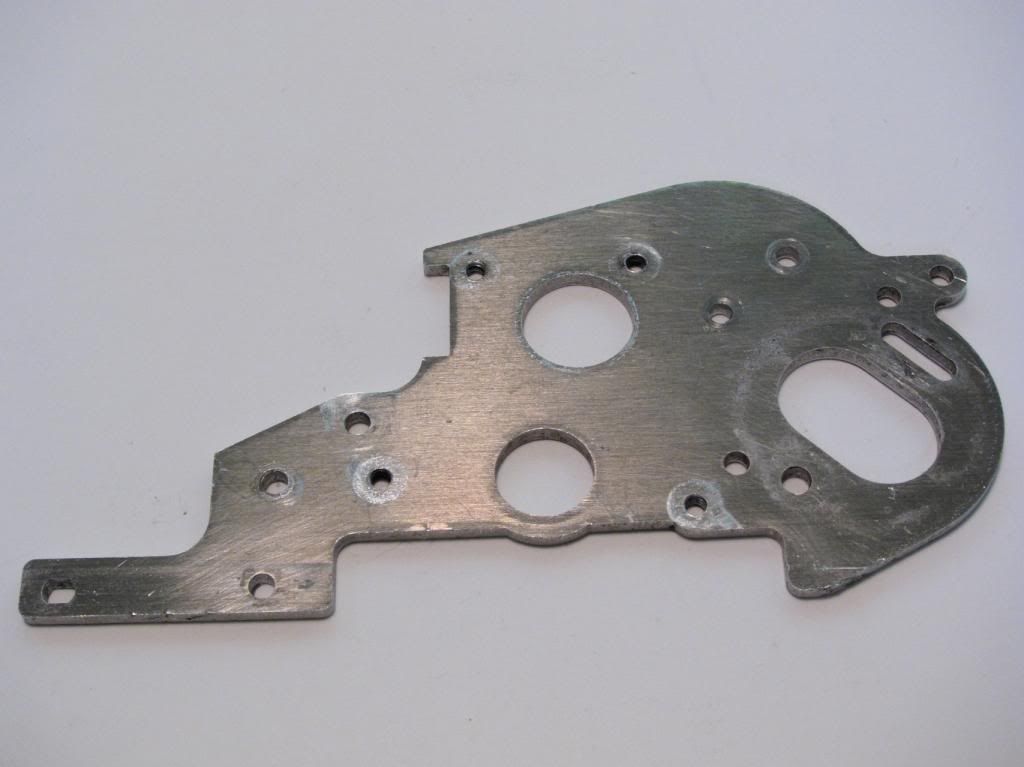
During:
After:
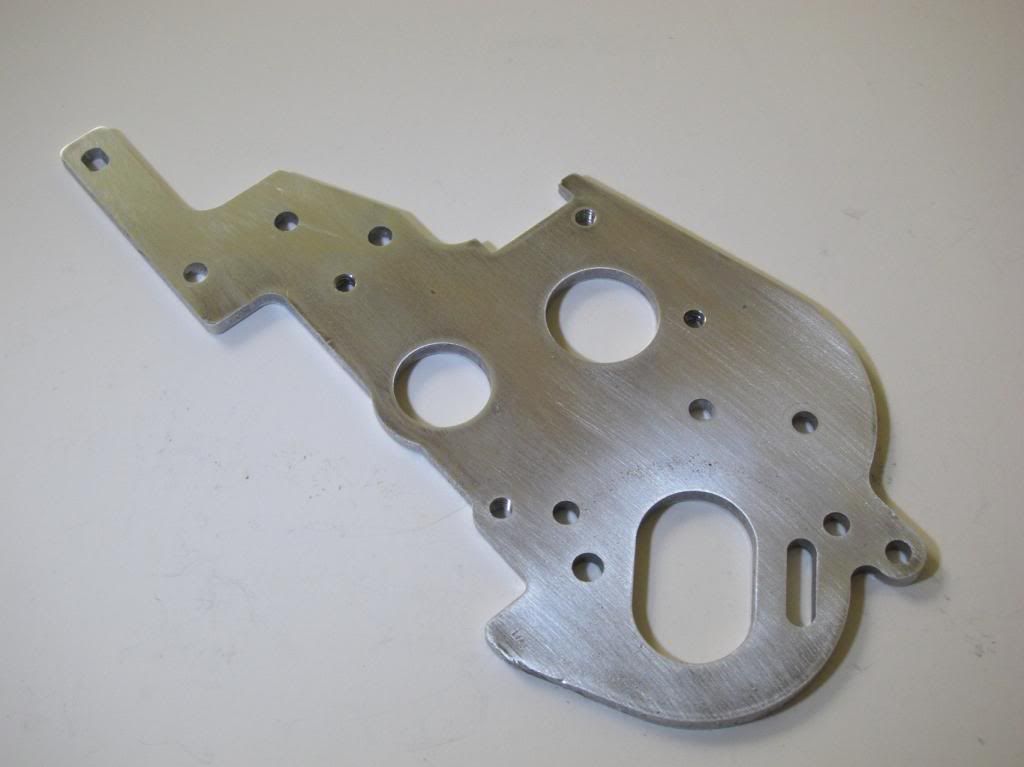
It's hard to get the light at just the right angle with aluminium to get a decent photograph.
Before:

During:

After:

It's hard to get the light at just the right angle with aluminium to get a decent photograph.
Romans 5:8
-
lifeIsAnalog
- Approved Member
- Posts: 75
- Joined: Tue Jun 04, 2013 11:56 am
- Location: Milky Way Galaxy, 3rd planet from the Sun
- Been thanked: 1 time
Re: Kyosho Optima Teardown, Cleaning (, and rebuild...)
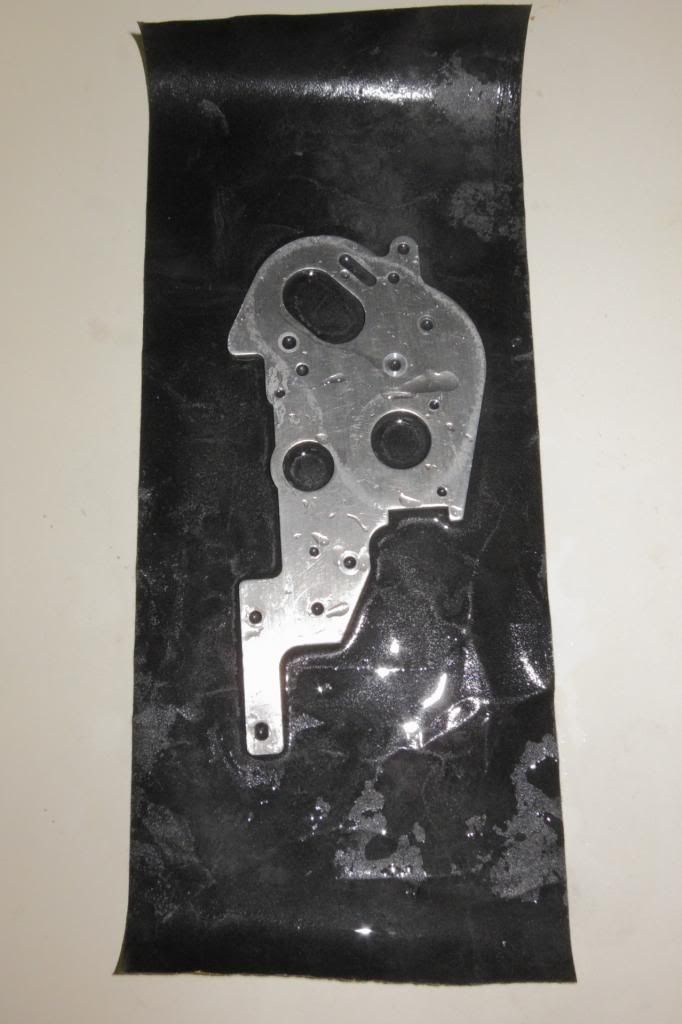
This is how I fixed the broken piece on the plastic chain guard (one of the pieces anyway; the top piece is long gone):
1. Get some plastic weld. This stuff is great and I have used it for a wide variety of fixes. The label is gone, so I don't remember the brand name.
[EDIT] The brand is Permatex® PermaPoxy™ 5 Minute Plastic Weld
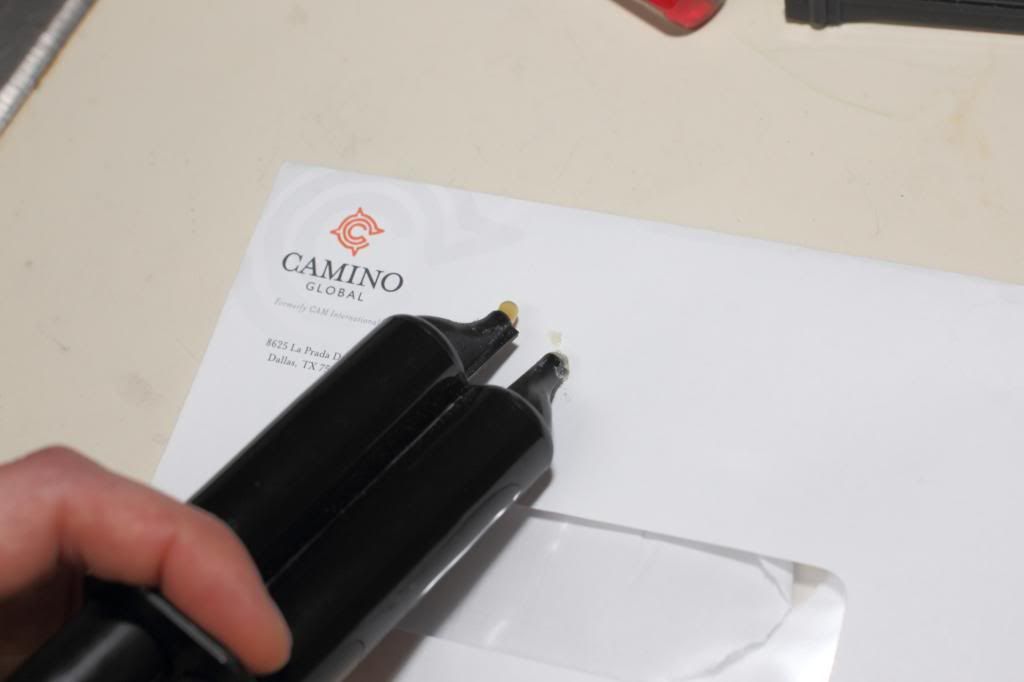
2. Mix equal parts on a piece of paper or cardboard (I used an envelope):
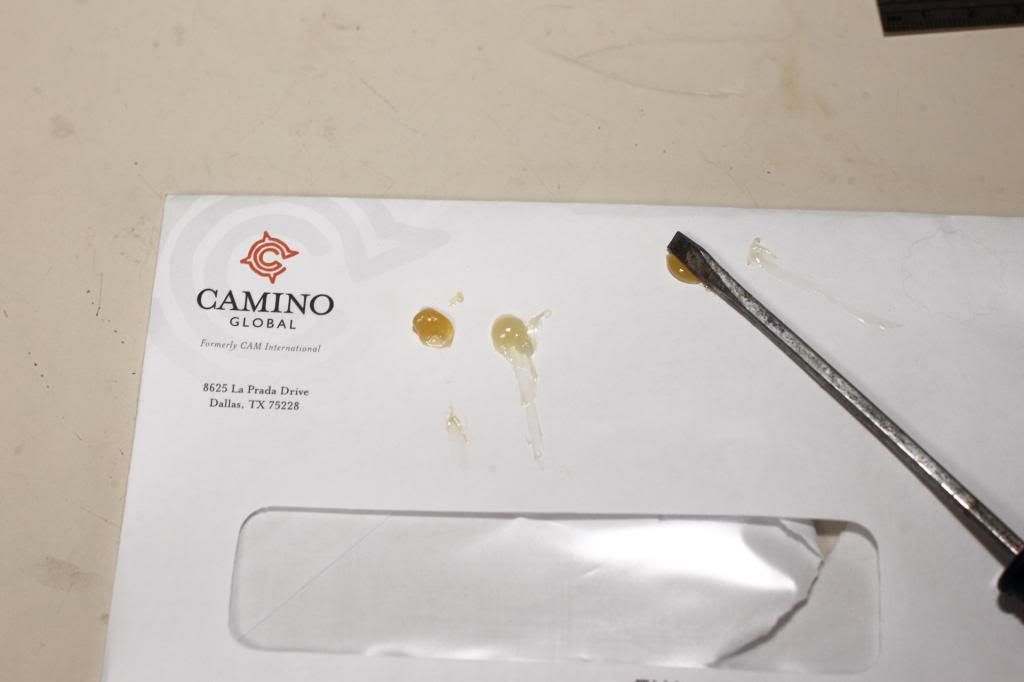
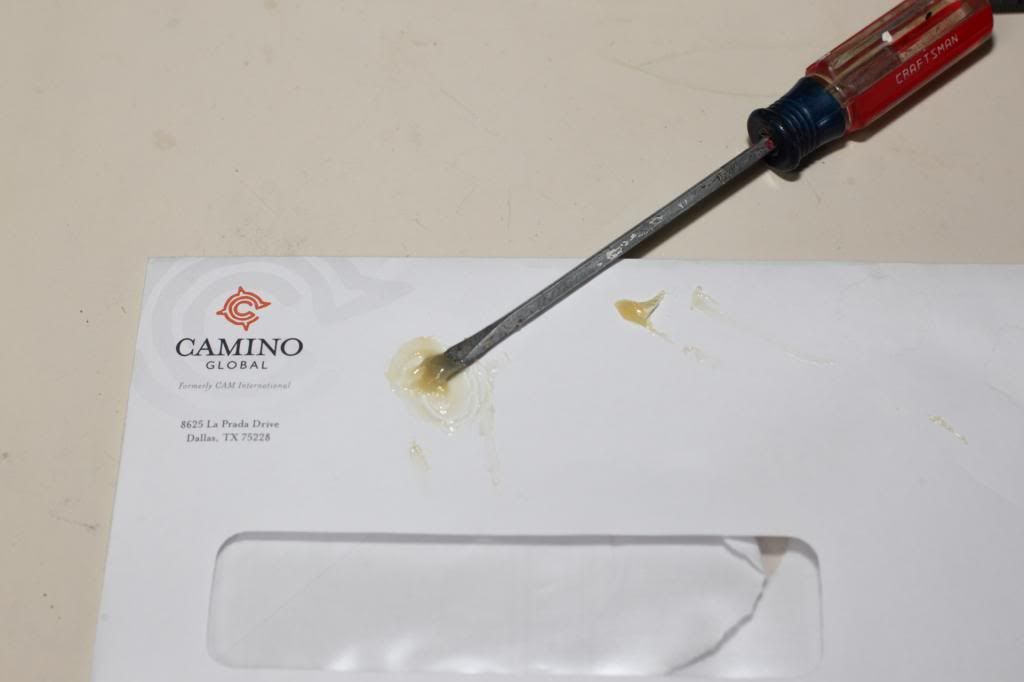
3. Apply to the broken pieces and hold them together. It dries quickly, so you have to move fast.

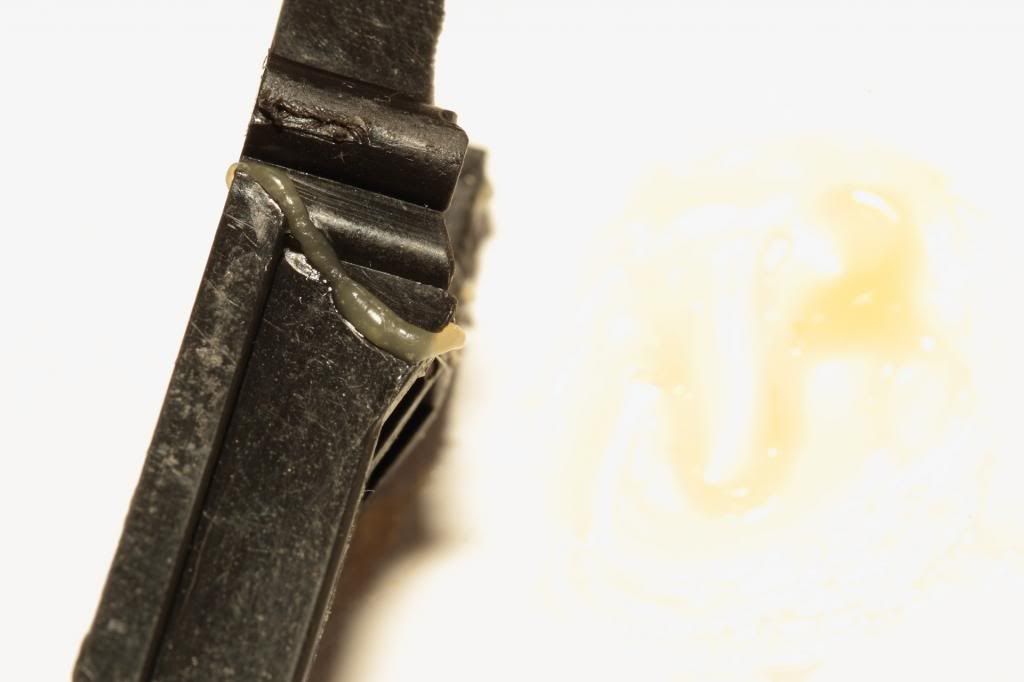
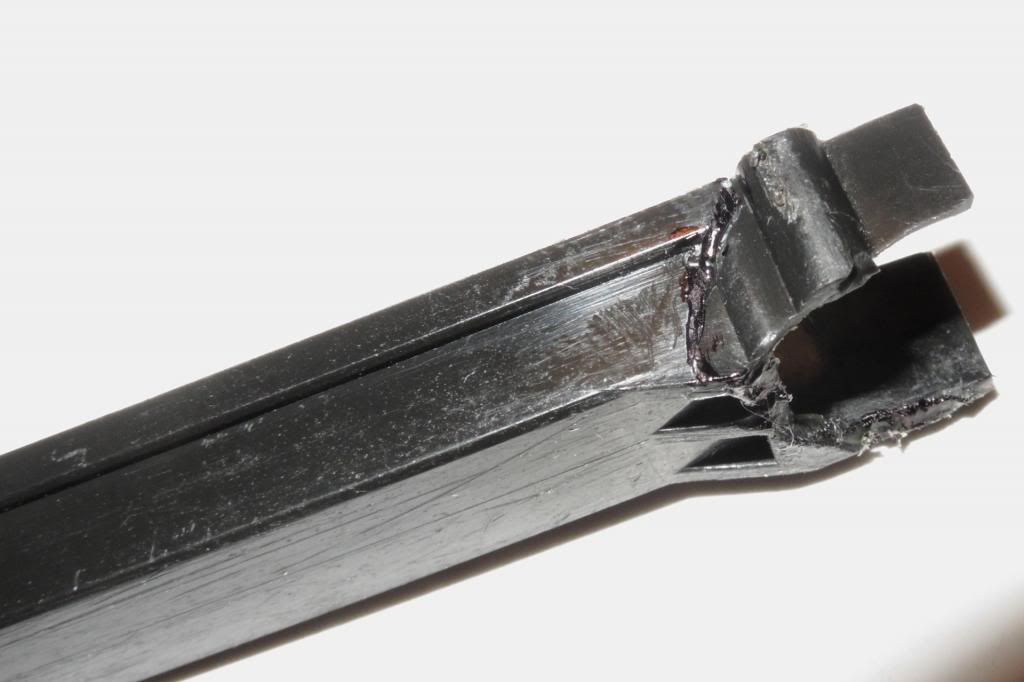
Once it dries, you can trim off the excess with a blade. In my case, I also colored over the dried weld with a black marker:
1. Get some plastic weld. This stuff is great and I have used it for a wide variety of fixes. The label is gone, so I don't remember the brand name.
[EDIT] The brand is Permatex® PermaPoxy™ 5 Minute Plastic Weld

2. Mix equal parts on a piece of paper or cardboard (I used an envelope):


3. Apply to the broken pieces and hold them together. It dries quickly, so you have to move fast.


Once it dries, you can trim off the excess with a blade. In my case, I also colored over the dried weld with a black marker:

Romans 5:8
Create an account or sign in to join the discussion
You need to be a member in order to post a reply
Create an account
Not a member? register to join our community
Members can start their own topics & subscribe to topics
It’s free and only takes a minute
Sign in
-
- Similar Topics
- Replies
- Views
- Last post
-
- 13 Replies
- 2499 Views
-
Last post by soniccj5
-
- 30 Replies
- 3292 Views
-
Last post by zuki250
-
- 16 Replies
- 2214 Views
-
Last post by myk
-
- 4 Replies
- 862 Views
-
Last post by Barefoot
-
- 49 Replies
- 7277 Views
-
Last post by BoostCreep
-
- 4 Replies
- 996 Views
-
Last post by Coelacanth
-
- 31 Replies
- 10478 Views
-
Last post by ipenalosa
-
- 188 Replies
- 38717 Views
-
Last post by Alcam
Who is online
Users browsing this forum: ![]() Tbot [Bot] and 3 guests
Tbot [Bot] and 3 guests