Choppy as heck on the river today, so only a half day boating. So, got a little hobby time.
mikea96 wrote: ↑Sat Jun 19, 2021 8:06 pm
You don't need screws in those holes they will still fit fine once powder coated and if not just hit the holes with a countersink plus once you powder coat over them and bake the coating you won't get them out unless you were going to remove prior to baking. But I think if you don't coat the holes the screws might sit funky.
I asked for advice, and I was nicely given some, and I did what? Ignored it!

Mike, I apologize; and you are right! Dealing with the screws to mask the countersinks was so much more trouble than it was worth! I will not be doing that again.
I thought today was a relative success, until, you know, I looked at the baked part for the first time! Not a complete failure, but pretty close. This is what is apparently called outgassing. There are a few possible reasons for it, but I am hoping it is simply my lack of properly cleaning the part prior to coating, or applying too much coating at once. I doubt it is an issue with the aluminum, or the original anodizing process; I am pretty sure it is all bad technique.
The bottom came out about 80% on the positive side. A smudge I didn't see (this side would have been down during my final coating) and a few pinholes (again, outgassing), but nothing difficult to fix.
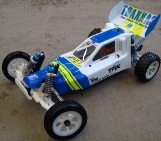
Here are a couple of pics of how my, now known to be terrible, process went:
Here are my lessons learned for the afternoon:
1) already knew this, but it is confirmed, this process is messy! This is definitely a workshop or garage project, and not a spare bedroom / hobby room project. Give yourself at least a solid 6' x 6' area to work. Disposable 9 x 12 plastic sheeting drop clothes are my recommendation. Make your mess, then wrap it up and toss it.
2) this process is SO delicate! Yes, the process uses electric charge to attract the coating to the metal, but once there, it isn't holding on all that well. Draft of air, quick touch, sneeze, look at it wrong ...... and it is coming off! This is why adding steps like using screws as masks and coating a tub in two separate phases with a manual flip in between them doesn't work! Is is a simple, delicate process, and if you overcomplicate it, you will screw it up. This is why pros hang a piece and coat it from all directions at once, and then put the hanging piece directly in an oven. Simple.
3) this HFT powder coating system works as well as all HFT pneumatic tools ....... pretty poorly. Its only real problem is that it randomly just coughs up a big poof of powder. Doesn't provide a nice constant flow.
Next steps:
Sand away the bad areas and feather it out well or just remove most of what is there.
Properly clean all exposed areas.
Coat and bake hanging. I got to thinking and realized that my toaster oven doesn't know its relative position in this world, so why not use it vertically? It has a few vents on the side, but set it on one of its own racks, and insulate that from my workbench with some firebrick, and we should be good to go.
I build RCs like people would have done back in the '90s ..................................... if they had 3D printers.