Never thought I would get my hands on an early Edinger until I stumbled across a driven but relatively untouched box stock car here in Norway in 2022.
Seems like this car was abandoned in the eighties like i did with my own late Edinger.
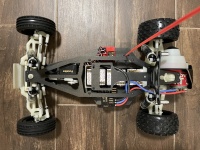
Here is an initial look before the rebuild. Servos in place and it came with the AE Edinger stock motor.
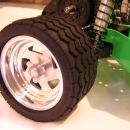
Goodyear front wheels (Goodyear facing inwards), blank rear wheels, thin clear lexan gear cover, rear capturing spring retainers, one glass fiber battery strap, equal bell cranks, slender steering blocks etc.