Finally starting my Turbo Inferno build. I have been planning to build an Inferno since shortly after I started building my Turbo Burns. I have a real soft spot for both of these models.
The Inferno is the first 1/8th buggy released by Kyosho under the leadership of Yuuichi Kanai. He has remained as the main man behind the Kyosho buggies to present day, with the recent release of the MP10. Although there were not a lot of changes between the Burns and Inferno models, the updates seem well executed and make for a stronger and more capable car.
My plan is to build a full option Turbo Inferno using vintage upgrades from Kyosho and other aftermarket companies. Much like my Turbo Burns build, this will be a pristine shelf queen that could actually be capable of running with just a little prep. I have been very fortunate to find some very scarce parts for this car, as well as beautiful donor car. My list of needed parts is fortunately pretty short. I will list them below with the hope someone here may be able to help track them down.
BSW19
BSW35 - Tie rods
OG Decals
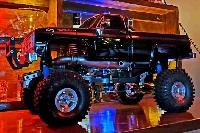
Donor car - This is how I received it. It is a new but mostly built Inferno 4WD. It was built well, and is good and dirty from sitting in a garage. Fortunately it doesn't have a scratch on it, and came with a brand new OS RX. Although it isn't a Turbo version, I will be replacing/upgrading all the parts that make the difference, and then some. It will be completely torn down, and rebuilt using the upgrades.
Kyosho Turbo Inferno - New Rebuild
-
Lavigna

- Super Member
- Posts: 1462
- Joined: Wed Aug 05, 2015 4:24 am
- Location: Petaluma, CA
- Has thanked: 1099 times
- Been thanked: 1418 times
Kyosho Turbo Inferno - New Rebuild
- Attachments
-
-
-
-
-
-
-
My Gallery ---> https://www.rc10talk.com/viewtopic.php?f=77&t=38934
-
Lavigna
- Super Member
- Posts: 1462
- Joined: Wed Aug 05, 2015 4:24 am
- Location: Petaluma, CA
- Has thanked: 1099 times
- Been thanked: 1418 times
Re: Kyosho Turbo Inferno - New Rebuild
Parts & Engine - I already had this new OS RX ready for this build. I added the Duratrax flywheel and rear cooling fins, and header pipe. I have a purple Kyosho motor mount coming to replace the plain silver unit shown here.
Not all the parts are shown here, plus more are still being shipped. I still have lots of details to sort, such as electronics, linkage, and paint.
Not all the parts are shown here, plus more are still being shipped. I still have lots of details to sort, such as electronics, linkage, and paint.
- Attachments
-
-
-
-
-
-
My Gallery ---> https://www.rc10talk.com/viewtopic.php?f=77&t=38934
-
Lavigna
- Super Member
- Posts: 1462
- Joined: Wed Aug 05, 2015 4:24 am
- Location: Petaluma, CA
- Has thanked: 1099 times
- Been thanked: 1418 times
Re: Kyosho Turbo Inferno - New Rebuild
The build has officially begun. I was beyond excited to find this NIP BSW86. I had nearly given up and was about to purchase the AR Products aluminum steering kit, which is nice, but I much prefer the BSW86 for this build.
** Since I posted this, I have found a Duratrax front plate and radio tray that I will use to replace the carbon fiber unit from AR Products, and the stock aluminum tray. I like how the material of the Duratrax pieces matche the Duratrax chassis.
** Since I posted this, I have found a Duratrax front plate and radio tray that I will use to replace the carbon fiber unit from AR Products, and the stock aluminum tray. I like how the material of the Duratrax pieces matche the Duratrax chassis.
- Attachments
-
-
-
-
-
My Gallery ---> https://www.rc10talk.com/viewtopic.php?f=77&t=38934
-
coxbros1
- Approved Member
- Posts: 2495
- Joined: Mon Dec 24, 2018 8:50 am
- Location: Energy, Illinois
- Has thanked: 2758 times
- Been thanked: 2407 times
Re: Kyosho Turbo Inferno - New Rebuild
Nice build, great pics, wish i could take pics like yours
Tap pic for clarity: Derek
-
Lavigna
- Super Member
- Posts: 1462
- Joined: Wed Aug 05, 2015 4:24 am
- Location: Petaluma, CA
- Has thanked: 1099 times
- Been thanked: 1418 times
Re: Kyosho Turbo Inferno - New Rebuild
^ Thanks! I bought a simple light box awhile back, and it works well.
Progress shots. Still waiting on parts like rear carbon tower, blue hinge plates, BSW19 gear, and more.
I upgraded both front and rear diffs to BS106 housings, and BSW1 & BSW2 gears. The BS106, with its additional o ring for sealant allows for the use of oil instead of grease.
Progress shots. Still waiting on parts like rear carbon tower, blue hinge plates, BSW19 gear, and more.
I upgraded both front and rear diffs to BS106 housings, and BSW1 & BSW2 gears. The BS106, with its additional o ring for sealant allows for the use of oil instead of grease.
- Attachments
-
-
-
-
My Gallery ---> https://www.rc10talk.com/viewtopic.php?f=77&t=38934
-
Lavigna
- Super Member
- Posts: 1462
- Joined: Wed Aug 05, 2015 4:24 am
- Location: Petaluma, CA
- Has thanked: 1099 times
- Been thanked: 1418 times
Re: Kyosho Turbo Inferno - New Rebuild
Built the shocks and added the blue hinge mounts.
- Attachments
-
-
-
My Gallery ---> https://www.rc10talk.com/viewtopic.php?f=77&t=38934
-
Lavigna
- Super Member
- Posts: 1462
- Joined: Wed Aug 05, 2015 4:24 am
- Location: Petaluma, CA
- Has thanked: 1099 times
- Been thanked: 1418 times
Re: Kyosho Turbo Inferno - New Rebuild
More parts and progress. I am so excited to have found this NIP Kyosho special center diff housing and blue wheels. Same goes for the purple engine mounts.
I don't yet have a BSW19 gear, but I am hopeful that Dimitri will be helping me out in this department.
Still waiting on a few key parts, but once they come I should be able to bring this thing to roller status. I am pretty surprised how fast this build is coming together. Most of the hard stuff, like disassembly, cleaning, polishing, and rebuilding of the donor buggy is done. These Kyosho vintage 1/8th scale builds take a lot of prep work for me. I try to get every part just right, which means polishing all aluminum and hardware, and finish treating all the plastics. It's a level of OCD I don't wish on anyone, but it does make for a nice result.
- Attachments
-
-
-
-
-
-
-
-
-
My Gallery ---> https://www.rc10talk.com/viewtopic.php?f=77&t=38934

-
Coelacanth

- Approved Member
- Posts: 7421
- Joined: Thu Jul 29, 2010 6:20 pm
- Location: Alberta, Canada
- Has thanked: 16 times
- Been thanked: 325 times
Re: Kyosho Turbo Inferno - New Rebuild
Nice work so far, I like that blue wheel set! 
Completed projects: CYANide Onroad Optima | Zebra Gold Optima | Barney Optima | OptiMutt RWD Mid
Gallery - Coel's Stalls: Marui Galaxy & Shogun Resto-Mods | FrankenBuff AYK Buffalo | 1987 Buick GNX RC12L3
Gallery - Coel's Stalls: Marui Galaxy & Shogun Resto-Mods | FrankenBuff AYK Buffalo | 1987 Buick GNX RC12L3
-
coxbros1
- Approved Member
- Posts: 2495
- Joined: Mon Dec 24, 2018 8:50 am
- Location: Energy, Illinois
- Has thanked: 2758 times
- Been thanked: 2407 times
Re: Kyosho Turbo Inferno - New Rebuild
Attn to detail is off the chain, and those pictures!!!
Tap pic for clarity: Derek
-
mtbkym01
- Approved Member
- Posts: 470
- Joined: Sat Dec 17, 2011 3:31 pm
- Location: South Australia
- Has thanked: 190 times
- Been thanked: 274 times
Re: Kyosho Turbo Inferno - New Rebuild
Maybe not the right place for it, but do you have details of the Light Box you use?
Cheers
You name it - and I want it 
If it's Old Skool, It's Kool

If it's Old Skool, It's Kool
-
coxbros1
- Approved Member
- Posts: 2495
- Joined: Mon Dec 24, 2018 8:50 am
- Location: Energy, Illinois
- Has thanked: 2758 times
- Been thanked: 2407 times
-
Lavigna
- Super Member
- Posts: 1462
- Joined: Wed Aug 05, 2015 4:24 am
- Location: Petaluma, CA
- Has thanked: 1099 times
- Been thanked: 1418 times
Re: Kyosho Turbo Inferno - New Rebuild
^ Thanks all. This is the light box I have -https://www.amazon.com/Promaster-Still-Life-LED-Studio/dp/B07BX32GMJ
Promaster Stil Life LED Studio 2.0. I got their largest version at 28"x28". After 6 months of use, here are my thoughts on this light box.
Pros - Perfect lighting at the flip of a switch. Comes with different background colors. Folds very flat for under bed storage. Good quality.
Cons - Takes up a lot of space when erected. Even with the largest size, it's difficult to photograph entire vehicles without seeing one or both corners of the light box in the background. This is not a big deal, but it bugs me when I see the corner seam in the background.
The build continues. These matching Duratrax front plate and radio tray are icing on the cake of this build. I have never seen a picture of either installed, and wasn't even sure Duratrax made a radio tray. Well, it turns out they do. They also make a top brace for the center diff housing, but I don't need that since I am using the special Kyosho optional unit. I love the blacked out look, and how the Duratrax chassis, front plate, and radio tray are all matching material. I had to spend way too much for these two small pieces, but they sure do fit well on this build.
The BSW55 center diff housing requires you to cut out a small section of the radio tray. I was so nervous to cut the Duratrax piece I just found, and spent a small fortune on. It turned out well though. The Panic center drive bones are aluminum and should look pretty cool. I happened on them awhile back, and bought them for cheap not really knowing what they would fit. Score!
- Attachments
-
-
-
-
-
-
My Gallery ---> https://www.rc10talk.com/viewtopic.php?f=77&t=38934
-
coxbros1
- Approved Member
- Posts: 2495
- Joined: Mon Dec 24, 2018 8:50 am
- Location: Energy, Illinois
- Has thanked: 2758 times
- Been thanked: 2407 times
Re: Kyosho Turbo Inferno - New Rebuild
Those aluminum center shafts are rad!
Tap pic for clarity: Derek
-
coxbros1
- Approved Member
- Posts: 2495
- Joined: Mon Dec 24, 2018 8:50 am
- Location: Energy, Illinois
- Has thanked: 2758 times
- Been thanked: 2407 times
Create an account or sign in to join the discussion
You need to be a member in order to post a reply
Create an account
Not a member? register to join our community
Members can start their own topics & subscribe to topics
It’s free and only takes a minute
Sign in
-
- Similar Topics
- Replies
- Views
- Last post
-
- 11 Replies
- 4517 Views
-
Last post by lexster76
-
- 5 Replies
- 1573 Views
-
Last post by urban hype
-
- 26 Replies
- 2175 Views
-
Last post by Helge
-
- 188 Replies
- 38545 Views
-
Last post by Alcam
-
- 23 Replies
- 3795 Views
-
Last post by lexster76
-
- 6 Replies
- 711 Views
-
Last post by Lavigna
-
- 5 Replies
- 1136 Views
-
Last post by Helge
-
- 3 Replies
- 1319 Views
-
Last post by USA-1
Who is online
Users browsing this forum: ![]() timjz,
timjz, ![]() Yandex [Bot] and 4 guests
Yandex [Bot] and 4 guests